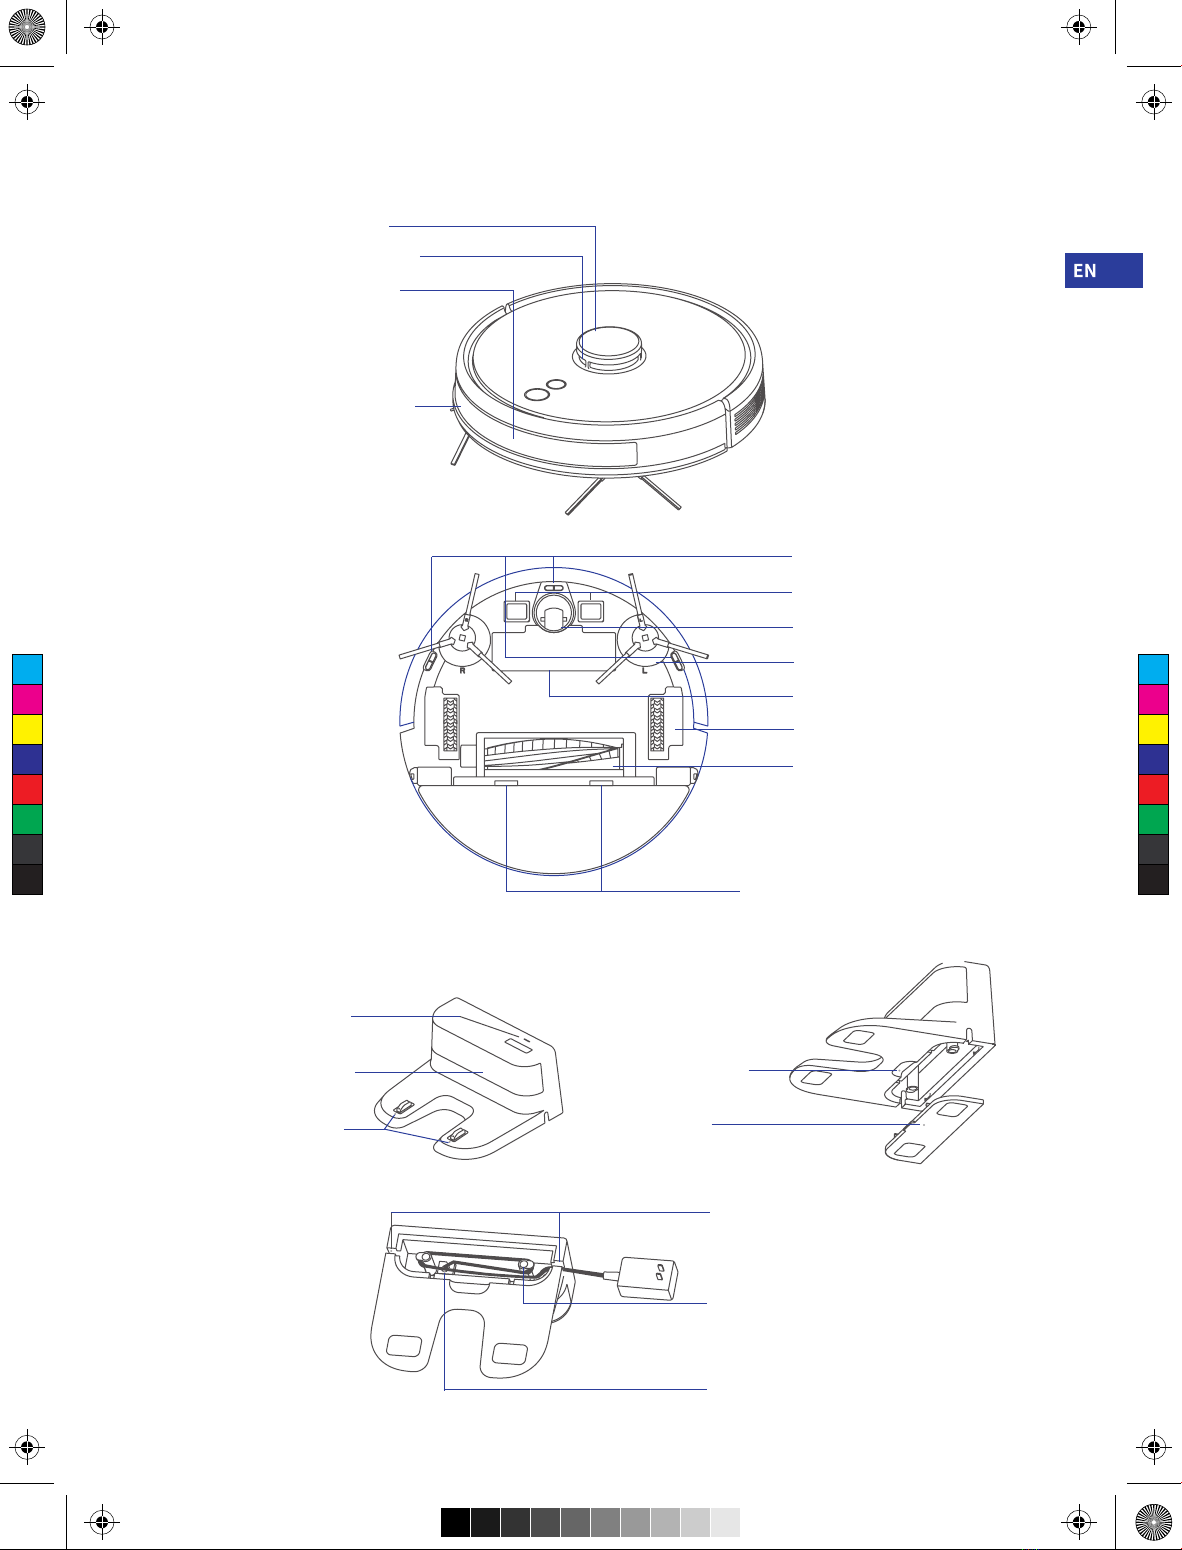
AIRROBO T9 User manual

User manual
Robot Vacuum Cleaner T9
Lds Laser Navigation
C
M
Y
CM
MY
CY
CMY
K
T9 说明书英文版_20210629.pdf 1 2021/6/29 16:39:50

C
M
Y
CM
MY
CY
CMY
K
T9 说明书英文版_20210629.pdf 2 2021/6/29 16:39:50

Wecome to use!
May you have a nice usage experience!
C
M
Y
CM
MY
CY
CMY
K
T9 说明书英文版_20210629.pdf 3 2021/6/29 16:39:50

Contents
English P01-P12
.................................................................................................................................................
EN
Deutsch P13-P23
...............................................................................................................................................
DE
Русский P24-P34
.................................................................................................................................................
RU
Français Edition électronique
..........................................................................................................................
FR
Español E-edición
...............................................................................................................................................
ES
Italiano Edizione elettronica
.............................................................................................................................
IT
Friendly Tips!
Scan the QR code to get the latest electronic version of the manual.
Including English/Deutsch/Русский/Français/Español/Italiano
Airrobo airrobo_official
C
M
Y
CM
MY
CY
CMY
K
T9 说明书英文版_20210629.pdf 4 2021/6/29 16:39:50

- 01 -
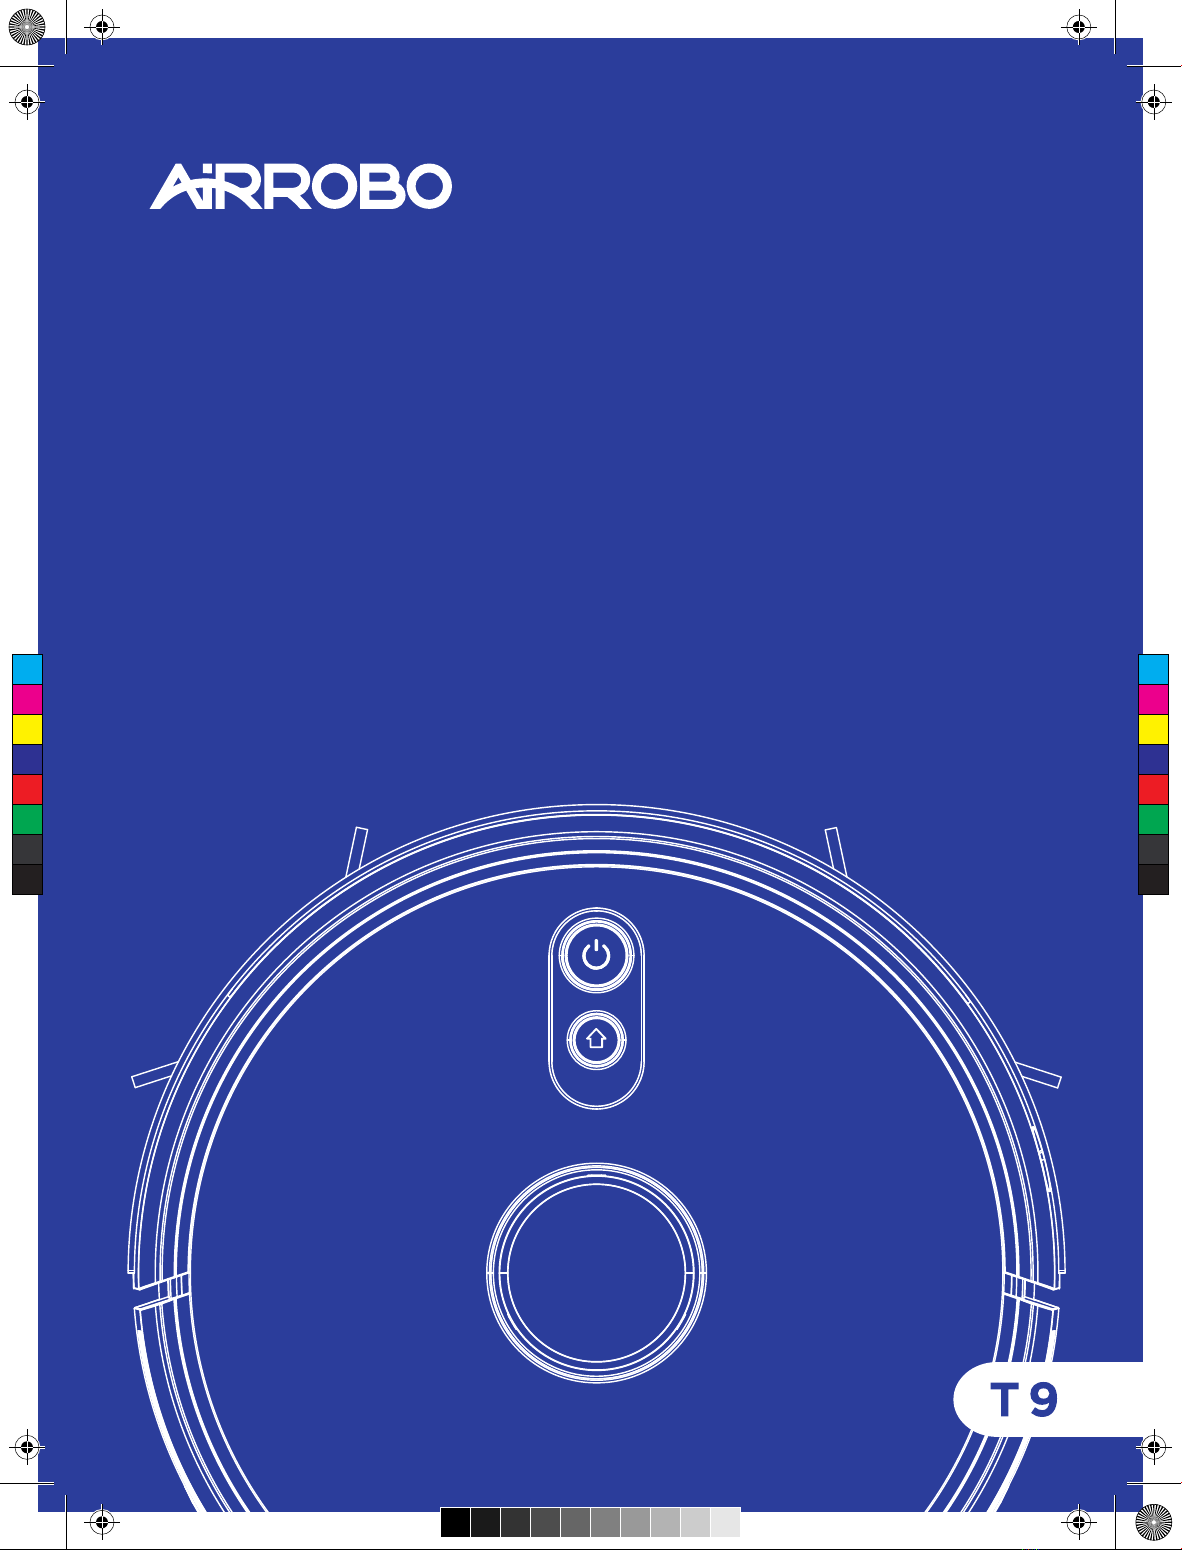
Thank you for purchasing AIRROBO ROBOT VACUUM CLEANER.
• It is strongly recommended to read and understand the user manual comprehensively prior to the first use of robot for proper
usage, safety information and correct maintenance instructions for AIRROBO ROBOT VACUUM CLEANER.
• This user manual is for the user's instructions, it does not cover all possible situations. If there are any situations that you encounter
that are not addressed in this user manual, please contact our customer service at: support.airrobo@ubtrobot.com for product
technical support.
• This user manual will be updated upon new software or hardware updates, and the content and images are liable to be updated
without further notice.
Part 1 Safety Information
1.1 Usage Limitations
• The product is used for floor cleaning in a home environment only and cannot be used for outdoor (such as open terrace),
non-ground (such as sofa) and commercial or industrial environment.
• Please do not use the product in midair areas (such as penthouse, open terrace and furniture top) without protective fence.
• Please do not use the product at a temperature of above 40℃ or below 0℃or when there are liquids and sticky substances on the
ground.
• Please hang cables on the ground before use so as to avoid being dragged by the host.
• Please clear fragile objects and impurities (such as vase and plastic bag, etc.) on the ground so as to avoid damaging valuables when
the host is stuck or impacted slightly.
• People with physical, spiritual or perceptual disorder (including children) are not allowed to use or operate the product.
• Children cannot use the product as a toy. Please keep children and pets away when the host is working.
• Please keep main brush and other cleaning tools out of reach of children.
• Please do not place objects (including children and pets) on a stationary or moving machine.
• Please keep hair, fingers and other parts of human body or pets away from the suction inlet when the machine is works.
• Please do not use the product to sweep burning objects (such as burning cigarette end).
• Please do not use the product to clean long-haired carpet (some dark carpets may not be cleaned normally).
• Please prevent the host from suctioning hard or sharp objects (such as waste decorative materials, glass and iron nail, etc.).
• Please do not move the machine by holding the protective cover of laser distance sensor and collision bumper.
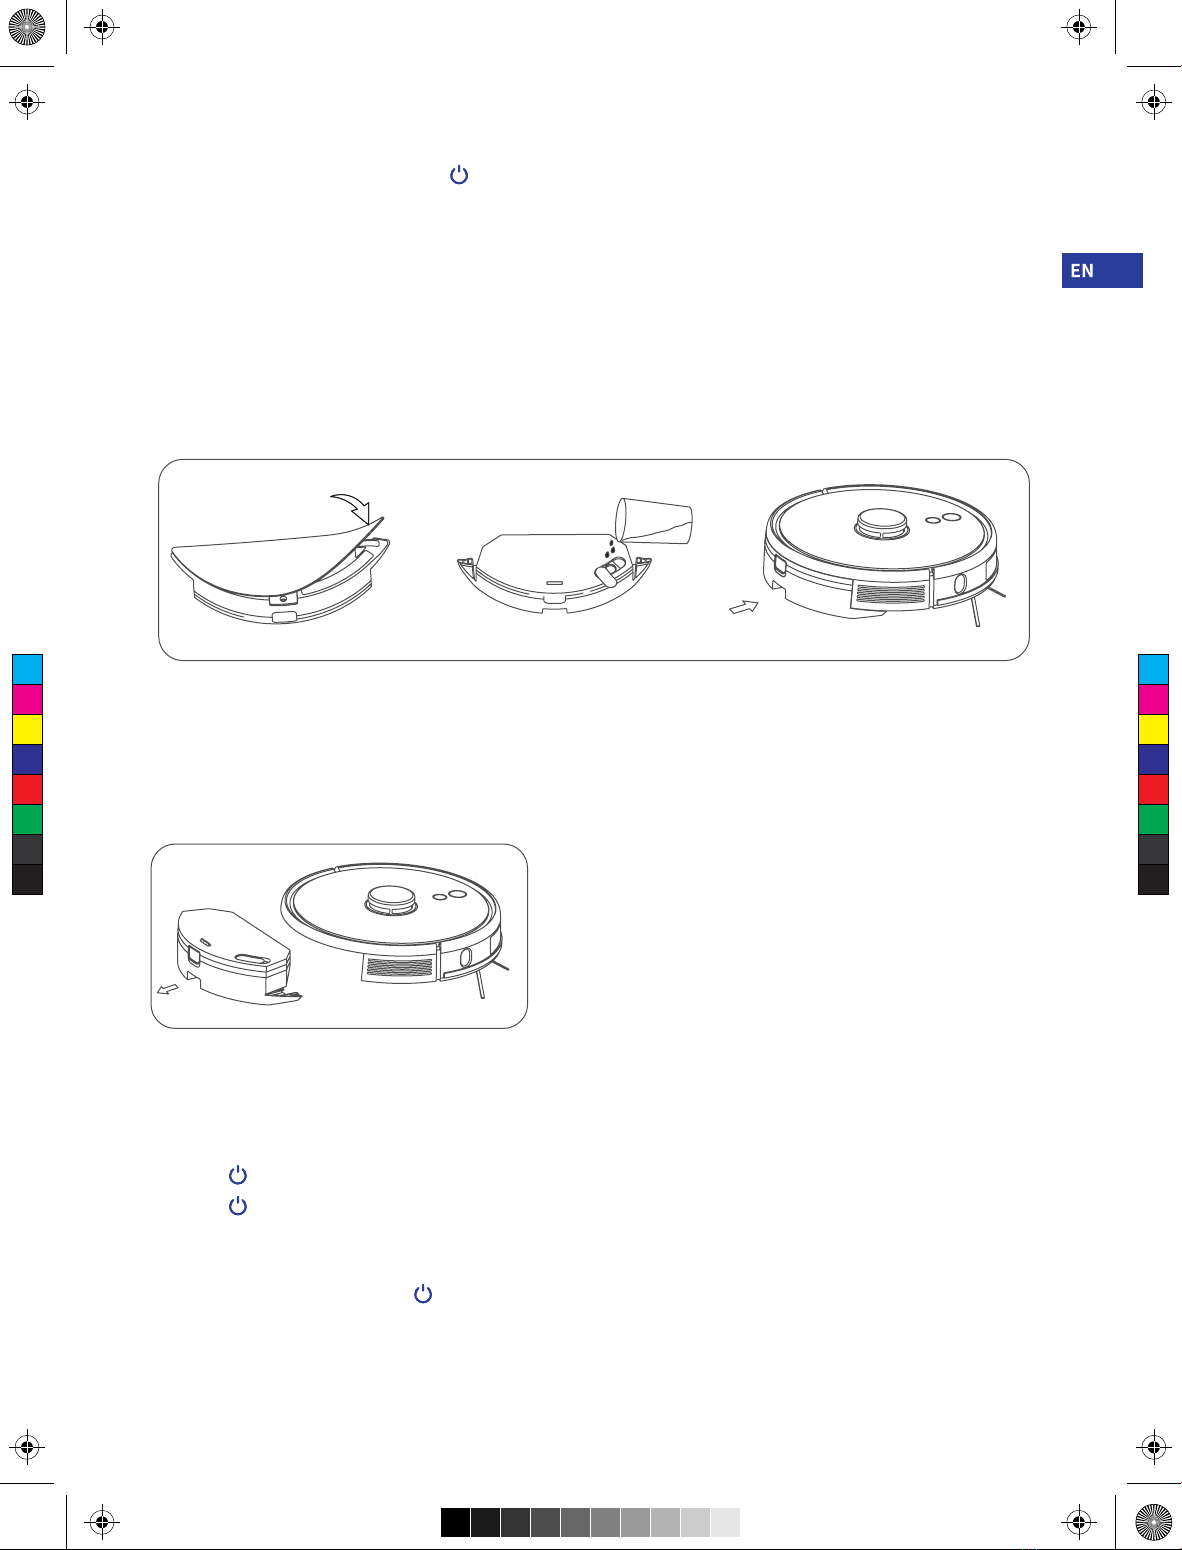
• Please clean or maintain the host and the charging base under shutdown or power-off state.
• Please do not wipe any part of the product using wet cloth or any liquid.
• Please use the product according to User Manual. User should be responsible for any damages and injuries caused by improper use.
• Please do not use mopping function for carpet and furniture top.
• Please be sure to remove the water tank when the machine is being charged.
1.2 Battery and Charging
• Please do not use battery, charging base or charger provided by any third parties.
• Please do not dismantle, report or refit battery or charging base arbitrarily.
• Please keep the charging base away from heat source (such as heating plate).
• Please do not wipe or clean the charging base shrapnel using wet cloth or wet hand.
• Please do not abandon used batteries arbitrarily. Used batteries should be disposed of by professional recycling agency.
• If power line is damaged or broken, please disuse it immediately and replace it through official channels.
• Please ensure the host shuts down during transportation and the product should be transported in or iginal packaging.
• If the machine is left unused long, it should be fully charged and then placed in a cool and dry place. Charge the machine at. least
every 3 months so as to avoid damaging batteries due to excessive discharge.
• The appliance is only to be used with the power supply unit provided with the appliance.
• The adapter must be removed from the socket-outlet before cleaning or maintaining the appliance.
• The appliance contains batteries that are only replaceable by skilled persons.
• The battery must be removed from the appliance before it is scrapped.
• The appliance must be disconnected from the supply mains when removing the battery.
• The battery is to be disposed of safety.
• WARNING: For the purposes of recharging the battery, only use the detachable supply unit (model: xxx) provided with this appliance.
1.3 Laser Safety Information
• Laser distance sensor of the product complies with the standard for class1 laser products of IEC60825 and does not produce
dangerous laser radiation.
• Laser class IEC-60825 Class 1
• The maximum laser output of the product 10mW
• Laser head Pulse time (1/2300) s
• Invisible laser radiation
• laser energy-Exposure near aperture may cay cause burns
• Standard: IEC 60825-1:2014
C
M
Y
CM
MY
CY
CMY
K
T9 说明书英文版_20210629.pdf 5 2021/6/29 16:39:50

- 02 -
Part 2 Product overview
2.1 Packing list
• Key Function
Sweep/ON &OFF
Sweep/ON &OFF
Recharging/ local cleaning
Recharging/
local cleaning
• Short press to start Sweep/Pause
• Long press for 3s for ON/OFF
• Long press for 15s for forced shutdown
under abnormal circumstances
• Blue: Normal operation or charging
• Red: Abnormal condition or low battery
• Purple: Equipment is not connected to the network
• Short press Recharge/Pause
• Long press to start partial cleaning
• Press two buttons simultaneously for 3s
Indicator light Reset WiFi
Main unit * 1
Charging base * 1 User manual * 1 Quick user guide * 1
Adapter * 1
Cleaning brush * 1
Duster cloth*1
HEPA Filter +
Sponge Filter *1
Left side brush*2
Right side brush*2
Electric-controlled
water tank * 1
2.2 Product Appearance
• Main unit
Filter screen cover
Dust bin button
Wall sensor
System reset button
System upgrade port
(This port is only for
professional use)
C
M
Y
CM
MY
CY
CMY
K
T9 说明书英文版_20210629.pdf 6 2021/6/29 16:39:50

- 03 -
LDS laser ranging sensor
Anti-collision sensor for radar
Infrared anti-collision sensor
Infrared recharging sensor
Charging contact
Universal wheel
Side brush
Battery cover
Driving wheel
Rolling brush
Rolling brush cover buckle
Anti-drop sensor
Power indicator light
Signal emission area Catching groove
Cover plate
Wire slot
Power adapter port
Wrapping post
Charging base pins
• Sensor and Structure
• Charging Base
C
M
Y
CM
MY
CY
CMY
K
T9 说明书英文版_20210629.pdf 7 2021/6/29 16:39:50

- 04 -
Part 3 Installation and operation
3.1 Installation
1. Connect power line and feed the excess wire into the slot.( Figure3.1a )
2. Place charging base against the wall and connect the power.( Figure3.1b )
Note:
• Ensure a space of above 0.5m on both sides of the charging base and a space of above 1.5m in the front.
• If the power line is vertical to the ground, it may be dragged by the host and consequently the charging base may be powered off .
• The charging indicator is normally on when powered on and off when charged.
3. Please do not move the charging base arbitrarily and keep it out of direct sunlight.( Figure3.1c )
Note:
• If the charging base is relocated, the host may fail in positioning and lose the map. When restarted, the host will rebuild and memorize
the map and the rebuilt map may lose cleaning information of forbidden areas and other areas。
• Direct sunlight will interfere with recharging signal and consequently the host may be unable to return to the charging base.
4. Installation of side brush.( Figure3.1d )
Make the left side brush (L) and the right side brush (R) correspond to L and R on the bottom casing, press L and R and the side brushes
are installed till you hear a “cracking” sound.
5. Starting up and charging.( Figure3.1e )
Long press to switch on the robot. Charge the robot on charging base when the power indictor light is normally on.
Note:
If the machine cannot be started due to low battery, please charge the host on the charging base and the machine will be started
automatically. The machine can work normally only when the battery level is ≥20%.
6. Connect mobile APP (this step can be skipped)
Please refer to WiFi connection guideline, then connect mobile APP.
Note: If you want to connect to Alexa, please click" Alexa" and follow the prompts!
>0.5m
>0.5m
>1.5m
( Figure3.1a )
( Figure3.1c ) ( Figure3.1d ) ( Figure3.1e )
( Figure3.1b )
Tuya Smart
C
M
Y
CM
MY
CY
CMY
K
T9 说明书英文版_20210629.pdf 8 2021/6/29 16:39:50

- 05 -
7. Start cleaning
After the robot is powered on, short press key on the robot or use mobile APP to start cleaning.
(press any button to pause during using).
Note:
• The sweeping robot cannot be used to remove liquids.
• If the battery level is less than 20, the machine cannot work. Please charge it.
• The machine will return to the charging base automatically if the battery level is less than 20% in use and will be powered off
and start cleaning automatically after the battery level reaches 80%.
• Please clear various wires (including power line of charging base) on the ground before use so as to avoid outage and damage of
objects or wires when wires are dragged by the host.
8. Installation of mopping module( Figure3.1f)
(a) Install Electric-controlled water tank;
(b) Fill the water tank: uncap the cover and fill with water;
(c) Intall the module: push the module horizontally along the rear part of the robot.
The module is installed in place if you hear a "click" sound.
9. Remove the mopping module( Figure3.1g) 10. Instructions for mopping module
When the robot is finished working, press the button in the
middle of the water tank to remove the mopping module
backwards, empty the water in the water tank and clean
the mopping cloth (do not move or turn the robot over
during cleaning) .
① Please do not use the mopping module when it is left
unused.
② For the sake of safety, please be sure to remove the
mopping module when it is being charged or left unused.
③ Please do not mop the carpet. Set a forbidden area in APP
to prevent the machine from entering the carpet.
④ To achieve a better mopping effect, the mopping module
should be installed after the floor is swept for three times.
⑤ To add water or clean the dust cloth when the machine
works, please pause it, and take out and reassemble the
mopping module according to steps 8 and 9. Please do
not move or turn over the host so as to avoid failing in
positioning and losing the map.
⑥ Mopping function of the machine is intended for wiping
and is conducive to deep cleaning. it cannot remove
stubborn stain effectively and replace labor force.
3.2 Operation
1) ON/OFF
Long press key for 3s, the indicator light is on and the machine is started.
Long press key for 3s when the machine is under standby mode,the indicator light is off and the machine shuts down.
Note: The machine cannot shut down when the host is being charged.
2) Sweep/Pause
After the machine is started, short press key on the host or start the machine using mobile APP.(Press any key to pause in use)
Note:
• The cleaning robot cannot be used to remove liquids.
• If the battery level is less than 20%, the machine cannot work. Please charge it.
• The machine will return to the charging base automatically if the battery leve is less than 20% in use and will be powered off and start
cleaning automatically after the battery level reaches 80% Please clear various wires (including power line of charging base) on the
ground before use so as to avoid outage and damage of objects or wires when wires are dragged by the robot.
( Figure3.1f)
( Figure3.1g)
C
M
Y
CM
MY
CY
CMY
K
T9 说明书英文版_20210629.pdf 9 2021/6/29 16:39:50

- 06 -
3) Charging
Automatic mode:
The robot will return to the charging base automatically after work.
Manual mode:
Under suspended state, short press key to start recharging or when the recharging host is charged under the control of mobile APP,
The indicator light is under breathing mode when the recharging host is charged.
Note: If the robot can not find the charging base, it will automatically return to the starting position. Please manually put the robot back to
the charging base for charging.
4) Cleaning mode( Figure3.2a)
After the robot is powered on, it will scan and generate the map and divide it into areas intelligently. Then sweep the areas one by one
along the wall orderly, efficiently and thoroughly and plan the cleaning route in a bow/S shape. The robot will return to the charging base
automatically after cleaning.
Note:
Do not move the robot casually and frequently when it is cleaning. After moving, please put the robot near the original position. When it
starts again, it will try to reposition itself. After successful positioning, it would follow the planned path and continue to work. If the
positioning fails, the robot would abort previous mission, make a map and do the cleaning again. Even it maynot find the charging base.
5) Spot cleaning
When a local area needs a deep sweep, the user specifies a point on the map on the APP, the machine will automatically drive to the
vicinity of the point, take the point as the center, and clean within 1.5m x 1.5m.
6) Partial cleaning( Figure3.2b)
When the robot cannot be controlled by the mobile APP, please remove the robot to the place you want to clean. Long press the
button for 3 seconds, and the robot will clean twice within the scope of 2mx2m centering on itself.
10) WiFi reset
If the mobile phone cannot be connected to the machine due to modification of router configuration and password or for other reasons,
please press the both keys simultaneously for 3s till a voice prompt “WiFi has been reset” is given and the indicator light turns
purple and flickers slowly.
Area being cleaned
Area to be cleaned
7) User-defined area cleaning
Use the mobile APP to set the size and location of the area you want to clean. You can set one or more areas. The robot would clean
according to the areas you set.
8) Restricted area
Set one or more forbidden areas using mobile APP. The robot will not sweep forbidden areas but other areas.
Note:
• The robot may intrude into the restricted area due to positioning errors, abnormal sensors and other reasons.
• The permanent closed zone may become invalid due to the big change of the position of the charging seat and furniture. Therefore,
please try not to move or interfere with the robot during cleaning.
• The permanent restricted area would be lost when the map is rebuilt.
9) Schedule cleaning
Schedule cleaning can be set by mobile APP. The robot will start cleaning automatically at the appointed time and return to the charging
base after cleaning.
2
2
( Figure3.2a) ( Figure3.2b)
C
M
Y
CM
MY
CY
CMY
K
T9 说明书英文版_20210629.pdf 10 2021/6/29 16:39:51

- 07 -
Part 4 Daily maintenance
4.1 Rolling brush (clean it regularly)
1. Turn over the machine and press the buckle on the Rolling rush cover to take out the Rolling brush.
2. Remove dust outside and inside the Rolling brush using tiny brush and clean the Rolling brush.
3. Reassemble the Rolling brush and press the Rolling brush cover and clean the Rolling brush tightly to fix the buckle.
4.2 Side brush (clean it regularly)
1. Turn over the machine and pull out the side brush upwards.
2. Remove hair and dirt and reassemble the side brush.
3. Make the left side brush (L) and the right side brush (R) correspond o L and R on the bottom casing, press L and R to reinstall them.
4.3 Dust box and filter screen (clean it regularly)
1. Press the button and pull out the dustbin backward.
2. Open and clean dustbin.
11) DND mode
The robot will neither sweep the floor nor issue a voice automatically under DND mode. The available time of DND mode can be startup
or modified using mobile APP.
12) Adjustment of suction power
You can adjust the suction power to silent level, standard level and high level by mobile APP.
13) Adjustment of water flow (only for electric-controlled water)
You can adjust the water flow to low level, stardard level and high level by mobile level.
Buckle
Main brush
R(right side brush)
L(left side brush)
4.4 Filter screen cleaning (clean it regularly)
a. After a long time usage, remove the filter gauze, sponge and HEPA.
b. Clean the removed filter gauze ,sponge and HEPA under water.
c. Shake off the water drops and dry it naturally, then use it after completely dryied.
d. After dry, instll it well in sequence, filter gauze - sponge -HEPA.
Filter gauze
Button
HEPA
Filter cover
Sponge
C
M
Y
CM
MY
CY
CMY
K
T9 说明书英文版_20210629.pdf 11 2021/6/29 16:39:51

- 08 -
Part 3 Installation and operation
3.1 Installation
1. Connect power line and feed the excess wire into the slot.( Figure3.1a )
2. Place charging base against the wall and connect the power.( Figure3.1b )
Note:
• Ensure a space of above 0.5m on both sides of the charging base and a space of above 1.5m in the front.
• If the power line is vertical to the ground, it may be dragged by the host and consequently the charging base may be powered off .
• The charging indicator is normally on when powered on and off when charged.
3. Please do not move the charging base arbitrarily and keep it out of direct sunlight.( Figure3.1c )
Note:
• If the charging base is relocated, the host may fail in positioning and lose the map. When restarted, the host will rebuild and memorize
the map and the rebuilt map may lose cleaning information of forbidden areas and other areas。
• Direct sunlight will interfere with recharging signal and consequently the host may be unable to return to the charging base.
4. Installation of side brush.( Figure3.1d )
Make the left side brush (L) and the right side brush (R) correspond to L and R on the bottom casing, press L and R and the side brushes
are installed till you hear a “cracking” sound.
5. Starting up and charging.( Figure3.1e )
Long press to switch on the robot. Charge the robot on charging base when the power indictor light is normally on.
Note:
If the machine cannot be started due to low battery, please charge the host on the charging base and the machine will be started
automatically. The machine can work normally only when the battery level is ≥20%.
6. Connect mobile APP (this step can be skipped)
Please refer to WiFi connection guideline, then connect mobile APP.
Note: If you want to connect to Alexa, please click" Alexa" and follow the prompts!
4.6 Sensor Cleaning (clean it regularly)
Clean the sensors by soft mop, include:
1. Clean the sensors along the wall on the right.
2. Three anti-dropping sensors at the bottom of the host.
3. Infrared avoidance sensor in the front of the host.
4. Radar avoidance sensor on the top of the host.
5. Electric shock protector and charging base shrapnel at the bottom of the host (please cut of the power during cleaning).
6. Signal transmission area of charging base.
4.5 Mopping module (clean it every time)
1.Remove the mop, pure out the water from water tank.
2.Clean the mop, dry the water tank and mop
4.7 Battery
Upgrade firmware using mobile APP. If new firmware is detected, upgrade it according to prompt. The battery level should be ≥50%
during firmware upgrade, so the machine should be placed on the charging base.
4.8 Firmware upgrade
Upgrade firmware using mobile APP. If new firmware is detected, upgrade it according to prompt. The battery level should be ≥50%
during firmware upgrade, so the machine should be placed on the charging base.
4.9 System reset
Take down the dust box, open the rubber plug and press Reset key (refer to page 4). Current map will be lost and timing, WiFi and
personalized settings will be reserved after reset.
Anti-dropping sensor
Charging contact
LDS laser ranging sensor
Anti-collision sensor for radar
Anti-collision sensor
Infrared recharging sensor
Signal emission area
Charging base pins
C
M
Y
CM
MY
CY
CMY
K
T9 说明书英文版_20210629.pdf 12 2021/6/29 16:39:51

- 09 -
Part 5 Common Problems
Problem Solution
Error 1: Oh dear! I cannot find the dust collector Cleaning is triggered when the dust box is take out
Error 2: Please check if the radar on top has
been covered or blocked
The top radar is covered or placed in an open area
(there is not obstacle within an area of 6×6m2)
Error 3: Please place me in a new location and try again Pick the robot up or hang it in the air
Error 4: Please scrub the cliff sensor, and restart me
from a new location
The cliff sensor is covered or placed at height
Error5: please scrub the front sensor,and restart
mefrom anew location
The infrared avoidance sensor is dirty or covered
Error 6: Please scrub the right-hand sensor,and
restart me from a new location.
The wall sensor is dirty or covered
Error 7: Please scrub the radar housing on top,
and restart me from a new location.
The radar avoidance sensor is dirty or covered
Error 8: Please check if the bumper has been
blocked in some way.
The edge or collision sensor is stuck
Error 9: Master, please clean the dust container and filter. The dust box is full or the filter screen needs to be replaced
The robot cannot be started
The robot cannot be charged
The robot cannot be recharged
Abnormal behavior
Abnormal noise in use
Cleaning ability declines
or dust falls out
WiFi cannot be connected
Fixed-time cleaning fails
Whether the robot consumes
power if it is always placed
on the charging base
Whether the robot needs to
be charged for 16h for the
first three times
• In case of a low battery level, please place the robot on the charging base and align it at
the ele ctrode plate,the machine will be started autom atically(if the robot is completely
powered off, it can be started automatically after charged for a while).
• If the environment temperature is lower than 0oC or higher than 50 oC, please use it at a
temperature of 0-40 oC.
• Please move the robot away, check whether the indicator light of the charging base
lights on and confirm both ends of the power adapter of the charging base are
connected well.
• In case of poor contact, please clear the charging base shrapnel and the charging
contact on the robot or push the side brush aside.
The robot is too far away from the charging base, please put the robot near the charging
base and make another try.
Shut down and restart the robot.
Main brush, side brush or wheel may be twined by foreign matters, please shut down the
robot and remove foreign matters..
• The dust box is full, please clear it.
• The filter screen is blocked, please clear or replace it.
• The main brush is twined by foreign matters, please clear it
• Poor WiFi signal, please ensure is covered by WiFi signal.
• WiFi is connected abnormally, please reset WiFi, download the latest APP and try to
reconnect it.
• Password is inputted incorrectly.
• The router is available for 5GHz frequency band, the cleaning robot is available for
2.4GHz frequency band only.
• If fails to connect to the Wi-Fi network, probably because your Wi-Fi is 5GHz, please refer
to "Common router setting method" to set it to be 2.4GHz.
In case of a low battery level, fixed-time cleaning can be started only when the battery
level is no less than 30%.
The robot consumes a little power if it is always placed on the charging base and it
enables the best performance of battery.
The lithium battery can be used immediately after being charged and has no memory
effect.
5.2 Troubleshooting
5.1 FAQ
Prompt tone Solution
C
M
Y
CM
MY
CY
CMY
K
T9 说明书英文版_20210629.pdf 13 2021/6/29 16:39:51

- 10 -
10) WiFi reset
If the mobile phone cannot be connected to the machine due to modification of router configuration and password or for other reasons,
please press the both keys simultaneously for 3s till a voice prompt “WiFi has been reset” is given and the indicator light turns
purple and flickers slowly.
Part 6 Basic Parameters
Error 10: Dust container has been removed, please clean
the container and filter.
After error 9 is issued,user takes out the duct chamber
and error 10 is triggered
Error 12: Please place me correctly! The robot is tilt
Error 11: I'm stuck, please help me! The robot is stuck
Error 13: Please check if my wheels have become
blocked somewhere The driving wheel is stuck or twined
Error 14: Please check if the main brush has become stuck The main brush is twined or stuck
Error 15: Please check if the side brushes have become stuck The side brush is twined or stuck
Error 16: What's going on? Where is the docking station? The charging base cannot out found or is not plugged in.
Error 17: Oh dear! Program error, please restart me Abnormalities are caused by unknown breakdown,
restart the robot.
Error 18: Error encountered initiating shutdown The robot reminds the user and shuts down auomatically
or is recharged.
Error 19: Low battery, please recharge
When the battery level is too low and the robot is not on
the charging base, cleaning is triggered (the battery level
is lower than 10%)
The robot shuts down when charged on the charging base
Error 20: To shut me down, please place me
away from the docking station
Prompt tone Solution
Item Parameter
Model J301
Overall dimension 350X350X110mm
Product weight 3.3kg
Li-battery 5200mAh
Rated voltage 14.4V
Rated power 50W
Main unit
Item Parameter
Overall dimension 160X143X80mm
Rated power 24W
Rated output 24W
Charging Base
C
M
Y
CM
MY
CY
CMY
K
T9 说明书英文版_20210629.pdf 14 2021/6/29 16:39:51

- 11 -
Part 7 After-sales Service
AIRROBO provides a straightforward warranty that is processed in the most hassle- free way possible. This policy should be regarded as a
standard service policy that covers for the products that sold only by online stores (Amazon, AliExpress, etc), or authorized distributor.
Kindly contact us at support.airrobo@ubtrobot.com with your order receipt or other proof of purchase for confirmation.
Note:
• Consumables delivered with the product have no warranty.
• Warranty protections are in addition to rights provided under local consumer laws and may vary among countries.
30 days Money-Back Guarantee for Any Reason:
Undamaged products may be returned for a full refund for any reason within 30 days of the date the item was delivered to the designated
shipping address.
• Returns must include all accessories.
• Items must include original packaging.
• For non-quality related warranty claims, buyer is responsible for shipping costs.
• For non-quality related warranty claims, AIRROBO refunds the cost of the product itself.
• Returns may be rejected if product does not meet the above requirements.
It is not possible to process a request for a refund for non-quality issues for items that have expired this 30-day window. For purchases
not made directly through online stores (Amazon, AliExpress, etc), please contact retailers for refunds. For quality-related issues, please
see below.
Warranty Claims for Quality-Related Issues:
All quality-related defects on items sold directly by online stores (Amazon, AliExpress, etc) or AIRROBO’s authorized resellers are covered
by an extensive warranty, starting from the date of purchase.
AIRROBO’s limited warranty is restricted to the country of purchase. The limited warranty is void on items taken outside the country they
were originally bought in or shipped to directly from an authorized online purchase.
Warranties on all replacements follow the same warranty time frame of the original defective item, or 3 months after being replaced,
whichever is longer.
Warranties on products are void after having been fully refunded.
Process:
• Buyer must provide sufficient proof of purchase.
• AIRROBO must document what happens when buyers troubleshoot the product.
• The defective item’s serial number and/or visible proof depicting the defect are required.
• It may be necessary to return the item for quality inspection.
Valid proof of purchase:
• Order number from online purchases made through online stores (Amazon, AliExpress, etc) or AIRROBO’s authorized resellers.
• Sales invoice.
• Dated sales receipt from an authorized AIRROBO reseller that shows a description of the product along with its price.
Please note more than one type of proof of purchase may be required to process a warranty claim (such as receipt of money transfer and
confirmation of address item was originally shipped to).
Shipping costs must be covered by buyer in the following situations:
• Returning products for any reason other than a proven defect.
• Warranty claims on items taken outside the original country of purchase.
• Buyer’s accidental returns.
• Returning personal items.
• Returning items claimed to have defects but found by AIRROBO quality control to be in working condition.
• Returning defective items in international shipping.
• Costs associated with unauthorized returns (any returns made outside of the approved warranty process).
Not Covered Under Warranty:
• Products without sufficient proof of purchase
• Lost or stolen products
• Items that have expired their warranty period
• Non quality-related issues (after 30 days of purchase)
• Free products
• Repairs through 3rd parties
When returning items with a prepaid shipping label provided by AIRROBO, AIRROBO takes responsibility for any damage or loss incurred
in transit. When returning items for non-quality issues, buyer assumes responsibility for any damage or loss incurred in transit. AIRROBO
does not provide refunds for items damaged in transit for non- quality related warranty claims.
Item
Main unit
Accessories
Main unit (including the built-in lithium battery) 1 year
Charging base, power adapter and The water tank 1 year
Consumables Rolling brush, side brush, rolling brush cover, filter, cleaning tools, cloth, dust box /
Warranty Content Warranty Period
• Damage from outside sources
• Damage from misuse of products (including, but not limited to:
falls, extreme temperatures, water, operating devices improperly)
• Purchases from unauthorized resellers AIRROBO is not liable for:
• Loss of data incurred from use of AIRROBO products
• Returning personal items sent to AIRROBO
C
M
Y
CM
MY
CY
CMY
K
T9 说明书英文版_20210629.pdf 15 2021/6/29 16:39:51

- 12 -
Part 8 Declaration of Conformity
8.1 FCC Compliance Statement
Changes or modifications not expressly approved by the party responsible for compliance could void the user’s authority to operate the
equipment.
This device complies with Part 15 of the FCC Rules. Operation is subject to the following two conditions:
(1) this device may not cause harmful interference, and
(2) this device must accept any interference received, including interference that may cause undesired operation.
This equipment has been tested and found to comply with the limits for a Class B digital device, pursuant to Part 15 of the FCC Rules.
These limits are designed to provide reasonable protection against harmful interference in a residential installation. This equipment
generates, uses and can radiate radio frequency energy and, if not installed and used in accordance with the instructions, may cause
harmful interference to radio communications. However, there is no guarantee that interference will not occur in a particular installation.
If this equipment does cause harmful interference to radio or television reception, which can be determined by turning the equipment off
and on, the user is encouraged to try to correct the interference by one or more of the following measures:
• Reorient or relocate the receiving antenna.
• Increase the separation between the equipment and receiver.
• Connect the equipment into an outlet on a circuit different from that to which the receiver is connected.
• Consult the dealer or an experienced radio/TV technician for help.
8.2 FCC Radiation Exposure Statement
This equipment complies with FCC radiation exposure limits set forth for an uncontrolled environment. This equipment should be
installed and operated with minimum distance 20cm between the radiator and your body. This transmitter must not be co-located or
operating in conjunction with any other antenna or transmitter.
8.3 EU Declaration of Conformity
We, Best Epoch technology Co.,Ltd,declare under sole responsibility that the above products.to which this declaration relates, is in
conformity with the requirements of the following EU Directives:
Product description: Robot Vacuum Cleaner
Type designation(s): J301
Trademark: AIRROBO
Hereby we,
Name of manufacturer: Guangdong Wangjia Intelligent Robot Co., Ltd.
Address: Room 301, Building 5, No.1 Junma Road, Humen Town, Dongguan, Guangdong, China
declare under our sole responsibility that the product described above is in conformity with the relevant Union harmonization
legislations:
European Directive (2014/53/EU)
The following harmonized standards and/or other relevant standards have been applied, which included for Article 3.1a Health, Article
3.1b EMC, Article 3.2 Radio Spectrum requirements and Article 3.1a Electrical Safety
requirements:
EN 55014-1:2017
EN 55014-2:2015
EN IEC 61000-3-2:2019
EN 61000-3-3:2013
ETSI EN 301 489-1 V2.2.3(2019-11)
ETSI EN 301 489-17 V3.2.4(2020-09)
EN 300 328 V2.2.2(2019-07)
EN 62311:2008
EN 60335-2-2:2010+A11:2012+A1:2013,EN 60335-1:2012+A11:2014+A2:2019
EN 62233:2008
The performed the conformity assessment according to the European Directive, The laboratory issuing the report is is TÜV SÜD.
The Technical Documentation(TD),relevant to the product described above and which support this DoC is available from the EU contact
address on this Doc.
Signed: Date:
C
M
Y
CM
MY
CY
CMY
K
T9 说明书英文版_20210629.pdf 16 2021/6/29 16:39:51

- 13 -
Vielen Dank, dass Sie sich für den AIRROBO ROBOTER-STAUBSAUGER-REINIGER entschieden haben.
• Es wird dringend empfohlen, das Benutzerhandbuch vor dem Erstgebrauch des Roboters vollständig zu lesen und zu verstehen, um
den richtigen Gebrauch, die Sicherheitsinformationen und die korrekten Wartungsanweisungen für den AIRROBO ROBOTER-STAU-
BAUGER-REINIGER zu erhalten.
• Dieses Benutzerhandbuch dient als Anleitung für den Benutzer, es deckt nicht alle möglichen Situationen ab. Sollten Sie auf
Situationen stoßen, die in diesem Benutzerhandbuch nicht angesprochen werden, wenden Sie sich bitte an unseren Kundendienst
unter: support-eu@ubtrobot.com für produkttechnische Unterstützung.
• Dieses Benutzerhandbuch wird bei neuen Software- oder Hardware-Updates aktualisiert, und der Inhalt und die Bilder können
ohne weitere Ankündigung aktualisiert werden.
Teil 1 Sicherheitsinformationen
1.1 Einschränkungen bei der Verwendung
• Das Produkt ist nur für die Bodenreinigung in einer häuslichen Umgebung bestimmt und kann nicht für den Außenbereich (z. B.
offene Terrasse), nicht bodennahe Bereiche (z. B. Sofa) und gewerbliche oder industrielle Umgebungen verwendet werden.
• Bitte verwenden Sie das Produkt nicht in mittleren Bereichen (z. B. Penthouse, offene Terrasse und Möbeloberseite) ohne Schutz-
zaun.
• Bitte verwenden Sie das Produkt nicht bei einer Temperatur von über 40 ℃ oder unter 0 ℃ oder wenn sich Flüssigkeiten und
klebrige Substanzen auf dem Boden befinden.
• Bitte hängen Sie die Kabel vor dem Gebrauch vom Boden hoch, um zu vermeiden, dass sie vom Gerät mitgerissen werden.
• Bitte räumen Sie zerbrechliche Gegenstände und Verunreinigungen (z. B. Vase und Plastiktüte usw.) auf dem Boden ab, um zu
vermeiden, dass Wertgegenstände beschädigt werden, wenn das Gerät feststeckt oder leicht angestoßen wird.
• Personen mit körperlichen, geistigen oder Wahrnehmungsstörungen (einschließlich Kinder) dürfen das Produkt nicht verwenden
oder bedienen.
• Kinder dürfen das Produkt nicht als Spielzeug verwenden. Bitte halten Sie Kinder und Haustiere fern, wenn das Gerät in Betrieb ist.
• Bitte halten Sie die Hauptbürste und andere Reinigungswerkzeuge außerhalb der Reichweite von Kindern.
• Bitte stellen Sie keine Gegenstände (einschließlich Kinder und Haustiere) auf eine stehende oder sich bewegende Maschine.
• Bitte halten Sie Haare, Finger und andere Körperteile von Menschen oder Haustieren vom Saugeinlass fern, wenn das Gerät in
Betrieb ist.
• Bitte verwenden Sie das Gerät nicht zum Aufsaugen von brennenden Gegenständen (z. B. brennende Zigarettenkippen).
• Bitte verwenden Sie das Gerät nicht, um langhaarige Teppiche zu reinigen (einige dunkle Teppiche können möglicherweise nicht
normal gereinigt werden).
• Bitte verhindern Sie, dass das Gerät harte oder scharfe Gegenstände aufsaugt (z. B. Dekorationsabfälle, Glas und Eisennägel usw.).
• Bitte bewegen Sie das Gerät nicht, indem Sie die Schutzabdeckung des Laserabstandssensors und des Kollisionsschutzes festhalten.
• Bitte reinigen oder warten Sie das Gerät und die Ladestation im ausgeschalteten Zustand.
• Bitte wischen Sie keine Teile des Geräts mit einem feuchten Tuch oder einer Flüssigkeit ab.
• Bitte verwenden Sie das Produkt gemäß dem Benutzerhandbuch. Der Benutzer haftet für alle Schäden und Verletzungen, die durch
unsachgemäßen Gebrauch verursacht werden.
• Bitte verwenden Sie die Wischfunktion nicht für Teppiche und Möbeloberflächen.
• Achten Sie darauf, den Wassertank zu entfernen, wenn das Gerät geladen wird.
1.2 Akku und Aufladen
• Bitte verwenden Sie keine Akkus, Ladestationen oder Ladegeräte, die von Dritten zur Verfügung gestellt werden.
• Bitte zerlegen, melden oder montieren Sie den Akku oder die Ladestation nicht willkürlich.
• Bitte halten Sie die Ladestation von Wärmequellen (wie z. B. Heizplatten) fern.
• Bitte wischen oder reinigen Sie die Ladestation nicht mit einem feuchten Tuch oder nassen Händen.
• Bitte geben Sie gebrauchte Akkus nicht eigenmächtig weg. Verbrauchte Akkus sollten von einem professionellen Recyclingunterneh-
men entsorgt werden.
• Wenn das Stromkabel beschädigt oder gebrochen ist, verwenden Sie es bitte sofort nicht mehr und ersetzen Sie es über offizielle
Kanäle.
• Bitte stellen Sie sicher, dass das Gerät während des Transports ausgeschaltet ist und das Produkt in der Originalverpackung
transportiert wird.
• Wenn das Gerät lange unbenutzt bleibt, sollte es vollständig aufgeladen und dann an einem kühlen und trockenen Ort aufbewahrt
werden. Laden Sie das Gerät mindestens alle 3 Monate auf, um eine Beschädigung des Akkus durch zu starke Entladung zu
vermeiden.
• Das Gerät darf nur mit dem mitgelieferten Netzteil betrieben werden.
• Das Netzteil muss vor der Reinigung oder Wartung des Gerätes aus der Steckdose gezogen werden.
• Das Gerät enthält Akkus, die nur von Fachleuten ausgetauscht werden dürfen.
• Der Akku muss aus dem Gerät entfernt werden, bevor es entsorgt wird.
• Beim Herausnehmen des Akkus muss das Gerät vom Stromnetz getrennt werden.
• Der Akku ist sicher zu entsorgen.
• WARNUNG: Verwenden Sie zum Aufladen des Akkus nur die abnehmbare Ladestation (Modell: xxx), die mit diesem Gerät geliefert
wurde.
1.3 Laser Sicherheitsinformationen
• Der Laser-Entfernungssensor des Produkts entspricht der Norm für Laserprodukte der Klasse 1 der IEC60825 und erzeugt keine
gefährliche Laserstrahlung.
• Laserklasse IEC-60825 Klasse 1
• Die maximale Laserleistung des Produkts 10 mW
• Laserkopf Pulszeit (1/2.300) Sek
• Unsichtbare Laserstrahlung
• Laserenergie - Exposition in der Nähe der Blende kann Verbrennungen verursachen
• Norm: IEC 60825-1:2014
C
M
Y
CM
MY
CY
CMY
K
T9 说明书德文版_20210621.pdf 1 2021/6/25 16:50:50

- 14 -
Teil 2 Produktübersicht
2.1 Packliste
• Tastenfunktion
Wischen/EIN&AUS
Wischen/EIN&AUS
Aufladen/Teilreinigung
Aufladen/
Teilreinigung
• Kurzes Drücken zum Starten von Wischen/Pause.
• Langes Drücken für 3 Sekunden für EIN/AUS.
• Langes Drücken für 15 Sekunden für Zwangsabschaltung
unter abnormalen Umständen
• Blau: Normaler Betrieb oder Laden
• Rot: Abnormaler Zustand oder schwache Batterie
• Lila: Gerät ist nicht mit dem Netzwerk verbunden
• Kurz drücken Aufladen/Pause
• Langes Drücken zum Starten der Teilreinigung
• Zwei Tasten gleichzeitig für 3 Sekunden
drücken two buttons simultaneously for 3s
Anzeigerleuchte WLAN rücksetzen
Hauptgerät * 1
Ladestation * 1 Benutzerhandbuch * 1 Schnellstartanleitung * 1
Netzteil * 1
Reinigungsbürste * 1
Staubwischtuch*1
HEPA Filter +
Schwammfilter *1
Linke Seitenbürste*2
Rechte Seitenbürste *2
Elektrisch gesteuerter
Wassertank * 1
2.2 Produkterscheinung
• Hauptgerät
Filtersieb Abdeckung
Staubbehälter Taste
Wandsensor
System Rücksetz-Taste
System Aufwertung-
Anschluss
(Anschluss nur für Fachkraft)
C
M
Y
CM
MY
CY
CMY
K
T9 说明书德文版_20210621.pdf 2 2021/6/25 16:50:50

- 15 -
LDS Laser-Bereichssensor
Anti-Kollisionsensor für Radar
Infrarot Anti-Kollisionssensor
Infrarot Aufladesensor
Ladekontakt
Universalrad
Seitenbürste
Akkuabdeckung
Antriebsrad
Walzenbürste
Walzenbürste Abdeckungsschnalle
Anti-Sturz Sensor
Betriebsanzeigeleuchte
Signalausgabefläche Auffangnu
Abdeckplatte
Kabelschlitz
Netzteil-Anschluss
Aufwickelpfosten
Ladekontakte
• Sensor und Aufbau
• Ladestation
C
M
Y
CM
MY
CY
CMY
K
T9 说明书德文版_20210621.pdf 3 2021/6/25 16:50:50

- 16 -
Teil 3 Installation und Betrieb
3.1 Installation
1. Schließen Sie die Stromleitung an und führen Sie das überschüssige Kabel in den Schlitz ein.(Abbildung 3.1a)
2. Stellen Sie die Ladestation an die Wand und schließen Sie den Strom an.(Abbildung 3.1b)
Hinweis:
• Achten Sie auf einen Abstand von über 0,5 m auf beiden Seiten der Ladestation und auf einen Abstand von über 1,5 m an der Vorder-
seite.
• Wenn das Stromkabel senkrecht zum Boden verläuft, kann es vom Gerät mitgerissen werden und die Ladestation kann dadurch
ausgeschaltet werden.
• Die Ladeanzeige leuchtet normalerweise, wenn sie eingeschaltet ist, und erlischt, wenn sie geladen ist.
3. Bitte bewegen Sie die Ladestation nicht willkürlich und halten Sie sie von direkter Sonneneinstrahlung fern.( Abbildung 3.1c )
Hinweis:
• Wenn die Ladestation verlegt wird, kann das Gerät bei der Positionierung versagen und die Karte verlieren. Bei einem Neustart wird die
Karte neu erstellt und gespeichert, und die neu erstellte Karte kann die Reinigungsinformationen von verbotenen Bereichen und
anderen Bereichen verlieren.
• Direkte Sonneneinstrahlung stört das Aufladesignal, sodass das Gerät möglicherweise nicht zur Ladestation zurückkehren kann.
4.Installation der Seitenbürste.( Abbildung 3.1d )
Stellen Sie sicher, dass die linke Seitenbürste (L) und die rechte Seitenbürste (R) mit L und R auf dem unteren Gehäuse übereinstimmen,
drücken Sie L und R und die Seitenbürsten sind installiert, bis Sie ein „knackendes“ Geräusch hören.
5. Inbetriebnahme und Laden.( Abbildung 3.1e )
Lange drücken, um den Roboter einzuschalten. Laden Sie den Roboter auf der Ladestation auf, wenn die Betriebsanzeige normal
leuchtet.
Hinweis:
Wenn die Maschine aufgrund eines schwachen Akkus nicht gestartet werden kann, laden Sie bitte das Gerät auf der Ladestation auf und
die Maschine wird automatisch gestartet. Die Maschine kann nur dann normal arbeiten, wenn der Batteriestand ≥ 20 % ist.
6. Verbinden der mobile APP (dieser Schritt kann übersprungen werden)
Bitte beachten Sie die Richtlinien für die WLAN-Verbindung und verbinden
Sie dann die mobile APP.
Hinweis: Wenn Sie sich mit Alexa verbinden möchten,
klicken Sie bitte auf "Alexa" und folgen Sie den Anweisungen!
( Abbildung 3.1a )
( Abbildung 3.1c ) (Abbildung 3.1d ) (Abbildung 3.1e )
( Abbildung 3.1b)
Tuya Smart
>0.5m
>0.5m
>1.5m
C
M
Y
CM
MY
CY
CMY
K
T9 说明书德文版_20210621.pdf 4 2021/6/25 16:50:51
Other manuals for T9
1
Table of contents
Languages:
Other AIRROBO Vacuum Cleaner manuals