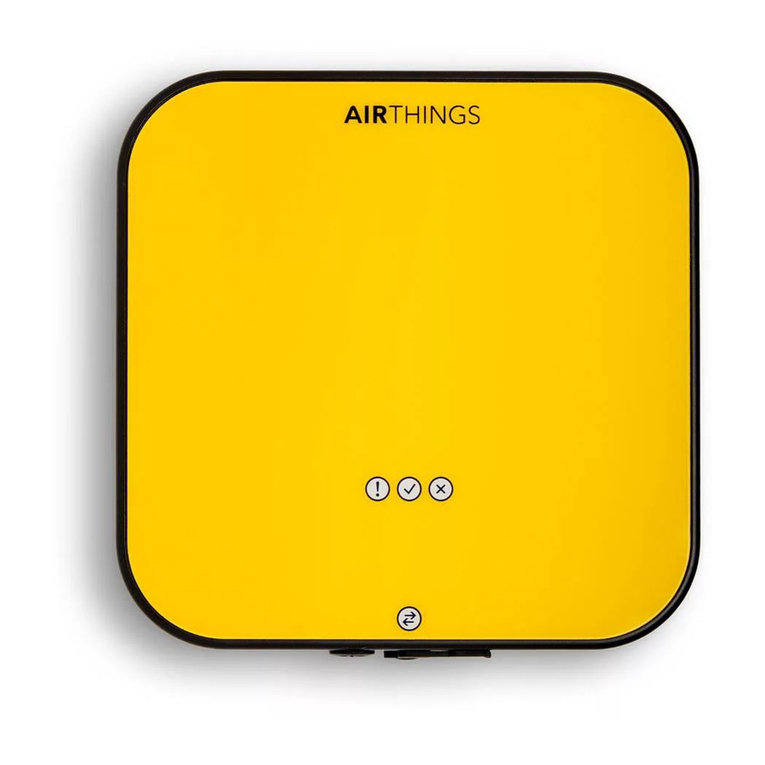
Airthings Corentium Pro User manual

CORENTIUM PRO
MANUAL
Developed in Norway - Home of fresh air
AReset button*
BKensington Security Slot
CMini-USB connection
* There is no ON/OFF button
1 Communication status light
2 Status lights (LEDs)
3 Battery compartment
4 Tripod mount
5 Serial number label
6 Calibration label
A B C 1 3 4 5 62

SPECIFICATION DESCRIPTION
Sampling Method Passive radon diffusion chamber
Alpha spectrometry
Detection Method 4 silicon photodiodes in 4
distinct radon chambers
Detector Power Supply 3 AA alkaline batteries (LR06)
~ 15-month battery life
Dimensions 5.5 x 5.5 x 1.2 inches 140 x 140
x 30 mm
Weight 10.6 ounces (including
batteries)
300 grams (including batteries)
Operation Environment 39 to 104 °F
4 to 40 °C
5% RH to 85% RH noncondensing
50 kPa to 110 kPa
Measurement Range 0 - 2700 pCi/L
0 - 100 000 Bq/m3
Measurement
Uncertainty
After 24 hours
After 7 days
σ~ 7 % ± 0.15 pCi/L
σ~ 7 % ± 5 Bq/m3
σ~ 5 % ± 0.06 pCi/L
σ~ 5 % ± 2 Bq/m3
Diffusion Time Constant 25 minutes
Temperature Sensor
Range
Resolution
Accuracy
39 to 104 °F
4 to 40 °C
0.36 °F
0.2 °C
± 1 °F (typical), ± 2 °F (max)
± 0.5 °C (typical), ± 1 °C (max)
Humidity Sensor
Range
Resolution
Accuracy
5% RH to 85% RH (non-
condensing) 0.5% RH
± 4.5% (in range 20 - 85% RH)
SPECIFICATION DESCRIPTION
Barometric Pressure
Sensor
Range
Resolution
Accuracy
50.0 kPa to 115.0 kPa
0.06 kPa
± 1 kPa
Memory The internal memory stores 5
years of hourly datapoints
Memory Capacity ~ 1 900 days of measurements
~ 5 datasets of one-year length
~ 177 datasets of 1-week
length
~ 325 datasets of 2-day length
Memory Type Non-volatile ash memory
SPECIFICATIONS
USAGE
USAGE & SAFETY
The radon sensors in Corentium Pro are made for
inside use only. Avoid storing or using the monitor
in environments with high humidity, extreme heat, or
freezing conditions. Condensation can form on the
monitor if it is moved from a warm location to a cold
location or vice versa. If condensation forms on the
monitor, remove the batteries and leave it in a dry
environment for 2 hours. The monitor should not be
used in environments with more than 85% relative
humidity. The unit must not be exposed to direct sunlight
for extended periods. Avoid subjecting the monitor to
shocks, impacts, pressure, vibrations, dust, or moisture.
Only use alkaline AA (LR06) batteries. The batteries must
not be exposed to re or other extreme heat. The battery
terminals must not be touched, and they must be kept
free from dust, sand, liquids and other foreign objects.
Use a Kensington cable Lock (often used for laptops)

for securing the instrument from theft, being moved
during measurement, etc.
Corentium Pro is designed to be used in horizontal
orientation only, do not use the monitor in vertical
orientation.
STORAGE INFORMATION
Store the Corentium Pro in its protective case, with
batteries installed, in a location with low to normal
relative humidity and avoid extreme temperatures.
Storing Corentium Pro in a vehicle is not
recommended.
Insert fresh batteries before long-term storage. Do not
allow batteries to die in the monitor at any time.
Contact the manufacturer if the monitor requires service
or repairs. Do not try to open the Corentium Pro.
Note: Failure to follow these usage and storage
requirements will void the warranty.
CALIBRATION
The monitor is tested, quality assured, and calibrated
by manufacturer. Calibration certicate is valid for one
year. Most jurisdictions require annual calibrations for
professional use.
GETTING STARTED
Use the Torx 6 screwdriver to open the battery
compartment and insert the batteries. Allow 45
seconds for the monitor to self-test, and then it will
begin recording information.
The Corentium Pro software system is comprised of
two parts, the mobile app which runs on the user’s
mobile device and is used for initiating and concluding
radon tests, and the online Pro Dashboard which is the
central hub for a radon testing company’s operations.
We have created a series of short instructional videos
to help you get started quickly: go to help.airthings.
com/pro and then the video section.
CREATING AN AIRTHINGS ACCOUNT
In order to use the mobile app and online Pro
Dashboard a user must create an Airthings account by
visiting the website at pro.airthings.com and clicking
on the “Sign Up with Airthings” button. Follow the
remaining prompts to create an account.
USING THE ONLINE PRO DASHBOARD
Radon tests are uploaded from the mobile app
to the Dashboard and can be accessed from any
location through a modern web browser. This enables
technicians to upload a radon test to the Dashboard
while in the eld, and the radon test can be analyzed
from a remote location by a specialist so a radon report
can be generated.
Logging into the Online Dashboard
To log into the Dashboard, open a web browser
and go to pro.airthings.com and enter in your login
information from the section above.
Managing Monitors of the Company
To add a monitor to the company, log into the
Dashboard and click on the monitor management icon
in the left menu, and then click on the “Add a Monitor”
bar at the top of the page. Enter in a nickname for the
monitor for easier identication of the monitor, and
then enter the monitor’s serial number and click on the
green checkmark to the right. Once a monitor is added
to the company it must be conrmed in the mobile app
when in proximity to the monitor. This is a safety feature
to help ensure that only monitors belonging to the
company can be added to the Dashboard.
Modifying Company Information
To modify company information, log into the
Dashboard and click on the company prole icon in
the left menu. The company name, mailing address,
phone number, email address, and company logo
can be modied. Additionally, company certications/
licenses can be added or modied.

Managing Users of the Company
To add a user to the company, log into the Dashboard
and click on the user management icon in the left
menu, and then click on the “Add a User” bar at
the top of the page. Enter the user’s name, email
address, and select whether they will have manager or
employee privileges and click on the green checker
to the right. (Managers can add and remove users and
monitors whereas employees are restricted from these
operations.) The user will receive an invitation link at
the email address entered. The user must click on this
invitation link and will be taken to a webpage to create
their account. To modify or delete a user click on the
“...” menu to the right of their name and select “edit” or
“delete”. In the edit page, the user’s name and phone
number can be modied. Additionally, professional
certications/licenses can be added or modied here.
Managing Report Templates
For your convenience, we have included ready-to-use
report templates which can be used as is, duplicated,
or customized to suit your needs!
To manage your templates, log into the Dashboard
and click on the report templates icon in the left
menu. To add a new template, click on the “Add a
New Template” bar at the top of the page. Name the
template and add a description and then click on
the green checkmark. In the menus on the right are
information blocks which you can add to the template.
These blocks can be added multiple times, and in any
order you choose. To see what your template will look
like, click on the “Preview” button at the top of the
page. Changes are saved as you make them. Once all
changes are complete, and the template is ready for
use, click on “Publish”. You may also use the ‘’duplicate’’
feature to create additional templates.
Generating a Report in the Dashboard
Once a radon test dataset has been uploaded to
the Dashboard it can be accessed by clicking on the
datasets icon in the left menu. A list of all datasets in
the Dashboard is presented, and a specic dataset
can be located using the search eld. To generate a
report, click on the dataset name and then click on
the “Generate Report” button at the top of the screen.
Follow the prompts to set various options for the nal
radon report. These options will vary based on the
information blocks that are included in the selected
report template. These options can include information
about motion events that occurred during the
measurement, selecting a dynamic paragraph option
(dynamic paragraphs are typically used to inform the
client of the recommended actions regarding the
overall radon average), and signing the report.
USING THE MOBILE APP
The mobile app is used for initiating and concluding
radon tests, and can also be used to view dataset
information, and generate radon reports in the eld.
Downloading the App
• iPhone and iPad: Go to the Apple App Store and
search for Corentium Pro.
• Android phones and tablets: Go to Google Play and
search for Corentium Pro.
Logging into the Mobile App
The rst time the mobile app is opened a login screen
is presented. Enter the same login credentials that you
created to access the Pro Dashboard.
Connecting to Corentium Pro
To connect to a radon monitor, from the home screen of
the app, simply tap on the monitor you wish to connect
to. Monitors will be listed in one of four sections:
1. Pending Monitors
2. Monitors in Range
3. Monitors Out of Range
4. Nearby Monitors Not Registered to This Company
Monitors under section 1 are ones which have been

added through the Dashboard and are awaiting
conrmation to be added to the company. Simply tap
on the monitors in this section to conrm adding them
to the company. Monitors under section 2 are those
which have been added to the company and are in
Bluetooth range and can be connected to. Monitors
under section 3 are those which are registered to the
company and have datasets cached on the mobile
device, but are not nearby. These cached datasets can
still be accessed to generate a report even when the
monitor is not in range. Please note that this is cached
data only and does not allow for live, remote access to
the monitor. Monitors under section 4 are nearby and
are not accessible, either because they have not been
added to the company yet through the Dashboard, or
because they are registered to another company.
The proper monitor can be identied by the serial
number on the monitor, which is also listed in the
app. Additionally, the monitor can be identied by a
custom nickname assigned to the monitor through
the Dashboard. The monitor will beep once, and the
blue light will ash once to conrm the connection and
help you identify that you are connecting to the correct
monitor. The app will begin transferring the dataset
information from the monitor to the mobile device.
Recent datasets are stored locally on the mobile device.
INITIATING A RADON TEST
Corentium Pro, like all radon testing devices, must be
placed and used in accordance with all radon testing
protocols required by the jurisdiction where the radon
test is taking place.
Note: This information is not exhaustive, and does not
contain any protocol or requirements for placement of
the monitor. Please become familiar with, and comply
with all regulations and requirements of your jurisdiction.
Scheduling a Radon Test
To start a radon test, connect to a monitor as described
in the Connecting to Corentium Pro section. If the
monitor is available to use for a radon test, a green
button that says “Start Test” will be seen at the bottom
of the screen, tap on this button to begin the scheduling
process. You will be prompted to enter some mandatory
information while the rest are optional.
Airthings recommends a minimum 48-hour
measurement duration and 4 hours delay for all short-
term radon tests. Radon tests should terminate in
24-hour increments to better account for day-to-night
uctuations of indoor radon concentrations.
Once all information about the property has been
entered in the various elds spread across several
pages, as indicated at the top of the screen, tap the
“Start” button at the bottom of the last scheduling
page. The monitor will beep, and the lights will ash for
approximately 45 seconds as the monitor reboots and
performs self-tests. The monitor will beep again, and if
a delay was used, the green light will ash rapidly, once
per second, to indicate that the radon test has been
successfully scheduled. If no delay was scheduled the
green light will ash once every 5 seconds to indicate
that the monitor is currently recording information.
CONCLUDING A RADON TEST
Finalizing a Dataset
Once a radon test is complete, connect to the monitor.
After the datasets have loaded, locate the proper
dataset and tap on “Finalize Dataset”, here you can
add any photos to the dataset, such as a building
footprint diagram, or a photo showing that the
monitor was indeed placed at the property. You can
also add comments about deviations from protocol,
such as the monitor being moved, or if it could not be
placed according to protocol, and the reason for this
placement. Additionally, you can add comments about
temporary conditions, such as extreme weather which
may have affected the measurement, or temporary
radon reduction measures in place.
Once the photos and comments are added, or if you

wish to conclude the radon test with no added photos
or comments, tap on the “Finalize Test” button at the
bottom of the screen. This will begin uploading the
dataset to the Dashboard. Once the dataset is uploaded,
you will be taken back to the main screen of the monitor.
Viewing a Dataset
To view the information of a dataset, rst nalize the
dataset as described in the above section. After the
dataset has been nalized, a button will appear titled
“View Dataset”. Tap this button to see the details of the
radon test including the measurement information, and
logged motion events if any occurred.
Note: Your mobile device must be connected to the
internet to view the dataset information.
Generating a Report in the App
To generate a radon report in the eld, locate the
correct dataset and tap on the “Generate Report”
button. The dataset must rst be nalized before
the Generate Report button will appear. Follow
the prompts to set various options for the nal
radon report. These options will vary based on the
information blocks that are included in the selected
report template. These options can include information
about motion events that occurred during the
measurement, selecting a dynamic paragraph option
(dynamic paragraphs are typically used to inform the
client of the recommended actions regarding the
overall radon average), and signing the report.
Note: Your mobile device must be connected to the
internet to generate a radon report.
Checking Monitor Details
To check details of the monitor, such as the rmware
version, date and time, calibration expiration date,
or status of a monitor, connect to it as described in
the section above. Once connected to the monitor,
tap on the “i” button near the serial number at the top
of the screen.
Other Operations
To log out of the app, from the home screen, tap on the
gear icon at the top right corner of the screen, then tap
on “Log Out”. You can also get help with the Corentium
Pro software system by tapping on the Help button.
The version number of the mobile app is located at the
bottom of this screen.
STATUS LIGHTS
• Flashing green once every 5 seconds: Normal
operation, monitor is recording data.
• Flashing green once per second: Radon test
scheduled, monitor in delay period.
• Flashing green, yellow, and red sequentially:
Monitor rebooting andperforming self-test.
• Flashing yellow: Indicates a warning but is still
operational. This usually means that the monitor
needs to synchronize the date, time, and time
zone. Connect to the monitor through the app to
synchronize the time.
• Flashing red: Error. Go to help.airthings.com/pro and
search for the keyword RED. If this does not solve
the issue, go back to the search bar and type Pro-
Technical Support Hours
•
Blue ash and beep: Bluetooth connection established.
• Blue ash (once): Bluetooth connection ended.
• Continuous blue: USB connected.
CRA PC Software
1. To download the software, go to help.airthings.com,
and type CRA in the search bar.
2. Refer to the Installation Guide and Software Manual
and open CRA PC Software
3. Connect the monitor to the PC via the USB cable.
Note: The CRA software is mainly used to remotely
troubleshoot a unit. It can may be used to create
report, but due to its complexity, we highly recommend
using only the Corentium Pro App and Pro Dashboard.

MORE INFORMATION
For more information and help, go to
help.airthings.com/pro where you will nd many
helpful articles, FAQs, QA/QC, instruction guides and
videos. We hope you enjoy using your new Airthings
Corentium Pro radon monitor.
Compliance
The monitor and the batteries must not be disposed
of as ordinary household waste. The materials used in
Corentium Pro can be recycled.
It is the user’s environmental responsibility to ensure
that electronic equipment and batteries
are disposed of in accordance with national
regulations. Users should contact the seller or their
local authority for information about environmentally
friendly waste disposal.
In the event of incorrect use or operation of the
monitor, Airthings AS cannot be held responsible for
any losses resulting from failure or from the loss of
measurement data.
This device complies with Part 15 of the FCC Rules.
Operation is subject to the following two conditions:
(1) this device may not cause harmful interference,
and (2) this device must accept any interference
received, including interference that may cause
undesired operation.
This equipment has been tested and found
to comply with the limits for Class B digital device,
pursuant to Part 15 of the FCC Rules. These limits are
designed to provide reasonable protection against
harmful interference in a residual installation. This
equipment generates uses and can radiate frequency
energy and, if not installed and used in accordance
with the instructions, may cause harmful interference
to radio communications. However, there is no
guarantee that interference will not occur in a particular
installation. If this equipment does harmful interference
to radio or television re- ception, which can be
determined by turning the equipment off and on, the
user is encouraged to try to correct the interference by
one of the following measures:
• Reorient or relocate the receiving antenna
• Increase the separation between the equipment and
receiver
• Connect the equipment into an outlet on a circuit
different from that to which the receiver is connected
• Consult the dealer or an experienced radio/ TV
technician for help
ICES-003 Class B Notice
This Class B digital apparatus complies with Canadian
ICES-003.
Avis NMB-003, Classe B
Cet appareil numérique de la classe B est confor- me à
la norme NMB-003 du Canada.
Corentium® is a registered trademark of Airthings AS.
The Bluetooth® word mark and logos are regis- tered
trademarks owned by the Bluetooth SIG, Inc. and any
use of such marks by Airthings is under license.
Airthings AS, Oslo, Norway. v2
© 2020 Airthings AS. All rights reserved.

Copyright Airthings AS V. 20191111
Questions, issues, feedback?
We are here to help!
help.airthings.com
Manuel d’utilisation
disponible en ligne
Manual del usuario
disponible online
Manuale d’istruzioni
disponibile online
Breathe better.
Live better.
help.airthings.com/pro
The manual is available in other languages online at
Other manuals for Corentium Pro
2
This manual suits for next models
1
Table of contents
Other Airthings Gas Detector manuals