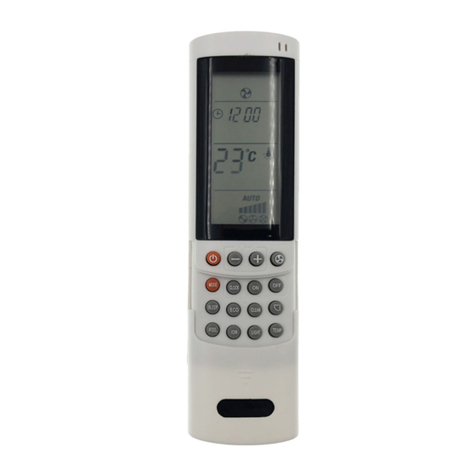
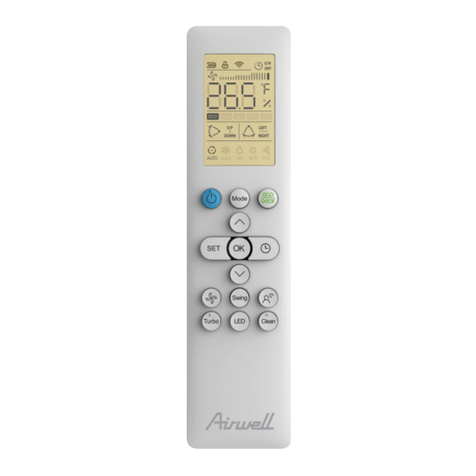
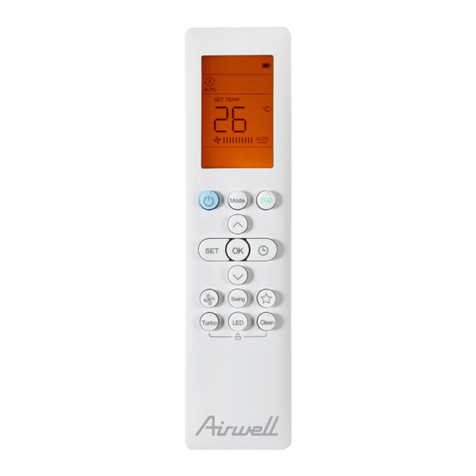
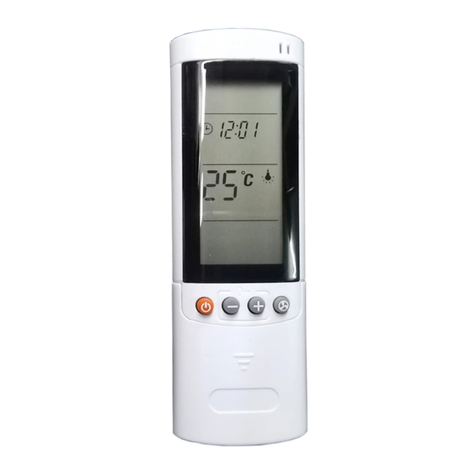
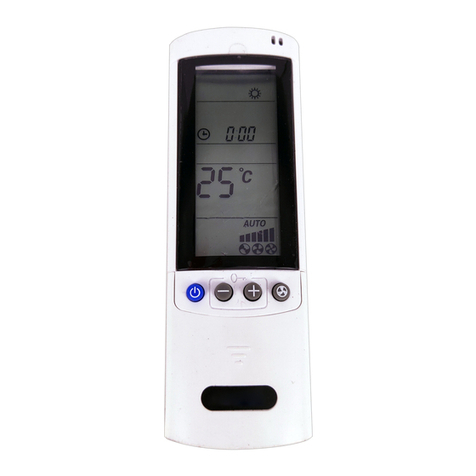
Airwell RC15-7ACEL1801 User manual

IMPORTANT NOTE:
Read this manual carefully before installing or operating your new air conditioning unit. Make sure to
save this manual for future reference.
HDA1-20190619-Rev1
User Manual
HDA High Wall
R32 - Product Version 1
Multilingual Manual (EN-FR)

Remote controller 1
Operation instructions
Operation modes 3
Airflow direction control 4
SMART mode 5
SUPER mode 7
ECONOMY mode 8
QUIET mode 7
IFEEL mode 9
TIMER mode 8
DIMMER button 9
CLOCK button 9
SLEEP mode
8°C HEAT mode
10
10
Remote controller Instructions
(RC15-7ACEL1801)

Remote controller
1
5
13
13
The remote controller transmits signals to the system.
FAN SPEED
Used to select fan speed in sequence auto,
higher, high, medium, low and lower.
SMART(invalid for multi system)
Used to enter fuzzy logic operation directly when
the unit is on .
POWER
The appliance will be started when it is
energized or will be stopped when it is
in operation, if you press this button.
MODE
Press this button to select the operation mode.
Remote controller
5
Used to adjust the room temperature and
the timer, also real time.
DIMMER
When you press this button, all the display
of indoor unit will be closed. Press any
button to resume display.
Used to stop or start vertical adjustment
louver swinging and set the desired up/
downairflow direction.
Used to stop or start Horizontal adjustment
louver swinging and set the desired left/right
airflow direction.
QUIET
Used to set or cancel Quiet Mode operation.
ECONOMY
8℃ HEAT(optional)
IFEEL
Used to set or cancel Economy Mode
operation.
Used to start or stop 8℃ HEAT mode.
+
Press to set IFEEL Mode operation.
In IFEEL mode,the Air Conditioner
operates basis temperature sensor
fitted in remote instead of machine,
Advice to use IFEEL mode and the
remote put where the indoor unit
receive signal easily.Press this
button above 5 seconds,start or
stop IFEEL mode.
SUPER
Used to start or stop the fast cooling/heating.
(Fast cooling operates at high fan speed with
16℃61 ) set temp automatically ; Fast heating
operates at auto fan speed with 30℃86°F) set
temp automatically)
( °F
(
13
ON TIMER
Used to set or cancel the timer operation.
SLEEP
Used to set or cancel Sleep Mode operation.
CLOCK
Used to set the current time.
OFF TIMER
Used to set or cancel the timer operation.
11
9
10
16
34
12
6
8
5
12
7
7
14
15
2
13
9
12
10
11
3
1
2
6
5
7
8
4
13
14
16
19
15
SWING
SWING
1
Note: Each mode and relevant function will be further specified in following pages.
Display set timer
Display current time
ON
OFF
Display temperature
Dry indicator Fan only indicator
Auto fan speed
Auto Higher fan speed High fan speed
Cooling indicator
Medium fan speed
Lower fan speed
Smart indicator
Super indicator
IFEEL
Quiet indicator Economy indicator Sleep indicator
8℃ Heat indicator
Heating indicator
Low fan speed
SMARTSMART
Indication symbols on LCD:
TEMP
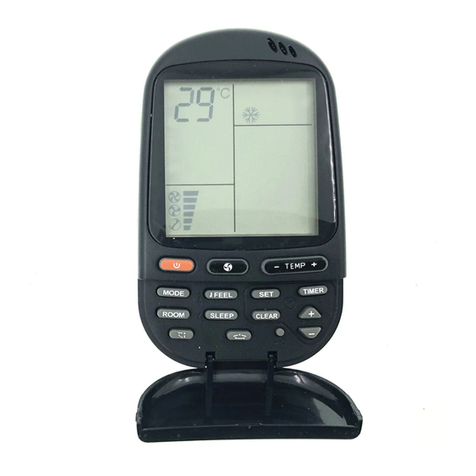
Remote controller
How to Insert the Batteries
How to Use
Pry open the battery cover according to the arrow direction.
Insert new batteries making sure that the (+) and (-) of battery are matched correctly.
Reattach the cover by pressing it back into position.
Storage and Tips for Using the Remote Controller
The remote controller may be stored mounted on a wall with a holder.
Note: The remote controller holder is an optional part.
remote controller
holder fixing.
remote controller
mounting.
Note:
you have selected.
The shape may differ from that of the remote controller holder
2
To operate the room air conditioner, aim the remote controller
to the signal receptor.The remote controller will operate the air
conditioner at a distance of up to 7m when pointing at signal
receptor of indoor unit.
Remote controller
Note:
Use 2 LR03 AAA(1.5volt) batteries. Do not use rechargeable batteries. Replace batteries with new ones of the same type
when the display becomes dim.
Signal receptor
1.
2.
3.
1 2 3
CAUTIONS
For appropriate signal transmission between remote controller and
indoor unit, keep the signal receiver away from the following items:
Direct sunlight or other strong lights or heat
Flat panel television screen or other electrical appliances that
react to the remote controller
Additionally, the air conditioner will not operate if curtains, doors or
other materials block the signals from the remote controller to the
indoor unit. If the signal may not be transmitted properly, either move
these materials or consult your local dealer.

Operation instructions
The operation modes changed in sequence:
The fan speed is changed in sequence:
Selecting mode
FAN mode
Heating mode is NOT available for cooling only air conditioner.
At "FAN ONLY" mode, only "Auto" is not available.
Some models, such as commercial air conditioner products, only have the third
gear speed.
At "DRY" mode, Fan speed is set at "AUTO” automatically, "FAN SPEED" button
is ineffective in this case.
Operation modes
Result :
Result :
Press button once by once
Auto
Auto
Higher
High
High
High
Lower
Low
Medium
Medium
HEATING
COOLING
DRY
FAN ONLY
PRESS
PRESS
Auto
Auto
Low
Low
Setting temperature
16℃~30 61℃( )°F~86°F
Range of available set temperature
*HEATING, COOLING
DRY ±7 deg C
unable to set
FAN ONLY
*Note:
Remote controller
*Note: Press and hold “ ” button and “ ” button
together for 2seconds will alternate the temperature display
between the ℃ a nd °F s cale.
*Note: Heating mode is NOT available for cooling only models.
At “Dry” mode, a decrease or rise of up to 7℃ can be set
with if you still feel uncomfortable.
Press button once
Raise temperature setting by 1℃ 1 or °F
Lower temperature setting by 1℃ 1 or °F
Press button once
Result :
Result :
3

Operation instructions
Turning on
SWING , SMART , SUPER , QUIET, TIMER , ECONOMY , IFEEL , DIMMER , CLOCK , and 8℃ HEAT operation modes will
be specified in the following pages.
SLEEP
Changing modes during operation, sometimes the unit does not response at once. Wait 3 minutes.
Wait 3 minutes before restarting the appliance.
During heating operation, air flow is not discharged at the beginning. After 2-5 minutes, the air flow will be discharged
until temperature of indoor heat exchanger rises.
4
Press button .
T he RUN indicator of the indoor unit lights up.
Result :
Vertical airflow(Horizontal airflow) is automatically adjusted to a certain angle in accordance with the
operation mode after turning on the unit.
The direction of airflow can be also adjusted to your own requirement by pressing the " " buttons of
the remote controller.
Operation mode
Direction of airflow
COOLING, DRY
*HEATING,
FAN ONLY
horizontal
downward
Using remote controller to set various angles of flow or specific angle as you like.
*Heating mode is only available for heat pump models.
Airflow direction control
Press " " button once.
Press " " button again .
The louvers swing to a suitable angle as desired.
The vertical adjustment louver will swing up and down automatically.Result :
Result :
Vertical airflow control (with the remote controller)
Using remote controller to set various angles of flow or specific angle as you like.
Press " " button once.
The horizontal adjustment louver will swing left and right automatically.
Result :
Horizontal airflow control (with the remote controller)
PRESS
PRESS
PRESS
PRESS
PRESS

Operation instructions
Do not turn the vertical adjustment louvers manually, otherwise malfunction may occur. If that happens, turn off the
unit first and cut off the power supply, then restore power supply again.
It is better not to let the vertical adjustment louver tilt downward for a long time at COOLING or DRY mode to prevent
condensed water from dripping.
A
B
5
Press " " button again .
The louvers swing to a suitable angle as desired.
Result :
NOTE:If the unit doesn’t have four ways airflow function, you can adjust
horizontal airflow by yourself.(invalid for some models)
PRESS
Indoor temperature Target temperature
21 70℃( ) or below°F 22 7℃( )2°F
26 7℃( )9°FOver 26 7℃( )9°F
21 3°F℃-23℃( )70°F-7
23 9°F℃-26℃( )73°F-7
Operation mode
HEATING
FAN ONLY
DRY
Room temperature
decrease 2 2°F℃( ) after
operate for 3 minutes
COOLING
Heat pump models
Cooling only models
Indoor temperature Target temperature
23 7℃( ) or below3°F
26 7℃( )9°F
Over 26 7℃( )9°F
23 73°F 79°F℃-26℃( - )
Operation mode
FAN ONLY
DRY Room temperature
decrease 2 2°F℃( ) after
operate for 3 minutes
COOLING
How to set SMART mode?
Press the button.
Result : Enters SMART mode(fuzzy logic operation)
directly only when the unit is on .
Temperature and fan speed are automatically
set based on theactual room temperature.
PRESS
SMART mode( )invalid for multi system
For the split-type models, such as wall-mounted air conditioners and some
floor-standing air conditioners, their operation mode and set temperature
should be determined based on the indoor temperature.
Operation mode and temperature are determined by indoor temperature
For commercial air conditioner products, such as cassette type air conditioners, duct type
air conditioners, ceiling & floor air conditioners and some floor-standing air conditioners,
their operation mode should be determined based on the difference between the indoor
temperature and set temperature.

Operation instructions
SMART button is ineffective in SUPER mode.
Your feeling
What you can do in SMART mode?
Button Adjust
Uncomfortable because
of unsuitable air flow
volume.
Uncomfortable because
of unsuitable flow
direction.
Note: Temperature, airflow and direction are controlled automatically in SMART mode.
However, For the on/off, you can choose from -2 to 2 (for some models you can choose
from -7 to 7), for the inverter you can choose from -7 to 7. if you still feel uncomfortable.
6
How to cancel the SMART mode?
Press the button.
Result :
Indoor fan speed alternates among Auto, Higher, High,
Medium, Low and Lower each time this button is
pressed.
Press it once, the vertical adjustment louver(horizontal
adjustment louver) swings to change vertical airflow
direction(horizontal airflow direction). Press it again,
swings stops.
The SMART mode will be cancelled.
Press MODE button cancel SMART mode.
PRESS
ECONOMY button is ineffective in SMART mode.
The operation mode is determined by the difference between the indoor
temperature and set temperature.
Heat pump models
Cooling only models
Indoor temperature Target temperature
Below T-3℃( )3°F T
T
T
Operation mode
HEATING
FAN ONLY
T-3℃T+3℃( )≤T ≤ 3°F
indoor
O3°Fver T+3℃( ) COOLING
Indoor temperature Target temperature
T
T
Operation mode
FAN ONLY
T+3℃( ) or below3°F
O3°F)ver T+3℃( COOLING

Operation instructions
SUPER mode can be set when the appliance is in operation or energized.
Note:
The Appliance will continue working in SUPER mode for 15 minutes , if you don't escape from it
by pressing any of the buttons mentioned above.
SMART button is not available in SUPER mode.
SUPER mode
SUPER mode is used to start or stop fast cooling or heating only when the unit is on.
How to set SUPER mode?
Press button at the cool,dry and fan only mode.
Result : At high fan speed ,the set temperature
automatically to 16℃.(61°F)
Press button at the heat mode.
Result : At auto fan speed ,the set temperature
automatically to 30℃.(86°F)
How to cancel SUPER mode?
7
Press . SUPER , MODE, FAN SPEED, ON/OFF or SLEEP button
Result : The display return to the original mode.
In SUPER mode, you can set temperature, airflow direction or timer
Escape from SUPER mode.
PRESS
Cancel
PRESS
QUIET mode
In this mode, the air conditioner will work with low noise performance by low compressor frequency and low
fan speed. This mode is only available for inverter models.
Note: Press MODE, FAN SPEED, SMART, SUPER, or ON/OFF button
cancel QUIET mode.
ECONOMY
PRESS
ECONOMY button is in SUPER mode.not available

Operation instructions
Timer mode
Note: It is similar to set OFF TIMER , you can make the appliance
switch off automatically at your desired time.
It is convenient to set the timer on with ON TIMER buttons when you go out in the morning to
achieve a comfortable room temperature at the time you get home. You can also set timer off at night to enjoy
a good sleep.
8
Press the or button.
Once to increase or decrease the time setting by 1 minute.
One and a half seconds to increase or decrease the time setting
by 10 minute.
For a longer time to increase or decrease the time by 1 hour.
A "beep" can be heard.
The TIMER indicator on the indoor unit lights up.
(invalid
for multi system)
"ON" stops flashing.
When your desired time displayed on LCD, press the ON TIMER button and confirm it.
After the set timer displayed for 5 seconds the clock will be displayed on the LCD of the remote controller
instead of set timer.
Result :
Result :
Press button.
Press the button.
A "beep" can be heard and the indicator disappears,
the time on mode has been canceled.
Result :
How to cancel ON TIMER ?
How to set ON TIMER ?
Result : “12:00 " flashes on the LCD. ON
1.
2.
3.
4.
PRESS
PRESS
PRESS
PRESS
ECONOMY mode
In this mode, the air conditioner will bring you energy saving performance by lower running currency.
ECONOMY button is ineffective in SUPER and mode.SMART
Press ON/OFF , MODE ,TEMP ∧,TEMP ∨, FAN SPEED , SLEEP ,
QUIET or ECONOMY button cancel ECONOMY mode.
PRESS

Operation instructions
IFEEL mode
The temperature sensor built in remote controller is activated.It can sense its surrounding temperature,and
transmit the signal back the unit,the unit can adjust the temperature so as to provide maximum comfort.
How to set IFEEL mode ?
Note:
The default setting is IFEEL inactiving.
Press the button for about 5 seconds once again.
DIMMER button
Press the DIMMER button to turn off the light and the display in the unit.
Note:
When the light is off,receive signal will turn on the light again.
How to set the DIMMER ?
How to cancel IFEEL mode?
Result :
The transmit signal in the display will appear,
the IFEEL function will be started. 1st
Press the button for about 5 seconds once.
Result :
IFEEL function will be shunted off.
2nd
PRESS
CLOCK button
How to adjust the real time?
Press button for about 5 seconds once.
Press and buttons.
Press button once again.
Result :
Result :
Result :
The time flashes on the LCD.
1.
2.
3.
The real time is set.
PRESS
Once to increase or decrease the time setting by 1 minute.
One and a half seconds to increase or decrease the time setting
by 10 minute.
For a longer time to increase or decrease the time by 1 hour.
PRESS
PRESS
9

Operation instructions
10
SLEEP mode can be set in COOLING ,HEATING mode. or DRYING
This function gives you a more comfortable environment for sleep.
The appliance will stop operation automatically after operating for 8 hours.
Fan speed is automatically set at low speed.
SLEEP mode
8℃ HEAT mode(optional)
Each time button is pressed.
How to set SLEEP mode ?
Result : SLEEP function will be started.
Set temperature will rise by 2 (2°F if the appliance operates in cooling mode for 2 hours
constantly, then keeps steady.
℃) at most
Set temperature will decrease by 2 ℃(2°F) at most if the appliance operates in heating mode for
2 hours constantly, then keeps steady.
Note: Heating is NOT available for cooling only air conditioner.
SLEEP mode :
How to cancel SLEEP mode ?
How to set ?8℃ HEAT
Press any button, except SLEEP button.
In HEATING mode, P for 2 seconds 8℃ HEAT moderess and . buttons together to start
Result :
Note :
The display return to the original mode.
In 8°C HEAT mode, the fan speed is set at “AUTO” automatically.The icon
will appear on the LCD.
If pressing any button, other than ON TIMER, OFF TIMER, CLOCK and
SWING, 8°C HEAT function will be turned off. And the icon will
disappear.
Escape from SLEEP mode.
In 8°C HEAT mode, the default temperature is set 8℃.
8°C HEAT mode can be set only when the air conditioner
works in HEATING mode.
PRESS
PRESS
1
2
Press together
for 2 seconds

IMPORTANT NOTE:
Read this manual carefully before installing or operating your new air conditioning unit. Make sure to
save this manual for future reference.
HDA1-20190619-Rev1
User Manual
HDA High Wall
R32 - Product Version 1
Manuel Français (FR)

Télécommande 1
Instructions d'utilisation
Modes d'opération 3
Contrôle de la direction du flux d'air 4
5
7
8
Mode INTELLIGENT
Mode SUPER
Mode SILENCIEUX 7
9
Mode minuterie 8
Mode ÉCONOMIQUE
Mode IFEEL
Bouton DIMMER 9
9
Bouton CLOCK
Mode VEILLE
Mode 8°C HEAT
10
10
Mode d'emploi de la télécommande
(RC15-7ACEL1801))

Télécommande
1
La télécommande transmet les signaux au système.
VENTILATION
Utilisé pour sélectionner la vitesse de ventilation :
auto, plus haute, rapide, moyenne, lente, plus
lente.
INTELLIGENT (invalide pour
les multi systèmes)
Utilisé pour passer directement en utilisation de
logique floue quand l'unité est allumée.
POWER
L'appareil s'allumera s'il est branché
ous'éteindra si vous appuyez sur ce bouton.
MODE
Appuyer sur ce bouton pour choisir le mode d'opération.
Télécommande
Utilisé pour ajuster la température de la pièce
et le minuteur, mais aussi l'heure actuelle.
VARIATEUR
Tous les voyants de l'appareil seront
éteintslorsque vous appuyez sur ce bouton.
Appuyez sur n'importe quel bouton pour
relancer l'affichage.
Utilisé pour arrêter ou définir l'ajustement
vertical des volets et pour définir la direction
du flux d'air désirée (haut ou bas).
Utilisé pour arrêter ou définir l'ajustement
horizontal des volets et pour définir la direction
du flux d'air désirée gauche/droite.
SILENCIEUX
Utilisé pour définir ou annuler le mode silencieux.
ÉCONOMIQUE
IFEEL
Utilisé pour définir ou annuler le
mode économique.
Appuyer pour définir le mode IFEEL. En
mode IFEEL, le climatiseur opère le capteur
de température fondamentale installé dans
la télécommande au lieu de la machine, il
est recommandé d'utiliser le mode IFEEL et
la télécommande est placé là où l'unité
intérieure reçoit facilement le signal.Appuyez
sur le bouton pendant environ 5 secondes
pour définir ou arrêter le mode IFEEL.
SUPER
Utilisé pour allumer ou éteindre le refroidissement/
chauffage rapide (le refroidissement rapide
fonctionne automatiquement avec une vitesse
de ventilation rapide à 16°C ; le chauffage
rapide fonctionne avec une vitesse de ventilation
automatique à 30°C ).
(61°F)
(86°F)
13
MINUTEUR ALLUMÉ
Utilisé pour définir ou annuler le mode Veille.
VEILLE
Utilisé pour définir ou annuler le mode Veille.
CLOCK
Utilisé pour définir l'heure.
MINUTEUR ÉTEINDRE
Utilisé pour définir ou annuler le mode Veille.
11
9
10
16
3
4
12
6
8
5
12
7
14
15
13
10
11
3
1
2
6
5
7
8
4
16
9
12 BASCULE
BASCULE
1
Note: Chaque mode et fonction relative spécifiée plus dans les pages suivantes.
Minuteur de l'affichage de l'heure
Affichage de l'heure actuelle
ON
OFF
Affichage de la
température
Indicateur de
séchage
Vitesse de ventil-
ation automatique
Vitesse du
ventilateur auto.
Auto Vitesse du
ventilateur élevée
Vitesse du
ventilateur élevée
Indicateur de
refroidissement
Vitesse du ventilateur
moyenne
Vitesse de ventilation
plus lente
Indicateur de
chauffage
Indicateur super
IFEEL
Indicateur
silencieux
Indicateur
économique
Indicateur de veille
Verwarmen
aanduiding
Vitesse du
ventilateur faible
SMARTSMART
Symboles d'indication en LCD:
TEMP
13
14 15
8℃ HEAT (en option)
Utilisé pour active ou désactiver le
mode 8℃ HEAT.
+
7
2
Témoin lumineux
du mode 8℃ HEAT

Télécommande
Comment insérer les piles
Utilisation
Soulevez le couvercle de la batterie en suivant le sens de la flèche.
Insérez les nouvelles piles en vous assurant de les placer dans le bon sens.
Remettez le couvercle en place en déposant.
Stockage et conseils pour l'utilisation de la télécommande
La télécommande peut être stockée dans un montant accroché au mur.
Le montant de la
télécommande est fixé.
La télécommande
est montée.
Note: Le montant est un accessoire optionnel.
Note: La forme peut être différente de celle du montant de la télécommande
que vous avez choisi.
2
Pour utiliser le climatiseur, visez le récepteur de la télécommande au récepteur du signal. La
télécommande peut être utilisée jusqu'à 7m du climatiseur quand elle indique au récepteur du signal de
l'unité intérieure.
Télécommande
Note:
Utilises 2 piles LR03 AAA(1.5volt). N'utilisez pas de piles rechargeables. Remplacez les piles avec les nouvelles
de même type lorsque l'affichages'affaiblit.
Récepteur du signal
1.
2.
3.
1 2 3
AVERTISSEMENTS
Pour une transmission du signal appropriée entre la télécommande et
l'unité intérieure, gardez le récepteur du signal loin des choses suivantes:
De plus, le climatiseur ne fonctionnera pas si les rideaux, les portes ou les
autres matériels empêchent les signaux de la télécommande vers l'unité
intérieure. Si le signal ne peut pas être convenablement transmis, bougez ces
matériels ou consultez votre distributeur local.
Lumière directe ou d'autres lumières fortes ou chauffage
L'écran de télévision plat ou d'autres appareils qui réagissent à la
télécommande.

Instructions d'utilisation
Les modes d'opération ont changé en séquence:
La vitesse de ventilateur a changé en séquence:
Le mode de chauffage est non disponible pour refroidir seulement le climatiseur.
Mode de ventilation
En mode « Ventilation seule », seulement « Auto » est non disponible.
En mode « Séchage », la vitesse de ventilation est définie automatiquement en
« AUTO », le bouton « Ventilation » est invalide en ce cas-là.
Certains modèles, tels que les climatiseurs commerciaux, ont uniquement trois
vitesses.
Résultat:
Résultat:
Appuyer sur le bouton
Auto
Auto
Plus haute
Haute
Haute
Haute
Plus
lente
Lente
Moyenne
Moyenne
Chauffage
Refroidissement
Séchage
Ventilation
seule
Appuyer sur
Appuyer sur
Auto
Auto
Lente
Lente
Définir la température
Échelle de la température disponible
*CHAUFFAGE,
REFROIDISSEMENT
Séchage
Ventilation seule
16℃~30℃(61°F~86°F)
±7℃
Incapable de définir
*
*Note: Maintenez les boutons “ ” et “ ” enfoncés pendant environ
2 secondes pour faire basculer l’affichage de la température entre °С et °F .
*Note: Le mode de chauffage est non disponible pour le mode de refroidissement seul.
Note: En mode de séchage, vous pouvez diminuer ou augmenter jusqu'à 7
℃
avec la
télécommande si vous ne vous sentez encore pas comfortable.
La température plus basse
est définie par 1℃(1°F)
Appuyer une fois sur le bouton
Résultat:
Résultat:
3
Modes d'opération
Sélectionner le mode
Augmenter la température par
1℃(1°F) Appuyer une fois sur
le bouton
pour une fois.
pour une fois.

Instructions d'utilisation
Allumage
Les modes SWING, SMART, SUPER, QUIET, TIMER, ECONOMY, IFEEL, DIMMER, CLOCK, SLEEP et
8
℃
HEAT seront mentionnés dans les pages suivantes.
Lorsque vous changez de mode durant une opération, l'appareil peut prendre du temps à réagir. Attendez 3 minutes. Attendez 3 minutes.
Durant le chauffage, il n'y a aucun flux d'air au début. Le flux d'air commencera après 2 à 5 minutes jusqu'à ce que la température définie soit
atteinte.
Attendez 3 minutes avant de redémarrer l'appareil.
4
Appuyer sur le bouton
Résultat: Le l'indicateur RUN de l'appareil s'allume.
Le flux d'air vertical (flux d'air horizontal) est automatiquement ajusté à un angle donné suivant le
mode d'opération à l'allumage de l'appareil.
de la télécommande.
La direction du flux d'air peut également être ajustée suivant vos besoins en appuyant sur le bouton
REFROIDISSEMENT,
SEC
*CHAUFFAGE,
VENTILATION SEULE
Horizontal
Vers le bas
Contrôle du flux d'aire vertical (avec la télécommande)
Utilisez la télécommande pour définir la différente direction du flux d'air et l'angle spécifique que vous voulez.
*Le mode chauffage n'est disponible que pour les modèles de pompe à chaleur.
Contrôle de la direction du flux d'air
Appuyer une fois sur le bouton
Les volets basculent dans l'angle désiré.
Le volet d'ajustement vertical bascule vers le haut ou le
bas automatiquement.
Appuyer une fois sur le bouton
Résultat:
Résultat:
Contrôle du flux d'air horizontal (avec la télécommande)
Utilisez la télécommande pour définir la différente direction du flux d'air et l'angle
spécifique que vous voulez.
Appuyer une fois sur le bouton
Résultat: Le volet d'ajustement horizontal bascule automatiquement
vers la gauche et la droite.
Appuyer
sur
Appuyer
sur
Appuyer
sur
Appuyer sur
Appuyer sur
Direction du flux d'air
Mode d'opération

Instructions d'utilisation
Ne bougez pas les volets d'ajustement verticaux manuellement, cela pourrait les endommager. Si un défaut se
produit, éteignez l'appareil et débranchez-le puis rebranchez-le.
Il est conseillé de ne pas laisser les volets d'ajustement verticaux pencher vers le bas pendant trop longtemps
en mode REFROIDISSEMENT ou SEC pour éviter que l'eau condensée ne goutte.
A
B
5
Appuyer une fois sur le bouton
Résultat: Les volets basculent dans l'angle désiré.
NOTE: Si l'appareil ne possède pas quatre fonctions pour diriger le flux d'air, vous pouvez
ajuster le flux d'air horizontal par vous-même.(non disponible sur certains modèles)
Appuyer
sur
Température intérieure Température ciblée
21℃(70°F) ou en-dessous 22 7℃( )2°F
26 7℃( )9°F
21 3°F℃-23℃( )70°F-7
23 9°F℃-26℃( )73°F-7
Mode d'opération
CHAUFFAGE
VENTILATION SEULE
SÉCHAGE
La température de la
pièce baisse de 2°C( 2°F)
pendant 3minutes
REFROIDISSEMENT
Modèles pompe à chaleur
Plus de26℃(79°F)
Modèles de refroidissement uniquement
Température intérieure Température ciblée
23℃(73°F) ou en-dessous
26 7℃( )9°F
Plus de 26℃(79°F)
23 73°F 79°F℃-26℃( - )
Mode d'opération
VENTILATION SEULE
SÉCHAGE La température de la
pièce baisse de 2°C( 2°F)
pendant 3minutes
REFROIDISSEMENT
Comment définir le mode INTELLIGENT?
Appuyer sur les boutons
Résultat: Passez directement en mode INTELLIGENT (opération de
logique floue) seulement quand l'appareil est allumé.
La température et la vitesse de ventilation sont
automatiquement définies selon la température
actuelle de la pièce.
Appuyer sur
Mode INTELLIGENT (invalide pour les multi systèmes)
Pour les modèles à ventilation, tels que les climatiseurs muraux et certains
climatiseurs posés au sol, leur mode de fonctionnement et la température réglée
doivent être déterminés en fonction de la température intérieure.
Le mode de fonctionnement et la température sont déterminés par la température intérieure
Pour les climatiseurs commerciaux tels que les climatiseurs à cassette, les climatiseurs à
conduit, les climatiseurs de plafond et mobiles, aussi bien que certains climatiseurs
posées au sol, leur mode de fonctionnement doit être déterminé en fonction de la
différence entre la température intérieure et la température réglée.

Instructions d'utilisation
Votre sensation
Ce que vous pouvez faire en mode INTELLIGENT?
Bouton Ajustement
Mal à l'aise à cause du
volume de flux d'air.
Mal à l'aise à cause de la
direction du flux d'air.
Le bouton INTELLIGENT n'est pas effectif en mode SUPER.
Le bouton ÉCONOMIQUE n'est pas effectif en mode INTELLIGENT.
Appuyez sur le bouton MODE pour annuler le mode INTELLIGENT.
Remarque: La température, le débit d'air et la direction sont contrôlés automatiquement
en mode SMART. Toutefois, pour l'activation / désactivation, vous pouvez choisir entre
-2 et 2 (pour d’autres modèles, vous pouvez choisir entre -7 et 7), pour l'onduleur, vous
pouvez choisir entre -7 et 7, si vous vous sentez encore mal à l'aise.
6
Comment annuler le mode INTELLIGENT?
Appuyer sur le bouton
Résultat: Le mode INTELLIGENT sera annulé.
La vitesse du ventilateur varie entre les modes Auto, Higher
(Plus haute), High, (Haute) Medium (Moyenne), Low (Lente) et
Lower (Plus lente), dès que la touche est enclenchée.
Appuyez une fois, le volet d'ajustement vertical (volet
d'ajustement horizontal) bascule pour changer la direction
verticale du flux d'air (direction horizontale du flux d'air). Appuyez
de nouveau, la bascule s'arrête. Appuyer encore une fois sur le
bouton, le bascule s'arrête.
Appuyer sur
Le mode de fonctionnement est déterminé par la différence entre la
température intérieure et la température réglée.
Modèles pompe à chaleur
Plus deT+3℃(3°F)
Modèles de refroidissement uniquement
Température intérieure Température ciblée
En-dessous de T-3℃(3°F) T
T
T
Mode d'opération
CHAUFFAGE
T-3℃ ≤ TIntérieure ≤T+3℃(3°F)
REFROIDISSEMENT
Température intérieure Température ciblée
T
T
Mode d'opération
VENTILATION SEULE
T+3℃(3°F) ou en-dessous
Plus de T+3℃(3°F) REFROIDISSEMENT
VENTILATION SEULE
Table of contents
Languages:
Other Airwell Remote Control manuals

Airwell
Airwell RC08C User manual

Airwell
Airwell RC5 User manual

Airwell
Airwell RWV05 User manual

Airwell
Airwell RCW11 Installation instructions

Airwell
Airwell RCV03 User manual

Airwell
Airwell RC4 User manual

Airwell
Airwell RC08A User manual

Airwell
Airwell RC19 User manual

Airwell
Airwell RC18 User manual

Airwell
Airwell RC 08B User manual