Aisee V3TSM20MA User manual

Operating Instructions
V3TSM20MA

1
Safety Precautions
Never expose this unit, amplifier,
and speakers to moisture or water to
prevent electric sparks or re.
Please don't change the fuse on the
power cord without professional guidance,
using improper fuse may cause damage
to this unit or even cause re.
Please contact your nearest dealer if one
of the following symptoms is experienced:
(a). Water or other objects enters the unit.
(b). There is smoke.
(c). Peculiar smell.
Only connect the unit to a 12-volt power
supply with negative grounding.
MUTE
OK
MUTE
OK
Never install this unit where the
operation & condition for safe driving is
impaired.
Never use the video display function
in the front when driving to prevent the
violation of laws & regulations and also
to reduce the risk of traffic accident
except for using rear view video
camera.
MUTE
OK
MUTE
OK
MUTE
OK
MUTE
OK
Thank you for purchasing this product.
Please read through these operating
instructions so you will know how to
operate your model properly. After
you’ve nished reading the instructions,
keep this manual in a safe place for
future reference.
To ensure safe driving, please adjust the
volume to a safe and comfortable level in
case of emergency situations.

2
Safety Precautions
1. Never disassemble or adjust the unit without any professional guidance.
For details, please consult any professional car shop / dealer for inquiry.
2. If the front panel or TFT monitor is dirty, please use a clean silicone cloth and neutral detergent
to wipe off the spot. Using a rough cloth and non-neutral detergent such as alcohol for cleaning
may result in scratching or decoloration to the monitor.
3. If any abnormal behavior of the unit is found, please refer to trouble shooting guide of this
manual. If no relevant information is found, please press [ RST ] with a ball-point pen or similar
tool to resume factory default.
4. If you have parked the car in hot or cold weather for a long time, please wait until the temperature
in the car becomes normal before operating the unit.
5. Do not impact the LCD monitor which could cause damage.
6. To prevent damage to the screen, avoid touching it with sharp objects.
7. To provide a clear demonstration and an alternative for easy understanding to the operation of
this unit, graphic illustrations are used.
However, some illustrations are different from the actual images displayed on the screen.
8. Operate the unit correctly according to this manual to prevent unnecessary problem. The
guarantee won't be valid if the problem is caused by inappropriate operation.

3
Contents
Safety Precautions ...................................1
Contents....................................................3
Basic Operations......................................4
Status bar ...............................................4
Playing Source Selection ........................4
Equalizer .................................................4
Volume distribution (fader/balance) ........4
Radio Mode ...............................................5
Radio Display..........................................5
Select One Radio Band ..........................5
Tune........................................................5
Preset Station .........................................5
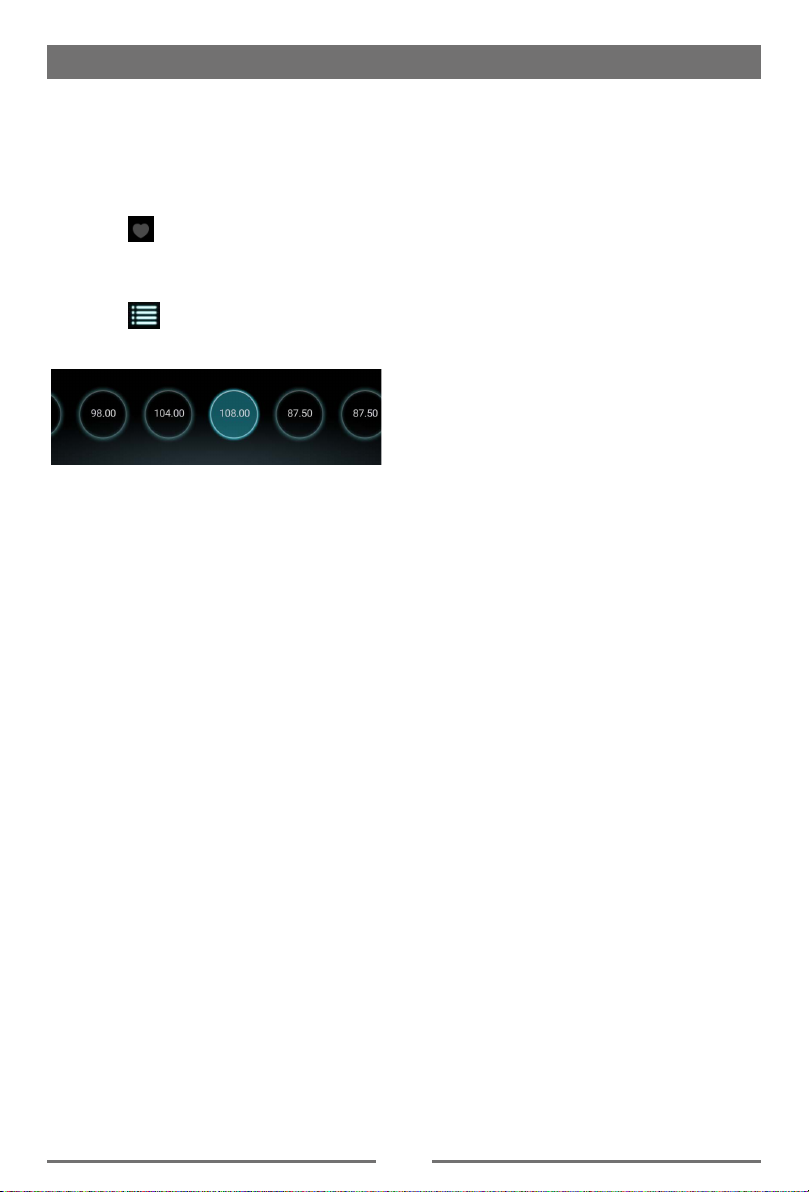
Favorite station .......................................6
Playback Mode..........................................7
Connect a USB Device ...........................7
Remove a USB Device ...........................7
Music Playback .......................................7
Play/Pause..............................................7
Previous/Next Track ...............................7
Search for a Folder .................................7
Playlists...................................................7
Video Playback .......................................8
Gallery Operations ..................................8
Bluetooth Mode ........................................9
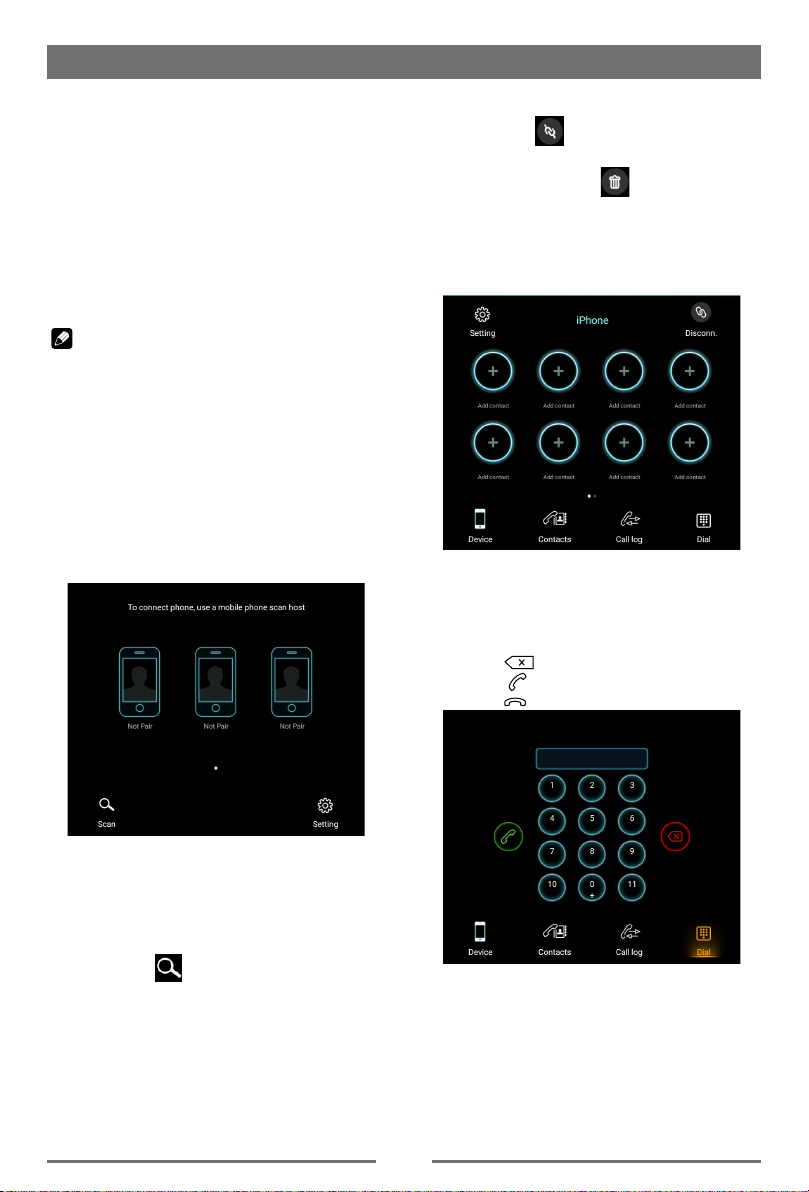
Making a Call .........................................9
Call from Phonebook ............................10
Call History ...........................................10
Audio playback via Bluetooth streaming10
Adjust Bluetooth Settings......................11
Apple CarPlay .........................................12
AVM..........................................................12
Settings ...................................................13
Basic settings........................................13
General settings....................................13
Volumes settings ..................................13
Device settings .....................................13
System settings ....................................13
Other Modes............................................14
Listen to Other Devices ........................14
Reset ....................................................14
Replace a Fuse.....................................14
Specications .........................................15
Cautions:
1. Please don’t forget to install CAN agreement box in the package. For specic details, please
refer to installation guide.
2. Recommended USB format FAT32 for update purpose.

4
Status bar
1. [ ]: Tap to show main menu
2. [ ]: Tap to reveal the multitasking
screen.
Swipe up or down to see more.
To switch to another app, tap it.
To close an app, drag the app left or right
from the multitasking display.
4. [ ]: Return to previous screen
Press the center of the bar and swipe down
to show shotcut menu.
Playing Source Selection
The playing sources are displayed on the
upper side of the screen.
Tap to enter the selected app, swipe left/right
to see other screens.
Basic Operations
Equalizer
1. Touch the [ EQ ] icon in the source menu
and the Sound setup interface will display
on the screen.
2. Hold the highlight spot and drag left/right to
adjust the Treble/Midrange/Bass.
Volume distribution (fader/
balance)
You can adjust the volume distribution in the
vehicle for all sources.
1. Press the [ Balance ] button.The menu for
fader and balance is displayed.
2. Adjust fader and balance with [ ] / [ ]
or [ ] / [ ] .

5
Radio Mode
Manual Tuning
Method 1:
During manual tuning, the frequency will be
changed in steps.
Touch the [ ] / [ ] icon on the user
interface to tune in a higher / lower station.
Method 2:
1. Touch the numeric keypad icon [ ].
Numeric keyboard is displayed, touch
number to input frequency.
2. Touch [ ] to delete the input number
step by step.
3. Touch [ OK ] to enter.
Preset Station
Up to 30 FM and 20 AM stations can be stored
in preset station list.
Search stations automatically
Touch [ ] to search station and
store strongest stations in current band
automatically.
Store a station manually
1. Tune to a station.
2. Hold the preset station icon on the center of
the screen.
Recall a preset station
1. Select a band.
2. Touch a preset station on the screen.
Radio Display
1
6 7 8 9 10
532 4
1.Tune backward
Auto tune backward. (long press)
2. Store current station to favorite list
3. Current frequency
4. Preset radio station list
5. Tune forward
Auto tune forward. (long press)
6. Enter Preset Station list
7. Search stations automatically
8. Band switch
9. Goto station by inputting frequency
10. Receive local/distant stations
Select One Radio Band
Touch the [ ] icon on the user interface to
select one radio band among FM, AM.
Tune
Auto Tuning
Hold [ ] / [ ] icon on the user interface
more than 1 second to seek a higher / lower
station.
To stop searching, repeat the operation above
or press other buttons having radio functions.
Note:
When a station is received, searching stops
and the station is played.

6
Radio Mode
Favorite station
Up to 30 FM and 20 AM stations can be stored
in favorite station list.
Store a favorite station
1. Tune to a station.
2. Touch [ ] to store current station.
Recall a favorite station
1. Select a band .
2. Touch [ ] to show favorite stations.
3. Select the corresponding station.

7
Playback Mode
8 10 11 129
8. Return to playback menu
9. List window
Drag up/down to scroll.
Touch an item to select.
10. List the les by song name
Touch a song to start play.
11. Show folder/le list
12. Show favorite list
Play/Pause
When playing, press [ ] button to pause, and
the sound will be mute.
Press [ ] button to play.
Previous/Next Track
Press [ ] or [ ] button to go to previous or
next track.
Search for a Folder
When playback, touch [ ] icon to show
folder/le list.
Playlists
Add a song to favorite playlist
1. Press a song and select [ ].
2. Add it to an favorite playlist.
Delete a song from favorite playlist
Press [ ] on the favorite playlist, then
remove it from playlist.
Connect a USB Device
Insert a USB device into the USB slot.
When connecting a USB device, the unit will
read the les automatically.
Remove a USB Device
1. Select other source on the main menu.
2. Remove the USB device.
Music Playback
Select [ ](USB Music) of the screen, the
unit will playback all the music on the mobile
storages.
1
4 5 6 7
32
1. Previous track
2. Play/Pause
3. Next track
4. Display the le list
5. Add the track to favorite list
6. Playhead
7. Repeat / Shufe Play

8
Playback Mode
Video Playback
Select [ ](Video) on the screen, the unit
will playback all the video les on the storages.
During playback, touch the screen to show
control buttons.
1 2 3 4 5
1. Show list menu
2. Previous movie
3. Play/Pause
4. Next movie
5. Sequential/Shufe play
6 7
6. Return to playback menu
7. List window
Drag up/down to scroll.
Touch an item to select.
Gallery Operations
1. Select [ ](Photo) on the screen.
2. Select one gallery to show the picture list.
3. Touch to view it.
Drag left/right to scroll.

9
The Bluetooth allows you to utilize your car’s
built-in audio system for handsfree wireless
mobile phone or music communication. Some
Bluetooth mobile phones have the audio
features, and some portable audio players
support Bluetooth feature. This system can
play audio data stored in a Bluetooth audio
device. The car stereo with Bluetooth will be
able to retrieve phonebook contacts, received
calls, dialed calls, missed calls, incoming calls,
outgoing call and listen to music.
Notes:
• This system will not operate or may operate
improperly with some Bluetooth audio
players.
• The unit cannot guarantee the compatibility
of all mobile phones together with the unit.
• Audioplaybackwillbesettothesame
volumelevelassetduringtelephonecall.
Thiscancauseproblems,ifextremevolume
levelissetduringthetelephonecall.
Touch [Phone] on the source menu to enter
Bluetooth Phone mode.
1. Turn on Bluetooth function of your mobile
phone.
2. Search for new Bluetooth devices on
your phone. Select Device name from the
pairing list on the mobile phone, and enter
password.(Default password: 0000)
Or touch [ ] button on the screen to
search mobile Bluetooth devices.
Bluetooth Mode
If there are devices connected before, touch
the chain icon under the phone name to
establish a connection.
Touch the dustbin icon under the phone
name to delete the Bluetooth® device from the
list.
After connect successfully, the unit show
following menu.
Making a Call
• DialNumber
1. Input numbers by digit-keys on the screen.
Touch [ ] to clear the digits.
2. Touch [ ] button to dial out.
3. Touch [ ] button to terminate call.

10
Bluetooth Mode
•Answeringacall
You can answer an incoming call by pressing
the [ ] button.
Touch [ ] button to reject an incoming call.
Call from Phonebook
1. Touch [ ] button to show your phone
book.
2. Touch a number to dial out.
Call History
Access Call History by touching [ ] button.
Then select a number from Dialled/Missed/
Received calls.
Audio playback via Bluetooth
streaming
If an audio streaming device is connected with
the car sound system via Bluetooth®, you can
play back the music via the car sound system
and control the playback.
Touch [ ] button to play music on your
mobile phone.
[ ] Previous track
[ ] Play/Pause
[ ] Next track

11
Adjust Bluetooth Settings
1. In Bluetooth menu, touch [ ].
The option menu is displayed.
2. Touch on the selected option to change the
setting.
∙ [ Auto Connect]: To turn on or off “Auto
connect” function.
∙ [ AutoAnswer]: To turn on or off “Auto
answer” function.
∙ [PIN code]: To set paring code.
∙ [ Phone Book Sync]: To synchronize phone
book. It may take several minutes to load
on initial setup.
Bluetooth Mode

12
Available on select cars, CarPlay is a smarter,
safer way to use your iPhone in the car.
CarPlay takes the things you want to do with
your iPhone while driving and puts them
right on your car's built-in display. You can
get directions, make calls, send and receive
messages, and listen to audiobooks and
music, all in a way that allows you to stay
focused on the road.
HowtoenterCarPlaymode
1. Connect your iPhone to the CarPlay
connector of the unit via the Apple Digital
Cable. The unit will enter CarPlay mode
automatically.
2. To exit CarPlay mode, select other mode
on the upper side of the screen.
If you want to return to CarPlay mode,
touch [ CarPlay ] on the menu.
HowtouseCarPlay
CarPlay features and Siri voice control is
specially designed for driving scenarios. It
also works with your car’s controls. And the
apps you want to use in the car have been
reimagined, so you can use them while your
eyes and hands stay where they belong.
Touch
you can use the touch screen of the unit to
control CarPlay.
Apple CarPlay AVM
AroundViewMonitor
If you have installed 4 vehicle-mounted
cameras, select [AVM] in the source menu, the
system will create a virtual 360° view of what
surrounds the vehicle.
Touch [F], [D], [L,], [R] to switch to
corresponding area.
RearViewMonitor
If the car is only equipped rearview camera,
the system will display the view behide the car
during reversing.
Note: The function is only an assistant system.
There may be some deviation. Please operate
according to the actual situation.

13
Basic settings
In the settings menu, you can adjust the basic
settings for the different functions of the device
to your requirements.
In the main menu, press the [ ] button.
The settings menu is displayed, the General
submenu is activated.
General settings
The following setting are possible:
Radio region - Select the reception region for
the radio reception.
Blackout - Set the blackout time.
Temperature Unit - Set the temperature unit.
Mileage Unit - Set the Mileage Unit.
Ambient Lighting - Select the color of
ambient lighting. (if the car supported)
Beep - Switch conrmation beep on/off.
Driving Video - If the function is activated,
Driving will be dusturbed with the video on,
and increase the risk of trafc accidents.
Camera Delay - Turn on/off the delay display
of AVM system.
Volumes settings
Adjust the volume level of each mode.
Settings
Device settings
Brightness - Swipe left/right to adjust the
brightness of the screen. Tap [OK] to conrm.
Day/Night - Select a backlight mode from the
list.
Storage - Show the storage informations.
Door KeyPad Code - Set the Door KeyPad
Code.
System settings
Language - Select on-screen display
language.
Time - Set date, time and time format.
Factory data reset - Load the factory settings.
All data erase - Erase all data from your
vehicular platform’s internal storage.
Softwareversion - Show software version
informations.

14
Listen to Other Devices
You can connect an external audio/video
device to the unit.
1. Connect the external device with the
supplied AV cable.
2. Touch the upper left corner to display the
main menu.
3. Touch [ Aux in ] to access external device.
Reset
When the unit hangs up, you can reset it.
Press [ RST ] with a ball-point pen or similar
tool.
Note:
When the unit has been reset, all the settings
will return to default settings.
Replace a Fuse
If there is no power, the fuse may be damaged
and need to be replaced.
1. Take out the unit from dashbpard.
2. Check all electrical connections.
3. Buy a fuse that matches the amperage of
the damaged fuse.
4. Replace the fuse while the units power is
disconnected.
Other Modes

15
Specications
General
Reference Supply Voltage .................................................................. 12V(DC)
Operating Voltage Range ..............................................................9 - 16V(DC)
Max Operating Current ...............................................................................15A
Maximum Output Power ..................................................................... 4 X 20W
Grounding System .................................................. Car Battery Negative Pole
Dimensions(WXHXD) ............................................................. 250*380*97 mm
Weight(main unit) ..................................................................................... 2.4kg
FM
Signal Noise Ratio ................................................................................≥50dB
Residual Noise Sensitivity (S/N=30dB) ...............................................≤9dBμV
Frequency Response (±3dB) ....................................................20Hz~12.5KHz
Station Seeking Level .................................................................... 20~28dBμV
Distortion ............................................................................................... ≤2.0%
Stereo Separation (1KHz) ..................................................................... ≥25dB
Antenna Impedance ....................................................................................75Ω
AM
Residual Noise Sensitivity (S/N=20dB) .............................................≤30dBμV
Selectivity (±9KHz) ................................................................................ ≥50dB
LCD
Screen size .............................................................................. 12.1 inchs (4:3)
Display resolution ....................................................................1024 X 768 dots
Brightness .......................................................................................... 280cd/m2
AUX IN
Distortion ............................................................................................... ≤0.5%
Frequency Response (±3dB) .......................................................20Hz~20KHz
Audio Input Level .................................................................................0.5Vrms
Audio
Audio Output Impedance ..........................................................................100Ω
Audio Output Level ....................................................................... 2Vrms(Max)
Video
Normal Video Input Level (CVBS) ......................................................1.0±0.2V
Video Input Impedance ...............................................................................75Ω
Environment
Operating Temperature ..............................................................-30°C ~ +70°C
Storing Temperature ..................................................................-40°C ~ +85°C
Operating Humidity ..................................................................... 30%~85%RH
Storing Humidity .......................................................................... 30%~95%RH
Notice:
When the unit is operated to extremes, such as with maximum power output for a long time,
or the temperature is over 70°C, it will enter heat protection mode, the volume will be reduced
automatically. This is normal.

FCC Statement
1. This device complies with Part 15 of the
FCC Rules.
Operation is subject to the following two
conditions:
(1) This device may not cause harmful
interference, and
(2) This device must accept any interference
received, including interference that may
cause undesired operation.
2. Changes or modications not expressly
approved by the party responsible for
compliance could void the user's authority to
operate the equipment.
NOTE: This equipment has been tested and
found to comply with the limits for a Class B
digital device, pursuant to Part 15 of the FCC
Rules. These limits are designed to provide
reasonable protection against harmful
interference in a residential installation.
This equipment generates uses and can
radiate radio frequency energy and, if not
installed and used in accordance with the
instructions, may cause harmful interference
to radio communications. However, there is
no guarantee that interference will not occur
in a particular installation. If this equipment
does cause harmful interference to radio or
television reception, which can be determined
by turning the equipment off and on, the
user is encouraged to try to correct the
interference by one or more of the following
measures:
Reorient or relocate the receiving antenna.
Increase the separation between the
equipment and receiver.
Connect the equipment into an outlet on a
circuit different from that to which the receiver
is connected.
Consult the dealer or an experienced radio/
TV technician for help.
FCC Radiation Exposure Statement
This equipment complies with FCC radiation
exposure limits set forth for an uncontrolled
environment. This equipment should be
installed and operated with minimum distance
of 20 centimeters between the radiator and
your body.

Table of contents