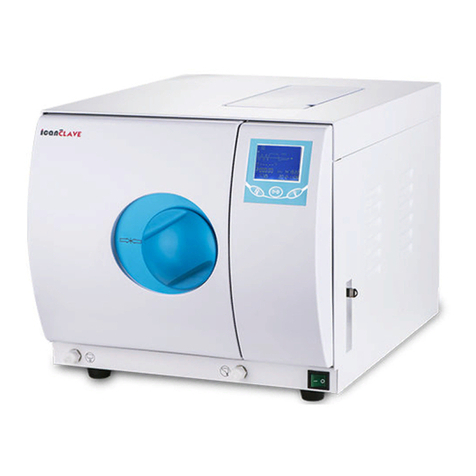
Aison STE12L-C User manual

Instruction manual
STEAM STERILIZER
Instructionmanual
STE12L-C Class B
Aison international AB
Stigs Center 2B,
42246,Hisings Backa
Sweden
Mob:+46-(0)73-5543108
Web: www.autoclave.se
Email: info@autoclave.se

Instruction manual I
FOREWORD
Thank you for purchasing this STEAM STERILIZER. It is manufactured to the highest
standards using quality materials. Please follow all recommended maintenance,
operational and safety instructions and you will receive years of troublefree service.
This manual is an unseparated part of the device, Save this manual for future reference
and keep in the vicinity of the product.

Instruction manual I
I
CONTENTS
FOREWORD.......................................................................................................................Ⅰ
CONTENTS........................................................................................................................Ⅱ
1.GENERAL........................................................................................................................1
2.TECHNICAL PARAMETER.............................................................................................3
3.PACKING CONTENT.......................................................................................................3
4.INSTALLATION...............................................................................................................4
5.OPERATION....................................................................................................................5
5.1 FILLING THE DISTILLED WATER.........................................................................................5
5.2 PREPARING THE MATERIAL TO BE STERILIZATION........................................................6
5.3 SELECTING THE STERILIZATION PROGRAM....................................................................7
5.4 RUNNING THE STERILIZATION PROGRAM........................................................................8
6.ADVANCED SETTING....................................................................................................11
7.MAINTENANCE..............................................................................................................15
8.TRANSPORT AND STORAGE.......................................................................................19
9.ALARM............................................................................................................................19
10.SAFETY DEVICES........................................................................................................20
APPENDIX
1. CHARACTERISTICS OF THE FEEDING WATER...............................22
2. DIAGRAMS OF THE STERILIZATION PROGRAMMES.....................23
3. PROGRAM RUNNING DIAGRAM ......................................................24
4.ELECTRICAL DRAWING.....................................................................28
5. HYDRAULIC DRAWING......................................................................29

Instruction manual - 1 -
1.GENERAL
This sterilizer described in this manual is intended for the sterilization of re-usable
surgical instruments and material.
It operates automatically with 134℃ and 121℃ sterilization temperatures. The
sterilizer is a Medical device class Ⅱa, in accordance with article 15-Appendix Ⅸ of
the European Directive 93/42/CEE and it has been produced in accordance with the
EN13060.
1Distilledwatertank 9Airfilter
2LCDscreen 10Safetyvalve
3Controlpanel 11Condenserventilation
4Mainswitch 12Printerport
5Mainfuses 13Powersupplycord
6 Drain connector of distilled water tank 14 Rating plate
7 Door handle
8 Drain connector of used water tank

Instruction manual - 2 -
Security Notice:
In order to proper use the sterilizer, please be sure to read the warning and attention
carefully for safety.
Grounding protection
This symbol is grounding protection inside the machine.
Hot surface
This symbol is visible at the rear of the unit and on the front of the panel after opening
the door.
Important safety information
This symbol is used to draw the attention of the reader to particularly important notions
for operator safety.

Instruction manual - 3 -
2.Technical Parameters
Item STE12L-C Class B
Chamber volume 200mm x360mm
Rated Voltage AC220V±22V(AC110V±11V),50±1HZ(60±1Hz)
Main Fuses T12A/250V(T20A/250V for 110V)
Nominal Power 1750VA
Sterilization Temperature 121℃/134℃
Capacity of the distilled
water tank
Approx 2.5L(water at level MAX)
Approx 0.5L(water at level MIN)
Outside Dimensions 445mm(width)x440mm(height)x590mm(length)
Net Weight 45Kg
Noise <70db
Relative Humidity Max 80%, non condensing
Atmosphere pressure 76kPa-106kPa
3.Packing Content
NO. Item Quality
1 STE12L-C Class B Steam sterilizer 1
2 Instrument tray 2
3 Instrument tray rack 1
4 Instrument tray handle 1
5 Door adjustment tool 1
6 Draining hose 2
7 Instructions manual 1
8 Power fuse( VACAT VforVACAT 250/12
)110(250/20 ) 2
9 Door seal 1

Instruction manual - 4 -
4. Installation
* There must leaves 10cm gap around sterilizer, and 20cm on top side. the
clearance required for the movement of the door: leave an at least 450mm
fan-shaped space in front of the door.
* The place which sterilizer located must be ventilated, make sure that the radiator
not being jammed.
* The sterilizer should be placed on a level worktable.
* Don't cover or block the door, ventilation or radiation openings on the sterilizer.
* Don't place the sterilizer near a sink or in a location where it is likely to be
splashed.
* Keep away from all sources of heat.

Instruction manual - 5 -
5.Operation
5.1 Filling the distilled water
5.1.1 Open the door and take out all the instrument trays and other accessories
inside, unpack and clean them.
5.1.2 Connect the power, and connect the printer (See 6.5)
5.1.3 Switch on
Switch on the sterilizer through the mains switch mounted
on the lower right side. At the switching on, the machine
turns on the LCD display. And it will show the door position, water level, working
program, date, time and etc. .The machine will alert by beep sounds if there are
problems.
Icon description:
Notice:
Before using the sterilizer at the first start-up or any time the signal
blink, it is necessary to fill the distilled water tank with distilled water.

Instruction manual - 6 -
5.1.4 Fill in the distilled water
Open the top lid, and fill the tank with distilled water by cup or tank. When you hear
a beep signal, it means the water level is exceed
the max. Level. Please stop filling immediately.
5.2 Prepare the material to be sterilized
To get a better effectiveness of the sterilization process and to preserve
the material in time, follow the indications below reported.
* Arrange the tools of different metal (stainless steel, moderate steel,
aluminum, etc.) on different trays or however well separate between them;
* In case of not stainless steel tools, interpose a sterilization paper napkin or
muslin cloth between tray and tool, avoiding direct contacts between the
two different materials;
* Verify all the tools are sterilized in open position;
* Arrange the containers (glasses, cups, test-tubes, etc.) on one side or
inverted position, avoiding possible water stagnation;
* Don't overload the trays over the stated limit (see Appendix 1).
* Don't stack the trays one above the other or put them in direct contact with
the walls of the sterilization chamber.
* Always use the instrument tray handle.
* Wrap the tools one by one or, if more tools have to be set in the same wrap,
verify that they are of the same metal;
* Seal the wrap with sterilization adhesive ribbon or by a thermal sealer.

Instruction manual - 7 -
* Don't use metallic clips, pins or other, as this jeopardizes the maintenance of
the sterility;
* Turn the sterilization paper in order to set the plastic part downward (tray side)
and the paper part upward.
Always wrap the tools in case of prolonged store.
5.3 Selecting the sterilization program
5.3.1 LCD display
Displays the cycle temperature, pressure, error code,
sterilization state and program.
5.3.2 TEMP button
Sterilization temperature select button.
5.3.3 PROGRAM button
Select sterilization procedure.
5.3.4 START button
Start a procedure ; hold on for 3 seconds to interrupt procedure.
5.3.5 SELECT a program
Press TEMP button to select sterilization
temperature, then press PROGRAM
button to select a sterilization procedure
(refer to APPENDIX 2).
Notice:
There’er 10 seconds for self-test of control system with all of the

Instruction manual - 8 -
buttons locked at the starter when you turn on the sterilizer, not fault.
5.4 Running the sterilization program
After selecting program, put the
instruments into the chamber by tray handle.
5.4.1 After the instruments are loaded, you
may close and lock the door by turning the
door handle clockwise.
You must turn the door handle to the maximum
position, otherwise the machine maybe alarm and stop
working during the cycle.
5.4.2 Start the sterilization program.
Press START button,the machine will starts a cycle automatically. It will take
30-75 minutes. (See Appendix 2)
Caution
:
When you press the "Start" button the door handle has not been turned to the
maximum position, you will see the blinks on the screen, It means you can not

Instruction manual - 9 -
start a cycle until you close the door completely and press the "Start" button again.
5.4.3 Sterilization cycle end
After a cycle completes, the printer will start work and print the report of the
sterilization cycle data if you have install it. During the sterilization progress,alert
beep would occur if temperature or pressure has any fault.After the pressure is 0 ,you
may open the door, and take out the sterilized instruments.
Please use the tray handle to load or unload the tray in order to avoid scald.
5.4.4 Drain
Whenever blinks, it means the used water tank if full, you need to drain it
immediately in the way as following described.
1.Push the hose to the waterspout of the
connector.
2.Turn the waterspout anticlockwise.

Instruction manual
-
10
-
3.Pull the waterspout out .Then the tank will
be drained.
4.After finish draining water,push waterspout
and turn clockwise to the position as fig.
5.5 Test program
5.5.1 Press PROGRAM button,select B&D TEST program.
5.5.1.1 Put the Bowie-Dick pack into the chamber.
5.5.1.2 Then close the door and start it. After finish the
cycle, check the indicator. And evaluate the result.
5.5.2 Press PROGRAM button,select HELIX TEST program.
5.5.2.1 Put the indicator paper in the capsule.
5.5.2.2 Put the Helix tube into the chamber. Then close
the door .
5.5.2.3 After finish the cycle ,check the indicator and
evaluate the result.
5.5.3 Press PROGRAM button,select CACUUM TEST program.
5.5.3.1 Then close the door and start program.
5.5.3.2 After finish the cycle it will show the result.
5.5.3.3 In compliance with EN 13060, the test requires the
air leakage rate less than or equal 0.13kPa/min

Instruction manual
-
11
-
during the 10 minutes.If the leak on the screen is not
greater 0.13,it will show OK. Or it will show failure.
5.5.3.4 "Tp" is the temperature difference between the max.
temperature and the min. temperature during the
cycle. If it is greater 3℃ it will show void. That means
the result is void. You need run the test again after the chamber has cooled down.
6. Advanced Setting
6.1 Enter the setting menu
6.1.1 Hold START button and then turn on the main power
switch. Keep holding for about5 seconds, you will enter
setting menu.
6.1.2 Press PROGRAM button, you can select to set S1,S2,S3,
S4. The chosen option will blink. Press START button and enter the sub menu.
6.2 S1 setting
You can adjust units of pressure and temperature as you
like, also of the date and time.
6.2.1 For example,you can adjust temperature unit as
following:Press PROGRAM button to switch setting option,when the temperature
unit is blinking,press TEMP button,and it will change between F and ℃. Press
PROGRAM button again to switch to the next setting option.
6.2.2 The other option can be adjusted as the same way above.
6.2.3 After finish it, press START button to exit this menu, all of the data you have

Instruction manual
-
12
-
adjusted are saved.
6.3 S2 setting(Reserved setting,no adjust it)
6.4 S3 setting
6.4.1 S3 is used to adjust sterilization holding time and drying time.
Press PROGRAM button to select intended parameters of sterilization
cycle.
Press TEMP button to select sterilization temperature.
(121℃/134℃)
Press START button to enter sub-menu for adjustment.
6.4.2 In this menu, PROGRAM button is for option selecting, TEMP button is for
number adjustment.
6.4.3 After finish it, press START button to save and exit back to upstream menu.
6.4.4 Holding time range: 1~60min.
Drying time range: 0~20min. (The drying time here refers to adjustable part of
the whole drying time. Default time of device is 7 min. The real drying time is the
total value of default and adjusted value here.)
Caution:
We don’t suggest to change these parameters if not necessary.
6.5 S4--Altitude setting
You need to adjust altitude parameter when use the device at a high altitude level.
Hold PROGRAM and TEMP button and then turn on the main power switch. Keep
holding for about 5 seconds, you will enter S4 setting menu-Altitude setting. Press

Instruction manual
-
13
-
TEMP button to adjust, press START button to confirm it.
Please set the parameter as following:
Altitude Parameter Altitude Parameter
1.0>h>0.5 km, 0.5; 1.5>h>1.0 km, 1.0;
2.0>h>1.5 km, 1.5; 2.5>h>2.0 km, 2.0;
3.0>h>2.5 km, 2.5; 3.5>h>3.0 km, 3.0;
4.0>h>3.5 km, 3.5; 4.5>h>4.0 km, 4.0;
Note:
The standard atmospheric pressure is about 100kPa. And the pressure decrease 5kPa for
each 0.5 kilometers of altitude increased.
If the parameter is set above 2, you need to reevaluate the sterilization result.
And you may correct the effect by prolong the holding time.
6.3.3 Print and USB setting
‘ 1’ means it is effective , ‘0’means it is noneffective. The left number refers to
USB, and the right one refers to print function.
6.3.4 Identification code
You shall not change the identification code of your device, it is used for
maintenance trace.
6.6 Printer( Optional)
6.6.1 Connect printer to the connector of device located on the right panel. When a

Instruction manual
-
14
-
cycle is finished, it will print the sterilization report automatically.
The sample of content of print and files in memory is as below:

Instruction manual
-
15
-
7. Maintenance
Frequency Operation
Daily Cleaning the door seal
Cleaning the external surface
Weekly Cleaning the reservoir
Cleaning the chamber
3~6 months Replace the air filter
Every year Replace the door seal

Instruction manual
-
16
-
7.1 Clean the distilled water tank
every week with medical disinfectant .
7.2 Clean the chamber weekly.
7.2.1 Remove the trays and rock from the
chamber.
7.2.2 Clean the chamber with non-plush cloth
saturated with distilled water.
7.2.3 Apply the same procedure for the trays
and rock.
7.3 Cleaning the door seal
Clean the door seal weekly, with non-plush cloth saturated with the distilled water.

Instruction manual
-
17
-
7.4 Replace the air filter
Air filter is at the back of the device, remove it by tunning it anti-clockwise and install
a new one instead.
7.5 Door adjustment
On normal circumstance the chamber door lock don't need to adjust.Once steam
leaking occurs (the seal fails), you may use the spanner to adjust door seal.
7.51 Open the door firstly.
7.5.2 Insert the spanner into the gap beneath the plastic cover; use the spanner to
lock on the adjusting nut (Fig 1). Turn the nut counter clockwise as the figure below
(Fig 2). This will tighten the sealing plate.
7.5.3 Turn the nut until the sealing plate is tight. If the door knob is too tight, you
may also turn the nut clockwise to loosen it.
Caution:
Never try to readjust the chamber door while the door is locked.
Table of contents
Other Aison Laboratory Equipment manuals
Popular Laboratory Equipment manuals by other brands

Syngene
Syngene G:Box Chemi XRQ Installation quick guide

Serstech
Serstech ARX user manual

DLAB Laboratory Instruments
DLAB Laboratory Instruments D3024 user manual

Thermo Scientific
Thermo Scientific Heraeus MULTIFUGE 3S+ instruction manual

LevelOne
LevelOne IGP-0101 user manual

FRIMED
FRIMED SB10E Use and maintenance manual