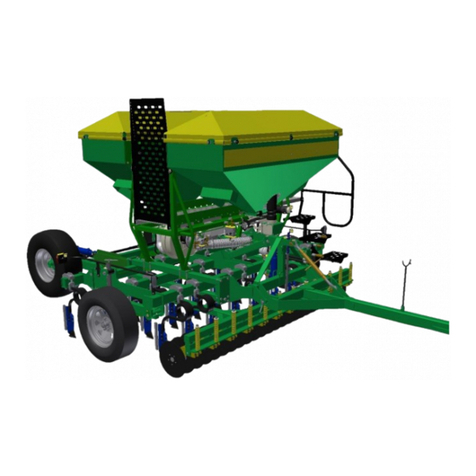
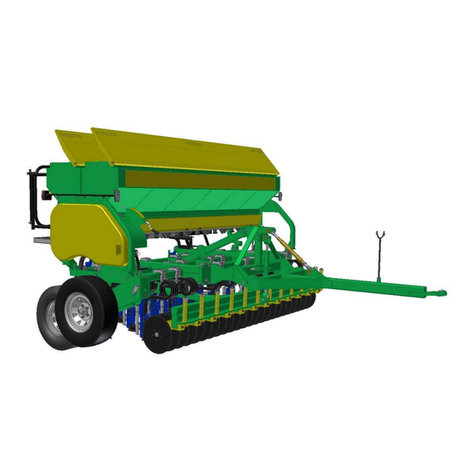
Aitchison SEEDMATIC PROFESSIONAL 8140 User manual

2 | P a g e

3 | P a g e
TABLE OF CONTENTS
INTRODUCTION
4
WARRANTY INFORMATION
5
TO THE OWNER & OPERATOR
6
TECHNICAL SPECIFICATION
7
SAFETY FIRST
9
GENERAL OPERATION IN THE FIELD
12
PASTURELAND FARMING WITH THE AIR-PRO
12
MANAGEMENT CONSIDERATIONS
12
TECHNIQUES AND TIMING FOR PASTURE RENOVATION
13
SIMPLE RULES TO FOLLOW FOR SUCCESSFUL PASTURE
RENOVATION
14
MICRO INSECTICIDE GRANULES IN PASTURE
15
SOWING IN CULTIVATED SOILS
16
SEED DEPTH ADJUSTMENT
17
FRONT DEPTH WHEELS
17
PACKER ROLLERS
17
FOLDING HYDRAULIC SYSTEM
18
HYDRAULIC RAMS
18
DRAWBAR RAMS
18
FOLDING & UNFOLDING WINGS
19
STEP 1: UNLOCK
19
STEP 2: LOWER BACKWARDS
19
HYDRAULIC FAN DRIVE
20
HYDRAULIC MOTORS SETUP
20
SYSTEM OVERVIEW
20
ELECTRONIC DRIVE HEAD UNIT & CALIBRATION
21
SEED & FERTILISER RATES
32
FINE SEEDS
32
FINE SEED SETTING
33
SMALL SEEDS BOX
34
PRODUCT DOWN MAIN AIRSTREAM
34
PRODUCT BROADCASTED
34
SMALL SEEDS BOX CALIBRATION
34
TINE PLACEMENT
35
PARTS BREAKDOWN
36

4 | P a g e
Introduction
Dear Valued Owner,
Congratulations, you have just made an excellent investment.
Your new Aitchison drill has been designed and engineered to give years of
dependable service. Every consideration has been taken to incorporate the latest
technology, thus ensuring optimum seeding is achieved. Aitchison Drills provide the
optimum agronomic environment, ensuring proper seedling germination, leading to
superior crops and thus greater revenue earning potential.
It has often been said: “when all else fails-read the operators manual” and to ensure
you get the best from your new Aitchison drill it is very important that you thoroughly
read through the entire contents of the manual. Please also pay attention to the
maintenance recommendations, understand the calibration system and consider the
design features and their specific functionality.
Your local dealer carries an extensive range of genuine Aitchison spare parts and
consumables that also have been engineered to provide long service and life. It is
important that only genuine parts are used on your drill.
Thank you for making your investment in our expertise.
Yours Sincerely,
Ross Simpson
Director
Reese Agri

5 | P a g e
COMPLETE AND RETURN WARRANTY REGISTRATION TO ENSURE VALIDATION.
IN THE USA RETURN TO: REESE AGRI USA, 705.N MAIN STREET, BRAYMER, MISSOURI,64624, USA.
IN AUSTRALIA AND NZ RETURN TO: REESE ENGINEERING LTD, PO BOX 5056, PALMERSTON NORTH, NEW
ZEALAND
REESE warrants that the Machine delivered shall conform to the specifications set out in this
Handbook.
REESE makes no warranty of saleability or fitness for a particular use, nor is there any other
express or implied warranty.
Subject to such other conditions, warranties, and/or undertakings which may apply from
time to time under any applicable law, REESE warrants with respect to each new
AITCHISON Machine sold by its accredited agents, that for a period of twelve months
from the dates of original retail sale, REESE will repair or replace free of charge any
part found to be defective in factory materials or workmanship under normal use and
operation within the United States of America, Canada, Australia and New Zealand
provided that;
1. The Machine
(a) has been properly assembled and adjusted
(b) has been properly used and operated within the capacity and operating limitations
specified by the manufacturer thereof, and
(c) has been properly maintained and cared for.
2. This Warranty applies to direct purchase from an authorized AITCHISON dealer. If
any defect or fault shall arise such purchaser must return the defective work or Machine
to an authorized AITCHISON Dealer within ten working days of such defect or fault
arising.
3. In the event of the purchaser attempting to repair or replace the work or product
without prior written consent of an authorized AITCHISON Distributor this guarantee
shall become void. REESE may replace or repair any damaged product or work at its
discretion.
4. In respect of such Machine this warranty does not apply to:
(d) misuse or carelessness in handling,
(e) Noncompliance to REESE’s operating and maintenance instruction,
(f) Unauthorized repairs or alterations,
(g) Consequential damage resulting from misuse or initial faults,
(h) Parts subjected to ware or damage as a result of normal operation i.e.
i. Sponge pads and discs
ii. Tines and boots
iii. Discs
iv. Tyres
v. Hydraulic components
5. Any disputes in relation to this contract or product shall be governed by New
Zealand law and shall be determined in a New Zealand court.
WARRANTY
THE OPERATION AND ADJUSTMENT OF THE REESE MACHINE REQUIRES A COMPLETE KNOWLEDGE OF
THE CONTENTS OF THIS HANDBOOK. TO AVOID PERSONAL INJURY PLEASE ENSURE THAT ALL
PERSONNEL ARE THOROUGHLY CONVERSANT WITH ALL DETAILS BEFORE COMMENCEMENT OF
OPERATION OR MAINTENANCE.
WARNING
!

6 | P a g e
TO THE OWNER AND OPERATOR
Your Aitchison Drill was carefully designed and manufactured to give you years of
dependable service. To keep it running efficiently, read and follow the instructions in
this operator’s manual. Any questions you may have that are not covered in this
manual should be referred to your dealer:
Dealers Name: ______________________________________
Address: ___________________________________________
Phone: Business: ______________ Private: _______________
Date of Purchase: ___________
Model: ________________Serial Number: _______________
The warranty card on your Seedmatic Drill is included with this manual. Please
ensure that the registration card is correctly filled in.
The owner must ensure the dealer, upon delivery of the machine, has completed the
WARRANTY REGISTRATION CARD. This must be signed by the owner and
returned to the factory promptly. Failure to carry out this function could nullify
warranty claim opportunities against the factory in the future. Warranty claims
will only be accepted for registered products.
When ordering spare parts, quote the model and serial number of the drill and use
the Aitchison part number given in the parts section. Reference to the right hand
and left hand is taken from behind in the direction of travel.

7 | P a g e
TECHNICAL SPECIFICATIONS
SEEDMATIC Air-Pro
Airpro 8140
Overall Width –Transport
2.9m
Overall Width –Seeding
6.0m
Sowing Width
6.0m
Working Speed
6-15 km/h
Tractor HP (min)
140
Weight Empty
4400kg
Seed Hopper Capacity
1000lts
Fertiliser Hopper Capacity
1500lts
No. Tines
40
Row Spacing
150mm
Opener Stagger
400mm
Optional Extras:
Front Disc Coulter Kit. #A3650-ASSY
Hiab Mount (Drawbar). #A3660-ASSY
Rear Press Roller Kit. #A3680-ASSY
Small Seeds Box Kit. #A3690-ASSY / A3695-ASSY
Rear Chain Harrow Kit. #A3670-ASSY
QUICK SYSTEM CHECK
1. Fan Hydraulics: has the drill been set to match your tractors
hydraulic system? (Open/Closed centre system)……see page 18.
2. Fan Hydraulics: does your tractor have a PRESSURE FREE return
dump port?………………………………………………see page 18.
3. Drawbar Lift Hydraulic: when seeding ensure that your tractors
hydraulic bank connected the Drawbar Lift Rams is kept in FLOAT
……………………………………………………………see page 16.
4. Seed Metering Units: has the metering units been set up to match
your seed type & seeding rate? Ensure that the “Fine Seeds Lock”
is locked in the correct position……………………….see page 31.

8 | P a g e
OPERATING TIPS
1. Run Fans Before Operating drill: by running the fans before seeding
helps dry out the seed delivery tubes.
2. Run Fans After Seeding: this will help to clean out any seed/fertilizer
that may still be in the air system.
3. Check Locks & Stops: check that the transport locks work & the
carrier bolts are adjusted so they are carrying the weight of the
machine in transit.
4. Transit Speed: keep your transport speeds below 40km/h at all times.
5. Turning: when seeding don’t attempt tight turns, this will scuff up the
ground and stress the tine especially in dry hard ground.
6. Storage: if you are storing the seed drill outside leave it in the
unfolded state to prevent rain entering the delivery tubes.
7. Road Transport Wheels: If the AIRPRO is to do a lot of road work we
recommend fitting Heavy Duty (truck style) Transport Legs and
Wheel assemblies.

9 | P a g e
SAFETY FIRST
Keep all covers in place when using the drill.
Stop the drill before making adjustments.
Lower the drill to the ground or put on props when working around the machine.
Tighten all nuts and bolts after initial use.
FOLLOW SAFETY INSTRUCTIONS
Carefully read all safety messages in this manual
and on your machine safety signs. Replace missing
or damaged safety signs, these can be ordered from
your local Aitchison dealer.
Learn how to operate the machine and how to use controls properly. Do not let
anyone operate it without instruction.
Keep your machine in proper working condition. Unauthorized modifications to the
machine may impair the function and/or safety and affect machine life.
If you do not understand any part of this manual and need assistance, contact your
Aitchison’s dealer. OPERATE YOUR MACHINE SAFELY
Be careful when operating machine to avoid injury.
Serious injury or death can result from contact with
electric lines. Use care when moving or operating
the machine near electric lines to avoid contact.
Be careful when operating on hillsides, tractor can tip sideways if it strikes a hole,
ditch or other irregularity.
Permit only one person, the operator, on tractor
platform while tractor and planter are in operation.
Keep riders off. They are subject to injury such as
being struck by foreign object and being thrown off
the machine. They also obstruct the operators view.
WEAR PROTECTIVE GEAR
Wear close fitting clothes and safety equipment
appropriate to the job.
Wear suitable hearing protective device as
prolonged exposure to loud noise can cause
impairment or loss of hearing.
Wear safety gloves when working with discs as they can have sharp edges.
Operating equipment safely requires the full attention of the operator. Do not wear
radio headphones while operating machine.

10 | P a g e
BE SAFE WITH CHEMICALS
Direct exposure to agricultural and hazardous
chemicals can cause serious injury. Potentially
hazardous chemicals used with Aitchison
equipment include such items as lubricants,
coolants, fertilizer, paint and adhesives. If in
doubt, contact your local Aitchison dealer
for information about chemical safety and first aid
procedures.
Keep a fire extinguisher and first aid kit handy
When disposing of chemicals, make sure hoppers are properly washed to get rid of
any chemical residue and that any chemicals are disposed of in an approved
manner. Follow instructions of chemical manufacturers for disposal methods.
USE SAFETY LIGHT AND DEVICES
Slow moving tractors and equipment can create a
hazard when driven on public roads. They are
difficult to see, especially at night. This could
lead to personal injury or death if a collision with a
vehicle occurs.
Whenever driving on public roads, use flashing warning lights. Provide extra lighting
at night on machine and tractor. An implement safety lighting kit is available from
Aitchison Industries.
TRANSPORT SAFELY
Do not exceed transport speed for machine; see your local Aitchison dealer. Never
transport at any speed which does not permit adequate control of steering and
stopping.
Reduce speed over rough ground
For safe transport, tractor must weigh more than machine.
REDUCE SPEED WHEN TOWING LOADS
Braking to stop towed loads from transport speeds can
cause the towed load to swerve and upset. Reduce
speed if towed load weighs more than the tractor and
is not equipped with brakes.
Use additional caution when towing loads under adverse
surface conditions, when turning and on road marking lines.

11 | P a g e
PRACTICE SAFE MAINTENANCE
Understand service procedure before doing work. Keep area clean and dry.
Never lubricate, service or adjust machine while it is moving. Keep hands, feet and
clothing from power driven parts. Disengage all power and operate controls to relieve
pressure. Lower equipment to the ground. Allow machine to cool.
Securely support any machine elements that must be raised for service work.
Keep all parts in good condition and properly installed. Fix damage immediately.
Replace worn or broken parts. Remove any build-up of grease, oil, or debris.
Remove paint before welding or heating.
Avoid potentially toxic fumes and dust
when sanding, repainting or welding. Do
all work outside in a well-ventilated area.
Dispose of paint and solvent properly.
Avoid heating near pressurized fluid lines or other flammable materials. Pressurized
lines can be accidentally cut when heat goes beyond the immediate flame, which
could result in severe burns to yourself and bystanders.
Avoid high-pressure fluids. Escaping fluid under pressure can cause injury. Relieve
pressure before disconnecting hydraulic or other lines.
DISPOSE OF WASTE PROPERLY
Improper disposing of waste can threaten the
environment and ecology. Use leak-proof
equipment when draining fluids. Do not use
food or beverage containers that may mislead
someone into drinking from them.
Do not pour waste onto the ground, down a drain, or into any water
source. Use the manufacturer’s directions on the correct way to
recycle or dispose of waste.

12 | P a g e
GENERAL OPERATION IN THE FIELD
When the drill is in work in the field, adjust the front Depth Wheels evenly across the
width of the drill; also adjust the rear Press Rollers across the width of the drill to give
the required opener penetration.
The drill should always be moving forward when lowered or raised from work. Avoid
stopping and never reverse with drill in work. These precautions will avoid blocking
outlets; however make periodic checks for blockages while drilling.
The speed of travel is governed by the conditions e.g. if the ground is rough the drill
may tend to bounce which would necessitate a lower speed. In optimum conditions
8 km/h may be maintained.
Always lift the drill out of the ground before turning sharp corners as this will protect
the tines and openers and stop the turf from ripping.
Under no circumstances should the tractor wheels be allowed to slip excessively as
this will break the turf and the following tines will tear up the ground. If slippage is a
problem, use a tractor with more traction or wait for the ground to be in better
condition. Towing chain or bar harrows behind the drill is very beneficial as this will
crumble the groove and help to cover the seed.
PASTURELAND FARMING WITH THE AIRPRO
Continuous reaping of grasses either by machine or animal will eventually lead to
their degeneration. Desired species of grasses and legumes will weaken and their
ability to survive adverse climatic conditions will be diminished. Undesirable species
of grasses and weeds will eventually tend to dominate or pasture may simply thin out
with minimal plant populations. Of course conditions that cause pasture
degenerations vary from location to location, and from country to country, but one
can assume that every pasture can be improved no matter where its location.
MANAGEMENT CONSIDERATIONS
In describing the technique for sowing seeds into uncultivated soils, we should clarify
the terminology. It is most common to refer to CONSERVATION TILLAGE (or CT)
but it may be called SOD-SEEDING in Australia, or DIRECT DRILLING in UK or
even NO-TILL SEEDING in North America. Wherever it is practical, successful
conservation tillage requires well considered and thorough preparation, integrated
with a whole farm management program.
The cropping rotation, optimum sowing dates and grazing fertilization program will
depend on the seasonal vegetation or weed spectrum, paddock history, soil type,
fertility and drainage, and many other factors.
Here is a checklist that should be followed for any CT program (courtesy of
Monsanto NZ Ltd):
1. Check that the soil pH is around 6.0.
2. Check soil fertility levels for fertiliser requirement.
3. Ensure your spray boom has a marking system and is fully operational.
4. Establish optimum time for planting.

13 | P a g e
5. Check and control weeks present, before and during crop establishment.
6. Check and control insect and slug infestation before and during plant
establishment.
7. Ensure soil conditions are suitable for drilling.
8. Inspect the crop regularly after planting.
Experience has shown that farmers new to CT often have crop failures on the first
occasion, but as their skills and understanding of the technique improve, so do their
crop results.
TECHNIQUES AND TIMING FOR PASTURE RENOVATION
There are two basic techniques for pasture renovation, i.e. rejuvenation and renewal.
Rejuvenation is the most efficient technique and involves sowing the seeds of new
and virile pasture grasses and legumes direct into existing pasture and have them
gradually take over the old strain, without causing loss of production due to
cultivation. This technique is known as ‘stitching in’. Renewal involves a total
herbage control system, i.e. spray off old pasture with a wide spectrum herbicide
before drilling.
Local knowledge is invaluable when determining which techniques to use and when
to use them. The best time for pasture renovation will vary by region, and is largely
governed by the temperature and weather that follow. In temperate climates with
mild winters the autumn is best; and tropical climates the spring is the best time
when the tropical grasses have not recovered from their winter dormancy. In arid
climates the time is directly before or after summer rains.
The basic requirement for seed germination is a warm moist seed bed. The aim
should be to sow the seed at a time when there is sufficient moisture for quick
germination, and little likelihood for later drought. The Aitchison opener/coulter
however will promote germination in much drier soils than any other known coulter
when used correctly.

14 | P a g e
SIMPLE RULES TO FOLLOW FOR SUCCESSFUL PASTURE
RENOVATION

15 | P a g e
MICRO INSECTICIDE GRANULES IN PASTURES
In New Zealand where grass grub is a problem, excellent control has been attained
with the use of Gesapon, Dasanit, Dysiston, Mocap, and Lindane in control of this
pasture destroyer. Normal rates applied on the pasture surface can be as high as 30
kg/ha but when sown in the soil and hence away from neutralizing effect sunlight,
rates as low as four and five kg/ha can be used. If unexposed to sunlight these
chemicals can remain effective in the soil as long as three months, thus killing
generations of pupae as they emerge. Also, withholding of livestock after treatment
is not necessary. Both these factors are important features with the Seedmatic
Professional.
Watch for slugs. Slugs like the moist groove produced by the wing blade opener. If
slugs become a problem (eating seeds or seedlings underground), a suitable pellet
should be used.
DIRECT SEEDING OF FEED CROPS AND ARABLE CROPS
WITH SEEDMATIC PROFESSIONAL.
We are not in a position to give total formal recommended seeding rates, chemical
usage and fertiliser recommendations because of the circumstance that the
Seedmatic will be used in will be so varied and diverse that some misunderstanding
can occur.
Refer to the checklist and ALWAYS confirm with known successful CT operators as
well as your local seed specialist and chemical company representatives.
Remember that with this technique the environment is not as predictable as with
cultivated soils, and take the precaution of using insecticide or increased fertiliser if
there should be any element of doubt.
Seeding programs are wide and varied and it is best to look at rotation that starts
with a legume or feed crop followed by a grain crop, followed by another feed crop
and so on. Heavy pasture into grain can be disappointing, but grain after legume or
brassica is outstanding.
Here are just a few possibilities:
Brassicas, Turnips, Swedes, Legumes –Can be sown early spring (for winter
feed) or again in autumn for later winter early spring feed. The technique is to
blanket spray the entire area and ensure that seeding depths are shallow. A light
bar harrow pulled over the seeding areas is beneficial. Use fertiliser and see your
chemical company specialist with regard to the correct insecticide to use.
Winter Feed Oats –This can be seeded direct into pasture in early autumn.
Herbage control can be carried out also if necessary.
Wheat and Barley –Direct seeding in early spring or autumn depending on variety.
Spray out pasture with approved herbicide (may not be necessary after brassica).
Always sow with fertiliser.
Lucerne, Alfalfa –Sow in early spring after spraying out entire area with Roundup
or Paraquat. It is always a good idea to do a soil test to ensure that the soil pH is
satisfactory for plant establishment. Also it is necessary to ensure that the seeds are
treated with inoculants to guarantee their germination and nodulation. Use fertiliser
and ensure that spraying for insects is carried out –particularly for control of slugs
and spring snails.

16 | P a g e
Green-feed Maize –Carry out in early spring and the same rules apply as with
wheat, barley and oats. You may wish to seed in 30 or 45 cm rows and the
technique for achieving that is shown under the section SPECIAL PURPOSE
SEEDING shown later in this booklet.
SOWING IN CULTIVATED SOILS
As this is a tined implement with a direct drill type opener, it is important to treat all
seed beds as you would a pasture. With a conventional drill one works up the soil
into a fine seedbed so that a broad boot type coulter will pass through leaving the
seed behind, in the soil tilth. Cultivate the soil to destroy existing vegetation, then roll
the seedbed thoroughly and finally drill the seeds required into this rolled seedbed
with the Seedmatic. Good germination results will occur.

17 | P a g e
SEED DEPTH ADJUSTMENT
The seeding depth on the Air-Pro is controlled by the front row of depth and transport
wheels and by the rear packer rollers.
LH WING SHOWN.
Note: When setting the seeding depth make sure you have the disc coulter kits clear
of the ground. The disc coulters can sometimes interfere with the seeding depth.
FRONT DEPTH WHEELS
The transport wheels are also depth wheels, these wheels are set first after all three
tined frames are lowered to the ground. These control the depth of the front of the
centre frame assembly. In conjunction with setting this, set the back-depth adjusters
on the centre frame which are either the roller kit or the rear depth wheels.
Each wing RH/LH have a front “Depth Wheel”; this wheel holds the end of the wing
at the desired seeding depth.
To adjust these wheels, unlock the depth adjustment ratchet and set to the desired
height. Re-lock the depth adjustment ratchet. Damage or changing depth may occur
if the ratchets are not re-locked.
Use the “Depth Gauge” decals to set all the front wheels at the same height. Re-
lock.
PACKER ROLLERS
The “Packer Rollers” do two jobs: 1. They help to cover the seed slots and 2. Control
the seeding depth. The Packer Rollers should be set so that the depth of the rear
row of tines is at the same depth as the front row of tines. To adjust these rollers,
loosen the lock nut on the turn-buckles, adjust both turn-buckles in small increments
until the desired depth is achieved. Ensure that the turn-buckle handle (Pin) is
pointing straight down, re-tighten lock nut. Damage or changing depth may occur
if lock nuts are not re-tightened.
Now adjust the Disc coulters to be shallower than the tip of the points.

18 | P a g e
FOLDING HYDRAULIC SYSTEM
The AIRPRO is fitted with two separate folding hydraulic systems.
One is the “Drawbar Rams” and the other is the “Wing Rams”.
NOTE: Ensure that the AIRPRO is connected to the tractors drawbar before
folding/unfolding to prevent damage or injury.
HYDRAULIC RAMS
DRAWBAR RAMS
The Drawbar Rams are used to fold/unfold the machine; they are also used to lift the
three rear sections clear of the ground in the headlands of the paddocks. They can
also be used to lift the rear sections to clear any trash that might be caught up in the
tines.
NOTE: When the drill is in work planting seeds the Drawbar Rams should be left in
float.

19 | P a g e
FOLDING & UNFOLDING WINGS
When you are about to unfold the AIRPRO the “Wing Lock” will need to be pulled
outward and locked out. To do this the operator will need to exit the tractor and
physically pull out and lock-out the Wing Lock mechanism.
NOTE: Ensure that the AIRPRO is connected to the tractors drawbar
before folding/unfolding to prevent damage or injury.
STEP 1. UNLOCK
Lock-out Wing Lock mechanism.
STEP 2. LOWER BACKWARDS
The Drawbar Rams can now be partly extended.

20 | P a g e
HYDRAULIC FAN DRIVE
The AIRPRO has one hydraulic fan drive system; this hydraulic system has two
hydraulic motors controlled by two flow control valves.
One fan is used to deliver product from the seed hopper and the other fan is used to
deliver product from the fertiliser hopper.
The hydraulic motors require 10 to 22 l/m to run and should turn at about 2000 to
4500rpm.
This hydraulic system has been designed to be compatible with either open centre or
closed centre hydraulics; this is achieved by having a valve (tap) plumbed into the
hydraulic circuit.
Have this valve closed for “Closed Centre” systems or open for “Open Centre”
systems.
This system requires continuous oil flow. One PRIORITY hydraulic bank with the
lever locked on, (motor spool) setting. It’s very important that the fans maintain a
constant speed especially when the seed drill is lifted for the headlands.
Hydraulic Motors set-up
System overview.
The tractor oil is fed into the 1st Flow Control Valve, some oil is used to drive the SEED
fan. The excess oil is then diverted to the 2nd Flow Control Valve, which is used to run
the FERTILISER fan, the oil is then returned back to the tractor.
The CASE DRAIN hose (the hose with the female coupling) is used to drain any oil that
has sneaked pass the main seals in both hydraulic motors. This CASE DRAIN hose
needs to be connected to the tractor oil tank without any restriction.
NOTE: If the case drain hose is pressurised or blocked sever damage
will occur
Table of contents
Other Aitchison Farm Equipment manuals
Popular Farm Equipment manuals by other brands

FENDT
FENDT 900 Gal Liquid System Operator's manual

Kellands
Kellands Agribuggy 2500 Operator's instruction manual

Krone
Krone Swadro TC 1000 operating instructions

roost&root
roost&root Heritage Series Assembly instructions

Alpego
Alpego K-DYNO Use and maintenance manual

Raven
Raven SmarTrax installation manual