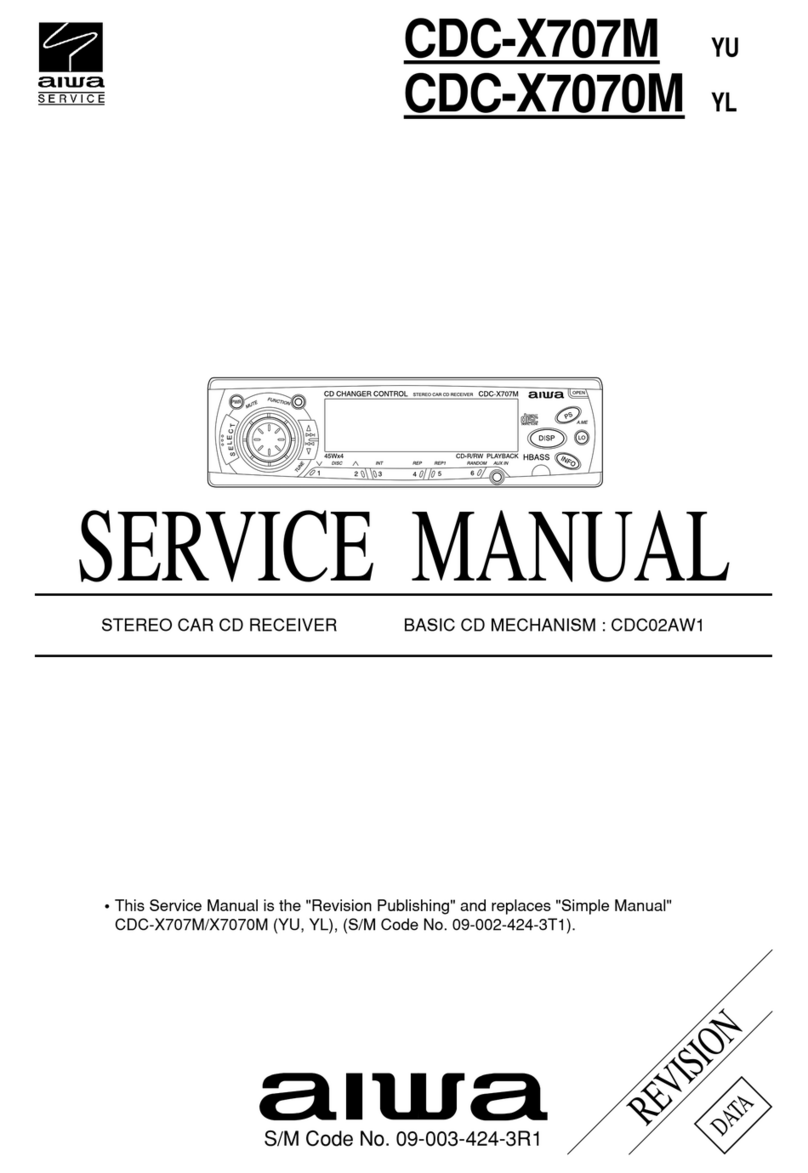
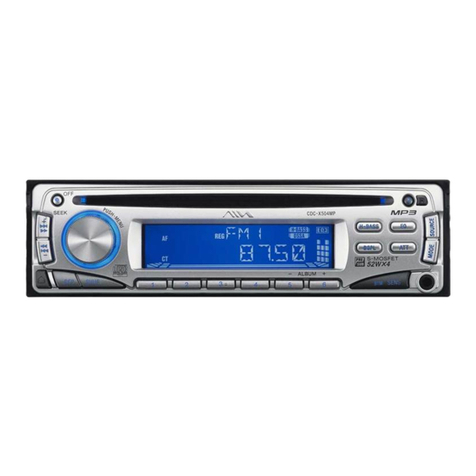
Aiwa CDC-X155 User manual

mi!!itt
DIGITAL AUDIO
CDC-X175M ,“
CDC”X155M Y“
STEREO CAR CD RECEIVER
RADIO-TOCADISCOSDE CD ESTEREOFONICOPARA
AUTOMOVIL
OWNER’S RECORD
For your convenience, record the model number and
serial number (you will find them on the right side of
your set) in the space provided below. Please refer to
them when you contact your AIWA daaler in case of
difficulty.
Model No. lCDC-x175M, cDc-x155M
seria’NO ~

Welcome
Thank you for your purchasing this AIWAproduct.
To optimize the performance of this unit, please
read through this manual carefully.
In addition to this operating instructions manual,
be sure to refer to the separate installation and
connections manuals as well.
PRECAUTIONS
●This unit isdesigned to be operated on a 12-volt
DC negative-ground electrical system only.
●To prevent short-circuiting, disconnect the
negative car battery terminal until the unit has
been mounted and connected completely.
●When replacing the fuse, be sure to use one
whose amperage rating is identical. Use of a
fuse of higher amperage may cause serious
damage to the unit,
●Do NOT attempt to disassemble this unit. Laser
rays from the optical pickup are dangerous to
the eyes.
●Make sure that pins or other foreign objects do
not get inside the unit; they may cause
malfunctioning, or asafety hazard such as
electrical shock or exposure of laser rays.
●Keep screwdrivers, etc. and other metallic or
magnetic objects away from the playback head.
●When your car was parked in direct sunlight
resulting in aconsiderable rise in temperature
inside the car, allow the unit to cool off before
operating it.
●Keep the volume at such alevel that you can
hear outside warning sounds (borne, sirens,
etc.).
Notes on CDs
sAdefective or soiled disc inserted into the unit
can cause sound to drop out during playback.
.Handle the disc by holding
its inner and outer edges.
&
●Do NOT touch the surface of the unlabeled side
of the disc.
●Do NOT stick paper or tape
etc. on the surface.
?9
iENGLISH
●Do NOT expose the disc to
direct sunlight or excessive
heat. )( (@/l
L-
Q
m
●Clean the disc before
playback. wipe thediscfrom
the center outward with a
cleaning cloth.
%
●NEVER use solvents such as benzine or alcohol
to clean the disc.
●Smaller 3-inch (8cm) CDs cannot be played on
this unit. And do not use adaptor as it may
cause malfunctioning.
●Do not use irregular shape CDs (example: hearf-
shaped, octagonal ones). It may result in
malfunction.
NOTE
This equipment has been tested and found to
comply with the limits fora Class Bdigital device,
pursuant to Part 15 of the FCC Rules. These
limits are designed to provide reasonable
protection against harmful interference in a
residential installation.
This equipment generates, uses, and can radiate
radio frequency energy and, if not installed and
used in accordance with the instructions, may
cause harmful interference to radio
communications. However, there isnoguarantee
that interference will not occur in aparticular
installation. Ifthis equipment does cause harmful
interference to radio ortelevision reception, which
can be determined by turning the equipment off
and on, the user is encouraged to try to correct
the interference by one or more of the following
measures
—Reorient or relocate the receiving antenna.
—Increase the reparation between the
equipment and receiver.
—Connect the equipment into an outlet on
circuit different from that to which the receiver
is connected.
—Consult the dealer or an experienced radio/
TV technician for help.
CAUTION
Modificationsoradjustmentstothisproduct, which
are not expressly approved by the manufacturer,
may void the user’s right or authority to operate
this product.
TABLE OF CONTENTS
FRONT PANEL ................................................................................................................ .................. 3
DETACHING AND AITACHING THE FRONT PANEL ................................................... .................. 4
SELECTING THE COLOR OF THE ILLUMINATION (CDC-X175M only) .,..,,..,.,,,.,,.,,.,..,,,,.,,.,,.....,,,., 5
SEITING THE CLOCK ....................................................................................................................... 5
RADIO OPERATION .......................................................................................................................... 6
PRESE~lNG STATIONS .................................................................................................................. 7
MY INFORMATION SWITCH ............................................................................................................. 8
SOUND ADJUSTMENTS ................................................................................................................. 10
CD PLAY ........................................................................................................................................... 12
CD CHANGER PLAY ........................................................................................................................ 13
CONNECTING APORTABLE CASSETTE PLAYER OR OTHER EQUIPMENT ............................. 14
SETTING THE BEEP TONE ............................................................................................................. 15
MAINTENANCE ................................................................................................................................ 15
TROUBLESHOOTING ...................................................................................................................... 16
SPECIFICATIONS ............................................................................................................................ 17
This operating instructions manual covers the CDC-XI 75M and CDC-X155M.
Their main differences are listed below,
ICDC-X175M CDC-X155M
Choice of illumination color Yes INo
ICDC-X175M CDC-X155M
Wired remote control* Supplied Sold separately
*Refer to the operating instructions manual supplied with the remote control RC-CX1 for details.
The unit has an extra display (DEMO) modewhich demonstrates the display of the operation modes of
the unit. The unit switches to DEMO mode automatically if you turn the unit on and leave it as it is for 5
seconds afler all the connections have been completed.
To deactivate the DEMOmods
During DEMO mode, press PWR for more than 2seconds.
To resume DEMO mode, press PWR for more than 2seconds again.
ENGLISH 2

FRONTPANEL
Display window
@H-BASS button
@PWR (power ontoff) button
@SEL (selsct) bunon
@+/- (sudlo control) button
@CD button
@BAND button
@OPEN button
@CD CH (CD changer) button*
OTUNEMISC* VIA btrttone
@MtJTE button
@TAPE IN jack (3.5-mm dia.)
@Preset station buttons 1-0
@W(back sklplseerch) button
@I W(forward skip/search) button
@INT (intro) button
@REP (repeat) button
@IREP 1(repeat 1) button*
(@IRANDOM button
@A.ME (auto memory/preeet ecan) button
@DiSP (dispiay) button
@LO (local/DX) button
@DRV (drivers eound stage adjustment)
button
@CD running indicator
@CD indicator
@CD changer operation indioator’
@IHBASS indicator
@LO (local) indicator
@ST (stereo) indicator
@DRV (drivars sountt stage adjustment)
indicator
@Main display section
*Usable only when an optional CD changer is
connected
3ENGLISH

DETACHING AND
ATTACHING THE FRONT
PANEL
12
You can detach the front panel from the unit and
carry it with you when you leave your car
unattended.
When you carry the front panel out of your.car,
use the supplied earring case.
1Press PWR to turn the unit off.
2Press OPEN toopenthe front panel
and pull out it as illustrated.
/
3Return theholdertotheformer poaition
as illustrated.
/
Notss
●Ifyou leave the unit with the front panel opened,
the panel may drop from the holder. Therefore,
be sure to pull out the panel and return the
holder to the former position.
oWhen You leave the unit with the front Panel
opened, do not put anything on the panel.
●When you carry the front panel put inthe carrying
case, do not drop or apply mechanical shock to
the panel or never get the panel wet with water.
Atlachingthe frontpanel
1
2
3
Push the left side
ageinst the unit. of the front panel
Push the right side of the front panel
against the unit.
Push the lower front side of the front
panel to secure it.
Notes
●Do not press OPEN by accident when you push
the front panel to secure it in above procedure.
●Do not touch the connector on the reverse side
of the front panel, as doing so may contaminate
the connector and cause apoor connection
resulting in amalfunction.
Security Lamp
When the front panel isdetached, you can find an
LED lamp on the front side of the unit. This lamp
is designed to deter thefl, and continues to flash
when the car’s ignition is turned off with tha front
panel detached. This unit is not equipped with
any other security systems such as asecurity
alarm, sothere are limitations to itseffectiveness.
LEDlamp
ENGLISH 4

SELECTING THE COLOR
OF THE ILLUMINATION
(CDC-X175M only)
You can select the color of the illumination
between green and amber.
Detach the front panel and slide the switch on the
back of the front panel to the “G (green) position
or “A (amber) position.
SETTING THE CLOCK
23
1
2
3
DISP
Switoh the ignition to ACC.
With the unit off, press and hold down
SELfor more than 1.5 seconds untif the
cfock indication appears.
●If you do not proceed with step 3within 5
seconds, the clock indication cfLsappears.
Press 7to set the hour.
Press Ato aet the minutes.
When the minutes are adjusted, the clock is
set. When Ais releaeed, the clock starts
working from Osecond,
Havingthe cleck dispfayedwhile the unit Is
turnedon
Press DISP, To return the unit to its former
display, repeat the same procedure.
5ENGLISH

RADIO OPERATION
PWR 41,2
3
You can turn the unit on by pressing any button
except OPEN on the front panel.
1
2
3
4
Press BAND to turn the radio on.
The radio frequency appears.
Press BAND sgsin to select the bsnd
from smong F1 (FM1), F2 (FM2), F3
(FM3) snd AM.
The band indication appears cyclically in
order.
(FI, F2 and F3 share the same frequency
range.)
f-1
Bsndindication Frequencyindication
Press (more than 0.5 second) either
TUNE vor TUNE Ato tune inthedesired
ststion.
Press Vto decrease and Ato increase the
frequency.
The unit starts scanning and tunes inastation
automatically (Seek tuning).
Press the button again to deactivate Seek
tuning. Repeattheprocedure until the desired
station is tuned in.
Note
If you press (less than 0.5 second at atime)
either TUNE 7or TUNE A, the frequency
decreases or increases step by step.
Adjust the volume with +/-.
The unit turns on in the last mode selected when
you turned off the unit with the exceptions of
pressing the following buttons.
●Pressing CD CH turns on the unit inCD Changer
Play mode.
●Pressing CD turns on the unit in CD Play mode.
PWR TUNEVIA CD BAND
LO CH
Toturnthe poweroff
Press PWR. The frequency indication goes off. If
you insertaCD, Radio mode will automatically be
deactivated as well.
LO(local/DX) bttlton
You can use Local mode when you wish to tune
in only strong stations during seek tuning. In
Radio mode, press LOto select Local mode. The
“LO indicator lights up.
●Press LO to deactivate the local mode and
switch to DX (distance) mode.
●The “ST” (stereo) indicator lights up when the
tuned-in station is broadcasting in stereo and
the reception is good.
To turnthe unit off
Press PWR.
ENGLISH 6

PRESETTING STATIONS
21
1
2
Press BAND to selects deeired bsnd
from smong FI (FM1), F2 (FM2), F3
(FM3) snd AM.
(1
Press snd hold A.ME for more thsn 1.5
seconde to activate the eutomatic
presetting function.
The six stronaest available stations will be
stored inmemory onthepresetstation buttons
1to 6in order of their signal strength. The
“A MEM indication appears while the unit is
in this mode.
Use this function to automatically preset up to 6
stations each for F1, F2, F3 and AM (up to atotal
of 24 stations).
●When auto memoty is completed, the preset
stations are automatically scanned in order.
●To stop auto memory, press A.ME again.
TOcnec~lhe preset stations(preset scan)
+If you wish to check the preset stations, press
A.ME for less than 1.5 seconds. The preset
stations stored in memory will be tuned in for 5
seconds each in order.
●To stop this function, press A.ME again or press
any of the preset station buttons 1to 6,
32
1
2
3
Press BAND to select the band from
among F1 (FM1), F2 (FM2), F3 (FM3)
and AM.
Tune in the station that you wish to
preset with TUNE Yor TUNE A.
Prees one of the presat station buttons
1to 6for approximately 1.5 seconds.
The number of the pressed preset station
button appears next to the frequency
indication.
wPresetnumber
Repeat these procedures to preset upto6stations
each for FI, F2, F3 and AM.
●You can manually preset stations that have not
been selected by auto memory.
●If you try to preset astation on a preset station
button on which another station of the same
band has already been preset, the previously
preset station will be erased.
During presetting of stations, beeps are heard
regardless of the beep on/off setting (page 15).
7EAfGLiSH

1
2
1
2
Press BAND to select adesired band
from smong F1 (FM1), F2 (FM2), F3
(FM3) and AM,
Prese the dasired I)reset station button,
The number of the-pressed preset station
button appears next to the frequency
indication.
Activetuning receptioncorflroi(ATRC)
This unit automatically suppresses FM noise
caused by varying signal strength resulting from
movement of the car.
●The built-in automatic blending circuit mixes the
left and right channel signals according to the
strength of the reception. At the same time, the
high-cut circuit activates to maintain the sound
quality.
●If the reception becomes even weaker, the unit
automatically switches to Monaural mode to
reduce noise.
MY INFORMATION
SWITCH
You can timer-activate the radio for up to two
daily radio programs. The unit turns on and off in
Radio mode at the preset time automatically.
3
1
2
3
12
With the unit turned off, press MUTE for
more than 1.5 seconde.
The “PROGRAM 1“ indication flashes in the
display window.
Thenumbsrforwhichnoprogram
ispresetflashes.
Press either of preeet station button 1
or 2to select PROGRAM 1or 2.
(-1
Thenumberon whichaprogramis
presetstopsflsshing.
Press SEL.
The “ON TIME indication flashes.
Press SEL again.
Timer indication flashes.
ENGLISH 8

Press SEL.
MY INFORMATION SWITCH
5,7,9,12 6
4
5
6
7
8
9
Set the time you wieh the unit to turn on
in Radio mode.
Press TUNE Tto set the hour.
Press TUNE Ato set the minutes.
Praas SEL.
The “BAND SEL” indication flashes.
Prees SEL again.
Radio indicationflashes.
w
Bandindication
Prees BAND to select the bend.
Press SEL.
The “FREQ” indication fiaahes.
Press SEL again.
Radio indication flashea.
w
Frequsncyin~cation
Tune in the station that you wish to
preeet with TUNE vor TUNE A.
ENGLISH
The “OFF TIME” indication flashes.
Press SEL again.
Timer indication flashes. .
10 Set the time you wish the unit to turn
off.
Press TUNE Yto set the hour.
Press TUNE Ato set the minutes.
~~ Press SEL.
The clock indication appears.
22 Prese MUTE.
Your setting is stored in memory and the unit
turns off,
●If you preset another program, repeat all the
steps from step 1.

lf3
2
1With the unit turned off, press DRV for
more thsn 1.5 seconds.
The “PROGRAM indication flashes in the
display window.
ZPress TUNE Yor TUNE Arepeatedly
until the “PROG ON” indication fleshes.
sPress DRV to turn the unit off:
To deactivate the timer
Press TUNE Yor TUNE Arepeatedly until the
“PRO13 OFF indication flashes in step 2.
Notes
●When you preset two programs, make sure that
both programs are not overlapped with each
other.
●Even if the unit is in amode other than Radio
mode, the unit switches to Radio mode and
tunes in the preset radio program at the preset
time automatically. When the program is over,
the unit returns totheformermode automatically.
●When this function is activated, TUNE V/A and
the preset number buttons do not work for
tuning-in stations.
●Even ifyou are listening to aradio program with
this function, pressing the following buttons
switches the unit to other mode:
—Pressing BAND changes the unit to Radio
mode.
—Pressing CD changes the unit to CD Play
mode.
—Pressing CD CH the unit to CD Changer Play
mode.
To switch to TAPE IN mode, press CD, CD CH,
or BAND before connecting aportable cassette
player, etc. to the TAPE IN jack.
SOUND ADJUSTMENTS
MUTE
~Press SEL to select the mode that you
wish to adjust from: VOL (volume),
BASS (bass), TRE (treble), BAL
(balence) and FAD (fader).
The following indications appear in cyclic
order,
r~nL+]RElt-~FE-lflL+FHll
The selected mods switches to Vokrmemode
if you do not proceed with step 2within 5
seconds.
ZPress +/-to adjust the level.
Press and hold either button to change the
level rapidly.
l-l+
IIn, IDecreases the IIncreases the
Decreases the
~~~ treble level Increases the
treble level
TDscreases ths Decreases the
illll_ level of the right level of the left
speaker(s) speaker(s)
Decreases the
FH] Ievelofthe front ~~~~~%1
speakers
Wtthout selecting any mode with SEL, only
the volume level can be adjustsd by pressing
+/-.
Emma
ENGLISH10

SOUNLIADJUSTMENTS
MUTE button
Press this button totemporarily Iowerthevolume.
Press it again to restore the previous volume.
You can adjust the position ofsound stage to best
serve aparticular seat just by pressing DRV.
DRV
Press DRV to change the position of sound
stage.
Every time you press DRV, the sound stage
changes as follows.
----3
OFF Deactivated
J
DRIVERS 1For the front left seat
ml
d__l
J
DRIVERS 2For the front rightseat
PI-Z
N-l
J
DRIVERS 3For all the seats
FEZ
~
Note
When the DRV ia activated, you can not adjust
BAL (balance) and FAD (fader) mode.
You can enjoy music with strong bass sound.
P)
H-BASS
Press H-BASS to obtain powerful bass.
Each time you press H-BASS, the bass sound
level changes as follows.
[
OFF Deactivated
J
H-BASS1 LOW
~J
H-BASS2 Medium
~J
H-BASS3 High
GIZEH
11 ENGLISH

CD PLAY
321
1
2
3
Press OPEN to open the front psnel
and insert aCD.
Cloee the front panel and press CD.
CD play starts and the track number and
elapsed playing time appear.
CDindicator
TracknumberJ~Elapsedplaying
time
Adjust the volume with i- or -.
Notes
●IfaCD iealready inserted, press CD to start CD
play.
●Be sure to close the front panel after inserting or
ejecting aCD.
ti PM INT REP RANDOM
Press these buttons to operate CD play.
‘Press ITo
&Load or eject adisc.
MSkip to ths next track with ashort press
(for less than 0.5 seconds).
Each extra press skips forward one
extra track.
To search forward rapidly, press and
hold EM down until the desired part is
played, then release it.
wRestari the track currently in play with a
short press (for less than 0.5 seconds).
Each extra press skips backward one
extra track,
To search backward rapidly, press and
hold Wdown until the desired pari ie
Dlaved,then release it.
●You can neither inserf nor eject adisc when the
unit is not turned on.
~Smaller 3-inch (8cm) CDs can not be played on
this unit. And do not use an adaptor as it may
cause malfunctioning.
~,The CD play starts from the first track on the disc
only when inserting adisc. Inother cases (when
switching from the radio operation or turning on
the unit), the CD play starts from the beginning
of the track being played when the CD play has
stopped.
oA&,c can be inserted by putting it into the disc
compartment slot, and either pushing it lightly
with fingers or pressing =.
ENGLISH 12

CD PLAY CD CHANGER PLAY
Press INT during CD play.
The “SCAN indication lights up and the first 10
seconds of all the tracks on the disc are played in
order.
When the desired track isfound, press lNTagain.
The unit returns to the normal CD play.
You can play CDs with this unit by connecting the
optional AIWA ADC-M55, ADC-M35 compact
disc changer, Make sure that the disc magazine
loaded with the discs isinserted inthe connected
CD changer.
To install the unit, refer tothe separate Installation
and Connections Manual.
21
Press REP during CD play.
The “REPEAT indication lights up and the
currently selected track is played repeatedly.
Press REP again to deactivate Repeat play.
Notes
●If Repeat play is not activated, all the tracks on
the disc are played repeatedly.
●One disc repeat (REP 1)is anormally function
of CD changers, if you press REP 1or not, one
cfkc repeat function is always activated.
Press RANDOM during CD play.
The’’RANDOM indication Iightsupandthetracks
on the disc are played randomly,
Press RANDOM again to deactivate Random
play.
Note
During Random play, even If -is pressed
repeatedly, the track currently in play isrestarted.
Press CD CH to start playing from disc 1.
The disc and track numbers appear.
CDchangeroperationindicator
m
DISCnumber Tracknumber
Adjust the volume with +/-.
PWR BAND CH
WPM INT REP REP1 DISCY/A
To switchmodes
●To turn the unit off, press PWR.
●Even if the unit is in Radio or CD Play mode,
pressing CD CH switches the unit to CDchanger
Play mode.
●Ifyou wish to switch to another mode, press the
following buttons.
-Pressing CD switches the unit to CD Play
mode.
-Pressing BAND switches the unit to Radio
mode.
13 ENGLISH

To skiptracks
Buttons Press” Press and hold
wSkips to the next Advances
track rapidly
Releases to
resume play
wSkips back to Reverses
the beginning of rapidly
the current track Releases to
resume play
*Press for less than 0.5 second.
TO skip diSCS
To skip to the next disc, press DISC A.
To skip to the previous disc, press DISC Y
To play other disc
To stari playing the previous disc in the disc
magazine, press DISC V.
To start playing the next disc, ”press
DISC A. The number of the disc (1.45)appears.
Note
You can not activate Random play function with
the optional CD changer by pressing RANDOM.
This function is designed only for the stereo car
CD receiver itself.
To repeat the current track, press REP (the
“REPEAT” indication appears).
To repeat the current disc, press REP 1.
To deactivate either mode, press the same button
again.
Press INT. (The “SCAN indication appears.)
The first 10 seconds of each track on all the discs
in the disc magazine will be played in sequence.
To deactivate Intro play, press INT again.
CONNECTING A
FWRTABLE CASSETTE
PLAYER OR OTHER
EQUIPMENT
1
1Connect aportablecaaaette player,etc.
via the TAPE IN jack (3,5-mm dia.) on
the unit.
2Press PWR to Iiaten to the connectad
equipment,
The ‘TAPE IN’ indication appears.
●lFor further information on the portable cassette
Iplayer, etc., refer to the operating instructions
for the equipment.
Notes
.Connecting aplug to the TAPE IN jack
deactivates Radio, CD play and CD changer
Play mode and activates TAPE IN mode.
Disconnecting the plug deactivates TAPE IN
mode and returns the unit to its former status.
●Whenthetimeris activated (page 10),connecting
aplug to the TAPE INjack does not switch the
unit to TAPE IN mode. Press CD, CD CH, or
BAND before connecting the plug to the TAPE
IN jack.
Note
By pressing one of the following buttons, you can
deactivate Repeat play and Intro play DISC T,
DISC A, W, W, INT, REP, REP 1, PWR.
ENGLISH 14

SETTING THE BEEP TONE
The unit is preset at the factory to beep each time
you press any button on the front panel except
OPEN. You can stop beeping by following the
procedure below.
1
2
Press and hold down 1and 4at the
same time while the unit ie turned on.
The “BEEP ON or “BEEP OFF indication
alternately appears in the display window.
Reieaaethebuttons when the indication
of adesired beep tone mode appears.
The indication returns to the current source
mode and the selected beep tone mode is
activated.
MAINTENANCE
Cleaning thefront panei
When the front panel is soiled, wipe the surface
of the panel with adry and soft cloth.
Cieaning the connector
The connector on the reverse side of the front ,
panel needs to be cleaned occasionally, Wtpe
the surface of the connector with acotton swab
slightly moistened with alcohol.
fl o
II n
“
15 ENGLISH

TROUBLESHOOTING
In the following cases, the corresponding error code indicator appears.
InternalCD player:
Error code
ERROR03
cause ~
Thedisccannotbereadproperly. Thediscmaybedamagedordirty. Insert
CD Change~
Error code Cause Solution
ERROR01 Thediscmagazineis not properlyIneerfed in Re-insert the magszine. Refer to the
the compect disc changer. instruction manual of the compact disc
changer.
ERROR 02 No discs are loaded into the diet magazine. Ineert diets properly. Refer to the instruction
manual of the compact disc changer.
ERROR 03 Focus error. Check that the dfece are loaded properly into
the disc magazine (right side up, etc.)
ERROR 04 Problem with the compaot disc changer. Reset the unit by pressing the reset button. If
this does not correct the problem, consult an
AIWA service center.
ERROR 05 The compact disc changer is overheated. Allow the changer to cool off by moving the
vehicle out of direct eunlight.
Reset button
The reset button is visible when you detach the
front panel. Try pressing this button if aCD does
not operate properly. When you press this button,
use the tip of apointed object such as apencil or
toothpick.
Note that the memory contents, however, will be
erased by preesing this button.
Reset button
ENGLISH 16

SPECIFICATIONS
RADIO SECTION
(FM)
Frequency Range 87.5 MHz-108 MHz
(lOo-kHz steps)
87.5 MHz-108 MHz
Y-B; steps)
Usable Sensitivity
50 dB Quieting Sensifivi~:
17,2 dBf
IF Rejection 80 dB
Frequency Response: 30 Hz-15,000 Hz
SIN Rstio 63 dB
Stereo Separation: 35 dB at 1kHz
Alternste Channel Selectivity
70 dB
Capture Ratio 3dB
(AM)
Frequency I%nge 530 kHz-1 ,710 kHz
(10-kHz steps)
531 kHz-1 ,802 kHz
(9-kHz steps)
Usable Sanaitivity 30 pV (3o riB)
CD SECTION
Frequency Responee: 17 Hz-20 kHz +0/4 dB
Dynamic Range More than 80 dB
Chsnnel Separation: More than 65 dB
SIN Ratio More than 85 dB
Wow/Flutfec Unmeasurable
AUOIO SECTION
Max. Power Output: 40 Wx4channels
TAPE IN input
Input sensitivity (load Impedance)
TAPE IN: 500 mV (10 kfl)
GENERAL
Power-Supply Voltage 14.4 V(11 to 18 Vallowable),
DC, .eearive ‘ground
Loadimpedance 4Q
ToneControh Baes*lOdBat100Hz
Treble*10dB at 10kHz
PreampOutputVoltage(loadimpedance):
2.2V(10kfl)
Installation size 182 (W) x53 (H) x155 (D) mm
(7i/, (w) ~2i/8 (H) x
6%1(D) inchee)
Acceaaory suppfied: Carrying case (1)
●Specifications and external atmearance are
subject to change without notice due to product
improvement.
.
~7 ENGLISH


88-KC4-901 -01
980122BTM-OX Printed in China AIWA CO.,LTD.
This manual suits for next models
3
Table of contents
Other Aiwa Car Receiver manuals

Aiwa
Aiwa CT-X411YU User manual

Aiwa
Aiwa NSX-SZ30 User manual

Aiwa
Aiwa CX-JS77 User manual

Aiwa
Aiwa NSX-BL14 User manual

Aiwa
Aiwa CT-FX5300M YL User manual

Aiwa
Aiwa CDC-X2670 User manual

Aiwa
Aiwa CDC-X227 YZ User manual

Aiwa
Aiwa CDC-X927M YUC User manual

Aiwa
Aiwa CDC-X447M User manual

Aiwa
Aiwa NSX-A909 User manual