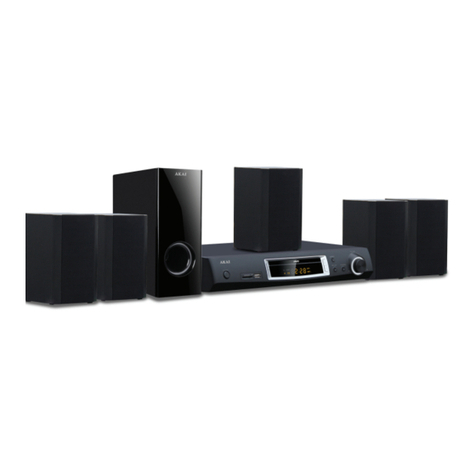
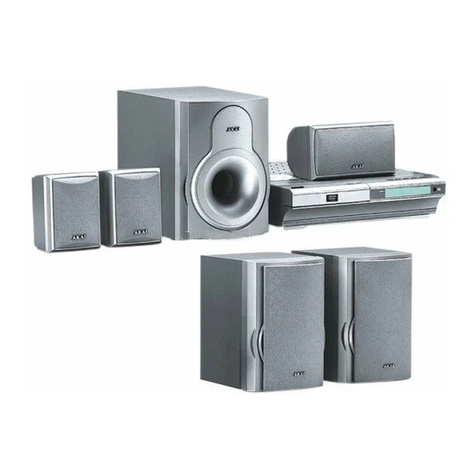
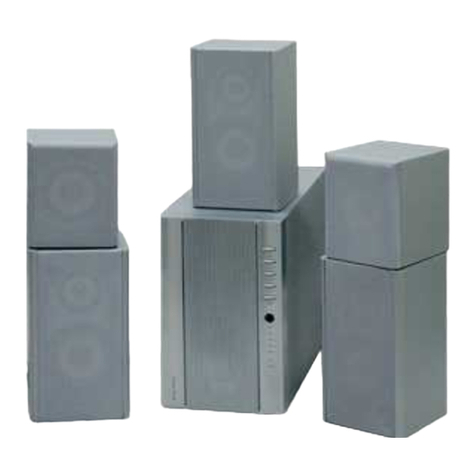
Akai KHT-S558 User manual

KHT-S558
5.1 Channel
DVD Home Theatre System
Instruction Manual

2
1 Power
2 Number keys
3 10+
4 0 /10
5 Go To
6 Program
7 Stop
8 Source
9 Menu / PBC
10 Navigation (arrow) buttons
11 Enter
12 Setup
13 DVD/USB
14 Search
15 Subtitle
16 Angle
17 CEN - / + (Centre)
18 SW - / + (Subwoofer)
19 Mute
20 Open / Close
21 CH -
22 CH +
23 FF -
24 FF +
25 VOL -
26 VOL +
27 Copy
28 Play / Pause
29 Title
30 N/P
31 Language
32 Repeat
33 Slow
34 OSD
35 SUR - / + (Surround)
36 Front - / +
Remote Control
19 20
21
22
23
24
5
25
26
27
28
29
30
32
31
34
33
35
3618
17
16
15
14
13
12
11
10
9
8
6
7
4
2
3
1

3
Contents
Remote Control i
Warranty Details 1
Welcome 2
General Safety Instructions 3
Product Overview 7
Getting Started 9
Instructions 12
FAQs 27
Other Useful Information 28
Repair and Refurbished Goods or Parts Notice 29

4
General Safety Instructions
Read this manual thoroughly before rst use and keep it in a safe place for future
reference, along with the warranty card, purchase receipt and carton. The safety
precautions enclosed herein reduce the risk of re, electric shock and injury when
correctly adhered to. Follow all instructions and take notice of all warnings to reduce
the risk of re or electric shock.
This symbol indicates there are dangerous voltage and laser beams
within the product housing, which may have sucient magnitude
to constitute a risk of electric shock if not handled correctly. Do not
open the housing at any time.
DO NOT OPEN
LASER RADIATION WHEN
OPEN. DO NOT STARE
INTO BEAM
RISK OF ELECTRIC SHOCK
Danger! Caution! This symbol alerts you that there is dangerous
voltage inside. To prevent electric shock, do not open the enclosure. Do
not expose it to rain or moisture.
Important! This symbol alerts you to read and observe important
warnings and instructions on the unit or in this manual.
This symbol for CLASS II (Double Insulation) indicates that the
equipment has been designed with double insulation surrounding
live parts.
WARNING!
This product utilises a Class 1 laser to read discs. This product is
equipped with safety switches to avoid exposure when the disc
door is open and the safety interlocks are defeated. Invisible laser
radiation is present when the product's lid is open and the system’s
interlock has failed or been defeated. It is very important that you
avoid direct exposure to the laser beam at all times. Do not stare
into the beam or blindness may result! Do not attempt to defeat or
bypass the safety switches!

5
General Safety Instructions (Cont.)
Installation
Location: When installing the unit, make sure to place it:
• In a well ventilated area. Do not build it into a frame.
• Away from heat sources, radiators or other products that produce heat.
• Away from areas with high temperatures, high humidity or direct sunlight.
• Away from excess dirt and dust.
• Away from open windows and any place where water may get into the unit.
• Disturbance: When you place this unit near a TV, radio or VCR, the playback
picture quality may deteriorate and the sound may be distorted. To avoid these
problems, place the unit away from these appliances.
• Power connection: This equipment can only be disconnected from the power
supply by unplugging it from the mains socket. Make sure the mains socket is
readily accessible at all times.
Electrical safety and cord handling
• Protect from moisture: Do not expose this equipment, the power supply cord
and plug to rain or moisture; do not use it anywhere near water or where water
splashes or drips; do not touch the power plug with wet hands.
• Do not open: To prevent contact with high voltage components inside, do not
attempt to open the equipment. Do not repair the unit yourself; there are no
user-serviceable parts inside. Only have it serviced by qualied personnel.
• Plug replacement: When replacing the unit’s power plug or cord, the replacement
must be exactly the same or one recommended by the manufacturer. Do not
replace the plug or cord yourself.
• Voltage: Before installing this equipment, make sure your outlet voltage
corresponds to the voltage stated on the appliance rating label.
Cord and plug: Only use this equipment with the cord and plug supplied. Align
the plug properly and insert it fully. Do not overload the power outlet.
• Damaged cord: When the power cord is damaged, it must be replaced by the
manufacturer or similarly qualied personnel in order to avoid a hazard.
• Protect the power cord: Do not let the cord hang over the edge of a table or
counter, or touch any hot surface. Do not allow anything to rest on or roll over the
power cord. Run any cords so no one steps on or trips over them. Do not run the
cord near heat-producing appliances such as radiators or stoves.
• Lightning storms: Unplug this equipment during lightning storms.
• Disconnect: Unplug the unit when it is not going to be used for a while. Grip the
plug when disconnecting, do not pull the cord. (We recommend that you switch
the unit on and use it occasionally, as it may not function properly when it is not
going to be used for a long period.)
6
General Safety Instructions (Cont.)
Moisture condensation
The unit may suer from condensation in the following situations:
• When you take the unit directly from a cold to a warm place, and vice versa.
• When you use the unit in a room where you just turned on a heater, or where cold
air from an air conditioner is directed on to the unit.
• When you use the unit in hot and humid surrounds just after having moved it
from an air conditioned room.
• When the room is steamy or damp.
If condensation exists, the unit will not operate properly. Remove any disc,
plug the power cord into the wall socket, turn on the unit and leave it for two
to three hours. After that time, the unit will have warmed up and any moisture
will have evaporated. Keeping the unit connected to the wall socket will keep
moisture condensation problems to a minimum.
Disc protection
• Do not touch the playback side of the disc.
• Do not attach tape or paper to the disc.
• Fingerprints and dust on the disc cause picture and sound deterioration.
Always keep the disc clean.
• Wipe the disc from the centre outwards with a soft cloth. If you cannot
wipe off the dust with a soft cloth, wipe the disc lightly with a slightly
moistened soft cloth and finish with a dry cloth. Do not use any type of
solvent, commercially available benzene or antistatic spray for vinyl LPs, as
these may damage the discs.
• Do not store discs in a place subject to direct sunlight or near heat source.
• Do not store discs in a place subject to moisture, such as a bathroom or
near a humidifier.
• Store discs vertically in a case. Stacking discs or placing objects on discs
outside their case may cause warping.

7
Product Overview
1. STANDBY
2. NEXT ( CH+)
3. PREV ( CH-)
4. SOURCE
5. DVD TRAY
6. LED DISPLAY
7. STOP
8. PLAY/PAUSE
9. OPEN/CLOSE
10. VOLUME CONTROL
11. USB PORT
1. R/L AUDIO OUTPUT
2. COAXIAL OUTPUT
3. VIDEO OUTPUT
4. COMPONENT OUTPUT
5. S-VIDEO OUTPUT
6. FM ANTENNA
7. 5.1CH SPEAKERS OUTPUT
8. AC POWER CORD
9. POWER SWITCH
Front Panel
Rear Panel

8
Getting Started
Loading batteries
Open the cover at the back of the remote control unit. Insert two AAA size batteries
following the polarity (+ / -) markings. Place the cover back into position.
Precautions for batteries
• CAUTION: Danger of explosion! Ensure to insert batteries according to the
polarity markings inside the battery compartment.
• Replace all batteries at the same time with fresh batteries of the same size and
type. Clean the battery and device contacts prior to installation.
• Do not mix old and new batteries, dierent types of battery (alkaline, carbon-
zinc or rechargeable), or rechargeable batteries of dierent capacities. Mixing
dierent types of battery could cause leakage or rupture.
• Note that there are chargeable and nonchargeable batteries. Do not attempt to
charge nonchargeable batteries.
• Remove the batteries when the unit is not in use for a long time to avoid leakage.
Batteries can leak chemicals that can damage electronic parts.
• Dispose of batteries promptly and properly, observing any local hazardous waste
regulations. Do not burn or bury them.
• Keep batteries away from children. If you suspect a battery may have been
swallowed, seek immediate medical assistance.
Using the remote control
• When using the remote control, aim it within a 30º window at the remote control
sensor. Make sure there are no large obstacles between the remote control and
the unit.
• Do not drop the remote control unit; do not subject it to physical shocks.
• The remote control may display erratic operation or interference when it is
exposed to bright sunlight, lightning or uorescent lighting. In such a case, move
the unit away from the cause of the interference.
• Keep the remote control dry. Wetting it may cause malfunction.
• Replace the batteries when remote control operation deteriorates.
• Do not use other remote equipment when operating this remote control.

9
Installing and connecting the system
• Before installing the components of the home theatre system, and before
connecting any other components to the system, make sure the power has been
disconnected to all units.
• Audio video cables are connected according to the dierent colour identication.
They should all be connected rmly, as illustrated below.
• The speakers are connected according to the positions.
Getting Started (Cont.)
FM ANT IN
75
L
R488888
A INT

10
Getting Started (Cont.)
Preparations
• All parts of the home theatre system must be placed on a stable, at surface that
is strong enough to support the weight.
• Make sure to connect the system to a 240V~50Hz AC power supply.
• Press the POWER switch at the back of the unit and then press the STANDBY
button on the front panel.
• Press the SOURCE or DVD/USB button on the remote control to select the input
audio source.
Adjusting the volume
• Rotate the VOLUME knob on the main unit, or press the VOL+/- button on the
remote control, to adjust the volume.
NOTE: The volume level will be reset to the factory default value after restarting the
system. If a short circuit occurs on the front outputs, the machine will enter a
protect mode automatically. If this occurs, please turn the power o to check
and repair.
Mute
Press the MUTE button to mute the sound temporarily; press the MUTE button
again to restore the volume.
Adjusting the volume for the 5.1 speakers
The Front/Surround/Centre/Subwoofer volume can be adjusted using the remote
control.
• Press the FRONT+/-, SURR+/-, CEN+/- AND SW+/- buttons to change the volume
individually.

11
Instructions
DVD Playback
Starting up
• Connect the 5.1 Channel DVD Home Theatre System to your TV.
• Switch on your TV set and select the appropriate input mode.
• Plug the 5.1 Channel DVD Home Theatre System into an appropriate power
point and switch on power to the outlet.
• Switch on the POWER switch on the rear panel and then press the STANDBY
button on the front panel. The screen will display "Load" if a disc is loaded, or
“No Disc” if no disc is loaded.
• Press the OPEN/CLOSE button on the front panel of the home theatre system,
the tray will come out automatically.
• Place a disc on the tray and press the OPEN/CLOSE button to close the tray. The
disc type will be shown in the upper left corner of the screen.
• After using the unit, press the POWER button on the remote control to switch
the unit into standby mode.
Functions
• Unless indicated otherwise, use the remote control to operate the functions
described throughout this manual.
• All functions can be accessed/operated with the remote control buttons, some
can also be accessed from the front panel of the system. The function of the
remote control buttons is the same as the corresponding buttons on the front
panel of the home theatre system.
• See the following pages for detailed information about these functions.
Playing a disc
Once it has read the disc, the machine will start playing automatically.
• If the disc is in DVD format, the machine will show the DVD or title menu.
• If the disc is in VCD 2.0 format, the machine will active PBC playback
control status.
• If the disc is in CD format, the machine will start playing it in sequence.
NOTE: If the picture does not cover the entire screen or there is no colour
display, press the N/P button and change the play mode.

12
Instructions (Cont.)
Basic playback controls
• Press the PLAY/PAUSE button to play or pause the disc.
• Press the CH- button to skip backward to the previous title/chapter.
• Press the CH+ button to skip forward to the next title/chapter.
• Press the FF- button to fast reverse the disc 2x, 4x, 8x, 16x, 32x or back to
normal playback speed.
• Press the FF+ button to fast forward the disc 2x, 4x, 8x, 16x, 32x or back to
normal playback speed.
• Press the STOP button ONCE to stop the disc playing; press the PLAY/PAUSE
button to resume playback from the last played location.
• Press the STOP button TWICE to stop playback completely.
Other functions
On-screen display (OSD)
• In DVD disc playback mode: press the OSD button on the remote control to
display title elapsed time, title remaining time, chapter elapsed time, chapter
remaining time and other information about the disc.
• In VCD disc playback mode: press the OSD button on the remote control
to display single elapsed time, single remaining time, display o and other
information about the disc.
Play mode (N/P)
Press the N/P button repeatedly to get toggle between NTSC, PAL and AUTO play
mode.
Number buttons
Press the relevant number buttons for playing favourite pictures according to their
numbers in the menu.

13
Title button
Press the TITLE button to display the title menu when watching movies/recordings
on multi-title encoded discs. (This function works only with
multi-title encoded discs.)
Menu/PBC
The MENU/PBC (Playback Control) button will return you to the main DVD playback
menu. (This function works only with multi-chapter encoded discs.)
• When playing SVCD discs, press the MENU/PBC button to display the menu
on screen. After loading the disc, the unit will enter PBC ON play mode
automatically.
• When playing VCD format discs, press the MENU/PBC button and the PBC ON
notice will appear on the screen. In this mode, the menu will display on the
screen; press the digit button to select the track directly.
Instructions (Cont.)
Subtitles
Press the SUBTITLE button to display the subtitles when watching movies/
recordings on multi-subtitle encoded discs. (This function only works with multi-
subtitle encoded discs.)
For example, to select language 1 (English) from 8 options, press the SUBTITLE
button and select “English”. If you do not want subtitles displayed, press the
SUBTITLE button repeatedly and select “Subtitle o”.
Angle
Press the ANGLE button repeatedly to view the same image from dierent angles
when watching athletic matches, concerts or theatrical programs on multi-angle
encoded discs. (This function only works with multi-angle encoded discs.)
Language
Press the LANGUAGE button to display the languages for selection when watching
movies/recordings on multi-subtitle encoded discs. (This function only works with
multi-subtitle encoded discs.)

14
Instructions (Cont.)
Insert the FM antenna cable in the FM ANT socket at the back panel of the unit.
• Press the SOURCE button to change to FM mode.
NOTE: You cannot switch to FM mode when the system is in USB mode.
Auto-searching stations
• Press the SEARCH button to automatically scan and store 20 radio stations in
preset memory.
Tuning in preset stations
• Press the CH- or CH+ button to select a preset station.
Manually searching stations
• Press the FF+ or FF- button to manually scan a radio station.
FM Radio
Preparations

15
USB Playback
This 5.1 Channel DVD Home Theatre System supports the following USB
playback multimedia formats: MP3, WMA, AVI, JPEG.
• Insert your USB device rmly into the USB port on the right side of the front
pannel.
(a) If there is no disc in the disc tray, the player will automatically play the
multimedia les from the USB device.
(b) If the player is in disc playing mode, press the DVD/USB button to switch to
USB mode.
• If the USB device contains MP3 as well as other multimedia les, the DVD Player
will give priority to MP3 les.
NOTE:
• When reading large AVI files, it may take some time to load a file.
• Using a USB device that is unsupported by this DVD Player may cause
problems with normal playback. In such a case, switch off the power, take
out the USB device and then reconnect the device and restart it.
• This unit supports USB1.1 Mass Storage Class Bulk Only Transport.
Other USB devices may not work. Always check the compatibility before
using a USB device.
Instructions (Cont.)

16
Instructions (Cont.)
In CD playback mode, press the COPY button on the remote control to
display the CD ripping interface. Use the UP, DOWN, LEFT, RIGHT arrow
buttons to move around on the screen and select the options. Then click on
Start to start ripping.
Audio CD ripping
• NOTE: The CD, MP3 disc must be in good condition, have no scratches or marks
and should play smoothly.
• NOTE: The destination USB device must be compatible with the DVD Player and
have enough space.
• In the OPTIONS section, you can select a different speed or bitrate, or add or
remove ID3 data.
• In the TRACKS section you can view the length of the tracks. Press the arrow
buttons to select a track, then press ENTER to confirm your selection.
• To select (or ‘unselect’) all tracks, highlight SELECT ALL or SELECT NONE
and press the ENTER button.
• Once all the tracks are selected, highlight START and press ENTER to start
the process. The screen will display the progress.
• At the end of the process, the screen will display RIPPING COMPLETE (see
below). Use the DOWN arrow button to select QUIT, then press ENTER to
exit.

17
Setup Menu
Setup options for your General Setup, Audio Setup, Dolby Setup, Video Setup and
Preferences can be accessed from the main setup menu. Available options for each
are listed on the following pages. The general procedure for selecting setup options
is as follows:
• Press the SETUP button on the remote control to display the main menu.
• Use the UP/DOWN arrow buttons to move up or down in the menu and select
an item. Then press the ENTER button to conrm your selection and enter the
submenu.
• Use the LEFT/RIGHT arrow buttons to move the pointer and the
UP/DOWN arrow buttons to select the desired option desired, then
press the ENTER button to conrm your selection.
• Press the LEFT arrow button to return to the last menu. The setup options for
this function are now set.
• To end the setup, press the SETUP button again.
General setup
Under this menu you can select options for your TV format, output options,
video and DVD functions.
TV display
Instructions (Cont.)
Use this submenu setting to select the aspect ratio.
NOTE:
• Irrespective of what screen format you have selected, if your screen
displays in 4:3 format, the picture will be shown in that format anyway.
• For DVDs, the screen format is convertible.
• If your screen displays in 4:3 format, when a DVD with 16:9 display
format is played back, the picture will be flattened.

18
Angle mark
Press the ANGLE button repeatedly to view the same image from dierent angles
when watching sport, concerts or theatrical programs on multi-angle encoded
discs. This function only works with multi-angle encoded discs.
OSD language
Use this option to set the language of the on-screen display and setup menu. You
can choose from eight dierent languages.
Closed captions
Closed captions allows you to activate subtitles while watching normal television
programs that provide it.
Screen saver
Use this option to turn the screen saver ON or OFF so it will or will not activate
when the unit is not in use.
HDCD
This option lets you set HDCD to OFF, 1x or 2x to switch the CD mode.
Last memory
Set this option to ON if you want DVD playback to start from the previously
stopped position.
Instructions (Cont.)
Audio setup

19
Instructions (Cont.)
Speaker setup
Downmix setup
Select the speakers setup between to LT/RT STEREO, 3D SURROUND 5.1CH.
Front speaker
Here you can set the front speakers' volume: Large, Small.
Centre speaker
Here you can set the centre speaker's volume: Large, Small or O.
Rear speaker
Here you can set the rear speakers' volume: Large, Small or O.
Subwoofer speaker
Here you can set the subwoofer speaker volume: On or O.
SPDIF
SPDIF output
SPDIF OFF: Turns o the coaxial digital audio signal.
SPDIF/RAW or SPDIF/PCM: Outputs digital audio signal to a Dolby Digital/DTS
decoder through the coaxial socket.

20
Instructions (Cont.)
Equaliser
EQ type
Here you can set the audio output to simulate the various kinds of music eect.
Bass boost
Here you can enhance the bass degree.
Super bass
Here you can enhance the super bass degree.
Treble boost
Here you can enhance the treble boost degree.
Table of contents
Other Akai Home Theater System manuals

Akai
Akai AHC1400 User manual

Akai
Akai DVR-3400SS User manual

Akai
Akai DV R3300SS User manual

Akai
Akai DV-R6000DSS User manual

Akai
Akai DV-R4045DSS User manual

Akai
Akai DVR4200SS User manual

Akai
Akai AHC 1500 User manual

Akai
Akai HTA-1150 User manual

Akai
Akai DV-R3110SS User manual

Akai
Akai DV-R4040VSMK User manual

Akai
Akai AHC1000 User manual

Akai
Akai SS007A-2011CF User manual

Akai
Akai DV-R3500SS User manual

Akai
Akai DV-R4030VSMK Operating and installation instructions

Akai
Akai DVR4200SS User manual

Akai
Akai DV-R4050-VSMK User manual

Akai
Akai DVR-3400SS User manual

Akai
Akai DV-R4000SS User manual

Akai
Akai HTA-1150 User manual

Akai
Akai AHC1200 User manual