7
CORRECTIONS
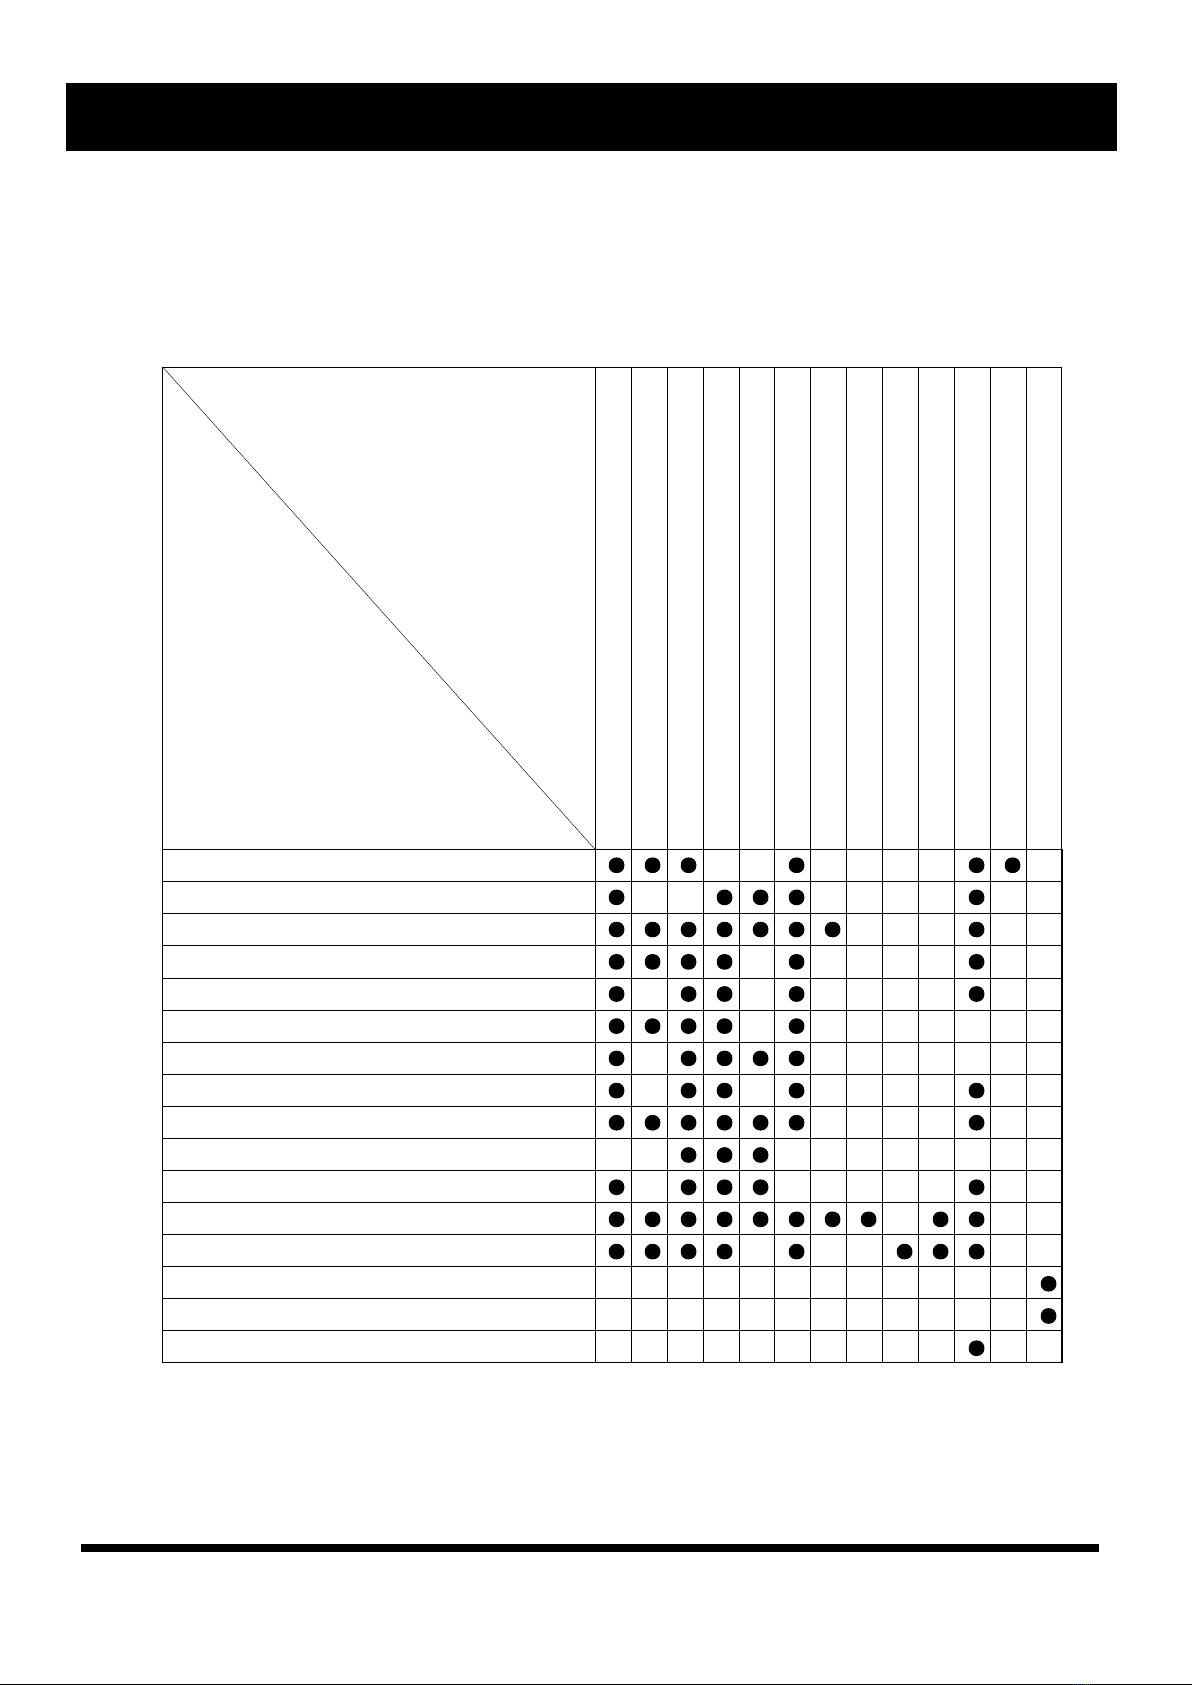
Check to make sure that the power connection is correct
NO picture
Make sure the connection between the player and the TV is correct
Make sure that the TV is in good working condition
Check to make sure that the power connection is correct
No sound
Make sure the connections between the player and other devices are correct
Make sure that the TV and AMP are in good wor ki ng con dition and prope rly set up
Check that the disc is properly inserted
Fails to play
Fails to respond to
remote control
Picture disturbance
Fail s to work with keys
Clean the disc
Remove obstacles between remote control and unit.
Aim remote control at the sensor on the front panel
Check batteries and replace them if necessary.
Check the disc for dirt and scratches. Clean or replace disc
Shut down the unit, wait ten seconds and restart the unit
Power surges or brown outs or other electrical phenomena. Shut down the
unit, wait ten seconds restart the unit.
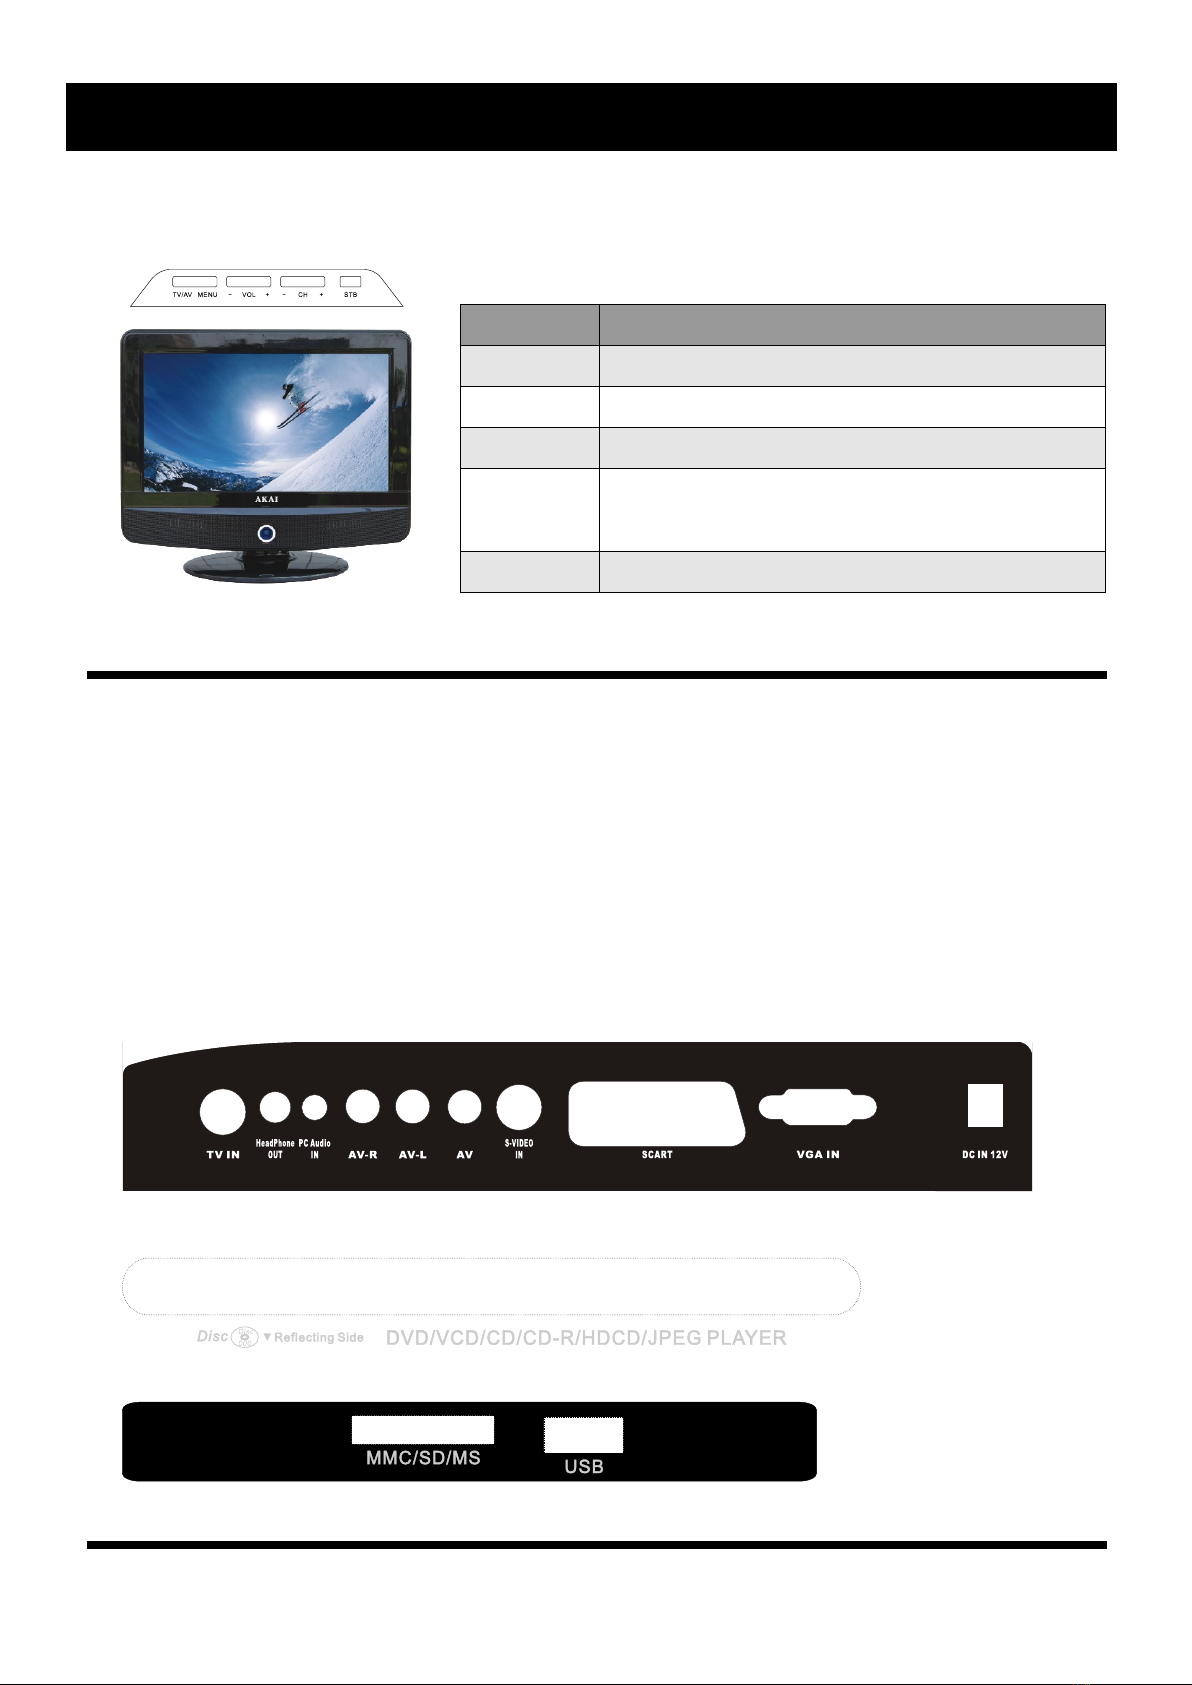
Your DVD player is a basic part of your home theater. The technical features on this machine are far
superior to any previous
Audio-visual equipment. This completely new digital technology has compressed the audio visual
effect of cinema into a
12cm-diameter disc, which is the same size as a CD, The Dolby digital out put in particular can provide
a prominent digital surround effect. It is also compatible with existing CD,CD-R and CD-RW(It is not
compatible with some CD-RW discs).
SYMPTOMS and CORRECTIONS
SYMPTOMS
NO POWER
SYMPTOMS and CORRECTIONS for DVD PLAYER