Akai VS-G205 User manual

AKAI
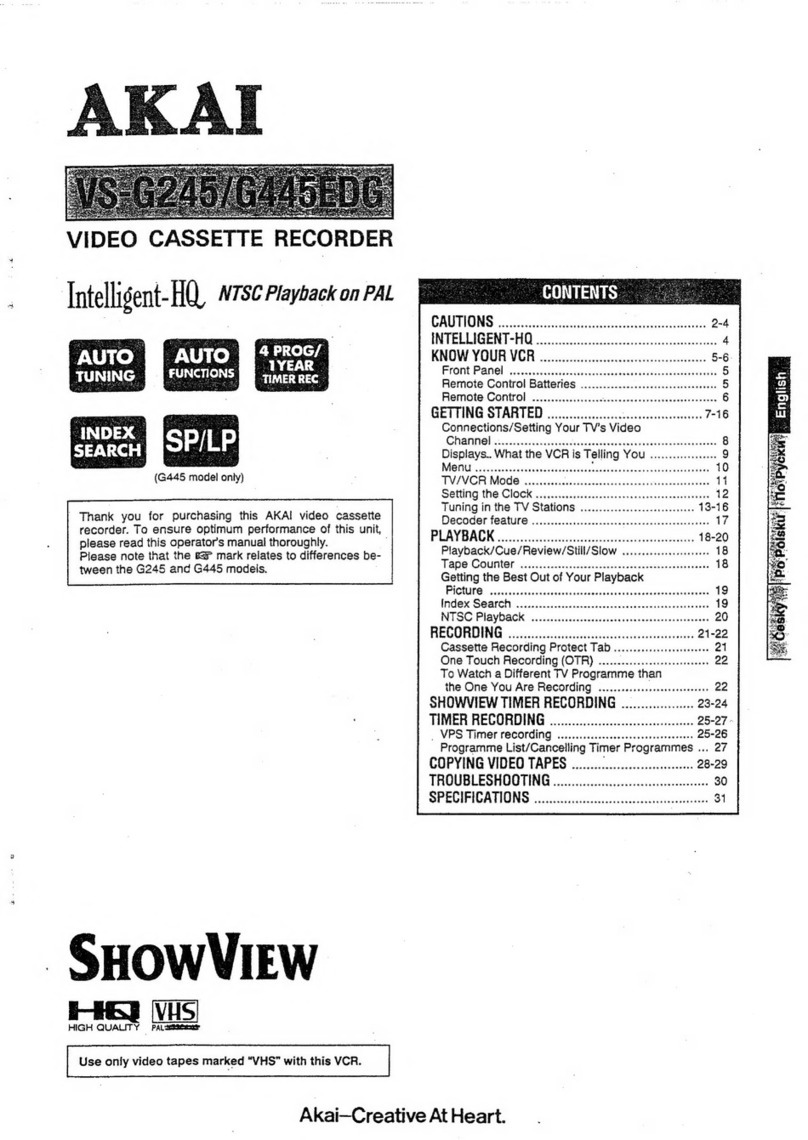
VS-G205/VS-G211
VS-G215EOH
Thank
you
for
purchasing
this
AKAI
video
cassette
recorder.
To
ensure
optimum
performance
of
this
unit,
please
read
this
operator’s
manual
thoroughly.
Operator’s
Manual
.......................
1-32
863
WHS!
SHowVIEW
Akai—Creative
At
Heart.

Table
of
contents
POAturess
oho.
cscsssccis
casetes
ath
obendesechavceveus
ulate
herceccdhcvts
2
Warnings
and
precautions
.........................
savesoadestasa
3
Controls
&
terminals
.................:cccccscccsccccssessesssecses
4-5
Remote
Control
...............ccccsscsccscccsesscessscssssceeseenes
6-9
Loading
the
batteries
...............cccecscssssssceseeseseeees
8
Comme
ction
........
2.2...
cece
cccsessesesectersecccsccevevsseesseees
10
The
Video
tape
.............c..cccccecececsccceseeseeeeesacensseereses
11
Inserting/Ejecting
a
video
tape
..................ccssseeeeseees
11
FL
(fluorescent)
display
....................cccccssssesssseeeeees
12
Video
channel.
::
#505.
0sccsissivcssseseaSeascceceivcissvivocscvvecees
13
Setting
the
Clock
.20.............cccsesesssecssesecesesesesenenes
14-16
Presetting
TV
stations
..................
ébvewebsapenesedeseees
17-18
“PHAYD
ACK:
«oi
cisecesessissese
ve
vvosevsvueveres
Secoeecnesieds
diaveneds
19-20
Still
picture
and
frame
advance
.............ccccceceeseceeeene
19
Tracking/picture/stability
adjustment
...................0006
19
Multi
speed
playback
.................ccccccccsssscceesevecceesees
QUICK
FINED...
ecccstessseseessesssssccnrccececsesssesancaueens
INDOX.
SALON:
oa
ics
iseccsvessecetecceevesscteretswotesctecassdesseans
Recording
TV
programmes.
...................sssssesseeeees
INDOX
CODOS
's2vssccisccascsettesdcsncdeassostcasccvsecenedecsvesoese
SHOWVIEW
timer
recording
..................::cccessceees
-
Timer
reCording
............cccccssessssssscsseseessssesesees
Copying
video
tapes
...............:......
The
Intelligent-HQ
(I-HQ)
feature
....
Troubleshooting
..................:.ccscceeeeeeeeeeceeeeeseeeeeesenss
Specifications
.................ccccscssesersscsensssccsasscneneaseces
Maintenance
..............cescceescevsencscncsesausucecsecneseesenes
Features
SHOWVIEW
timer
recording
.
Intelligent-HQ
system
Centre
cassette
loading
Quick
servo
drive
Automatic
tuning
Auto
tracking
Programmable
timer
eal
(4-programme/1-year
timer)
One
Touch
Recording
Quick
finder
Forward
and
reverse
multi-speed.
playback
LCD
infrared
remote
control
Auto
head
cleaning
PANUS
Colontsi
irom
istsi
blasts)
Auto
power
on
The
VCR
power
is
automatically
turned
on
when
the
tape
is
in-
serted.
Auto
rewind
’
The
video
tape
is
automatically
rewound
when
the
end
of
the
tape
is
reached
during
the
play,
recording
or
quick
finder
for-
.
’
ward
mode.
Auto
tape
reject
If
a
video
tape
with
its
recording
defeat
tab
removedis
loaded,
the
VCR
will
automatically
ejectit
when
the
record
or
timer
but-
ton
is
pressed.
Auto
play
If
the
video
tape’s
recording
defeat
tab
has
been
removed,
playback
will
begin
automatically
when
the
tape
is
inserted
into
the
VCR.
Power
off
eject
Even
when
the
VCR's power
is
off,
pressing
the
eject
button
will
turn
the
power
on
and
eject
the
tape.
Once
ejected,
i
power
will
be
turned
off
automatically.
Auto
head
cleaning
When
a
tape
is
loaded
or
ejected
the
VCR
video
head
drum
is
cleaned
automatically.

Warnings
and
precautions
Niv/atei@n
colem-)avelelcem.
date)
mi
come)ce)
(reat
WARNING
|
To
prevent
fire
or
shock
hazard,
do
not
expose
this
ap-
pliance
to
rain
or
moisture.
yourself
e
Never
touch
the
power
cord’s
plug
with
wet
hands.
e
Always
pull
the
power
cord
out
by
the
plug
and
never
by
the
cord.
©
Only
let
a
qualified
professional
repair
or
reassemble
the
1-En
Power
requirements
Power
requirements
for
electrical
appliances
differ
from
area
to
area.
Please
ensure
that
your
appliance
meets
the
Power
requirements
in
your
area.
The
operating
voltage
of
this
appliance
is
fixed
at
AC
220-
230
V,
50
Hz.
2-En
This
equipment
conforms
to
NO.
82/499/EEC,
87/308/
EEC
standards.
3A-En
This
appliance
is
not
equipped
with
a
main
power
switch.
Even
when
the
appliance
is
turned
off,
the
power
supply
is
not
completely
turned
off
when
the
power
cord
is
plugged
in.
Pull
out
the
power
cord
when
not
using
the
appliance
for
long
periods.
4-En
Power
failure
backup
This
VCR
utilizes
a
back-up
capacitor
for
possible
power
failure.
The
back-up
capacitor
prevents
clock
stoppage
and
loss
of
programme
information
(for
timer-controlled
recording)
in
the
event
of
a
power
failure
lasting
up
to
60
minutes.
(When
this
VCRis
first
plugged
in,
approximately
60
minutes
are
required
to
charge
the
back-up
capacitor
in
order
to
provide
60.minutes
of
back-up
time).
Power
failure
indication
If
a
power
failure
of
more
than
60
minutes
has
occurred
*.-:-="
will
be
flashing
on
the
FL
display.
In
this
case
the
clock
must
be
re-set.
Refer
to
the
“Setting
the
clock”
sec-
tion.
Use
only
video
tapes
marked
“VHS”
with
this
VCR.
video
cassette
recorder.
An
inexperienced
person
might
touch
the
internal
parts
and
get
a
serious
electric
shock.
e
Never
put
anything,
especially
metal,
into
the
video
cas-
sette
recorder.
Protect
the
VCR
too
Use
a
household
AC
power
source
only.
Never
use
a
DC
power
source.
Do
not
place
anything
heavy
on
top
of
the
VCR.
If
water
is
spilled
on
the
VCR,
disconnect
the
power
cord
at
once
and
consult
your
dealer.
Make
sure
that
the
VCR
is
well
ventilated,
and
do
not
place
anything
on
top
of
the
ventilation
holes.
To
avoid
damage
to
the
internal
circuits
and
the
external
surface,
keep
the
VCR
away
from
heat
(stoves,
direct
sun-
light,
etc.).
Avoid
using
aerosol
sprays
near
the
VCR
as
this
could
damage
the
finish
or
cause
sudden
ignition
of
the
spray.
To
avoid
damaging
the
finish,
never
use
paint
thinner
or
other
similar
chemicals
to
clean
the
VCR.
Place
the
VCR
on
a
fiat
and
solid
surface.
if
you
do
not
plan
to
use
the
VCR
for
a
long
period
of
time,
disconnect
the
power
cord.
Avoid
using
the
VCR
in
extremely
hot,
cold,
humid
or
dusty
places.
Avoid
using
the
VCR
near
appliances
generating
strong
magnetic
fields.
Avoid
using
the
VCR
near
fluorescent
lamps
as
this
may
shorten
the
operating
range
of
the
remote
control
unit.
i
day-lamegzlaryerelatiae|
.
_@
Avoid
violent
shocks
to
the
VCR
during
packing
and
trans-
portation.
©
Before
packing,
remove
the
video
tape
from
the
VCR.
Avoid
moisture
condensation
Moving
the
video
cassette
recorder
from
a
cold
place
toa
warm
place
can
cause
dew
condensation
on
the
drum
and
the
video
heads
inside
the
unit.
If
playback
is
carried
outin
this
state,
the
heads
may
become
dirty
and
the
tape
may
be
damaged.
To
prevent
this
from
occurring,
the
power
plug
must
be
plugged
in
for
about
one
hour
with
the
POWER
button
off,
before
playback
or
recording
of
a
video
cassette
tape.
This
is
particularly
important
when
a
video
cassette
is
in-
serted
for
the
first
time
after
purchase
of
the
video
cas-
sette
recorder.


Controls
&
terminals
Front
panel
A
Cassette
loading
slot
Load
the
VHS
video
tape
here.
B
FL
(Fluorescent)
display
Provides
visual
reference
of
the
VCR's
operating
modes.
C
Remote
sensor
window
For
reception
of
the
remote
contro!’s
signal.
m
/
&
Stop/eject
button
.
To
stop
playback
and
eject
the
video
tape.
The
tape
can
be
ejected
even
when
the
VCR's
power
is
off.
>
Play
button
To
start
video
tape
playback.
<4
Rewind
button
Torewind
the
video
tape.
Also
to
start
reverse
quick
finder
dur-
ing
playback.
>>
Fast
forward
button
To
fast
forward
the
video
tape.
Also
to
start
forward
quick
fin-
der
during
playback.
POWER/standby
button
To
turn
the
VCR
on
or
off
(standby
mode).
PROG.(Programme)
button
To
enter
the
timer
programming
mode
and
enter
programme
data.
OK/CANCEL
button
To
confirm/cancel
preset
TV
channels,
clock
or
timer
recor-
ding
data.
CLOCK
button
To
enter
the
clock
setting
mode.
Also
to
enter
clock
data.
TIMER
button
To
set
or
cancel
the
timer
recording
mode.
CHANNEL
button
To
select
TV
channels.
I-HQ
(Intelligent-High
Quality)
button
To
improve
picture
quality
during
recording
or
playback.
REC/OTR
(Record/One
Touch
Recording)
button
To
start
recording.
Also
used
to
enter
the
OTR
mode
and
set
the
OTR
stop
time.
Rear
panel
AC
power
socket
Connect
the
provided
power
cabie
here.
RF.OUT
CH.ADJ.
(Channel
adjustment)
screw
To
adjust
the
video
channel
of
the
VCR.
RF.OUT
terminal
To
connect
the
VCR
to
the
TV’s
ANTENNA
IN
terminal.
ANT.IN
terminal
For
TV
antenna
connection.
VIDEO/AUDIO
terminal
For
connection
of
a
TV
or
second
VCR
when
using
a
video/
audio
connection
cord.
DECODER
terminal
For
connection
of
a
decoder.
The
FL
display
can
be
dimmed
or
brightened
by
re-
peatedly pressing
the
DIMMER
button
on
the
remote
control.

Remote
control
(211EOH)
A
LC
(Liquid
Crystal)
display
Displays
clock
and
Programme
data.
PROG.
(Programme)
button
For
timer
Programming,
using
the
remote
control's
LC
display.
PROG.LIST
button
To
preview
programmes
set
for
timer
recording.
1-0
buttons
To
select
TV
channels.
Also
used
for
entering
clock,
and
pro-
gramming
data.
TIMER
button
To
set
or
cancel
the
timer
recording
mode.
-
DIMMER
button
To
dim
or
brighten
the
FL.
display.
AV
(External)
button
To
set
the
VCR
to
record
from
an
external
source.
CLOCK
button
To
set
the
remote
control's
clock,
“\s
4,
<,
>
Multi
control
buttons
To
adjust
tracking,
picture
shake
and
picture
sharpness
dur-
ing
playback.
OK
button
To
confirm
data
during
clock
setting
and
timer
programming.
(3)
CANCEL
button
To
cancel
preset
TV
stations
or
Programmes
programmed
for
timer
recording.
Also
used
to
adjust
for
daylight
saving
time.
AUTO
TRACKING
button
To
correct
tracking
automatically.
PAL/MESECAM
button
Toset
the
VCRfor
PAL
or
MESECAM
recording
and
playback.
COUNTER
RESET
button
_To
reset
the
tape
counter.
POWER
ON/STANDBY
button
To
turn
the
VCR's
power
on
or
off
(standby
mode).
TV/VCR
button
To
watch
a
different
TV
Programme
than
the.one
you
are
rec-
ording.
#
Eject
button
To
eject
the
video
tape
from
the
VCR.
CHANNEL
buttons
To
select
TV
channels.
MULTI-SPEED
(+
/
-
)
buttons
To
increase
or
decrease
the
playback
speed.
bid
Still
button
To
set
the
VCR
to
the
stil!
mode
from
the
playback
mode.
<4
Index
search
reverse
button
To
start
the
reverse
index
search.
I-HQ
(Intelligent
High
Quality)
button
To
set
the
I-HQ
mode.
Pi
Index
search
forward
button
To
start
the
forward
index
search,
<<
Rewind
button
To
rewind
the
video
tape.
Also
used
to
start
reverse
quick
fin-
der
during
playback.
>
Play
button
To
start
video
tape
playback.
>
Fast
forward
button
To
fast
forward
the
video
tape.
Also
to
start
forward
quick
fin-
der
playback.
REC
(Record)
button
To
start
recording.
as
Stop
button
To
stop
the
video
tape.
PAUSE
button
To
set
the
VCR
to
the
recording
pause
mode
from
the
recor-
ding
or
stop
mode.
came
TV/VCR
=
@&
CHANNEL
t—
MULTI-SPEED
PLAY
ae
|
|
GCS
@&
AKAI
INFRARED
REMOTE
CONTROL
UNIT

Remote
control
(21
5EQOH)
AL
LC
(Liquid
Crystal)
display
Displays
clock
and
programme
data.
SHOWVIEW
button
;
To
enter
the
SHOWVIEW
timer
recording
mode.
PROG.
button
To
set
timer
programming
using
the
VCR
FL
display.
PROG.LIST
button
To
preview
programmes
set
for
timer
recording.
1-0
buttons
To
select
TV
channels.
Also
used
for
entering
clock,
SHOW-
’
VIEW
and
programming
data.
TIMER
button
To
set
or
cancel
the
timer
recording
mode.
DIMMER
button
To
dim
or
brighten
the
FL
display.
AV
(External)
button
To
set
the
VCR
to
record
from
an
external
source.
REVIEW
button
To
review
SHOWVIEW
guide
channel
numbers.
CLOCK/CH
button
To
set
the
remote
control’s
clock.
Also
to
adjust
preset
TV
channels
for
the
SHOWVIEW
mode.
“\;
4,
<,
>
Multi
contro!
buttons
To
adjust
tracking,
picture
shake
and
picture
sharpness
dur-
ing
playback.
OK
button
To
confirm
data
during
clock
setting
and
timer
programming.
(4)
CANCEL
button
To
cancel
preset
TV
stations
or
programmes
programmed
for
timer
recording.
Also
used
to
adjust
for
daylight
saving
time.
AUTO
TRACKING
button
To
correct
tracking
automatically.
PAL/MESECAM
button
Tosetthe
VCR
for
PAL
or
MESECAM
recording
and
playback.
COUNTER
RESET
button
To
reset
the
tape
counter.
POWER
ON/STANDBY
button
To
turn
the
VCR’s
power
on
or
off
(standby
mode).
TV/VCR
button
To
watch
a
different
TV
programme
than
the
one
you
are
rec-
ording.
4
Eject
button
To
eject
the
video
tape
from
the
VCR.
CHANNEL
buttons
To
select
TV
channels.
MULTI-SPEED
(+
/
-
)
buttons
To.increase
or
decrease
the
playback
speed.
P<
Still
button
To
set
the
VCR
to
the
still
mode
from
the
playback
mode.
<q
Index
search
reverse
button
To
start
the
reverse
index
search.
I-HQ
(intelligent
High
Quality)
button
To
set
the
I-HQ
mode.
P|
Index
search
forward
button
To
start
the
forward
index
search.
<<
Rewind
button
To
rewind
the
video
tape.
Also
used
to
start
reverse
quick
fin-
der
during
playback.
>
Play
button
To
start
video
tape
playback.
bP
Fast
forward
button
To
fast
forward
the
video
tape.
Also
to
start
forward
quick
fin-
der
playback.
REC
(Record)
button
To
start
recording.
ms
Stop
button
To
stop
the
video
tape.
PAUSE
button
To
set
the
VCR
to
the
recording
pause
mode
from
the
recor-
ding
or
stop
mode.
POWER
twvcR
_@
CHANNEL
Esa
@
@®
fo"
MULTI-BPEED
PLAY
—]
=o
(a)
EE
a
Eo)
AKAI
INFRARED
REMOTE
CONTROL
UNIT
SHOWVIEW
IS
A
TRADEMARK
APPLIED
FOR
BY
GEN-
STAR
DEVELOPMENT
CORP.
SHOWVIEW
SYSTEM
IS
MANUFACTURED
UNDER
LICENSE
FROM
GEMSTAR
DEVELOPMENT
CORPORATION.

‘Remote
control
LC
(Liquid
Crystal)
display
>|
onl
5
G&:33-GG:88
OO"
OW
On
Daylight
saving
time
indicator
Indicates
that
the
clock
is
set
to
the
daylight
saving
time.
@
OK
display
Appears
when
data
is
ready
to
be
transmitted
to
the
VCR.
®
Transmit
indicator
Indicates
when
data
in
the
remote
control
is
transmitted,
or
is
ready
to
be
transmitted,
to
the
VCR.
®
Data
display
All
clock
and
programming
data
is
displayed
here
(illus-
trations
are
provided
later
in
the
manual).
The
“A”
display
signifies
that
this
is
an
A
type
remote
control.
However,
this
has
no
operational
significance
with
this
VCR.
Make
your
contribution
to
protect
the
environment
Used
batteries
with
the
{SO
symbol
for
recy-
-
OY
cling
as
well
as
small
accumulators
(recharge-
ge
&
able
batteries),
mini-batteries
(cells)
and
star-
ter
batteries
should
not
be
thrown
into
the
garbage
can.
Please
leave
them
at
an
appropriate
depot.
29A-En
|
|
Moy-Cel
fate
Mm
talem
ers
eccla
(cts
Open
the
battery
compartment
cover
on
the
back
of
the
remote
contro!
(refer
to
the
illustration
below).
2
Insert
two
AA,R6,
UM-3
or
equivalent
size
baiteries
(refer
to
the
illustration
below).
Replace
the
battery
compartment
cover.
Use
new
batteries
only.
When
replacing
the
batteries,
replace
both
the
batteries
at
the
same
time.
Do
not
mix
an
old
battery
with
a
new
one.
@
When
you
do
not
plan
to
use
the
remote
control
unit
for
a
long
period
of
time,
remove
the
batteries.
e
insert
the
batteries
following
the
polarity
guides
(-
and
+)
in
the
battery
compartment.
e
Nickel
cadmium
(Ni-Cd)
batteries
are
not
recommended.
When
the
remote
control's
batteries
are
removed
or
have
tost
their
charge
(asindicated
by
LC
display
becomming
dim,
or
by
the
remote
control's
incapacity
to
transmit
data)
the
clock
will
stop
and
ail
programme
data
in
the
remote
contro!
will
be
can-
celled
after
a
short
time.
After
replacing
the
batteries,
use
the
remote
control
to
reset
the
clock
and
programme
data.
If
the
batteries
are
replaced
quickly,
after
removing
the
old
batteries,
the
clock
and
pro-
gramme
modes
may
not
be
cancelled.
While
changing
the
batteries,
do
not
press
any
of
the
remote
control
buttons.
Resetting
the
remote
control
If
the
remote
control
fails
to
operate
properly,
itcan
be
reset
by
pressing
the
reset
button,
located
inside
the
battery
compart-
ment.
When
the
reset
button
is
pressed,
all
timer
programming
and
clock
data
will
be
cancelled.
Reset
button


Connections
This
VCR
has
a
built-in
tuner
to
receive
TV
stations,
so
it
must
be
connected
to
your
TV
antenna
as
shown
below.
Basic
connection
|
Connect
the
TV
antenna
cable
to
the
VCR’s
ANT.IN
4
If
your
TV
has
a
21
pin
audio/video
socket,
connect
terminal.
an
audio/video
cable
(scart)
for
better
sound
and
i
;
2
Connect
one
end
of
the
provided
connection
cord
to
on
Deut
auc
icees
iene
andisavallabie
the
VCR’s
RF.OUT
terminal.
3
Connect
the
other
end
of
the
provided
connection
cord
to
the
TV’s
antenna
terminal.
5
Connect
the
provided
power
cable
to
the
AC
socket.
6
Connect
the
AC
power
cord
to
the
AC
outlet.
Decoder
connection
The
rear
panel
of
your
decoder
may
differ
from
the
one
shown
below.
For
correct/alternative
connections,
refer
to
your
decoder’s
operator’s
manual.
Decoder
@
Connect
the
decoder
@
to
the
VCR’s
DECODER
termi-
nal
@.
.
Whenever
a
coded
programme
is
received,
the
VCR
will
automatically
decode
it.
10

The
video
tape
Inserting
a
video
tape
@
Insert
the
video
tape
as
shown
on
page
4,
and
push
the
_
centre
of
the
tape
gently
into
the
VCR.
The
VCR
will
be
turned
on
automatically
and
the
video
tape
will
be
loaded
automatically.
When
a
video
tape
is
inserted,
the
“
”
indicator
will
ap-
pear
on
the
FL
display.
Note:
e
When
a
video
tape
with
the
recording
defeat
tab
removed
(for
example
a
prerecorded
tape)
is
inserted,
playback
will
start
immediately.
Quick
start
mode
When
a
video
tape
is
inserted
into
this
VCR
any
function
button
pressed
will
operate
immediately.
If
a
function
but-
ton
is
not
pressed
within
5
minutes,
the
VCR
will
be
re-
leased
from
the
quick
start
mode.
If
the
play
or
record
but-
ton
is
pressed
after
the
5
minute
period
there
will
be
a
short
time
before
the
VCR
responds.
Ejecting
a
video
tape
@
Press
the
m
/
4
stop/eject
button.
—
When
the
VCRis
in
the
stop
mode,
press
the
button
once
to
eject
the
tape
(the
eject
button
on
the
remote
control
can
also
be
used).
During
the
playback
or
record
mode
press
the
button
twice
(once
to
stop
the
tape
and
twice
to
eject
it).
To
prevent
accidental
erasure
of
prerecorded
tapes:
Break
off
the
recording
defeat
tab
with
a
screwdriver.
To
record
over
tapes
with
the
recording
defeat
tab
removed:
Cover
the
hole
with
adhesive
tape.
In
case
of
malfunction
Alarge
amount
of
static
electricity
may
cause
this
VCR
to
malfunction
or
stop
functioning
completely.
In
this
case,
press
the
reset
button
to
reset
the
micro-processor.
Clock
and
programme
data
will
be
cancelled
when
the
reset
but-
ton
is
pressed.
Reset
button
11

12
FL
(Fluorescent)
display
@®
L
LLL
mt
iil
: . |
REY
:
Review-reverse
quick
finder
The
FL
display
can
be
dimmed
or
brightened
by
re-
peatedly
pressing
the
DIMMER
button
on
the
remote
SPO
H+t/S5
LH
-
:
Index
search
forward/reverse
control.
*
Programme
number
indicators
(1-4)
Light
to
show
how
many
programmes
have
been
set
for
@
Tape
load
indicator
timer
recording.
Lights
when
the
video
tape
has
been
loaded.
.
VCR
mode
indicator
1-HQ
indicator
Lights
when
the
TV/VCR
button
is
set
to
VCR.
Lights
when
the
VCR
is
in
the
|-HQ
mode.
®
PROG.
indicator
®
START
indicator
Lights
during
timer
programming.
Lights
when
setting
the
timer
programming
start
time.
CLOCK
indicator
®
STOP
indicator
Lights
during
clock
setting
and
when
the
clock
is
dis-
Lights
when
setting
the
timer
programming
stop
time.
played
on
the
FL
display.
OTR
(One
Touch
Recording)
indicator
Lights
during
the
OTR
mode.
©
Timer
indicator
Lights
when
the
VCR
is
in
the
timer
recording
mode.
®
MESECAM
indicator
Lights
when
the
VCR
is
set
for
MESECAM
recording
or
playback.
Multi
function
display
The
clock
appears
when
the
VCR's
power
is
off,
and
the
channel
number
appears
when
the
VCR’s
power
is
on.
When.a
tape
is
playing,
the
elapsed
time
of
the
tape
is
shown
(in
hours,
minutes
and
seconds).
Also
indicated
are
the
modes
below:
AYU
:
When
recording
from
an
external
source.
PLAY
>Playback
Sf
tic
:
Still
SL
G4)
+:
Slow
motion
playback
57g
:
Stop
REE
:
Recording
fF
-F
il
7:
Fastforward
F-#ii
7:
Fastrewind
Cue
:
Cue-forward
quick
finder

Video
channel
If
your
TV
already
has
a
preset
video
channel,
this
channel
should
be
used
to
assure
the
best
sound
and
picture
quality.
As
this
channel
varies
from
country
to
country,
you
should
check
your
TV's
operator’s
manual
to
see
which
is
the
video
channel
for
your
TV.
When
a
video/audio
connection
cord
is
used
for
con-
nection
of
the
VCR
and
TV
(refer
to
“Connections”),
setting
the
video
channel
is
not
necessary,
in
this
case
simply
set
the
TV’s
TV/VCR
switch
to
VCR.
—
This
VCRis
preset
to
channel
36
(UHF)
and
if
your
TV’s
video
channel
is
also
36
(UHF),
no
adjustments
are
necessary.
d
If
UHF
channel
36
is
being
used
for
broadcasting:
You
can
set
the
TV
to
a
channel
between
UHF
channels
30-39
and
tune
the
VCR
into
that
channel.
1
Insert
a
prerecorded
tape
into
the
VCR
and
press
the
play
>
button.
2
Set
the
TV
to
a
blank
channel
between
UHF
30-39.
3
Siowiy
adjust
the
RF.OUT
CH.ADJ.
screw
on
the
rear
panel
until
the
playback
picture
appears.
If
you
do
not
have
a
prerecorded
tape,
adjust
the
screw
until
the
screen
becomes
clear
black
(no
in-
terference).
This
is
now
your
video
channel.
Higher
channel
Lower
channel
USTater-lan=i00)ola’aevar-lalalsimelemiolelam
ma
|
Insert
a
prerecorded
video
tape
into
the
VCR
and
press
the
>
play
button
to
start
playback.
2
Choose
an
empty
channel
on
your
TV
to
use
as
the
video
channel.
Tune
the
channel
(using
the
TV
sta-
tion
tuner
on
your
TV)
until
you
receive
the
playback
picture
from
the
VCR.
3
Press
the
m=
stop
button
to
stop
playback.
This
channel
will
then
be
your
video
channel.
Using
your
TV’s
preset
video
chan-
aly
For
example,
if
your
TV's
video
channel.is
50:
|
Turn
the
VCR
on
and
set
the
TV
to
channel
50.
2
Insert
a
prerecorded
tape
into
the
VCR
and
press
the
play
(>
)
button.
3
Adjust
the
TV
station
tuner
on
your
TV
and
tune
the
channel
until
you
receive
the
clearest
playback
pic-
ture.
Select
this
channel
each
time
you
want
to
use
the
VCR.
If
you
do
nothave
a
prerecorded
tape,
adjust
the
channel
until
the
screen
becomes
clear
black
(no
interference).
TV/VCR
mode
When
the
VCR
is
connected
to
your
TV
with
a
SCART
audio/
video
cable
(see
“Connections”)
it
can
automatically
switch
between
the
TV
and
VIDEO
mode
of
your
TV.
This
VCR
will
automatically
be
set
to
the
VCR
mode
when
it
is
turned
on
(“VCR’
will
light
on
the
FL
display)
ready
for
VCR
operation
(playback
picture
viewing
etc.).
This
means
that
if
you
are
watching
a
TV
programme
when
the
VCR
is
turned
off,
when
you
turn
the
VCR
on
the
TV
picture
will
change
to
the
channel
selected
on
the
VCR.
Note:
©
If
the
VCR
and
TV
are
only
connected
using
the
antenna
connections
(RF
IN/OUT),
there
will
be
no
change
when
the
VCR
is
turned
on,
however,
you
have
to
set
the
TV
to
the
video
channel
to
watch
videos
etc..
If
you
want
to
change
the
VCR
so
that
it
is
set
to
the
TV
mode
each
time
the
power
is
turned
on
(so
that
it
doesn’t
interfere
with
normal
TV
viewing
if
you
turn
it
on
just
to
rewind
a
tape
etc.)
follow
the
step
below.
@
Press
the
front
panel
CHANNEL
/
button
(when
the
power
is
off)
until
“VCR”
flashes
on
the
FL
display
then
disappears.
To
reset
to
the
VCR
mode,
repeat
the
operation
until
“VCR”
appears
on
the
FL.
display.
13

14
Setting
the
clock
This
VCR
has
a
built-in
digital
timer
clock
which
must
be
setto
the
present
time.
This
clock
is
used
to
keep
the
time
and
for
timer
recording.
The
VCR
uses
a
24
hour
clock:
7:30
pm
=
19:30
on
the
FL
display.
When
the
VCR
is
first
plugged
in,
the
clock
display
will
auto-
matically
start
flashing.
UTTaremtalsmacsinrelccmereyalige)|
1
Press
the
CLOCK
button
(211EOH).
Press
the
CLOCK/CH
button
(215EOH).
The
clock
set
screen
will
appear
on
the
LC
display.
The
point
ready
for
data
entry
will
be
flashing.
2
Set
the
hour
with
the
“
or
\
button.
/N\.:
Press
this
button
to
count
up.
Vv
:
Press
this
button
to
count
down.
3
Press
the
>
button.
The
minutes
will
flash.
4
Set
the
minutes
with
the
“
or
\
button.
When
the
/“
or
\v
button
is
pressed
continuously,
the
minutes
will
increase
or
decrease
at
5
minute
intervais.
5
Press
the
>
button.
The
date
will
flash.
The
clock
can
be
set
using
either
the
remote
control
or
the
VCR
front
panel
buttons.
We
suggest
setting
the
clock
on
the
LC
display
of
the
remote
control
and
transmitting
the
time
to
the
VCR,
thus
synchroniz-
ing
the
remote
control
and
VCR.
6
Set
the
date,
month
and
year
with
the
A,
Vy,
<
or
>
buttons.
The
weekday
is
set
automatically.
"BIS
Pieogy
Daylight
saving
time
@
When
setting
the
clock
during
the
daylight
saving
time
period,
press
the
(4+)
CANCEL
button.
The
“Xt”
indicator
will
be
displayed
on
the
LC
display.
7
Press
the
OK
button
to
start
the
clock.
The
clock
will
start
and
the
transmit
indicator
will
flash.
Clock
data
can
now
be
transmitted
to
the
VCR.
"Bs
1S
A
I
mile
ior
8
Point
the
remote
control
at
the
VCR’s
remote
sensor
window
and
press
the
OK
button
to
transmit
the
clock
data.
The
time
will
appear
on
the
VCR’s
FL
display.
9
Press
the
CLOCK
button
(211EQOH)
to
return
the
.
remote
control
to
the
normal
mode.
Press
the
CLOCK/CH
button
twice
(215EOH)
to
re-
turn
the
remote
control
to
the
normal
mode.
Note:
e
Steps
2
to
6
can
also
be
set
using
the
1
-
0
buttons.
Instead
of
using
the
“
and
V
buttons.
To
set
a
single
digit
number
press
the
0
(zero)
first
then
press
the
number.
For
example
to
set
8:15;
press
0
(zero)then
8
then
1
and
then
5.
If
you
use
the
1
-
0
buttons
for
data
entry
you
do
not
need
to
press
the
>
button
to
start
the
next
data
flashing.
e
{f
you
make
a
mistake
while
setting
the
clock,
move
to
the
data
you
want
to
correct
with
the
<
or
>
button
then
re-
enter
the
data
with
the
“
or
\
button
or
1
-
0
buttons.

ae
ee
Ea
=aaaEaEEUaEY
SERIES
REE
Re-transmitting
clock
data
Using
the
VCR
front
panel
buttons
Clock
data
is
retained
in
the
remote
control
after
it
is
trans-
mitted
to
the
VCR.
If
the
VCR's
clock
data
is
cancelled
(be-
cause
of
a
power
failure,
etc),
or
if
the
data
is
wrong,
the
clock
data
in
the
remote
control
can
be
re-transmitted
to
the
VCR.
|
Press
the
CLOCK
button
(211EOH).
Press
the
CLOCK/CH
button
(215EOH).
The
year
will
appear
on
the
LC
display
along
with
the
clock
data.
2
Point
the
remote
control
at
the
VCR’s
remote
sensor
window
and
press
the
OK
button
twice
to
transmit
the
clock
data.
3
Press
the
CLOCK
button
(211EOH)
to
return
ws
remote
control
to
the
normal
mode.
Press
the
CLOCK/CH
button
twice
(215EOH)
to
re-
turn
the
remote
control
to
the
normal
mode.
Daylight
saving
time
To
adjust
for
the
daylight
saving
time
period
the
VCR's
clock
can
easily
be
set
one
hour
ahead,
or
one
hour
back.
|
Press
the
CLOCK
button
(211EOH).
Press
the
CLOCK/CH
button
(215EOh).
The
year
will
appear
on
the
LC
display
along
with
the
clock
data.
y)
Press
the
(<t)
CANCEL
button.
If
the
clock
is
set
to
the
normal
time
the
clock
will
ad-
vance
one
hour
ahead
and
the
“xt”
indicator
will
appear
on
the
LC
display.
If
the
clock
is
set
to
the
daylight
saving
time
the
clock
will
be
set
one
hour
back
and
the
“4”
indicator
will
disap-
pear.
3
Point
the
remote
control
at
the
VCR’s
remote
sensor
window
and
press
the
OK
button
to
transmit
the
new
clock
data.
4
Press
the
CLOCK
button
(211EOH)
to
return
the
remote
control
to
the
normal
mode.
Press
the
CLOCK/CH
button
twice
(215EOH)
to
re-
turn
the
remote
control
to
the
normal
mode.
1
Press
the
CLOCK
button.
The
hour
position
will
flash.
The
“W’”
display
is
explained
in
step
12.
Press
the
CLOCK
button
until
the
hour
is
set.
The
hours
will
repeat
cyclically
if
you
keep
pressing
the
button.
Press
the
OK
button
(DO
NOT
hold
the
button
down
as
this
will
cancel
the
data).
-
The
minutes
position
will
flash.
Press
the
CLOCK
button
until
the
minutes
are
set.
The
minutes
will
repeat
cyclically
if
you
keep
pressing
the
button.
Press
the
OK
button.
The
Day
(D),
Month
(M)
and
Year
(Y)
display
will
appear.
The
day
position
will
be
flashing.
Press
the
CLOCK
button
until
the
day
is
set.
The
numbers
will
repeat
cyclically
if
you
keep
pressing
the
button.
Press
the
OK
button.
The
month
position
will
flash.
Press
the
CLOCK
button
until
the
month
is
set.
Press
the
OK
button.
The
year
position
will
flash.
15

|
0
Press
the
CLOCK
button
until
the
year
is
set.
16
|
Press
the
OK
button.
The
“CLOCK?”
display
will
flash.
If
you
are
setting
the
clock
during
the
winter
daylight
saving
time:
Press
the
CLOCK
button,
the
clock
will
start.
If
you
are
setting
the
clock
during
the
summer
day-
light
saving
time:
Press
the
remote
control’s
CANCEL
button,
“S”
will
appear
on
the
FL
display
and
the
clock
will
start.
12
Note:
@
Ifyoudo
not
enter
data
within
Sm
minutes
when
the
position
starts
flashing,
the
clock
mode
will
cancel
and
all
the
data
will
have
to
be
entered
again.
®
Clock
setting
can
be
done
while
the
power
is
on
or
off.
@
While
the
clock
is
displayed
on
the
FL
display
you
can
can-
cel
the
time
by
holding
down
the
OK/CANCEL
button
until
the
data
is
cancelled.
In
steps
2-10,
the
remote
control
<,
>,
“\
or
\
but-
tons
can
be
used
in
place
of
the
CLOCK.
and
OK
but-
tons:
</>
:to
move
to
the
next
or
previous
data.
/N:
to
increase
the
number.
\V
:
to
decrease
the
number.
DEW
tela
mcr:
Milare
minal
In
the
operation
on
the
previous
page,
in
steps
11
and
12.
you
have
the
choice
of
selecting
winter
daylight
saving
time
(“W”)
or
summer
daylight
saving
time
(“S’).
This
VCR
allows
you
to
easily
set
the
clock
either
one
hour
forward
or
backward
when
the
daylight
saving
time
changes.
For
example,
you
have
set
the
clock
during
the
winter
time
To
set
the
clock
to
the
summer
daylight
saving
time:
™@
Press
the
CLOCK
button
until
the
clock
display
show-
ing
“W”
appears.
@
Press
the
remote
control’s
CANCEL/
«+
button.
The
hour
will
automatically
advance
one
hour.
The
same
operation
done
when
the
summertime
“S’
is
dis-
played
will
set
the
clock
back
one
hour.
Note:
e
The
Summer/Winter
time
can
not
be
changed
between
23:00
(11pm)
and
00:59
(12:59am).
lf
you
want
to
correct
clock
data
at
any
time.
|
Press
the
CLOCK
button
until
the
clock
display
starts
flashing.
Press
the
OK
button
until
you
reach
the
number
that
you
want
to
change.
Press
the
OK
button
until
the
display
returns
to
the
normal
display
(clock
or
channel
display).
3
Correct
the
number
with
the
CLOCK
button.

Presetting
TV
stations
This
VCR
contains
a
built-in
tuner
which
can
be
used
to
re-
ceive
TV
broadcasts
in
place
of
your
TV
set.
In
order
to
use
this
tuner,
the
VCR
must
be
tuned
to
the
locally
available
TV
sta-
tions.
This
procedure
is
called
“presetting”.
Up
to
45
stations
can
be
preset.
Preset
the
TV
stations
before
loading
a
tape.
Before
proceeding
e
Turn
on
the
TV
and
VCR.
©
Make
sure
thatthe
TV
is
set
to
the
video
channel
or
that
the
TV's
TV/VCR
switch
is
set
to
VCR
(refer
to
“Video
chan-
nel”).
PANGi
Colaatchtlomelacr-y-aailare|
With
this
mode,
the
VCR
automatically
searches
and
presets
the
TV
channels,
starting
at
channel
1.
Only
the
VCR
front
panel
buttons
can
be
used.
@
Press
and
hold
the
play
>
button
and
then,
at
the
same
time,
press
the
fast
forward
>>
button.
The
presetting
display
will
appear
and
the
VCR
will
auto-
matically
start
presetting.
When
all
the
TV
channels
have
been
tuned
in,
the
FL
display
will
return
to
the
normal
dis-
play
mode.
You
can
then
select
the
TV
channels
with
the
CHANNEL
buttons.
Note:
¢
To
cancel
the
automatic
presetting
mode,
press
the
stop/
eject
ma
/
&
button.
WV
FeTalere
lm
elg=t-t-30dlare
With
this
mode
you
can
tune
the
TV
programmes
in
manually
and
assign
them
to
whichever
channel
numbers
you
want
them
to
be
on.
Only
the
VCR
front
panel
buttons
can
be
used.
1
Press
and
hold
the
play
>
button
and
then,
at
the
same
time,
press
the
POWER
button.
The
presetting
display
will
appear
and
the
VCR
will
auto-
matically
start
searching
for
the
first
available
station.
When
the
VCR
reaches
a
station
it
will
be
displayed
on
the
screen
and
the
VCR
will
stop
searching.
Hf
Searching
will
start
on
the
VHF
low
band
(b1)
and
pro-
ceed
through
the
VHF
high
band
(b2)
and
stop
at
the
UHF
band
(b3).
If
you
want
to
select
a
different
wave
band
than
the
one
displayed,
keep
pressing
the
rewind
button
<<
until
the
band
that
you
want
is
displayed.
Note:
e
lf
the
“PS”
number
is
flashing,
no
programme
has
been
preset
on
that
channel
number.
e
\f
the
“PS”
number
remains
lit,
a
programme
has
already
been
preset
on
that
channel
number.
2
If
you
want
to
keep
the
TV
programme
displayed
on
the
screen,
select
a
channel
number
(PS)
with
the
CHANNEL
buttons
and
press
the
play
>
button
to
memorize
it.
The
VCR
will
automatically
start
searching
for
the
next
programme.
If
you
do
not
want
the
VCR
to
memorize
a
programme,
press
the
fast
forward
»
button.
The
VCR
will
start
searching
for
the
next
programme.
When
you
have
finished
presetting,
press
the
stop/
eject
m
/
4
button
to
return
the
VCR
to
the
normal
operating
mode.
You
can
press
the
stop/eject
m=
/
4
button
at
any
time
to
cancel
the
presetting
mode.
Cancelling
preset
TV
stations
Mi
Select
the
TV
channel,
that
you
want
to
cancel,
with
the
CHANNEL
buttons
and
then
press
the
CANCEL
button
for
a
few
seconds
until
the
channel
number
disappears
and
is
replaced
with
the
next
highest
channel
number.
oo
After
cancelling
TV
channels,
you
may
be
left
with
channels
1,
3,5,
9
etc.
(for
example).
if
you
want
to
change
the
channels
so
that
they
run
in
order
(1,
2,
3,
4,
etc.):
@
Press
and
hold
the
rewind
<4
button
and
then,
at
the
same
time,
press
the
POWER
button.
The
channels
will
be
automatically
converted.
This
feature
will
not
workif
there
is
atape
loaded
in
the
VCR.
For
reception
of
weak
TV
stations
This
VCR
has
a
built-in
mute
system
which
cancels
reception
of
weak
TV
stations
(programmes
with
a
weak
signal
that
causes
interference
and
poor
sound/picture
quality).
How-
ever,
if
you
want
to
preset
a
weak
TV
station
that
is
being
re-
ceived
by
your
TV
but
not
by
the
VCR,
the
mute
mode
can
be
cancelled.
M@
Mute
off:
With
the
VCR
power
off
press
the
front
panel
CHANNEL
-
button
for
a
few
seconds
until
“M”
flashes
on
the
FL
display.
The
“M”
display
will
disappear
after
a
few
seconds.
@
Mute
on:
To
reset
the
mute
mode,
repeat
the
above
procedure
until
“M”
lights
(not
flashing)
on
the
FL
dis-
©
play.
The
“M”
display
will
disappear
after
a
few
seconds.
17

18
Changing
PS
channel
numbers
Use
this
feature
if
you
want
to
change
a
preset
channel
toan-
other
number.
For
example,
you
may
want
to
change
channel
2
to
become
channel
6.
1
Press
the
fast
forward
>
and
stop/eject
a=
/
4
but-
tons
at
the
same
time.
The
FL
display
will
change
to
the
channel
(PS)
change
mode.
Select
the
channel
that
you
want
to
change
with
the
CHANNEL
buttons.
Press
the
OK
button.
The
channel
(PS)
position
to
the
right
will
start
flashing.
Select
the
new
number
for
the
previous
channel
with
the
CHANNEL
buttons.
Press
the
OK
button.
The
VCR
will
return
to
the
normal
mode,
displaying
the
new
channel
number.

Playback
Before
proceeding:
@
Turn
on
the
TV
and
VCR.
@
Make
sure
thatthe
TV
is
set
to
the
video
channel
or
that
the
TV’s
TV/VCR
switch
is
set
to
VCR.
(Refer
to
“Video
chan-
nel”.)
Tapes
recorded
inthe
Long
Play
(LP)speed
can
notbe
©
played
back
on
this
VCR.
Playback
of
E-300
tapes
is
not
recommended.
Load
a
pre-recorded
video
tape.
—a.
Press
the
>
piay
button
to
start
playback.
If
the
video
tape’s
recording
defeat
tab
has
been
removed,
playback
will
begin
automatically.
“PLAY”
and
“I-HQ”
will
light
on
the
FL
display.
The
dot
to
the
right
of
“PLAY”
indicator
will
flash
until
automatic
tracking
is
completed.
If
there
are
disturbances
in
the
playback
picture
refer
to
the
following
“Tracking/Picture/Stability”
section.
3
Press
the
mi
stop
button
to
stop
playback.
“STOP”
will
light
on
the
FL
display.
Press
the
>>
fast
forward
button
to
fast
forward
the
video
tape.
“F-FWD”
will
light
on
the
FL
display.
M@
Press
the
<<
rewind
button
to
rewind
the
video
tape.
“F-RWD?”
will
light
on
the
FL
display.
@
Press
the
m:
stop
button
to
stop
fast
forward
or
re-
wind.
“STOP”
will
light
on
the
FL
display.
Note:
e.
Ifthe
video
tape
ends
during
playback
it
will
stop
and
rewind
automatically.
¢
The!l-HQ
feature
operates
automatically
during
playback.
It
can
be
cancelled,
or
reset,
by
pressing
the
I-HQ
button.
Vso)
=
OFAN
olt-
MV
er- lel
eag-reelacllare
You
can
watch
MESECAM
(Middle
East
SECAM)
tapes
or
rec-
ord
MESECAM
broadcasts
with
this
VCR.
@
Press
the
remote
control’s
PAL/MESECAM
button
until
MESECAM
lights
on
the
FL
display.
Press
the
button
again
to
return
to
the
normal
PAL
system.
The
MESECAM
display
will
disappear
from
the
FL
display.
Still
picture
and
frame
advance
During
playback
the
still
picture
feature
can
be
used
to
freeze
the
playback
picture.
The
picture
can
then
be
advanced
one
frame
at
a
time.
@
Press
the
Pi
still
button
during
playback
to
freeze
the
_
picture.
-
“STILL”
will
appear
on
the
FL
display.
@
Press
the
P<
still
button
repeatedly
to
advance
the
frames.
Each
time
the
bution
is
pressed
the
still
picture
will
advance
one
frame.
li
Press
the
>
play
button
to
resume
playback.
Note:
®
if
“noise
bars”
appear
on
the
screen,
refer
to
the
tracking
section
in
the
following
section.
e
Aftera
frame
has
been
frozen
for
approx.
5
minutes,
the
still
mode
will
disengage
to
protect
the
video
tape.
Tracking/Picture/Stability
adjustment
Only
the
remote
control
buttons
can
be
used
for
the
fol-
lowing
operations.
To
correct
tracking
during
the
playback,
multi-speed
play-
back,
quick
finder
and
slow
modes:
M™@
Press
the
AUTO
TRACKING
button.
If
the
tracking
is
not
corrected
satisfactorily,
press
the
remote
control
<
or
>
button
until
the
picture
is
clear.
During
manual!
adjustment
the
tracking
position
will
be
shown
on
the
FL
display.
This
will
disappear
automatically
when
adjustment
has
been
completed.
To
correct
tracking
during
the
still
mode:
li
Press
the
<
or
>
button
repeatedly
until
the
picture
is
clear.
The
tracking
position
will
not
be
shown
on
the
FL
display.
To
correct
the
picture
sharpness
during
the
playback
mode:
@
Press
the
‘“
button
repeatedly
to
sharpen
the
picture
or
press
the
\y
button
to
soften
the
picture.
During
adjustment
the
picture
control
position
is
shown
on
the
FL
display.
This
will
disappear
automatically
when
ad-
justment
has
been
completed.
To
correct
picture
shake
during
the
slow
motion
or
still
mode:
@
Press
the
“
or
\
button
until
the
picture
shake
is
cor-
rected.
19

20
Multi-speed
playback
The
multi-speed
playback
feature
can
be
used
to
increase
or
decrease
the
playback
speed.
The
tape
speed
can
be
increased
up
to
3,
5
and
7
times
the
normal
playback
speed
in
the
forward
or
reverse
directions.
in
the
forward
direction
the
speed
can
be
reduced
to
1/10
of
the
normal
speed,or
a
still
picture
can
be
achieved.
@
Press
the
remote
control’s
MULTI-SPEED
PLAY
©
or
©
button
repeatedly
during
playback
until
you
reach
the
speed
that
you
want.
@
Press
the
play
>
button
to
resume
normal
playback.
Note:
®
Slow
motion
playback
will
be
cancelled
after
5
minutes
to
protect
the
video
tape.
x7
Forward
S)
ip
®
x5
Forward
©
=e
®
x3
Forward
|
0
yy
®
1/10
Forward
Om
®
>
ome
x3
Reverse
O
=
®
x5
Reverse
S)
=
®
x7
Reverse
®
:
Press
the
MULTI-SPEED
PLAY
©
button.
©
:
Press
the
MULTI-SPEED
PLAY
©
button.
Quick
finder
(cue/review)
During
playback
the
quick
finder
function
can
be
used
to
vis-
ually
locate
any
point
on
a
recorded
tape.
During
quick
finder
playback
the
picture
will
go
forwards
or
backwards
rapidly.
Disturbances
in
the
quick
finder
picture
are
normal
and
do
not
indicate
a
problem
with
the
VCR.
@
During
any
playback
mode
(play,
still,
slow,
etc.)
press
the
fast
forward
(cue)
>>
or
rewind
(review)
<4button.
There
are
two
ways
to
operate
the
quick
finder
mode.
One
way
is
to
keep
the
button
held
down
until
you
reach
the
part
that
you
want
to
watch,
and
when
you
release
it
playback
starts
automatically.
The
second
way
is
to
press
the
button
quickly
and
when
you
reach
the
part
that
you
want
to
watch,
press
the
play
button.
Note:
©
“CUE”
or“REVIEW’
will
appear
on
the
FL
display
for
about
4
seconds.
e
You
can
switch
directly
between
cue
and
review.
The
index
search
feature
uses
index
codes,
that
are
automatically
added
to
the
video
tape
when
programmes
are
recorded
on
the
VCR
(except
recordings
begun
from
the
rec-
ording
pause
mode).
You
can
go
directly
to
the
beginning
of
any
recorded
section
that
has
an
index
code
and
you
can
skip
as
many
index
codes
as
you
like
until
you
find
the
section
that
you
want
to
watch
(you
can
skip
up
to
99
index
codes).
@
Press
the
remote
control’s
index
search
forward
>i
or
reverse
|€<
button
(during
the
stop
or
play
mode).
For
example,
to
go
to
the
4th
index
code
from
your
starting
point
(forward
or
reverse),
press
the
button
4
times.
When
the
tape
reaches
the
section
that
you
select,
play-
back
will
begin
automatically.
Note:
e@
When
the
index
search
reverse
button
is
pressed
once
in
the
middle
of
a
programme,
playback
will
start
from
the be-
ginning
of
that
programme.
¢
This
feature
will
not
operate
with
tapes
that
do
not
have
index
codes.
During
index
search
“SRCH”
and
the
index
number
will
be
displayed
on
the
FL
display.
e
There
must
be
more
than
one
minute
between
index
codes
for
this
mode
to
operate
properly.
The
tape
counter
is
displayed
during
playback
and
shows
the
elapsed
time
of
the
video
tape
(in
hours,
minutes
and
sec-
onds).
The
tape
counter
will
not
count
unrecorded
spaces
on
the
tape.
Mi
To
reset
the
counter
to
zero,
press
the
COUNTER
RESET
button.
The
tape
counter
will
also
be
reset
when
a
video
tape
is
in-
serted
in
the
VCR.
This manual suits for next models
2
Table of contents
Other Akai VCR System manuals

Akai
Akai VS-G242EA User manual

Akai
Akai VS-2EGN User manual

Akai
Akai VS-606EA User manual

Akai
Akai VS-J4600 User manual

Akai
Akai VS-X9EGN User manual

Akai
Akai VS-G415EA User manual

Akai
Akai AVR250 User manual

Akai
Akai VS-K606N-E3(S) User manual

Akai
Akai VS-K203M-E7 User manual

Akai
Akai SHOWVIEW VS-G245EDG User manual