Akai VS-G415EA User manual

AKAI
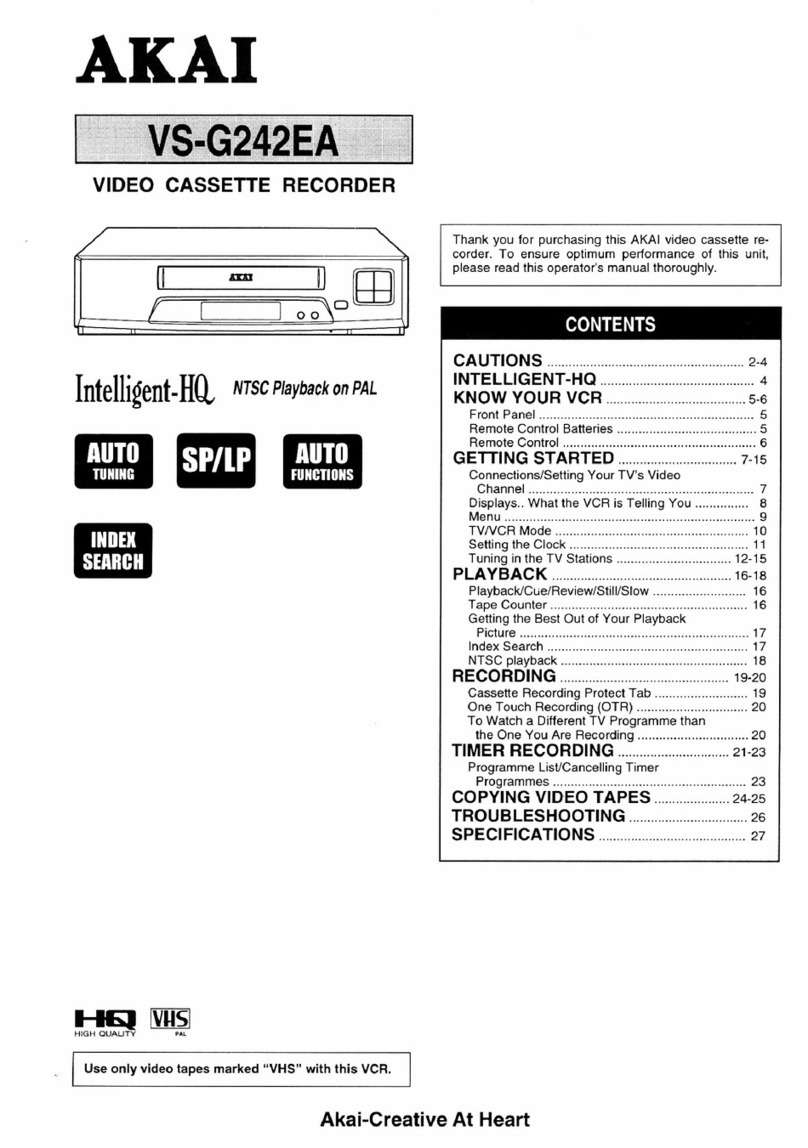
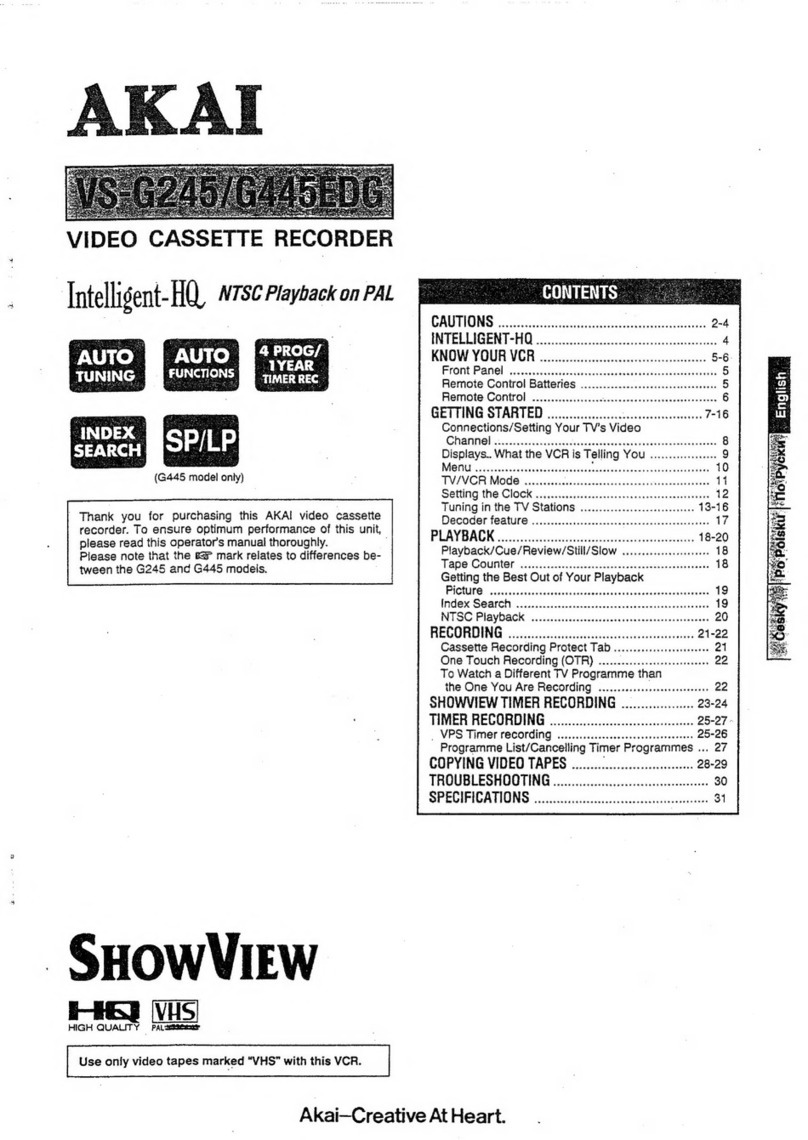
Thank you for purchasing this AKAI video cassette recorder.
To ensure optimum performance ol this unit, please read this
operator's manual thoroughly.
Operator's Manual
f, t-l^fll'lE
-r vvur
l+c! NES]
HIGH QUALITY - PAT
Akai-Creative At Heart.

Table of contents Features
G-CODE timer recording
NTSC playback on PAL TV
4 video heads
Audio dubbing
2 speed recording and playback
Super Intelligent-HQ system
Centre cassette loading
Quick servo drive
One Touch Recording (OTR)
Remaining tape time display
Blank Skip Play
Programmable infrared remote control with jog and shuttle
lntro scan
Edit search
MultFlanguage programmable on-screen display
Next-mode
Auto tracking
Blank search system
Quick finder
Automatic tuning
Programmable timer recording (8-programme/1-year
tamer)
Auto head cleaning
... 14
Initial setting
NTSC playback
Blank Skip Play
lndex codes.......... .................... 23
lntro scan and index search .............. ...................... 23
Recording TV programmes ................................. 24-26
Blank search
The Super Intelligent-HQ feature
Troubleshooting
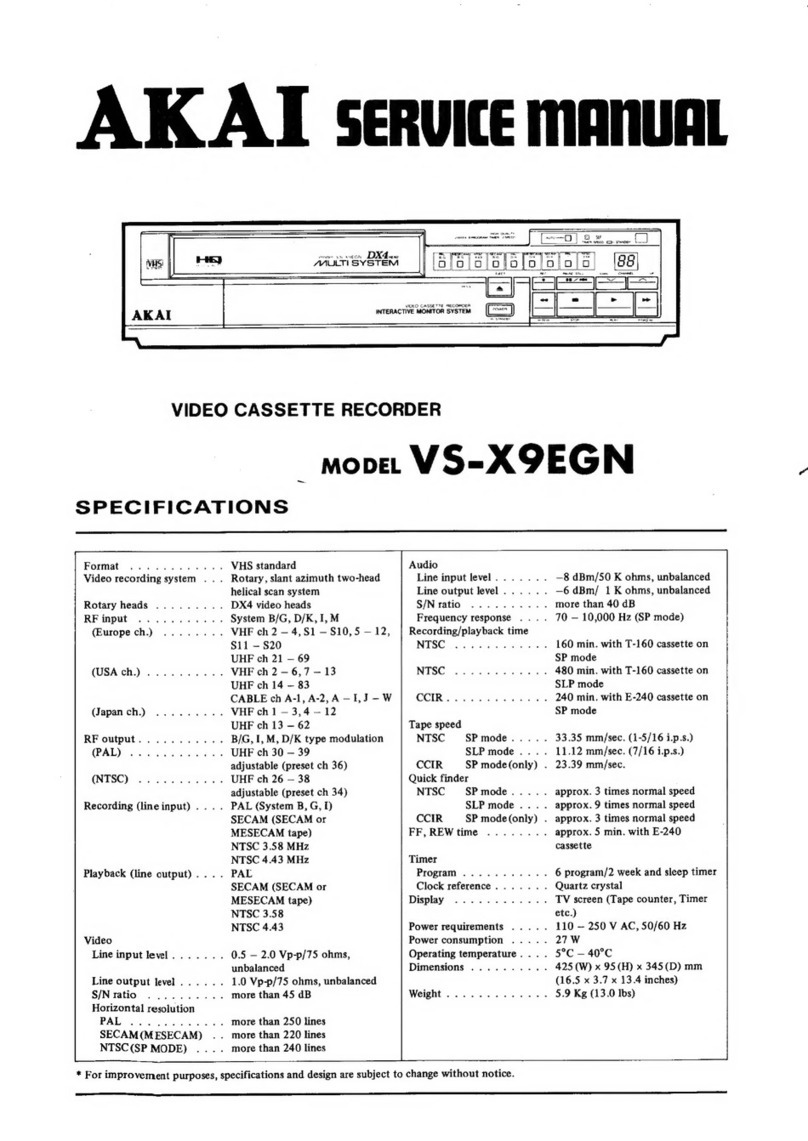
Specitications
Maintenance
Auto power on
The VCR power is automatically turned on when the tape is in-
serted.
Auto rewind
The video tape is automatically rewound when the end of the
tape is reached during the play, recording or quick finder for-
waro mooe.
Auto tape reiect
lf a videotape with its recording defeattab removed is loaded,
the VCR willautomatically eject it when the record ortimer but-
ton rs presseo.
Auto play
ll the video tape's recording defeat tab has been removed,
playback will begin automatically when the tape is inserted
into the VCFI.
Power off eiect
Even when the VCR'S power is off, pressing the eject button
will turn the power on and eject the tape. Once ejected, the
power will be turned otf automaticall,.
Auto counter display
When the display mode is on, the tape counter will be dis-
played on the TV screen automatically during fast forward or
rewtnd.
Auto power off
The VCR can be set so that the power is turned off automati-
cally if the VCFI is not being used (refer to "Mode teature").
Auto head cleaning
When a tape is loaded or ejected the VCR video head drum is
cleaned automatically.
22
22
25
36
37
38
38
2

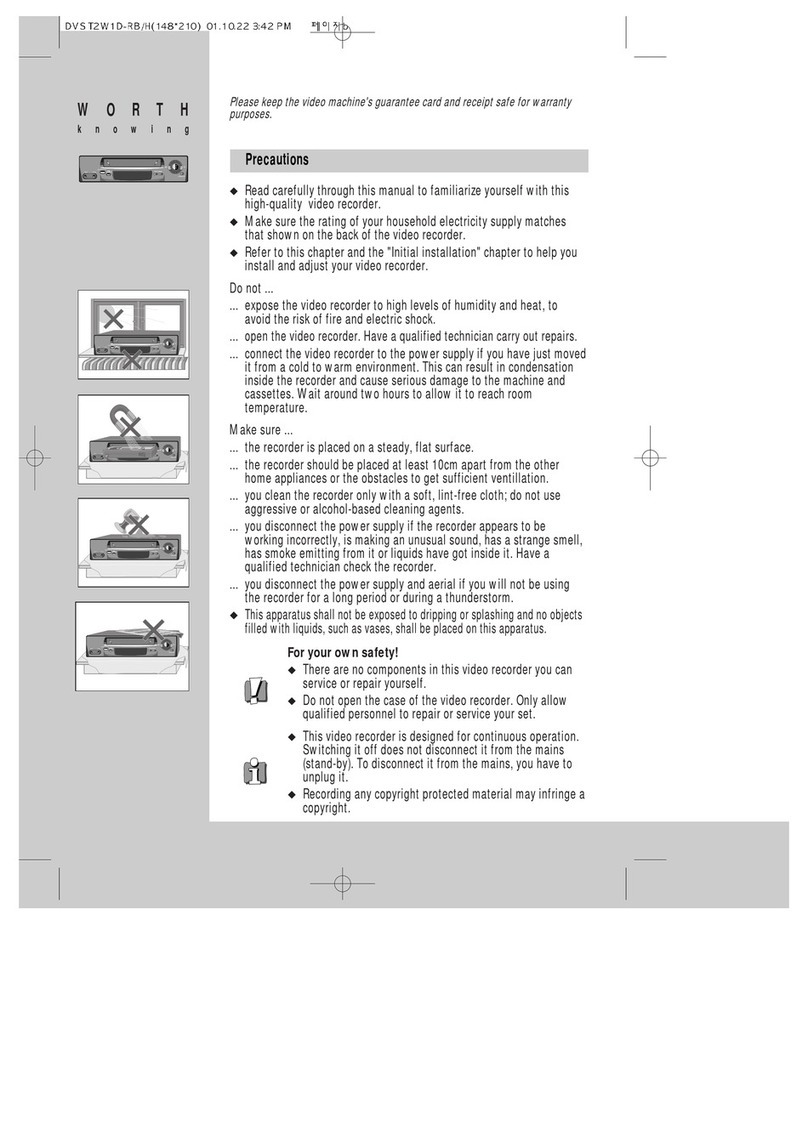
Warnings and precautions
WARNING
To prevent fire or shock hazard, do not expose this ap-
pliance to rain or moisture. 1-En
Power requirements
Power requirements for electrical appliances differ from
areato area. Please ensure thatyour appliance meets the
Power requirements in your area.
The operating voltage of this appliance is fixed at AC 240
V, 50 Hz. 2-En
This equipment conlorms to N0. 82I4991EEC, 87 l30a/
EEC standards. 3A-En
This appliance is not equipped with a main power switch.
Even when the appliance is turned off, the power supply is
notcompletely turned otfwhen the powercord is plugged
in. Pull out the power cord when not using the appliance
for long periods. 4-En
Power tailure backup
This VCR utilizes a back-up capacitor for possible power
failure. The back-up capacitor prevents clock stoppage
and loss of programme information (for timercontrolled
recording) in the event of a power failure lasting up to 60
minutes. (When this VCR is first plugged in, approximately
60 minutes are required to charge the back-up capacitor
in order to provide 60 minutes of back-up time).
Power lailure indication
lf a power failure of more than 60 minutes has occurred
'r-:-r'will be flashing on the FL display. In this case the
clock must be re-set. Flefer to the "Setting the clock" sec-
tion.
lf a power failure of less than 60 minutes occurs during
recording, the clock willflash on the TV screen when the
TV and VCR are turned back on. This indicates that a
powerfailure has occurred and the recording has been in-
terrupted. Press the DISPLAY button on the remote con-
trolto setthe clockto its normal mode (flashing willstop).
Use only video tapes marked "VHS" with this VCR.
Never touch the power cord's plug with wet hands.
Always pullthe power cord out by the plug and never by the
cord.
Only let a qualified professional repair or reassemble the
video cassette recorder. An inexperienced person might
touch the internal parts and get a serious electric shock.
Never put anything, especially metal, into the video cas-
sette recorder.
Use a household AC power source only. Never use a DC
power source.
Do not place anything heavy on top of the VCR.
ll water is spilled on the VCR, disconnect the power cord at
once and consult your dealer.
lvlake sure that the VCR is well ventilated, and do not place
anything on top of the ventilation holes.
To avoid damage to the internal circuits and the external
surface, keep the VCR away from heat (stoves, direct sun-
light, etc.).
Avoid using aerosol sprays near the VCR as this could
damage the linish or cause sudden ignition of the spray.
To avoid damaging the finish, never use paint thinner or
other similar chemicals to clean the VCR.
Place the VCR on a flat and solid surtace.
lf you do not plan to use the VCR for a long period ot time,
disconnect the oower cord.
Avoid using the VCFI in extremely hot, cold, humid or dusty
places.
Avoid using the VCR near appliances generating strong
magnelic fields.
Avoid using the VCR near lluorescent lamps as this may
shorten the operating range of the remote control unit.
Avoid violent shocks to the VCB during packing and trans-
portation.
Before packing, remove the video tape from the VCR.
Avoid moisture condensation
Moving the video cassette recorderfrom a cold place to a
warm place can cause dew condensation on the drum
and the video heads inside the unit. lf playback is carried
out in this state, the heads may become dirty and the tape
may be damaged.
To prevent this from occurring, the power plug must be
plugged in for about one hour with the POWER button otf,
before playback or recording ol a video cassette tape.
This is particularly important when avideo cassette is in-
serted for the first time after Durchase of the video cas-
sette recorder.
3
AIAI
%
ffi
E6r
lJ, v
4

Gontrols & terminals
Front panel
A Cassette.lolding slot
LOaO rne vH5 vtoeo taoe nere.
R FL (Fluorescent) display
- Provides visual reference of the VCR's operating modes.
n Femote sensor window
v For reception of the remote control's signal.
MIC (Microphone) socket
For connection of a microphone during audio dubbing.
AUDIO/VIDEO lN terminals
For connection of a second VCR or video camera.
r / a Stop/eiect button
To stop playback and eject the video tape. The tape can be
ejected even when the VCR'S power is off.
> Play button
To start video tape playback.
<< Rewind button
To rewind thevideo tape.Alsoto start reverse quick finder dur-
ing playback.
>> Fast forward button
To fast forward the video tape. Also to start forward quick fin-
der during playback.
POWER/standby button
To turn the VCR on or off (standby mode).
CHANNEL button
To select TV channels.
SPEED button
To set the tape speed for recording.
ll / *{ Pause/still button
To set the VCR to the recording pause mode lrom the recor-
ding or stop mode, or to freeze the playback picture.
l-HO button
To improve picture quality during recording or playback.
REC/OTR (Recording/One Touch Recording) button
To start recording. Also used to enter the OTR mode and set
the OTR stop time.
Rear panel
ll AC power socket
- Connect the orovided Dower cable here.
RF.OUT switch
To select the outout channel of the VCR.
RF.OUT terminal
To connect the VCR to the TV's ANTENNA lN terminal.
ANT.IN terminal
For TV antenna connection.
VIDEO/AUDIO lN/OUT lerminals
For connection of a TV or second VCR when using a video/
audio connection cord.
5

Remote control
A LC (Liquid Crystal) disPlay
^ Oisplays clock and programme data
G-CODE button
To enter the G-CODE timer recording mode.
OSD PROG. button
To set timer programming using the VCR FL display.
PROG.LIST button
To preview programmes set for timer recording.
1 - 0 buttons
To select TV channels. Also used for entering clock, G-CODE
and programming data.
TIMER button
To set or cancel the timer recording mode.
DISPLAY button
To display the clock, remaining tape time and tape counter on
the TV screen.
RCCODEE/Ebutton
To select either code A or B for remote control operation.
AV (External) button
To set the VCR to record from an external source.
SP/LP button
To set the tape speed lor recording.
MENU/REVIEW button
To display the MENU on the TV screen also to review
G-CODE guide channel numbers.
CLOCK/CH button
To set the remote control's clock. Also to adjust preset TV
channels for the G-CODE mode.
/^\, v, < , > Multi control buttons
To adjust tracking, picture shake and picture sharpness dur-
ing playback.
To selectthe mode from the MENU. Also used to controldata
entry.
OK button
To confirm the selecled mode lrom the lVlENu. Also used to
confirm entered data.
( +) CANCEL button
To cancelpresetTV stations or programmes programmeo lor
timer recording. Also used to adjust for daylight saving time.
AUTO TRACKING button
To correct tracking automatically.
COUNTER BESET button
To reset the tape counter.
AUDIO DUBBING button
To set the VCR to the audio dubbing mode
NEXT button
To display the nexFmode.
POWER ON/STANDBY button
To turn the VCR'S power on or oif (standby mode).
W/VCR button
To watch a different TV programme than the one you are rec-
ordrng.
A Eiect button
To eject the video tape from the VCR.
CHANNEL ,^ / \,, buttons
To select TV channels.
l-HO button
To improve picture quality during recording or playback.
14< Index search reverse button
^ To start the reverse index search
o
>> lndex search forward button
To start the torward index search.
<< Rewind button
To rewind the video tape. Also used to start reverse quick fin-
der during playback.
> Play button
To start video tape Playback.
>> Fast forward button
To fast forward the video tape. Also to start forward quick lin-
der playback.
a BEC (Record) button
To start recording.
r Stop button
To stop the video tape.
PAUSE/STILL button
To set the VCR to the recording pause mode from the recor-
ding or stop mode. Also to freeze the playback picture.
CHANNEL button
To change channels using the jog dial or shuttle ring.
JOG/SHUTTLE bUttON
To select the jog and shuttle mode.
Shuttle ring
To adjust the playback speed of the VCR.
Jog dial
To accurately locate the desired still picture.
G.CODE IS A TRADEMARK APPLIED FOF BY
GEMSTAR DEVELOPMENT COFP. G.CODE SYS-
TEM IS MANUFACTUFED UNDER LICENCE FFOM
GEMSTAR DEVELOPMENT CORPORATION.

Remote control LC (Liquid Crystal)
display
(i) Daylight saving time indicator
- Indicates that the clock is set to the daylight saving time.
(E A/B code display
- Shows whether the remote control is set to ooerate the
VCR on code A or B (refer to following section).
(O LP display
- Appears when setting the VCR to the long play mode dur-
ing timer recording.
(D OK display
- Appears when data is ready to be transmitted to the VCR.
(5) Transmit indicator
- Indicates when data in the remote control is lransmitted,
or is ready to be transmitted, to the VCR.
6) Data display
- All clock and programming data is displayed here (illus-
trations are provided later in the manual).
The VCR and remote control can be set to operate on one of
two codes (code A or code B). This means that during tape co-
pying, where you are using two VCRS, a different code can be
used for each VCR, so thatthe remote controlwillnot operate
both VCFIS at the same time. This gives you the freedom to
control each VCR separately.
The VCR is initially set to code A, so please make sure that the
remote control is set to code A, otherwise the VCR can not be
operated with the remote control.
To change the VCR code:
I From the standby mode (power of0, press the stop
r button on the lront panel for a tew seconds. Each
time you press the button the code will change be-
tween Aand B (the codewill bedisplayed on the FL dis'
plav).
To change the remote control code:
I Pressthe CODEA/B button untilthe code ihat you want
appears on the LCD display.
ll your remote control operates on code A: when you set it to
codeBand press any of the buttons, r. -il will appear on
the FL display indicating thatthe remote controlshould be set
to A (and vice versa for B code remote controls). The remote
controlwill not operate if the wrong code is selected.
7
E Efr:EE.EE:EE
E-E E2Tfl E:Fi E:
4560r,|Y
@@@@
7ae
ffi@@
ttr ^" o eP
@** @ @ @al
Hffiffi
..*19. ffIF"rflC ,*
et gt Et El
'ffies # ffii
I-Ha }- |
@@m@r
@ffi@
ffiffi6

1
2
3
Open the battery compartment cover on the back of
the remote control (refer to the illustration below)-
Insert three AAB6, UM-3 or equivalent size batteries
(refer to the illustration below).
Replace the battery compartment cover.
Note:
. Use new batteries only.
. When replacing the batteries, replace allthe batteries atthe
same time. Do not mix an old battery with new ones.
. When you do not plan to use the remote control unit for a
long period of time, remove the batteries.
. Insert the batteries following the polarity guides (- and +) in
the battery compartment.
. Nickel cadmium (Ni-Cd) batteries are not recommended.
When the remote control's batteries are removed or have lost
theircharge (as indicated by LCdisplay becomming dim, or by
the remote control's incapacity to transmit data) the clock will
stop and all programme data in the remote controlwill be can-
celled after a short time.
After replacing the batteries, use the remote control to reset
the clock and programme data. lf the batteries are replaced
quickly, after removing the old batteries, the clock and pro-
gramme modes may not be cancelled.
While changing the batteries, do not press any of the remote
control buttons.
Resetting the remote control
lfthe remote controlfails to operate properly, itcan be reset by
pressing lhe reset button,located inside the battery compart-
ment.
When the reset button is pressed, all timer programming and
clock data will be cancelled.
Make your contribution to protect the environment
Used batteries with the ISO symbol for .ecy- ,@^
cling as well as small accumulalors (recharge- fI
able batteries). mini-batteries (cells) and star \J
ter batteries should not be thrown into the garbage
Please leave them at an appropriate depot.
D
can.
29A-En
I

Connections
This VCR has a built-in tuner to receive TV stations, so it must
be connected to your TV antenna as shown below.
Basic connection
1
2
3
Connect the Tv antenna cable to the VCB'S ANT.IN
terminal.
Connectone end ofthe provided connection cord to
the VCF'S RF.OUT terminal.
Connect the other end of the provided connection
cord to the T\/s antenna terminal.
lf your Tv has audio/video lN terminals, connect
them totheVCF's VIDEO/AUDIO OUT terminals with
an audio/video cable for better sound and picture
quality (this cable is optional and is available trom
your audio/video dealer).
Connect the provided powercableto the ACsocket.
Connect the AC power cord to the AC outlet.
4
5
6
I

The video tape
I lnseri the video tape as shown on page 4, and push the
centre of the tape gently into the VCR.
The VCFI willbe turned on automatically and the videotape
will be loaded automatically.
Whenavideotapeisinserted,the" @ "indicatorwillap-
pear on the FL display.
Note:
When a video tape with the recording defeal tab removed
(tor example a prerecorded tape) is inserted, playback will
start immediately.
Quick start mode
When a video tape is inserted into this VCR any lunction
button pressed willoperate immediately.It a function but-
ton is not pressed within 5 minutes, the VCR will be re-
leased from the quick start mode. lfthe play or record but-
ton is pressed after the 5 minute period there will be a
short time before the VCR resoonds
I Press the r / 4 stop/eiect button.
When theVCR is in the stop mode, pressthe button once to
eject the tape (the eject button on the remote control can
also be used).Duringthe playback or record mode press
the button twice (once to stop the tape and twice to
elect it).
To prevent accidental erasure ot pretecorded tapes:
Break off the recording defeat tab with a screwdriver.
To record over tapes with the recording deleat
removed:
In case of malfunction
A large amount of static electricity may causethis VCR to
malfunction or stop functioning completely. In this case,
pressthe resetbutton to resetthe micro-processor. Clock
and programme datawill be cancelled when the reset but-
ton is Dressed.
Reset button
10
Cover the hole with adhesive taoe.

Displays
FL (Fluorescent) display
<il>
,trt tt,, ,trt
n En' ri Etu t7 t]s
1
2
3
4
o
@
@
@
@
/;\
\9/
@
Tape load indicator
Lights when the video tape has been loaded.
FHO indicator
Lights when the VCR is in the Super FHQ mode.
Timer indicator
Lights when the VCR is in the timer recording mode.
STOP indicator
Lights when setting the OTR(OneTouch Recording)stop
ttme.
Tape mode indicators
Indicate what operation mode the VCFI is in.
OTR (One Touch Fecording) indicator
Lights during the OTR mode.
Multifunction display
The clock appears when the VCR'S power is otf, and the
channel number appears when the VCR'S power is on.
When a tape is playing, the elapsed time ol the tape is
shown (in hours, minutes and seconds). The remain time
of the tape is also shown here. Also indicated are the
modes below:
fl ij : When recording from an external source.
5 [ -] : When using the intro scan and index search
modes.
BEMAIN indicator
Lights when showing the remaining time of a tape.
LP indicator
Lights during long play recording or playback.
VCR mode indicator
Lights when the TV/VCR button is set to VCR.
Press the MENU/REVIEW button, select MODE with
the ,\ / \,/ buttons then press the OK button.
Select DIMMEF with the ,^\ / \,/ buttons.
Use the < / > buttonstoselect the brightnessolthe
FL display (1, 2 or 3).
Press the OK button to return to normal VCF oDer-
ation.
@
rd)
@
11

Quick finder foMard
(5 and 7 times normal speed)
Quick finder reverse
(5 and 7 times normal speed)
Index search forward and index number
lndex search reverse and index number
Intro scan forward
and index number
TStop .^ Eject >D x5 Ouick tinder torward
(5 and 7 times normal speed)
il-!l-
PS.2 Recording pause
and channel O INDX
PS.2 Record, index
and channel )>>x7
il-=- Audio dubbing pause <<< x5 Ouick finder reverse
(5 and 7 times normal speed)
^
tt Audio dubbing {<<< x 7
>;>/a Play
Reverse play >x3 rK3 lndex search forward and indgx number
lndex search revers€ and index number
.D/<t Slow (forwa.d)
Slow (reverse) .frD slntro scan forward
and index number
,W, stitl
Reverse still -Dl' Blank search
>> <ll Fast forward
Rewind
Note:
. Additional indicators which appear on the TV screen are explained in the appropriate sections.
.lfyoudonotwishtheindicatorstobedisplayedtheycanbecancelled(refertothe"Cancellingtheon-screendisplays'section).
12

Video channel
It your TV already has a preset video channel, this channel
should be used to assure the best sound and picture quality.
As this channel varies from country to country, you should
check your rys operator's manual to see which is the video
channel for your TV.
For example, if your video channel is 50, turn the VCR on and
setthe TV to channel50. Then use the TV station tuner on your
TV and tune the TV until the screen becomes blue. The video
channel is now set.
This VCFI is preset to VHF channel 1 (HIGH position) and if
yourTV's video channelis also 1, no adjustments are necess-
4ry.
Note:
. When a video/audio cord is used for connection of the VCR
and TV (referto "Connections"), setting the video channelis
not necessary, in this case simply set the TV's TV/VCR
switch to VCR.
To confirm that the video channel is propefly set
I Press the PROG. LIST button on the remote con-
trol.
SIART
lf the video channel has been properly set, the pro-
gramme, clock screen will be displayed on the TV. ll the
programme/clock screen is nol clearly displayed, finer
tuning of the video channel of the TV is neccessary.
Press the button again to turn the display off.
1
2
Turn on the TV and VCR.
Press the W/VCR button until 'VCR" appears on the
FL display.
lltheVCR indicator is already lit, this step can be omitted.
Set the Tv to VHF channel 1.
When the TV is set to VHF channel 1. the screen will
become blue.
Set the RF.OUTswitch, on the rear panel, to the LOW
position.
Set the Tv to VHF channel 0.
When the TV is set to VHF channel 0, the TV screen will
become blue.
3
4
5
13

Initial setting
This VCR will automatically be set to the VCR mode when it is
turned on ("VCR" will light on the FL display) ready for VCR
operation (playback picture viewing etc ).
This means that if you are watching a ry programme when the
VCR is turned otf, when you turn the VCR on (to rewind atape
etc.) the TV picture may become very unclear or there may
only be interference on the screen.To viewthe TV programme
usino the TV s tuner vou have to set the VCR to the TV mode
(ore;s the TV/VCR button until VCR disappears lrom the FL
display) il you want to watch avideo, yourTV must be set to the
VIDEO (AV) mode with the TV'sTV/AV (TV/VCR) button.lf the
VCR and TV are only connected using the antenna connec-
tions (RF lN/OUT), you must set the TV to the video channel
(channel 1, for example. Refer to the previous page).
lf you want to change the VCR so that it is set to the TV mode
e;ch time the pow;r is turned on (so that it doesn't interfere
with normal TV viewing if you turn it on just to rewind a tape
etc.)follow the stePs below.
I Pressthe MENU/REVIEW button on the remote con-
I trol. setect MODE with the ./\/ \,/ buttons and press
the OK button.
.) Select W/VCR with the ,^\ / \,/ buttons.
L
This is an on-screen display ofthe various modes you can pro-
gramme via the TV screen.
LANGUAGE: To select a language lor the on-screen dis-
prays.
PS PRESET: To preset TV stations
PS CANCEL: To cancel preset TV stations
CLOCK SET: To set the clock.
MODE: To select the SPEED, BSP, oSD, AV MUTE,
TV/VCB, DIMMER and AUTO OFF modes.
SEARCH: To select the BLANK SEARCH and INTRO
SCAN modes.
Detailed information appears in the respective sections later
in the manual.
1 Press the MENU/REVIEW bution.
I
IIENU
LANGUAGE
> P3 PRESET
PS CAI{CEL
CL@K SEI
rcoE
SEAACH
3
4
Select wwith the < / > buttons
Pressthe MENU/REVIEW buttonto return tothe nor-
mal mode.
To return to the VCB mode, repeat the above steps and
set to VCR in step 3.
a) Select the mode that you want by setting the arrow
4 indicatortotheappropriatepositionwiththe,'\or \,/
button.
O Press the OK button.
O The selected function screen willbe displayed on the TV
screen.
I Press the MENU/REVIEW butlon again to return to the
normal screen.
The language of your choice can be selected for the on-
screen display. You can choose any one of the following lan-
guages: English, German, Spanish, French, ltalian, Dutch' Fin-
nish or Swedish. lf a language is not selected, the VCR will se-
lect English automaticallY.
.l Pressthe MENU/REVIEW button on the remote con'
I trol. select LANGUAGE with the ,/\ / \'/ buttons and
oress the OK button.
ihe language list screen will be displayed on the TV
screen.
, Set the arrow indicator to the desired language with
4 the \,/ butlon.
Q Press the OK button.
\, The language list screen will disappear after a few sec-
onds.
trENU
> LANGUAGE
PlI PRESET
PlI CANCEL
clctcx sET
uooE
SEARCH
LANGUAGE
> ENGUSH
OEUTSCH
€SPANOL
FRAI{CAIS
ITALIANO
NEOESLAI{DS
s{ro||l
SVENSKA
14

Presetting TV stations
This VCR contains a built-in tuner which can be used to re-
ceive TV broadcasts in place ofyour ry set.In orderto use this
tuner, the VCR must be tuned to the locally available ry sta-
tions. This procedure is called "presetting". Up to 45 stations
can be preset.
Channels 0-4,5a,6-1 1 have already been preset at the fac-
tory, local stations will automatically be available on these
channels. The lollowing procedure is for presetting the re-
maining 33 channels. The tactory preset channelscan also be
replaced with new channels if desired.
Before proceeding
Turn on the TV and VCR.
Make sure thatthe TV is setto thevideo channel or that the
TV's TV/VCR switch is set to VCR (refer to 'Video chan-
nel").
Presetting TV stations can only be done with the remote
control.
Press the MENU/REVIEW button, select PS PRESET
with the ,.\ / \,/ buttons and Dress OK. Press the OK button.
Once the station is preset, the "EMPTY" sign will disap-
pear and the PS number will change to the next highest
number. lf a station has already been preset at the se-
lected channel number, that station will be replaced with
the newly tuned station at this moment. Scanning will
continue to search forthe next station automatically and
stoo when the next station is tuned in.
4
I ll you want to select another wave band for presetting
(V-H for example), p.ess the ,^\ button then use the >
button to choose the band that you want. Then press
the \,/ button to return to the tuning position.
''Ii PflESET
't..............
PSi
PS PNESET
':....
PSi i2 €TPTY
PS PFESET
:..............
PSt
PS PBESET
:r..............
, Tune in the station by pressing the > button.
L lf a band is not selected TV scanning willstan on the VHF
low band and proceed through the VHF high and UHF
Danos.
The tuning bar indicator and the programme itself will be
shown on the TV screen.
Scanning willstop when astation is tuned in.lf you do not
want to store that particular station, press the > button
again to continue scanning.
To preset more stations into the memory, repeat
steps 3 and 4.
Press the MENU/REVIEW button after all the sta-
tions have been preset.
After the stations have been preset, they can easily be re-
called by pressing the CHANNEL buttons.
The channel number and wave band willalso aoDear on the
FL display during presetting.
lf you are watching (and not recording) Tv pro-
grammes using the VCR's tuner, make sure that the
AUTO OFF mode is set to OFF.
lf set to ON, the powerwill be turned oif while you are
watching the programme.
Band TV screen FL display
VHF low band L
VHF high band V-H H
UHF band UHF U
5
6
3Assign a channel number ("PS t'1" for example) to
the tuned in station with the CHANNEL buttons.
The "ENTPTY" sign will appear on the TV screen if a sta-
tion has not alreadv been Dreset at that channel.
PlI PRESET
't-!i....
PS 't
PS PRESET
'-....
PS 11
15

For reception of weak TV stations
This VCR has a built-in shut-otf system which cancels re-
ception of weak TV stations in order to ensure enjoyable
viewing and proper VCB operation. However, if you want
to preset aweakTV station that is being received by your
TV but not by the VCFI, the following procedure can be
used to cancel the shut-otf system.
{ Press the MENU/REVIEW button, select MODE
I with the ,,\ or \./ buttons and press OK'
O Select the AV MUTE mode with the ,^\ or \,/ but-
L ton.
Q Set torhe'OFF" position with the < or > button.
/4 Press the MENU/REVIEW button.
-t
I During normal programme leception, make sure
that the AV MUTE mode is set to the "ON" position.
Note:
. To reset the mute mode, repeat the above process but
in step 3 set to the -ON" Position.
Press the MENU/REVIEW button, select PS CANCEL
with the a\ / .v buttons and press OK.
The "PS CANCEL" screen will be displayed on the TV
screen.
Select the channel that you want to cancel with the
CHANNEL buttons.
2
3
PS CArcEL
>PS9
Press the (+) CANCEL button to cancelthe preset
station.
The channelnumber willbe replaced by the next highest
preset channel number.
PS CAI{CEL
'PS --
Pg CANCEL
-....
4
5
To continue cancelling stations, repeat steps 2 and
3.
Press the MENU/REVIEW button when you have fin-
ished cancelling the stations.
TV stations can be selected in three ways:
Using the CHANNEL -/\ / \,, buttons.
I Press the,^\ button to increase the channel number or
the .',/ button to decrease the number.
Usingthe l - 0 buttons.
I To select channel2lor example, press0andthen press
2, and for channel 23 press 2 and then 3.
Using the jog or shuttle dials on the remote conlrol.
I Press the CHANNEL button and turn the iog or shuttle
dialto the left or right.Turning eitherdialto the rightwill
increase the channel number and turning them to the
left will decrease the number.
The red LED indicator nextto the CHANNEL button will light
during this mode, to cancel the mode press the button
agarn.
16

Setting the clock
This VCR has a built-in digitaltimer clock which must be set to
the present time. This clock is used to keep the time and for
timer recording. The VCR uses a 24 hour clock: 7:30 pm =
19:30 on the FL display.
There are two ways to set the VCR clock:
. Setting the clock via the LC (Liquid crystal) display of the
remote control.
. Setting the clock via the TV screen.
Both ways use the remote control to enter the data. We sug-
gest setting the clock on the LC display of the remote control
and transmitting the time to the VCR, thus synchronizing the
remote control and VCR.
Before proceeding
Turn on the TV and VCR.
Make sure thatthe ry is set to the video channel or that the
TV's TV/VCR switch is set to VCB (refer to "Video chan-
nel").
Press the CLOCK,/CH button.
The clock set screen will appear on the LC display.
The point ready for data entry will be flashing.
Set the date, month and yearwith the a\ \,/, < or >
buttons.
The weekday is set automatically.
E8: l5
l,l" !J.g{
Daylight saving time
I When setting the clock during the daylight saving time
period, press the ({:} CANCEL button.
The "+" indicator will be displayed on the LC display.
7 Press the OK button lo start the clock.
t The clock will start and the transmit indicator will flash.
Clock data can now be tlansmitted to the VCR.
EB: l5
lry Il'g1'
Pointthe remote controlatthe VCR'S remote sensor
window and press the OK button to transmit the
clock dala.
The time will appear on the VCR's FL display.
Press the CLOCK/CH button twice to return the
remote control to the normal mode.
Note:
Steps 2 to 6 can also be set using the 1 - 0 buttons. Instead
ot using the ,,\ and \,/ buttons.
To set a single digit number press the 0 (zero) first then
press the number.
For example to set 8:15; press 0 (zero)then I then 1 and
then 5. lf you use the 1 - 0 buttons for data entry you do not
need to press the > button to start the next data flashing.
lf you make a mistake while setting the clock, move to the
data you want to correct with the < or > button then re-
enter the data with the ,^\ or \,/ button or 1 - 0 buttons.
To correct clock data at a later date. reoeat the above
proceoure.
6
2Set the hour with the ,,\ or .v button.
,,\ : Press this button to count up.
\,/ : Press this button to count down.
E
l,nr'*nn
&JIJJUU
[-5El
B
ffiffi00
to
Il'1\',
3
4
Press the > button.
The minutes will flash.
Set the minutes with the ,^ or \,/ button.
When the ,.\ or \,/ button is pressed continuously, the
minutes will increase or decrease at 5 minute intervals.
a8,ffi
l' i"g \'
Press the > button.
The date will flash.
6B: !5 i"9 \',
8
I
5
17

Clock data is retained in the remote control after it is trans-
mitted to the VCR. lf tho VCR'S clock data is cancelled (be-
cause of a powerfailure, etc), or if the data is wrong, the clock
data in the remote control can be re-transmitted to the VCR.
1 Press the CLOCK/CH button
I The "C-SEl'' display will appear.
4 Pointthe remote controlatthe VCR'S remote sensor
a window and press the OK button twice to transmit
the clock data.
Q Press the CLOCK/CH button twice to return to the
L, normal mode.
To adjust for the daylight saving time period the VCR'S clock
can easily be set one hour ahead, or one hour back.
1 Press the CLOCK/CH button.
I The "C-SET'display will appear.
t Press the (+) CANCEL button.
L lf the clock is set to the normal time the clock will ad-
vance one hour ahead and the "+" indicator willappear
on the LC display.
Itthe clock is set to the daylight saving time the clock will
be set one hour back and the "+'indicator will disap-
pear.
Q Pointthe remote controlatthe VCR'S remotesensor
tJ windorvand presstheOK buttonto transmitlhe nerv
clock data.
/,1 Press the CLOCK/CH button twice to return to the
-a normal mode,
lf you set the VCR'S clock via the TV screen, the VCR'S and
remote control's clock may not be synchronized.
j Press the MENU/REV|EW button, select CLOCK SET
I with the /^\ or \,/ buttons and press OK.
The flashing cursor indicates the point that is ready for
dataentry. lfthe clock is already set press the > button
to start the data llashing.
CLOCK SEI
l: oo
sal r/ r (JAl{)/ea
YEAR <HOt'R
-- > $l'tuTE
Note:
. The display on the bottom halfof the screen showswhich of
the,^\ \./, < or > buttonsyou can pressto reach the data
that you wish to enter. The + and - signs indicate the point
that is ready for programming (use these buttons to enter
the data).
, Set the hour, minutes, date, month and year with the
a- ,^\ or \,/. < Or > buttons.
Note:
. lf you make a mistake during the clock setting procedure
and wish to correctthe input dat4 pressthe < or > button
repeatedly to go to the data to be corrected, then re-enter
the correct data with the ,,\ or \./ button.
Daylight saving time
I When setting the clock during the daylight saving time
period, press the ({:) CANCEL button.
The "S" indicator will be displayed on the TV screen.
Q Press the OK button when you have finished enter-
v ing the date.
The clock will start and after a few seconds the clock
screen will disappear.
18

Mode feature
After you have set the clock, the MODE feature will automatF
cally be selected each time that you pressthe MENU/FIEVIEW
button.
Always check this mode before recording or playback.
To adjust for daylight saving time,the VCR'S clock can be eas-
ily set one hour ahead, or one hour back to normal time.
.1 Press the MENU/REVIEW button, select CLOCK SET
I with the ,^\ or \,/ buttons and Dress OK.
, Press the ( +) CANCEL button.
L lf the clock is set to the normal time the clock will ad-
vance one hour ahead and the "S" indicalor will aooear
on the TV screen.
lfthe clock is already setto daylightsaving time the clock
will be set one hour back and the "S" indicator will disap-
pear.
cLocK s€l
S 11 :dl
wED 2/ rr {NOV) / 9il
< ? t "ou"
Pressthe MENU/REVIEW button to return lothe nor-
mal screen,
IIENU
LANGUAGE
PS PRES€T
PS CA CET
ctocK sET
> l|oDE
SEARCH
After pressing the MENU/REVIEW button, press OK.
The mode screen will appear.
> 3PEED 9P
8AP OFF
oao otl
AV IUrE Ofl
DITTEF I
AUTOOFF OfF
3t Selectthe mode that you wantwiththe ,/\ or \./ but-
.- tons and use the < or > button to set the mode to
ON or OFF etc..
? Press the MENU/REVIEW button to return to normal
l, oDeration.
SPEED: To set the speed for recording (SP/LP).
BSP: Automatically rewinds and starts playback of
tapes that have the recording defeat tab
removeo.
OSD: To cancelthe on-screen displays.
AV MUTE: Should be set to'ON" for normal TV receotion
and viewing.
TVIVCR: To set the VCR to the TV or VCR mode
DIMMER: To dim or brighten the FL display.
AUTO OFF: When set to ON, the power will automatically be
turned off (atter about 10 minutes) if the VCR is
not being used. Set to OFF it you do notwant the
power turned off automatically.
lf you are watching (and not recording) TV pro-
grammes using the VCR's tuner, make sure that
the AUTO OFF mode is set to OFF.
lfsetto ON, the power willbe turned otf while you
are watching the programme.
Note:
. Full explanations of these modes are given in the respec-
tive sections later in the manual.
19

Playback
Before proceeding:
. Turn on the TV and VCR.
. Make sure that the TV is set to the video channelor that the
TV's ry/VCR switch is set to VCR. (Befer to "Video chan-
nel".) Playback of E-300 tapes is not recommended.
2
3
IMPORTANT
Before starting playback, set the VCF to the MODE
teature (refer to "Menu mode") and make sure that all
the settings are in the correct position tor the modes
that you want to use.
Load a pre-recorded video tape.
lf the video tape's recording defeat tab has been
removed, playback will begin automatically.
Press the > play button to start playback.
The l-HQ and D- indicators will light on the FL display, the
L- indicator will flash until auto tracking is completed.
lf there are disturbances in lhe playback picture refer to
the "Tracking/Picture/Stability" section.
Press the r stop button to stop playback.
I Press the >> fast torward button to fast lorward the
video tape.
I Press the < rewind button to rewind the video tape.
I Press the r stop button to stop fast torward or re-
wind.
Note:
. The video tape will automatically be played back at the
same speed it was recorded at.
. lfthevideotapeendsduringplaybackitwillstopandrewind
automatically.
. The Super l-HQ feature operates automatically during
playback.lt can be cancelled, or reset, by pressing the l-HQ
button.
During playback the still picture feature can be used to freeze
the playback picture. The picture can then be advanced one
frame at a time.
I Press the PAUSE/STILL MK button during playback
to lreeze the Dicture.
I Press the PAUSE/STILLIU>< button repeatedlyto ad-
vance the frames,
Each time the button is pressed the stillpicture will advance
one frame.
I Press the > play button to resume playback.
Note:
. lf "noise bars" appear on the screen, refer to the tracking
section in the following section.
. After a frame has been frozen for approx.5 minutes, the still
mode will disengage to protect the video tape.
To correct tracking during the playback and quick finder
mooes:
I Press the AUTO TFACKING button.lfthe tracking is not
corrected satistactorily press the < or > builon re-
peatedly until the picture is clear.
During manual tracking adjustment the tracking position is
shown on the TV, this will disappear automatically atter ad-
iustment has been comoleted.
To correct tracking during the still and slow modes:
I Press the < or > button repeatedly until the picture is
clear.
The tracking position will not be shown on the TV.
To correct the picture sharpness during the playback mode:
I Press the /\ button repeatedly to sharpen the picture
or press the \,/ button to soften the picture.
During adjustment the picture control position is shown on
the TV, this will disappear automatically after adjustment
has been completed.
PTCTURE -.... x.... +
To correct picture shake during the slow motion or still mode:
I Press the a\ or \,/ button until the picture shake is cor.
rected.
20
Table of contents
Other Akai VCR System manuals

Akai
Akai VS-2EGN User manual

Akai
Akai VS-J4600 User manual

Akai
Akai VS-K203M-E7 User manual

Akai
Akai VS-G205 User manual

Akai
Akai SHOWVIEW VS-G245EDG User manual

Akai
Akai VS-606EA User manual

Akai
Akai VS-K606N-E3(S) User manual

Akai
Akai VS-X9EGN User manual

Akai
Akai VS-G242EA User manual

Akai
Akai AVR250 User manual