●Safety instructions...........................................................................1-3
●Notes for use...................................................................................4-6
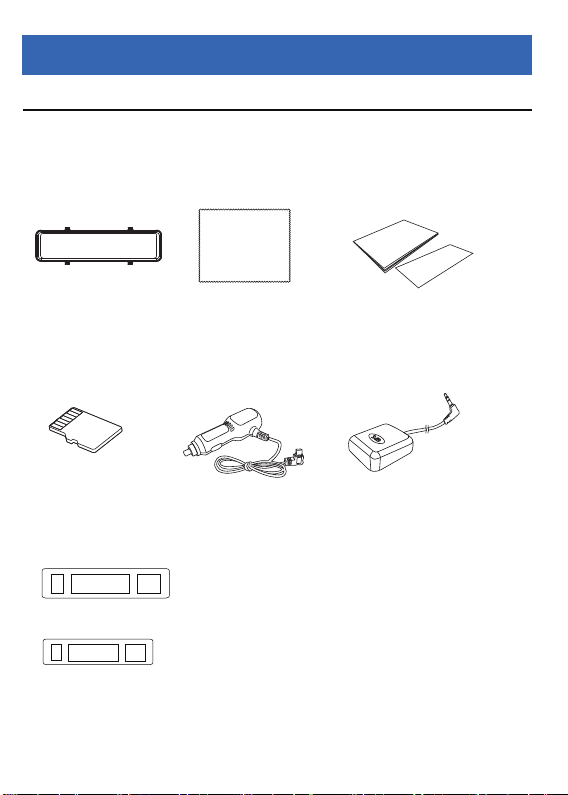
●Product components list..................................................................7-8
●Name and function of each part......................................................9-10
●About Micro SD Card.....................................................................11-13
●About Auto Recording.....................................................................13
●About power on/off........................................................................14-15
●About date setting...........................................................................16
●About the LCD display.....................................................................17
●About the cigarette lighter................................................................18
●About installation............................................................................19-25
●Screen mode....................................................................................26
●Screen mode・Function menu operation.........................................27-28
●Screen mode・Camera display mode ............................................29
●About LCD screen operation...........................................................30
●Recording Type..............................................................................31-32
●Playback of recorded video............................................................33-34
●About HUD mode............................................................................35
●Setting menu..................................................................................36-39
●Troubleshooting...............................................................................40
●Specifications...................................................................................41
●About Warranty................................................................................42
1
Safety instructions
For your safety, please be sure to comply with these safety instructions
for prevent traffic accidents.
Caution
Pay attention
Prohibit
Enforce
Precautions that must be observed to avoid the risk of death or serious injury.
Precautions to avoid the risk of minor injuries and property damage.
Precautions that must never be done.
Precautions that must be compulsorily observed.
Caution
Be sure to use fuses of the specified capacity
and have them replaced by a professional.
Using a fuse with more than the specified
capacity may cause fire, smoke, fire or
malfunction. (Fuse 3A)
Do not install this product in a place that
obstructs driving or visibility or poses a danger
to occupants.
Installation in a place that obstructs
driving, obstructs front and rear visibility,
or poses a danger to occupants may
result in a traffic accident or injury.
Never use the bolts or nuts of the car's safety
parts when installing.
Using bolts and nuts from safety parts
such as steering wheels and brakes can
lead to accidents.
Drivers should not operate this product or
watch the video inside this product while driving.
Watching the video while driving may
result in a traffic accident. Please be sure
to park your car in a safe place and use it
with the handbrake off.
After installation and wiring, make sure that the
electrical parts of the car are working normally.
If the electrical parts of the car (brakes,
lights, horn, directional lights, etc.) are
not working normally, it may lead to fire,
electric shock or accidents.
When setting up the wiring, please make sure
it will not interfere with driving or getting in and
out of the car.
Please make sure all lines are secured
together and do not wrap them around
the pedals, steering wheel, etc. as this
may lead to accidents or injuries.