11. TAP
Presione el botón en sincronía con el beat para, manualmente,
obtener una lectura del valor de BPM de la pista. En modo
manual el display muestra BPM. Para volver a modo AUTO BPM
mantenga el botón presionado 2 segundos. En el display leerá
AUTO BPM.
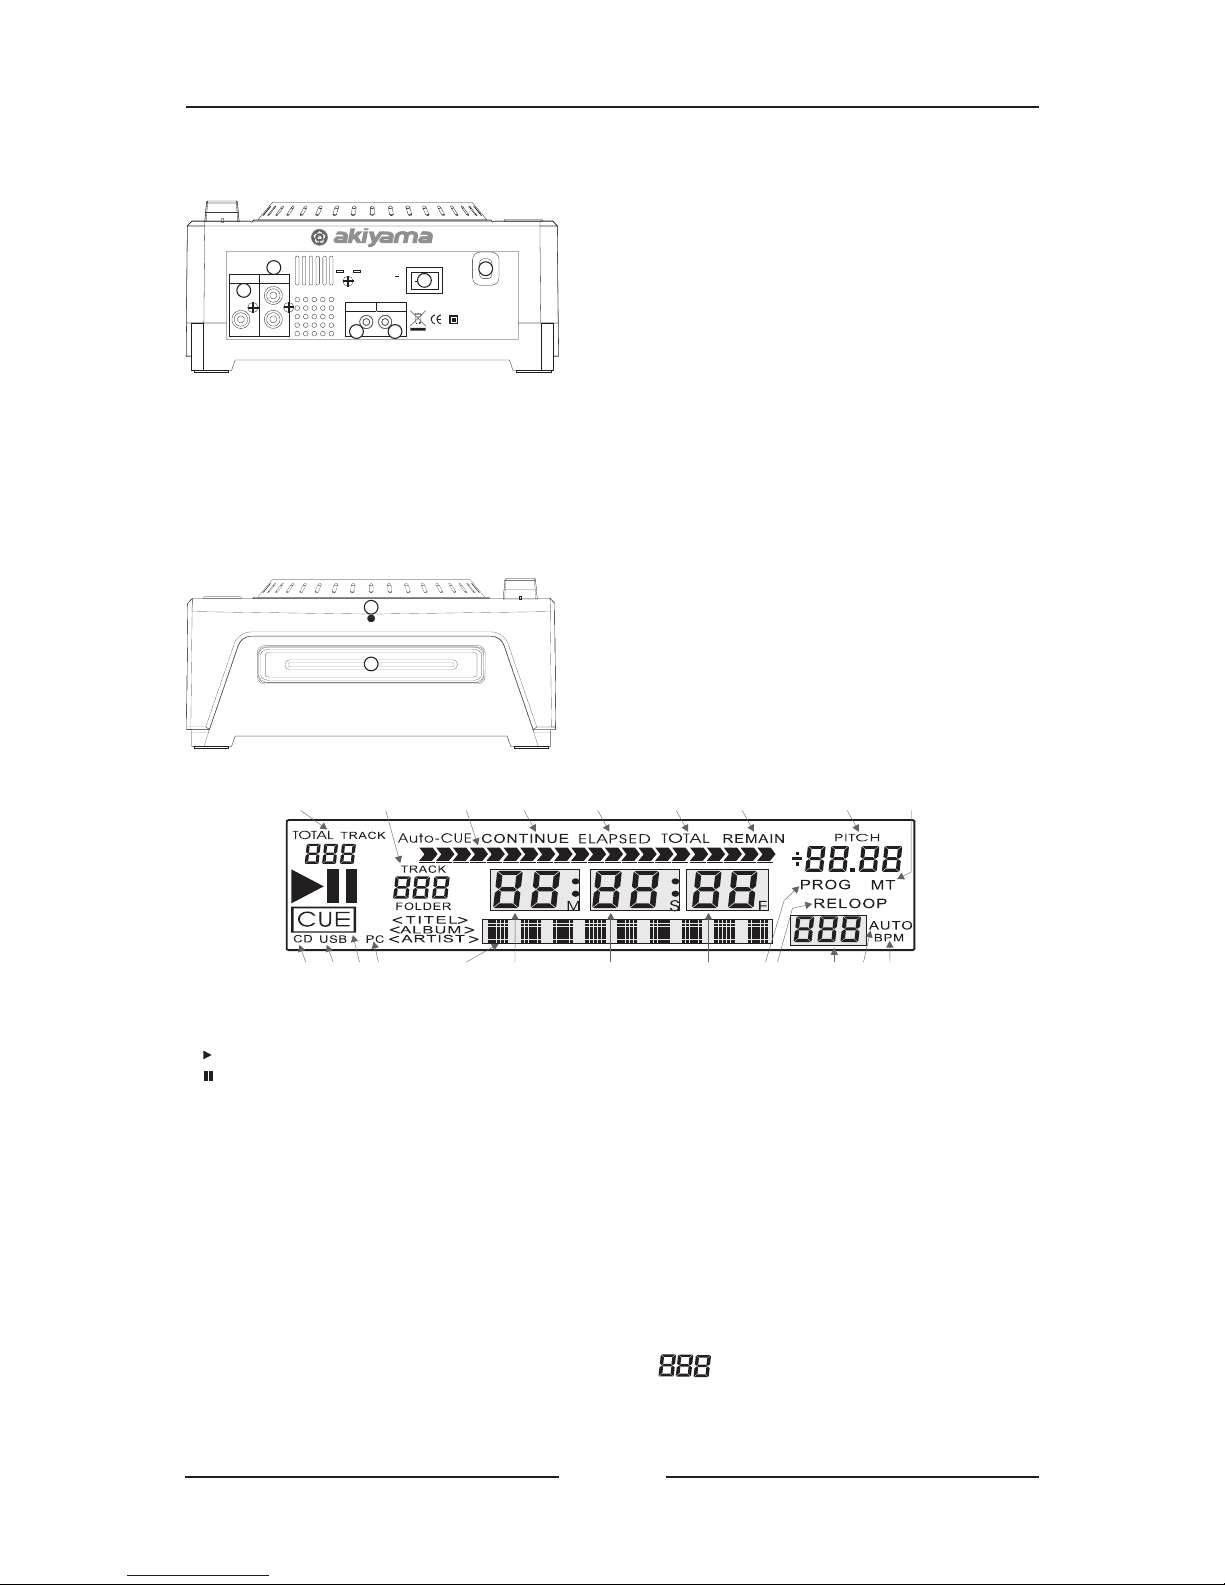
12. DISPLAY
Indica las funciones que van realizándose en tiempo real en
XCEED además de información variada. Vea más información en
el apartado dedicado al “Display” en página 7
13. CUE
En el modo de pausa, pulse este botón para establecer un punto
en el tiempo que quiera memorizar en su reproducción. En
modo reproducción, pulse este botón para pausar la música y
volver al punto memorizado. Si mantiene pulsado este botón se
iniciará la reproducción desde el punto de referencia. Cuando
deje de presionarlo, dejará de reproducirlo y volverá al punto
memorizado.
Después de pulsar este botón para memorizar el punto
deseado, los anteriores serán eliminados.
14. PLAY/PAUSE
Presione este botón para iniciar la reproducción o pausarla.
15. PITCH ON/OFF
Presione este botón para activar o desactivar el ajuste de pitch.
Ajustable mediante el deslizador PITCH (25).
16. PITCH RANGE
Cambie el rango de pitch entre el +/-8%, +/-16 % y +/-100%.
A. Cuando la luz LED está apagado, se establece +/-8%.
B. Cuando la luz LED está encendido, se establece +/-16%.
C. Cuando la luz LED parpadea, se establece +/-100%.
17. MT MASTER TEMPO
Cuando se activa esta función, la nota de la canción permanece
inalterada aunque manipule el pitch control (25) y/o el rango de
pitch (16)
Nos permite seleccionar el modo Key Lock (Master Tempo). En
modo Key Lock nos permite alterar el valor de PITCH de una pista
sin cambiar la percepción de la nota original. Cuando el modo
Key Lock está activado se iluminará el LED adjunto al botón KEY
LOCK. Si esta función no está activa y modificamos
significativamente el valor de velocidad de reproducción
mediante el potenciómetro Pitch (25) escucharemos la música
considerablemente modificada. Al incrementar la velocidad
escucharemos el llamado efecto “Mickey Mouse” al disminuir la
velocidad escucharemos el llamado efecto "James Earl Jones".
18. PITCH BEND
Pulse “+” para aumentar la velocidad y ”-“ para disminuir la
velocidad.
BOTONES PITCH -/+. La velocidad de reproducción disminuirá o
se acelerará automáticamente cuando presionemos el botón “ - “
o “+” y volverá a la velocidad de reproducción original cuando
dejemos de presionar el botón. El pitch bend actúa aún cuando el
botón pitch ON/OFF (15) no esté activado. El rango de pitch bend
depende del rango seleccionado con el botón (16).
19. PROG
El número máximo de pistas que se puede editar es de 99.
Iniciar PROG-Editar: En modo de pausa, pulse este botón para
editar el programa. La posición de pantalla MM: SS: FF mostrará
"P-xx" y luego parpaderá "xx". Seleccione una pista presionando
SKIP (*) y luego pulse este botón para almacenar. Repita el mismo
proceso y, finalmente, pulse este botón otra vez para terminar un
programa.
(*)Si quiere cambiar de folder, primero pulse el botón FOLDER (3)
y presione el botón SKIP para moverse dentro de las carpetas
disponibles. Una vez elegida la carpeta deseada vuelva a
presionar el botón Folder para entrar en el modo Pistas .
Reproducir PROG: Pulse PLAY / PAUSE para reproducir el
programa y PROG parpadeará en el display. Una vez que detenga
la reproducción programa, puede añadir más canciones al
programa.
Salir de PROG Reproducción-Editar: En modo de pausa, al pulsar
este botón durante dos segundos se puede volver a la
reproducción normal. Una vez que regrese a la reproducción
normal, pulsando este botón se puede entrar en el programa de
nuevo. Puede continuar la reproducción del programa,
almacenar más canciones en el programa o eliminar el programa.
20. OPEN/CLOSE
Presione para expulsar el disco. Eyecta el disco. Para evitar la
eyección accidental durante la reproducción, ésta no se produce
a menos que el equipo esté en modo Cue o Pause.
Nota: El disco no puede ser expulsado a menos CUE o PAUSE ha
sido presionado primero.
21. EFECTOS DE SONIDO
Estos cuatro botones activan los efectos de sonidos. Presionando
cada uno de ellos activará el efecto flanger, filter, eco, o reverse
(reproducción hacia atrás). Cuando seleccione estos efecos se
iluminará y parpadeará el botón RELAY (9). Presione RELAY para
alternar entre ganancia y parámetro (el seleccionado
parpadeará). Utilice el Jog-Wheel (la rueda) para cambiar el valor
de los mismos.
Flanger: Ganancia: 0 ~ 100. Parámetro: 1/32 ~ 16/1
Filtro: Ganancia: 0 ~ 100. Parámetro: -60 ~ +60
Echo: Ganancia: 0 ~ 100: Parámetro: 1/32 ~ 1/1
Cualquiera de los tres efectos puede ser parametrizado como
acabamos de describir. Así como la función REVERSE.
22. SCRATCH
Presione este botón para activar la función SCRATCH. Toque y
gire la superficie superior plana de la rueda (Jog-Wheel) de
desplazamiento para realizar este efecto. Podemos aplicar
cualquier efecto junto a la función SCRATCH.
23. BÚSQUEDA
Presione este botón para realizar búsqueda. Después de haberlo
seleccionado mueva la rueda de desplazamiento para realizar la
búsqueda rápida hacia delante o hacia atrás.
24. RUEDA (Jog-Wheel)
Utilice la rueda para:
24.1. Modo Pitch > ”Pitch Bend”: Use la rueda para ajustar la
velocidad para obtener un BPM más exacto.
24.2. Modo SCRATCH: La superficie plana superior se utiliza para
el efecto SCRATCH. El anillo de la rueda se utiliza para ajustar la
velocidad.
24.3. Modo efecto: En conjunción con el control RELAY para
ajustar la ganancia y el parámetro del efecto digital.
25. PITCH CONTROL
Deslizando este potenciómetro ajusta la velocidad de
reproducción.
Se utiliza para determinar el porcentaje de Pitch. Al mover el
control deslizante fijamos un porcentaje de Pitch que será fijo
hasta que volvamos a actuar sobre dicho control o desactivemos
la función Pitch (15). Recordar que para modificar el Pitch control
deberemos primero activar la función Pitch ON/OFF. El
porcentaje de Pitch aplicado se mostrará en el Display. Utilice
este control para igualar el valor de BPM de ambas pistas.
6
PRESIONE” RANGE” TRES VECES:
RANGE
8%-16%-100%
RANGE
8%-16%-100%
RANGE
8%-16%-100%
8% 16% 100%
> PARPADEA
1ENTRAR EN MODEO PLAY/PAUSE
2PRESIONAR PROG
PROG.
PRESS
3SELECCIONAR PISTAS CON LOS BOTONES SKIP > En Display podra ver la pista seleccionada.
4PRESIONE PLA; PROGRAM COMIENZA
4SALIR DE MODO PROGRAM .
> PROG en Display parpadea
DISPLAY >
PROG.
PRESS 2 seg.
> ENTRAMOS EN MODO PROG
> PRESIONAR BOTON PROG. 2 seg
1SELECIONE EFECTO i.e. FLANGER & ACTIVELO
2PRESIONE EL BOTON RELAY PARA ESCOGER ENTRE: GAIN o PARAMETER
2.1 SELECCIONAMOS GAIN > EN DISPLAY “G ###” PARPADEA (GAIN > DRY/WET)
2.2 SELECCIONAMOS PARAMETER > EN DISPLAY “Parameter value” PARPADEA
> GAIN= 28%
GAIN PARAMETER
> PARAMETER = 8 Ciclos Flange por Beat
Parpadea Parpadea
3GIRE LA RUEDA PARA DETERMINAR GAIN Y PARAMETER (el efecto debe estar activado)
Manual usuario Xceed. Descripción de funciones. Frontal