Akw Level Best Installation guide

Installer- please read all instructions carefully before installation and leave
these instructions with the end user for future reference as this document
contains important warranty information.
Suitable for
shower trays
and wet floors
EN14428
Guaranteed
for *
Life
Level Best Deflector Screen
Level Best
installation and user care instructions
15

© 2016 AKW 2 15-010-048-01
Deflector Screen Instructions
Technical Help line 01905 560219 www.akw-ltd.co.uk
Do not discard this document as it contains important warranty information.
Read all the instructions carefully and leave the instructions with the end user.
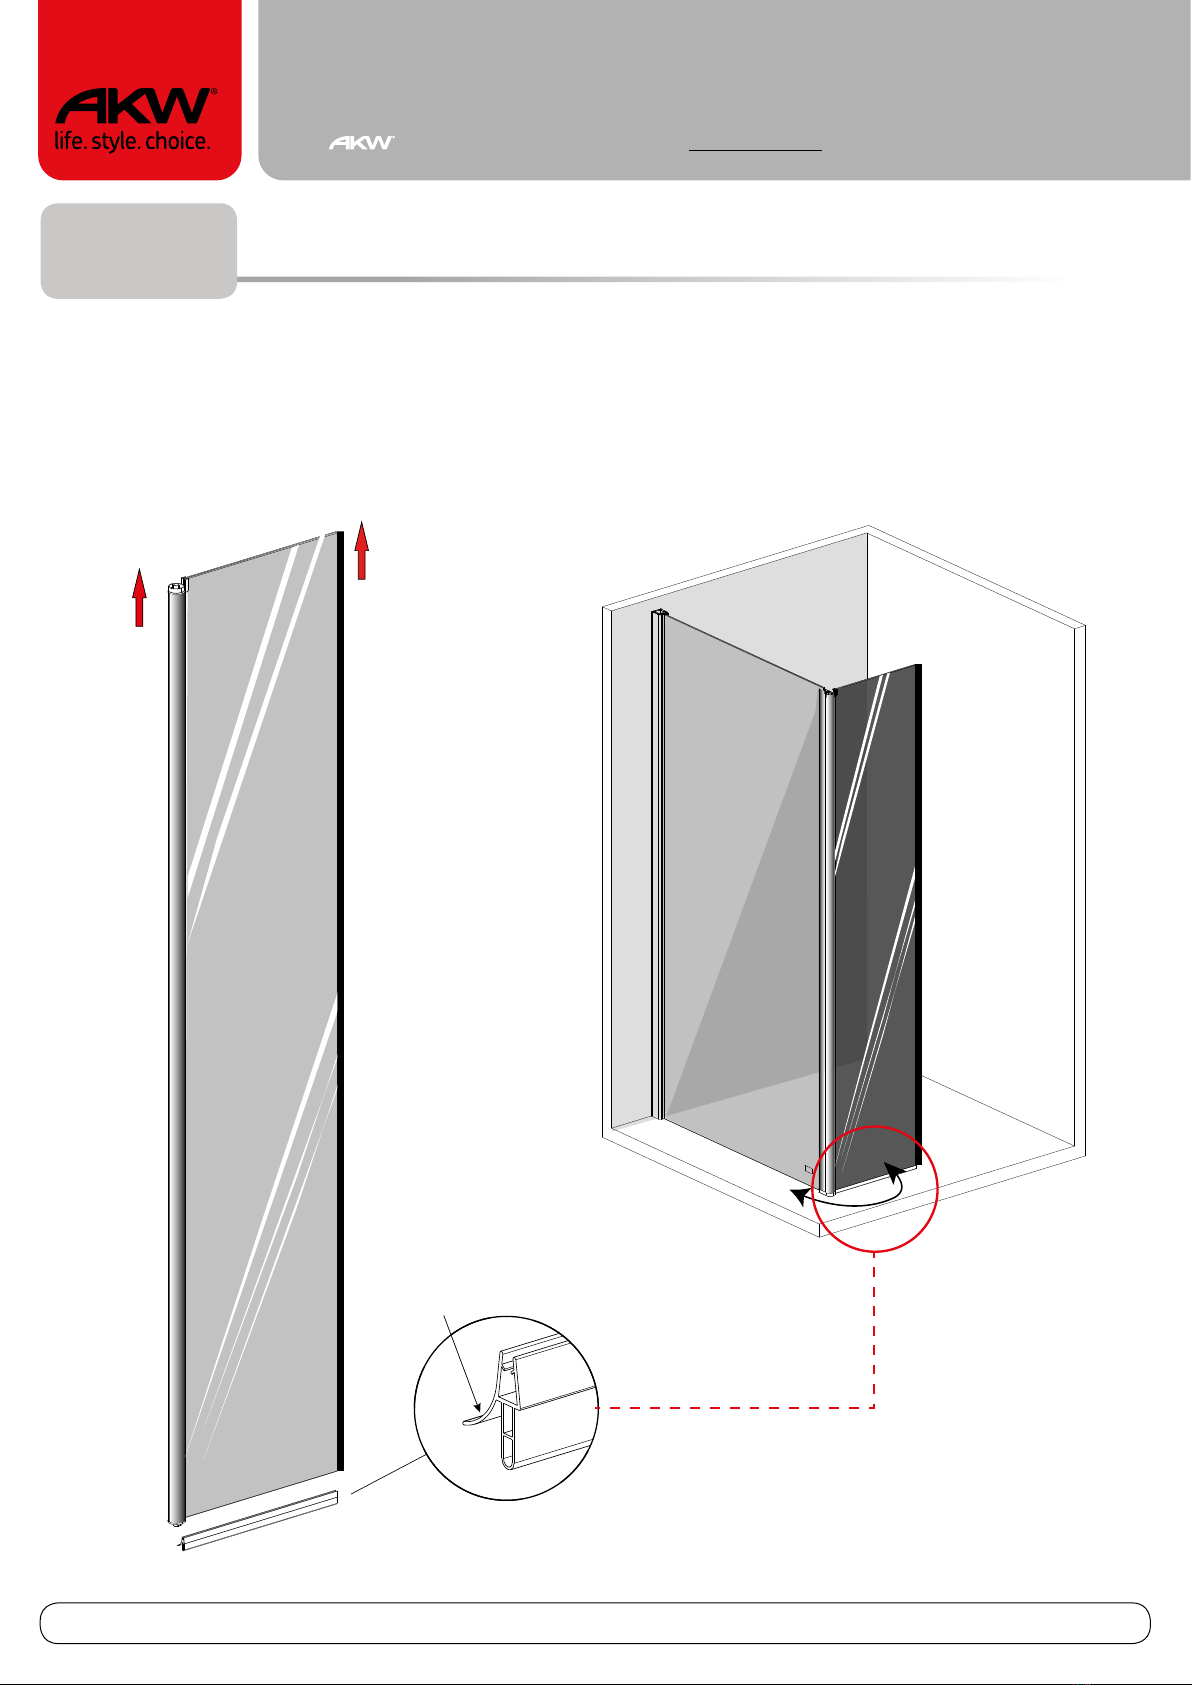
The product is heavy up to (50kg Max). Get someone to help to lift, assemble and install it.
Before you start work:
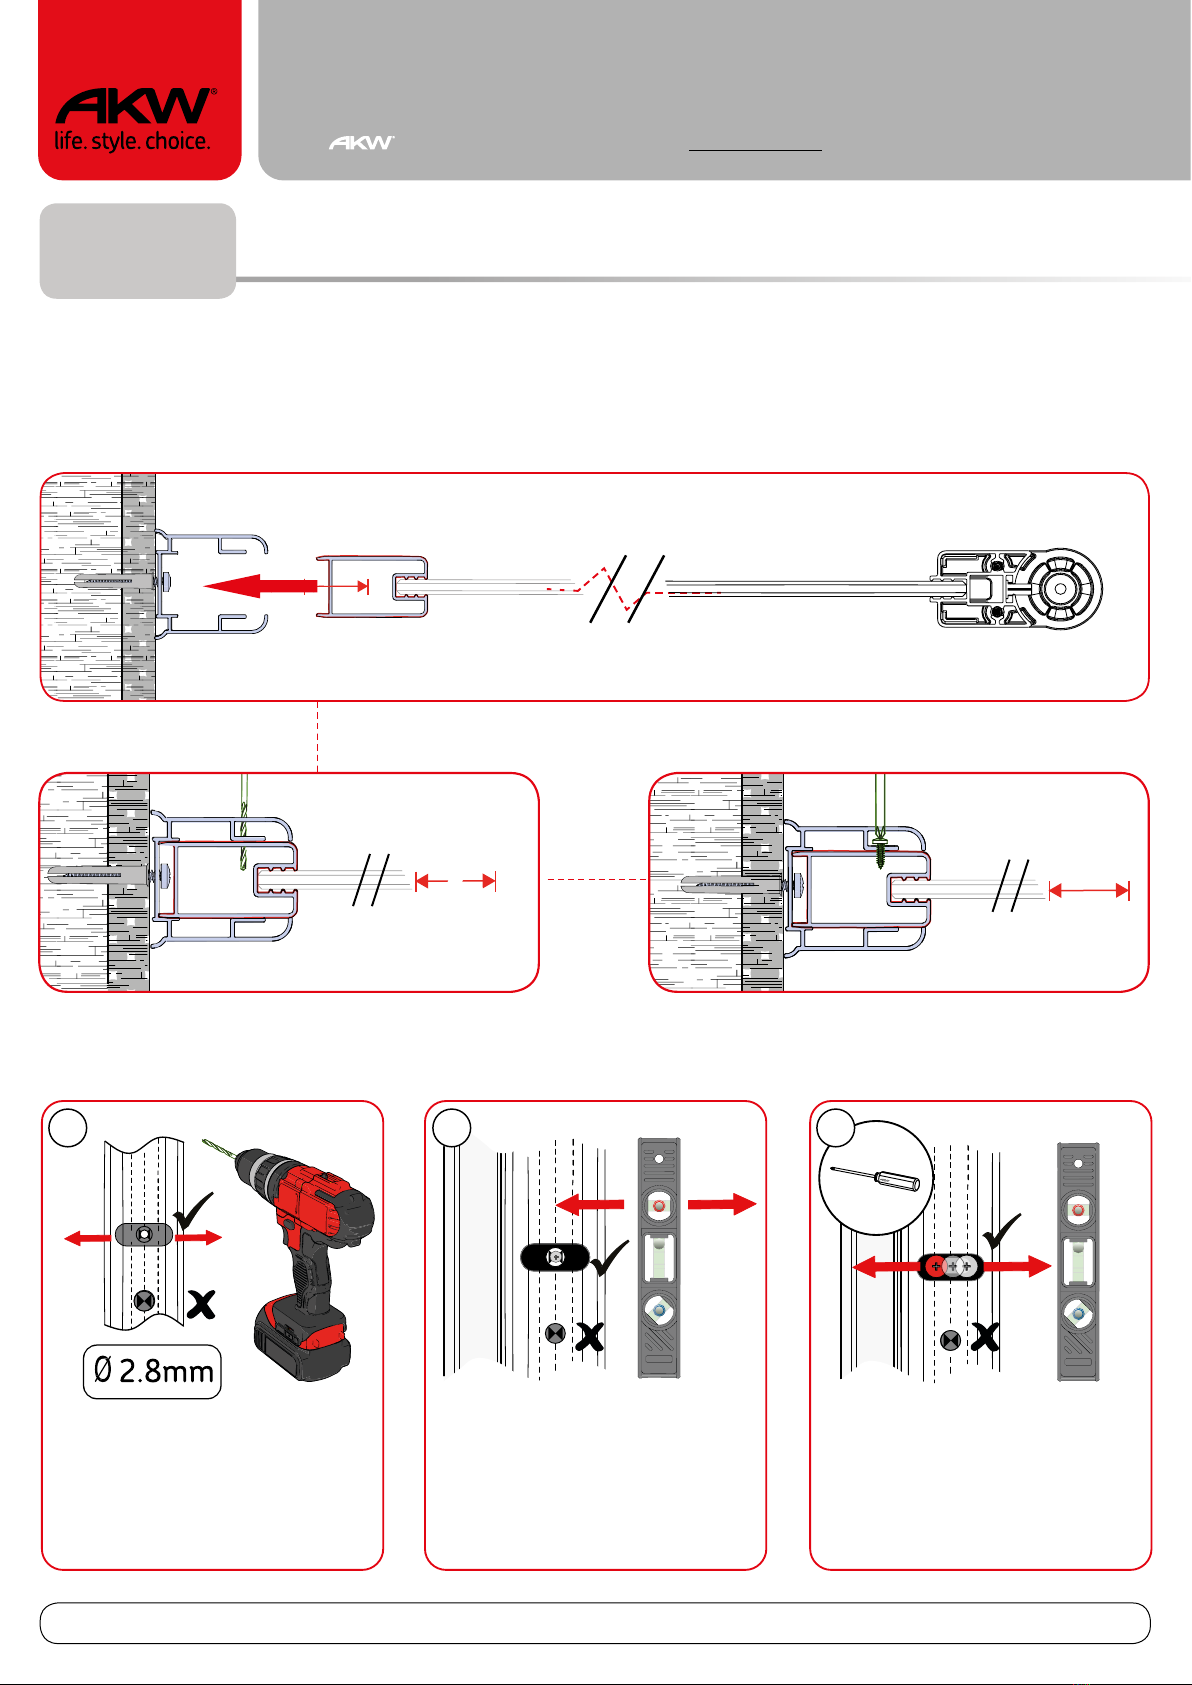
Check for hidden cables or pipes before drilling into a wall.
Caution:
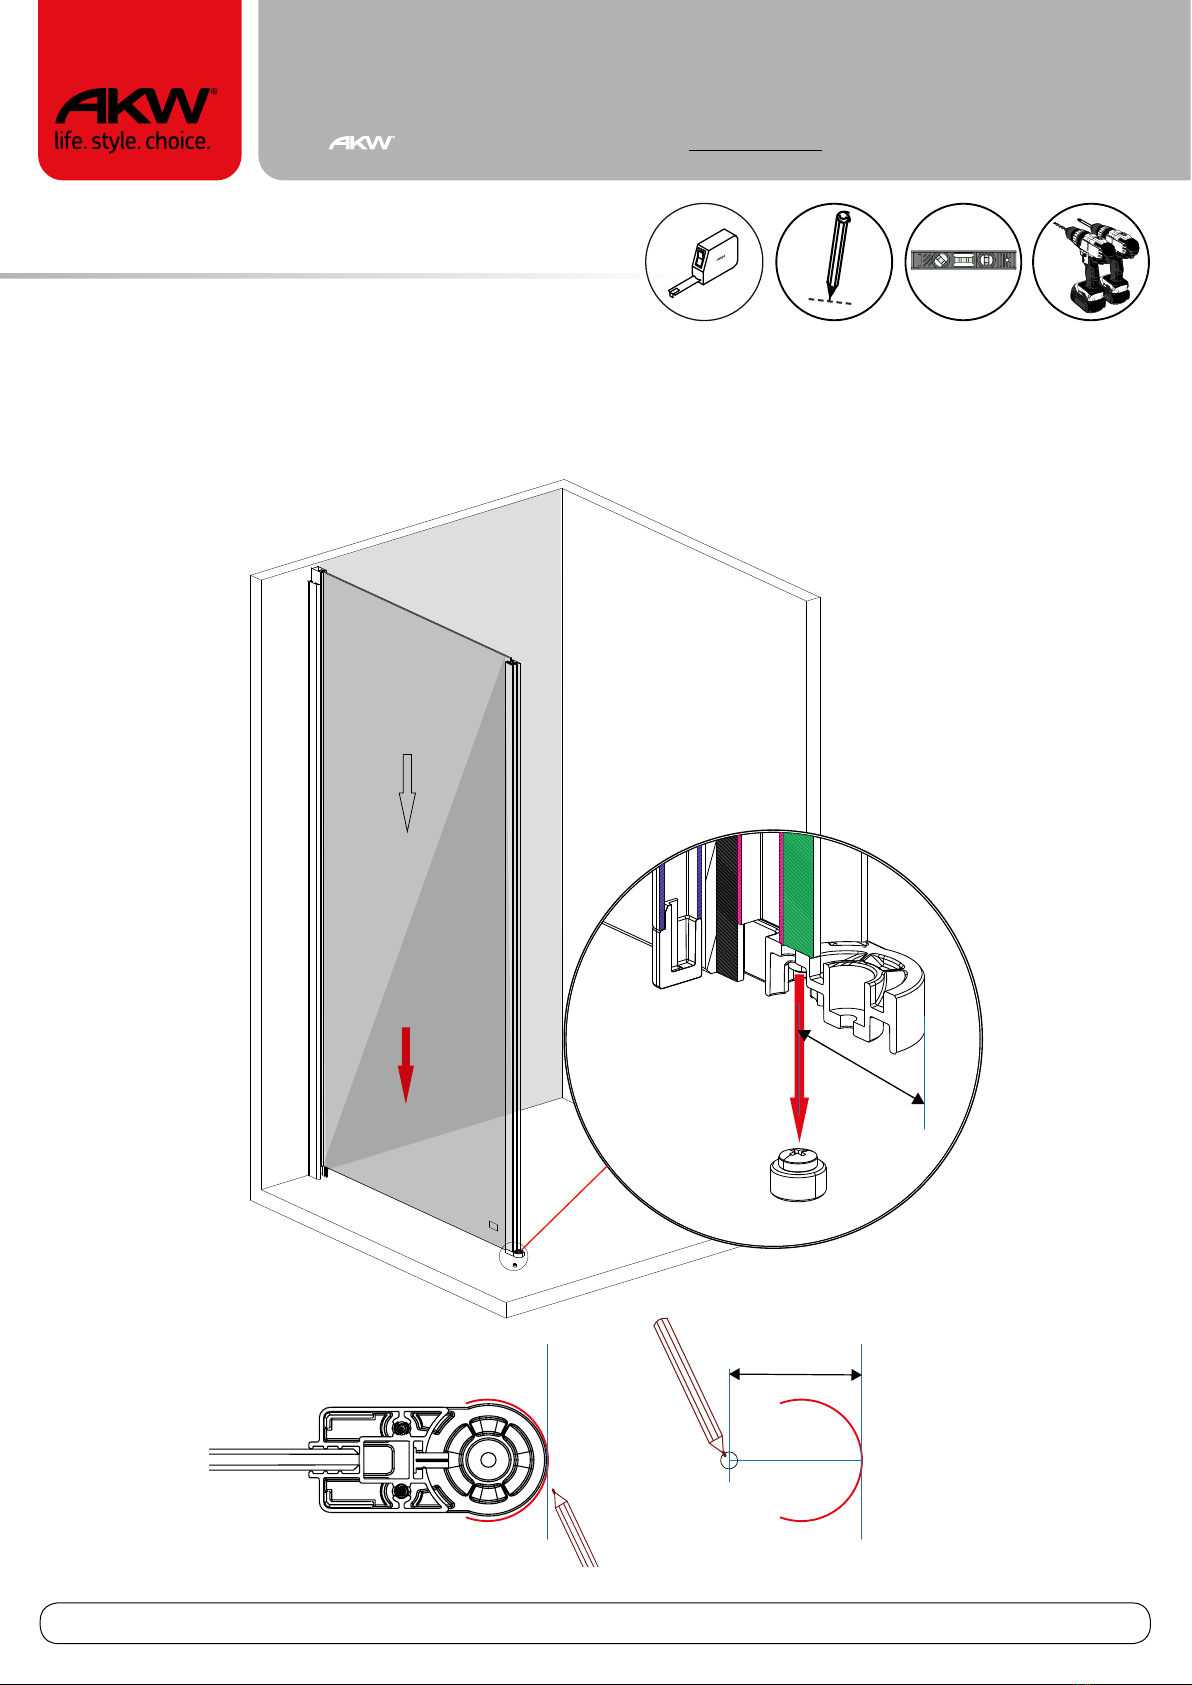
Always start with the wall prole and align the enclosure into position checking the
area is suitable before marking out and xing.
Always wear safety glasses when you use power tools and use the appropriate personal
protection equipment.
If you have to drill holes into ceramic tiles, stick a piece of masking tape to the tile to stop the
drill bit from slipping and damaging the tile. Do not use your drill on hammer action if you are
drilling holes into ceramic tiles.
Always disconnect power tools from the electrical supply when you have nished working with
them.
Make sure any electrical cables do not cause a trip hazard.
Take care when you handle the proles. They may have sharp edges.
Follow the manufacturer’s safety instructions when you use any silicone sealant or degreasing
agent.
Important safety notes
When you unpack the product:
Take care when you unpack the product and make sure that you do not inadvertently discard
any small parts. If any parts are missing or damaged contact the AKW customer services.
Before you start work:
Check the shower tray or wet-oor is level and is completely sealed to nished or tiled walls.
Check that nished walls are sound and free from cracks or loose tiles or grout.
While you work:
Make sure that all surfaces are clean, dry and free from loose debris or dust.
Protect the surfaces of the shower tray and cover the waste to prevent the loss of small
components and prevent debris from entering the waste trap.
Make sure that you follow the manufacturer’s instructions to degrease any surfaces that you
need to silicon.
Use the external packaging to protect the oor and wall when you assemble the product.
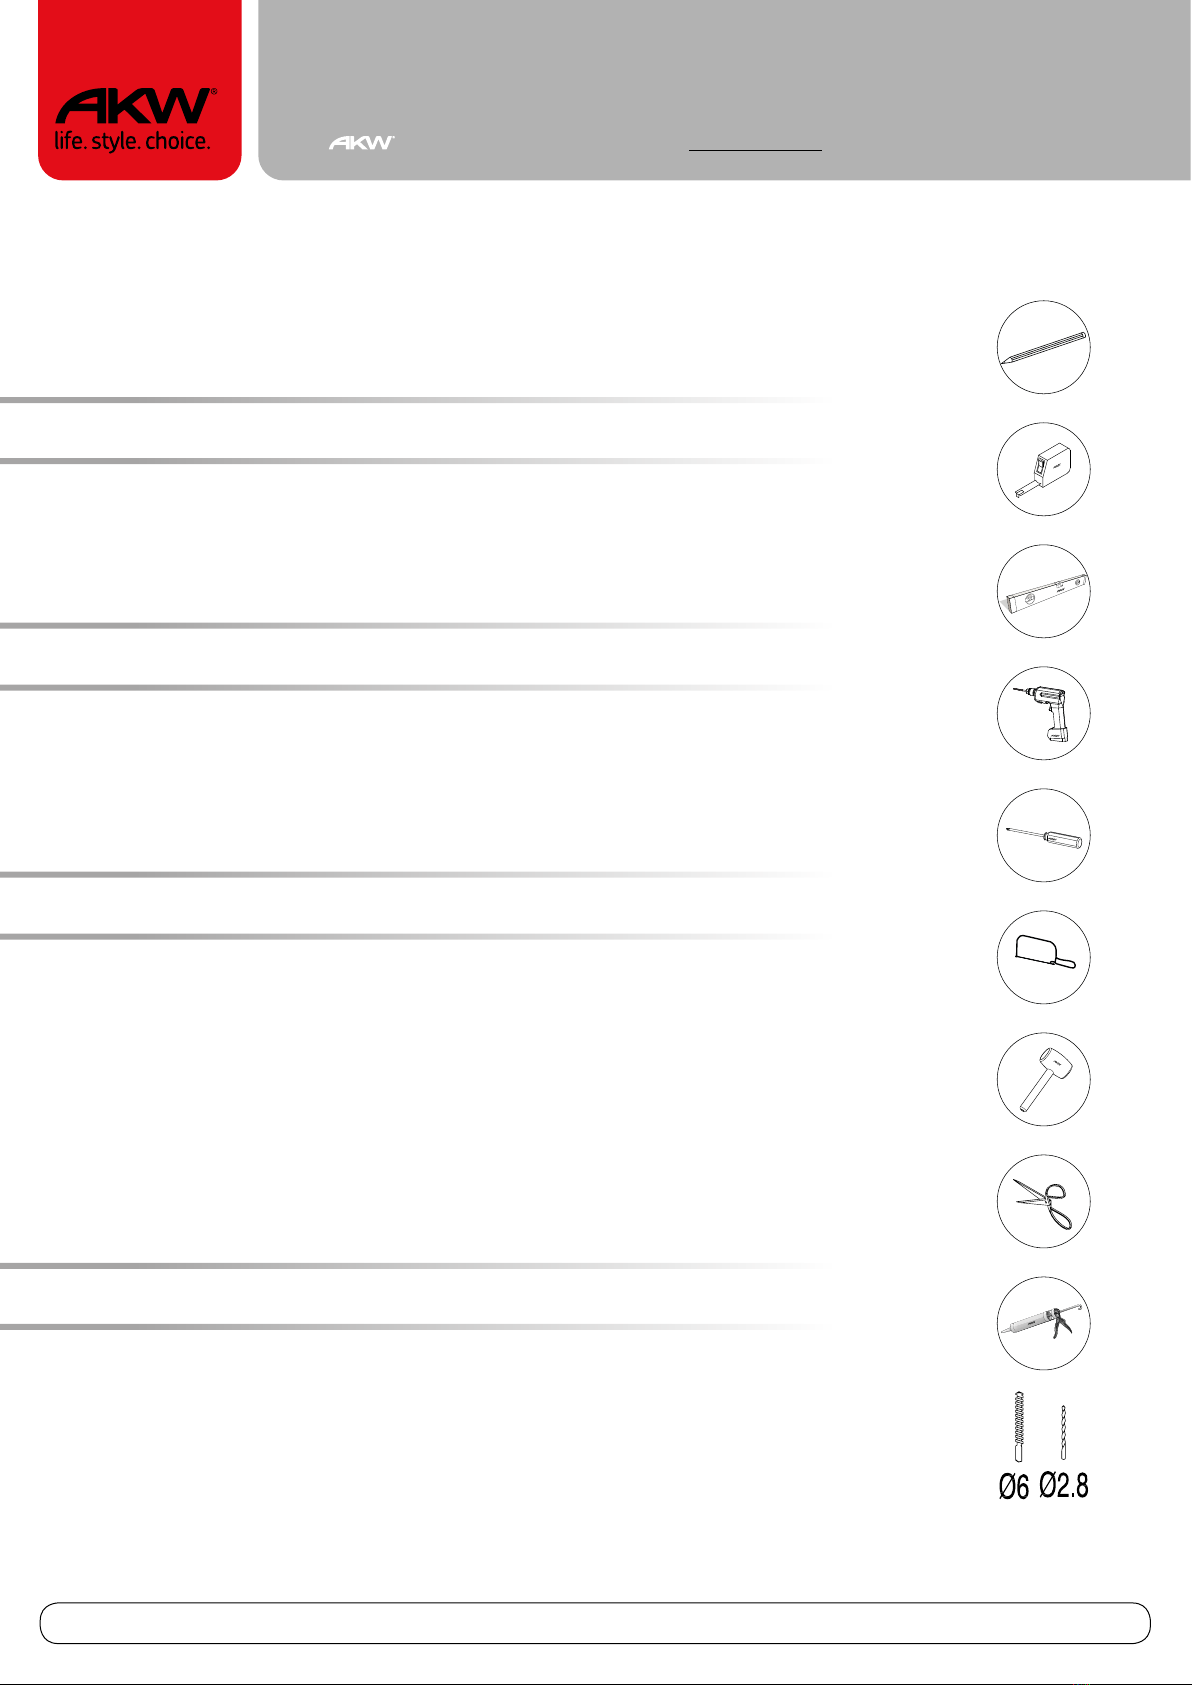
To check the accuracy of your spirit level place it on a horizontal surface and note the bubble
position between the markers. Rotate the spirit level through 180° and note the bubble position
again. Ensure the markers are level. Repeat the test vertically.
After installation:
Do not wet the enclosure for 24 hours to ensure that the silicone sealant is fully cured.

© 2016 AKW 3 15-010-048-01
Deflector Screen Instructions
Technical Help line 01905 560219 www.akw-ltd.co.uk
Tools required
Preparation Pages
Contents
Preparation & Planning Pages
Installation Pages
Final Installation Pages
4-5
14
15
6-8
9
10-11
12-13
Steps 2
Post block footplate installation
Steps 3
Installing the fixed panel
Step 4
Installing the deflector screen
Step 5
Installing the wall tie bar
Securing & fixing
Sealing the enclosure & aftercare
Steps 1
Wall profile installation

© 2016 AKW 4 15-010-048-01
Deflector Screen Instructions
Technical Help line 01905 560219 www.akw-ltd.co.uk
Step 1 Check pack contents
Check tray is completely level
Cover waste
Protect tray
Preparation
Tray installation must be completely 100% level in all
directions and sealed to the wall. Wet room preparation
must be completed before starting any work and the
screen area must be clean and dust free.
i
i
i Install the enclosure on the inside edge of the at portion of the tray.
Avoid installing over the edge radius as this will cause leakage.
Preparation

© 2016 AKW 5 15-010-048-01
Deflector Screen Instructions
Technical Help line 01905 560219 www.akw-ltd.co.uk
Do not silicone
between the wall
prole and the wall
as further adjustment may
be required.
Only seal the entire
enclosure after installation.
See page 15
TIP
Wall profile installation
TIP
X4
X4
WARNING -
Ensure there are no buried pipes
or cables before drilling.
Ensure the wall surface is
nished, level and capable
of supporting the screen.
Drill the wall through the
centre of the slots with a
6mm tile or wall masonry
drill bit and insert wall
plugs.
Ensure prole
is vertical by
using the
prole slots
for ner
adjustment.
4x35mm
i Ensure the xing holes are to
the inside of the enclosure.
i
Use masking
tape to drill on
tiled surfaces.

© 2016 AKW 6 15-010-048-01
Deflector Screen Instructions
Technical Help line 01905 560219 www.akw-ltd.co.uk
Fixed Panels use a support post block footplate and wall support post to
allow the deector screen to hinge like a door.
IMPORTANT: The post block must be installed before the deector screen
is assembled.
Install the post block footplate onto the tray or oor before installing the xed
panel or deector screen.
Continue to mark out the footplate.
Wall Prole
TIP
Panel
Step 2
Alignment

© 2016 AKW 7 15-010-048-01
Deflector Screen Instructions
Technical Help line 01905 560219 www.akw-ltd.co.uk
Fitting of the post
block footplate will
be approx 35mm
from the front edge
of the bottom hinge.
Mark the centre of
the footplate
Align the xed panel into the wall compensator. Ensure the screen is level and at 90
degrees from the wall before marking the oor with a pencil around the bottom hinge.
35 m m
35 m m
Post block
footplate

© 2016 AKW 8 15-010-048-01
Deflector Screen Instructions
Technical Help line 01905 560219 www.akw-ltd.co.uk
Remove the screen to install the footplate. Drill both footplate and bottom hinge holes and
secure the footplate into position. Realign and secure the deector screen into position.
Footplate
7
Install bottom post block foot-plate

© 2016 AKW 9 15-010-048-01
Deflector Screen Instructions
Technical Help line 01905 560219 www.akw-ltd.co.uk
Measure the panel width
and drill through adjusting
slot hole at its longest
position.
Align the panel and screw
through adjusting slot
holes to temporarily hold
door in place.
Do not drill the secondary
holes just yet, these are for
nal securing.
132
When the panel is aligned into wall prole and on the footplate post block, drill through the
slot holes at its longest position and hold the panel in place with the 4x10mm screws.
Note: Only secure the secondary xing holes in the nal installation steps.
Install Fixed Panel
Step 3
Installation

© 2016 AKW 10 15-010-048-01
Deflector Screen Instructions
Technical Help line 01905 560219 www.akw-ltd.co.uk
Attach the bottom seal strip to the inside edge of the enclosure.
Installing the deflector screen
Mount the seal strip
on the bottom of the
glass panel
inside
TOP
Step 4
Installation

© 2016 AKW 11 15-010-048-01
Deflector Screen Instructions
Technical Help line 01905 560219 www.akw-ltd.co.uk
Ensure the bottom hinge is secured to the oor or tray.
Attach the deector screen onto the xed panel hinges.
Secure the top hinge bracket cover.
Installing the deflector screen

© 2016 AKW 12 15-010-048-01
Deflector Screen Instructions
Technical Help line 01905 560219 www.akw-ltd.co.uk
Mark out the position of tie bar bracket on the wall, make sure it is level and at 90 degrees
to the screen face.
Attach the tie bar mounting assembly to the top of the deector screen.
6mm
Step 5
Installation
Tie bar wall bracket installation

© 2016 AKW 13 15-010-048-01
Deflector Screen Instructions
Technical Help line 01905 560219 www.akw-ltd.co.uk
Dismantle the tie bar, drill and x the tie bar bracket to the wall using a wall plug and
4x35mm screw. Secure the tie bar bracket to the wall. Re-attach the tie bar socket to the
wall bracket. Measure the distance between pivot xing and the tie bar socket and cut tie
bar to length.
Tie bar wall bracket installation
1 2 3
4
5
6
Insert the tie bar into the tie bar socket. Drill a hole through the tie bar socket into
the tie bar for the locking screw. Secure the tie bar into the socket with the self
tapping 4x13mm screw.
4x13mm
self
tapping
4x45mm
self tapping
6mm

© 2016 AKW 14 15-010-048-01
Deflector Screen Instructions
Technical Help line 01905 560219 www.akw-ltd.co.uk
Secure panels to the wall profile
Clip on prole and
panel cover caps
Screw cap covers
Finally check the
levels and operation.
i
i
Final Installation
Align the panel and deector screen and ensure these are level and inline before
drilling into nal position.
1
2 From the inside using a 2.8mm metal drill bit, drill through the wall prole into
secondary xing holes into the panel. Secure the panel into its nal position
using the 4x10 screws. Do not over tighten screws.
1
2
1
2

© 2016 AKW 15 15-010-048-01
Deflector Screen Instructions
Technical Help line 01905 560219 www.akw-ltd.co.uk
Sealing Shower Enclosure
Use a quality silicone sealant and
applicator gun to the nished enclosure.
Sealing internally
Seal all vertical joints between prole
and wall. Do not seal horizontally.
Sealing externally
Seal horizontally along the wall prole
and vertically 50mm up the wall.
Allow 24hrs to dry after sealing.
Do Not use the shower enclosure until it
is sealed as instructed.
Aftercare Instructions
This glass screen is coated with a Stayclear®Protection System.
Stayclear is an effective protection that makes shower glass easy to clean and keep clean.
It resists staining and maintains the hygienic environment and visual appeal much longer
than unprotected glass. It is especially formulated for use on Stayclear®glass and ceramics
and is also effective on most metal and plastic surfaces. Stayclear Glass requires cleaning
less than half as often as ordinary glass. We recommend halving your current cleaning
regime and either increase or decrease it as required. To optimise the performance and
durability of the unique protection, we recommend the following basic maintenance
programme:
• Regularly rinse off soap and water deposits and dry the surface using a squeegee or cloth
if required.
• Clean glass panels weekly (depending on usage and hardness of water).
• Alternatively, clean the panel with a non-abrasive daily cleaner and rinse with copious
amounts of water and wipe dry with a soft non-abrasive cloth.
Do not use abrasive products, cloths, strong or concentrated acidic, alkaline, chlorine or
other abrasive cleaning materials as these may discolour or otherwise damage the product
and will invalidate any warranty.
Do not place matches, cigarettes or naked ames on or near Larenco.
Note: The durability of the Stayclear®protection may be affected by the frequency of use of
the shower, hardness of the water and the type of cleaning compounds and methods
used. Such matters are outside the control of the manufacturer.

© 2016 AKW 15-010-048-01
Orderline
+44 (0) 1905 823299
General Enquiries
+44 (0) 1905 823298
Technical Help line
+44 (0) 1905 560219
Fax
+44 (0) 1905 823297
Website
www.akw-ltd.co.uk
Quotes & orders email
Enquiries email
Postal address
AKW, Pointon Way,
Hampton Lovett,
Droitwich Spa,
WR9 0LR
What to do if something goes wrong?
In the unlikely event that you should
encounter a problem with this product,
please contact your local installer and
if this does not resolve the issue then
contact AKW technical team who will
provide further advice and if necessary
arrange for a maintenance engineers to
visit and report any issues.
As part of our quality and training
programme calls may be monitored or
recorded. None of the foregoing affects
your statutory rights.
These instructions are provided to advise the minimum standards of installation and recommends what is the best practice for the installation.
Due to the very wide variability of possible installation conditions AKW cannot provide all circumstances for the installation. AKW cannot accept any
liability in connection with this information or its use. This information is provided on the condition that the person receiving it shall make their own
tests to determine the suitability for their particular purpose. Failure to install this AKW product in accordance with supplied instructions or the
making of unauthorised modifications will invalidate any warranty and may affect product safety. None of the foregoing affects your statutory rights.
Warranty information
Glass Screens are covered by a life time guarantee.
* The guarantee applies only to manufacturing or
material defects and does not apply to:
• Normal wear and tear, inappropriate use or
• accidental damage.
• Damage or defects that result from incorrect
installation, improper use, accidental damage
or lack of maintenance including the build up
of grime, dirt or lime-scale and water-borne
debris.
• Damage resulting from inappropriate cleaning
or water ingress.
• Damage or defects that result from repairs,
modifications undertaken by unauthorised persons
who are not installers or service engineers.
AKW products should be installed by an experienced
and competent installer or trades persons using
appropriate fixings suitable for the condition of the
surfaces on which the product is to be attached.
The selection of any specific fixings must be made by
the installer based upon the requirements for each
individual installation.
If you do not install AKW product in accordance
with the supplied instructions or if you carry out
any unauthorised modifications to this product then
you will affect product safety and invalidate this
guarantee.
For further information latest AKW
product news please visit our website
or scan this QR code with your device.
Guaranteed
for *
Life
Table of contents
Popular Shower Cabin manuals by other brands

ERLIT
ERLIT ER5508P-S2 installation manual

glass 1989
glass 1989 MOOV TO Installation & maintenance manual

Coram Showers
Coram Showers PREMIER installation instructions

Fleurco
Fleurco Latitude LA2-33-43-79 instruction manual

Samo
Samo B7830 Assembly instruction

Sanotechnik
Sanotechnik PR150 Mounting instruction