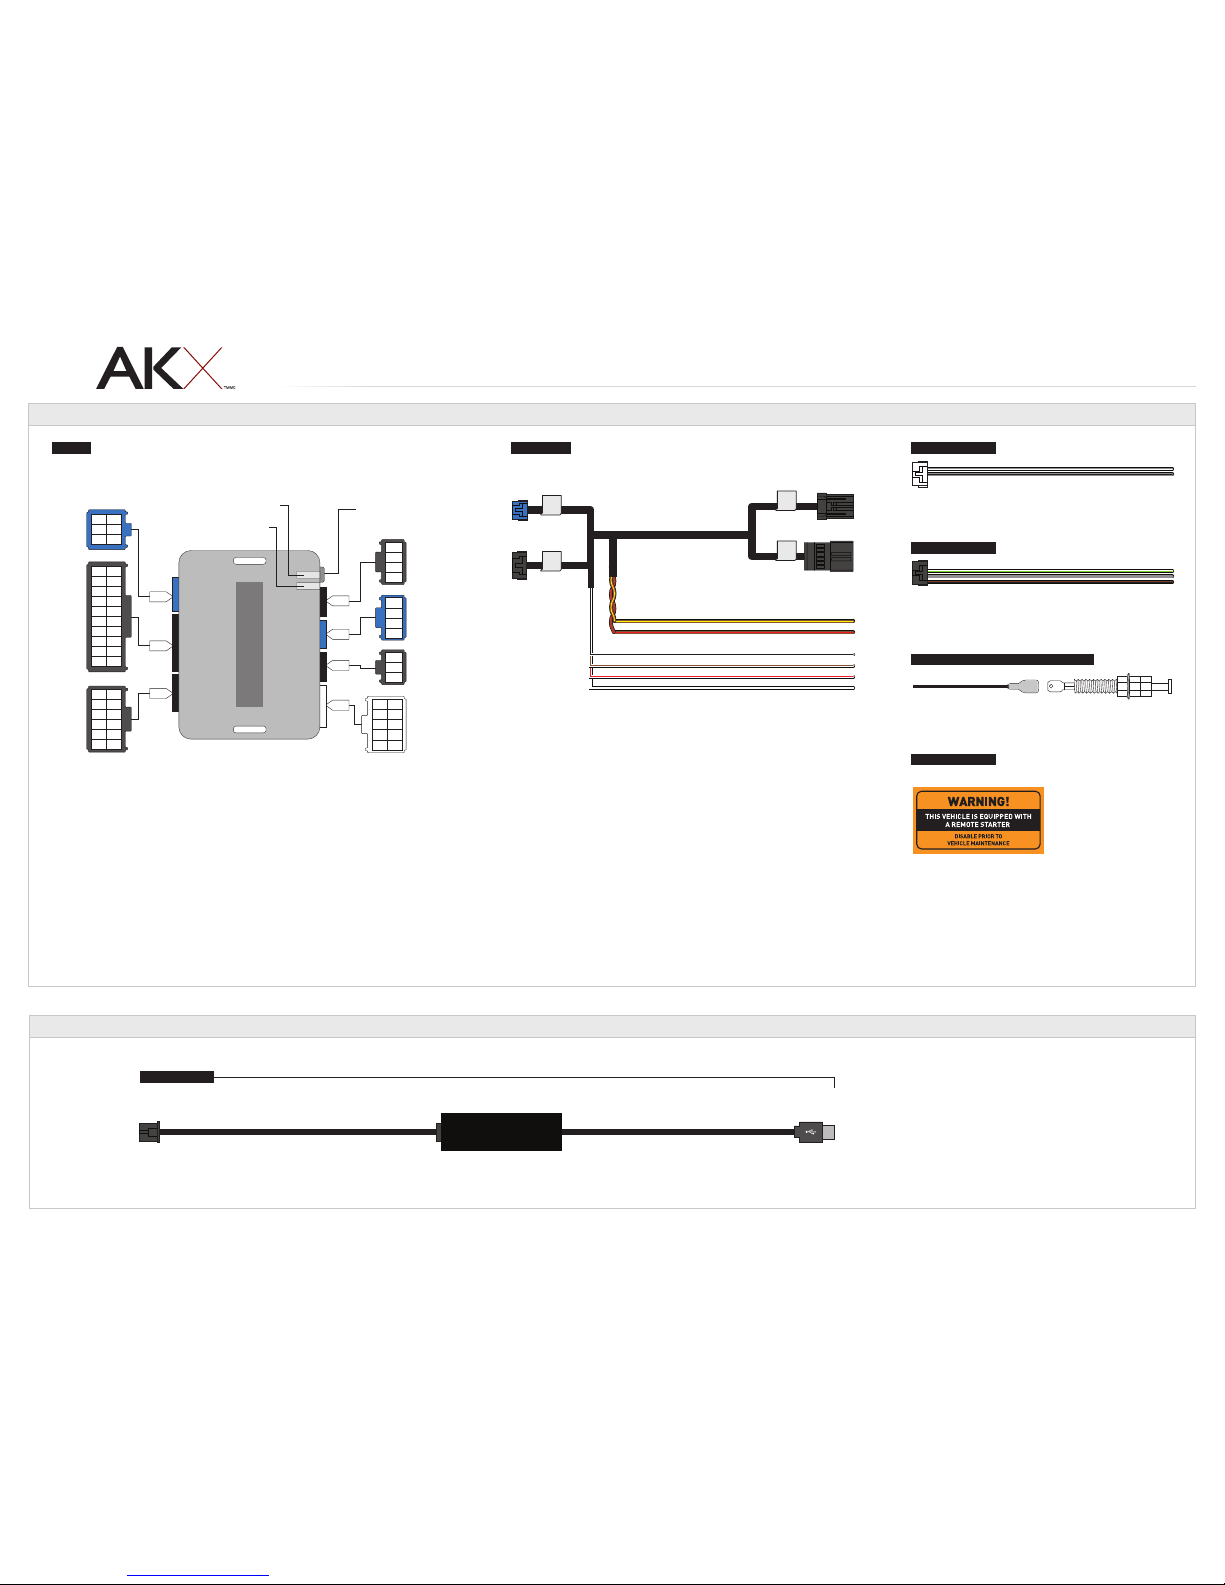
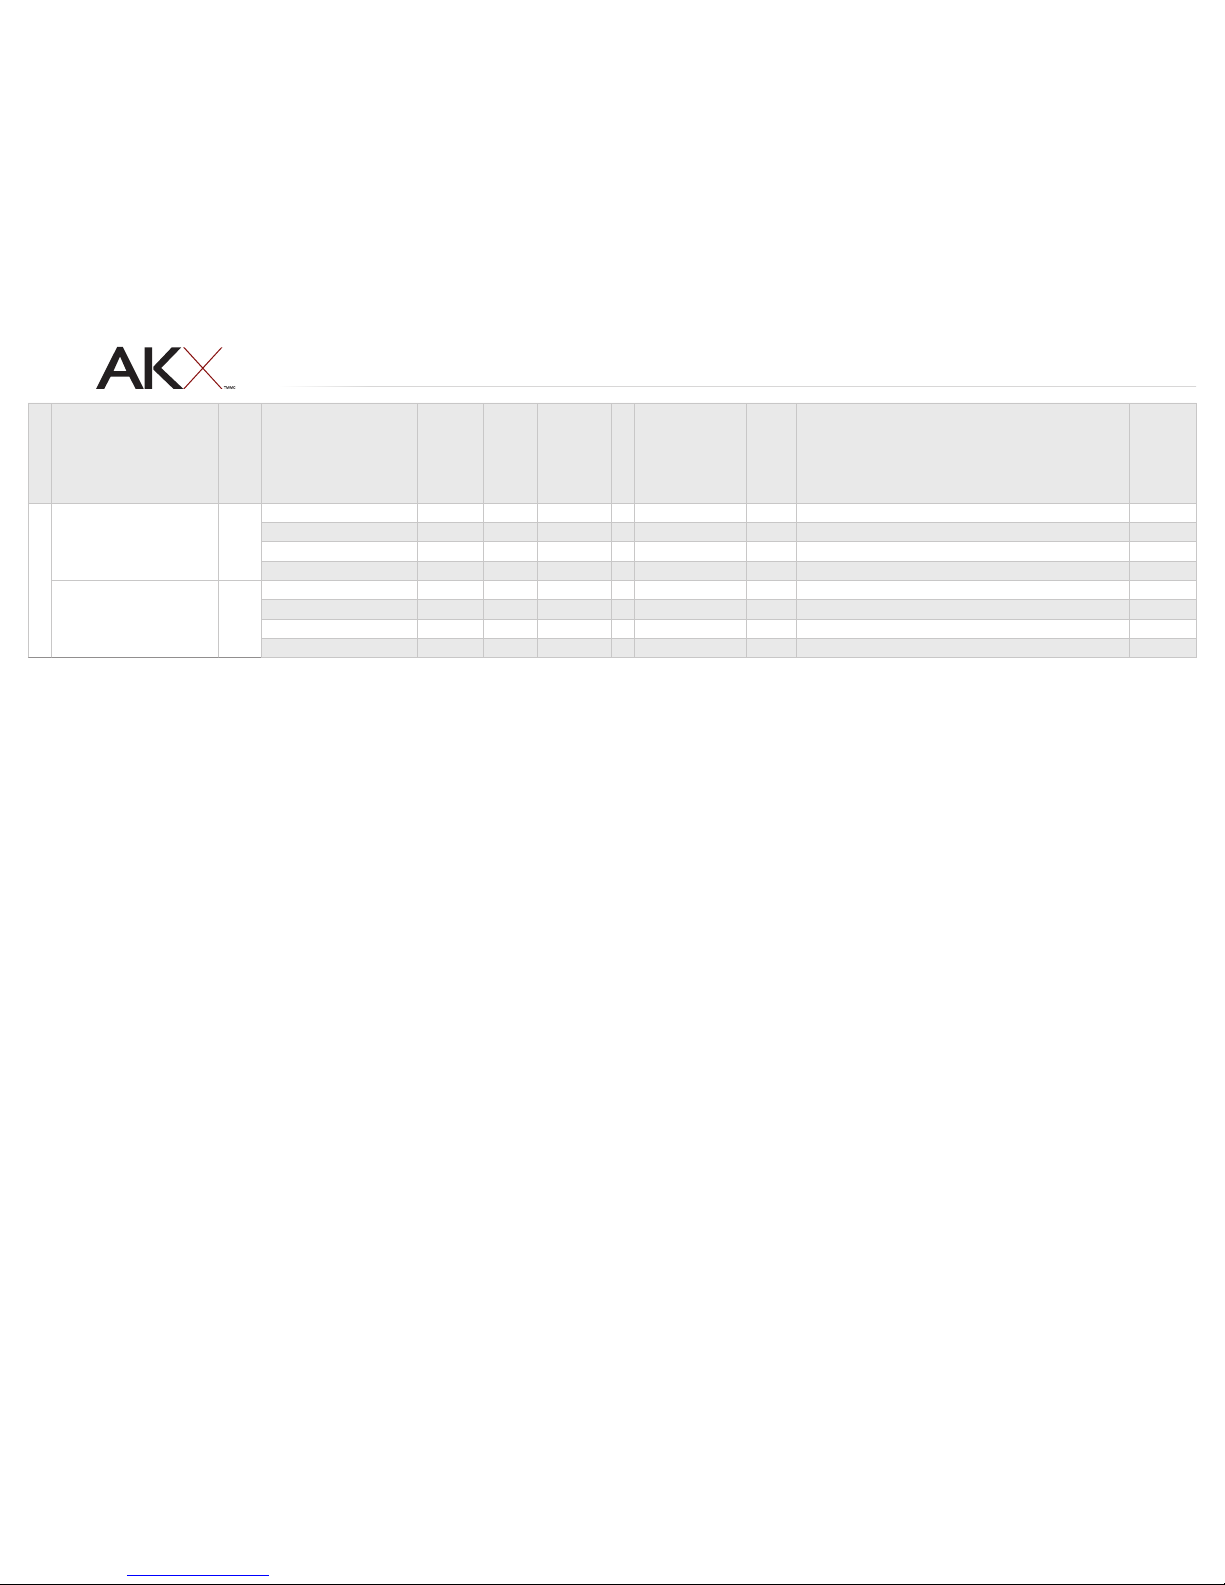
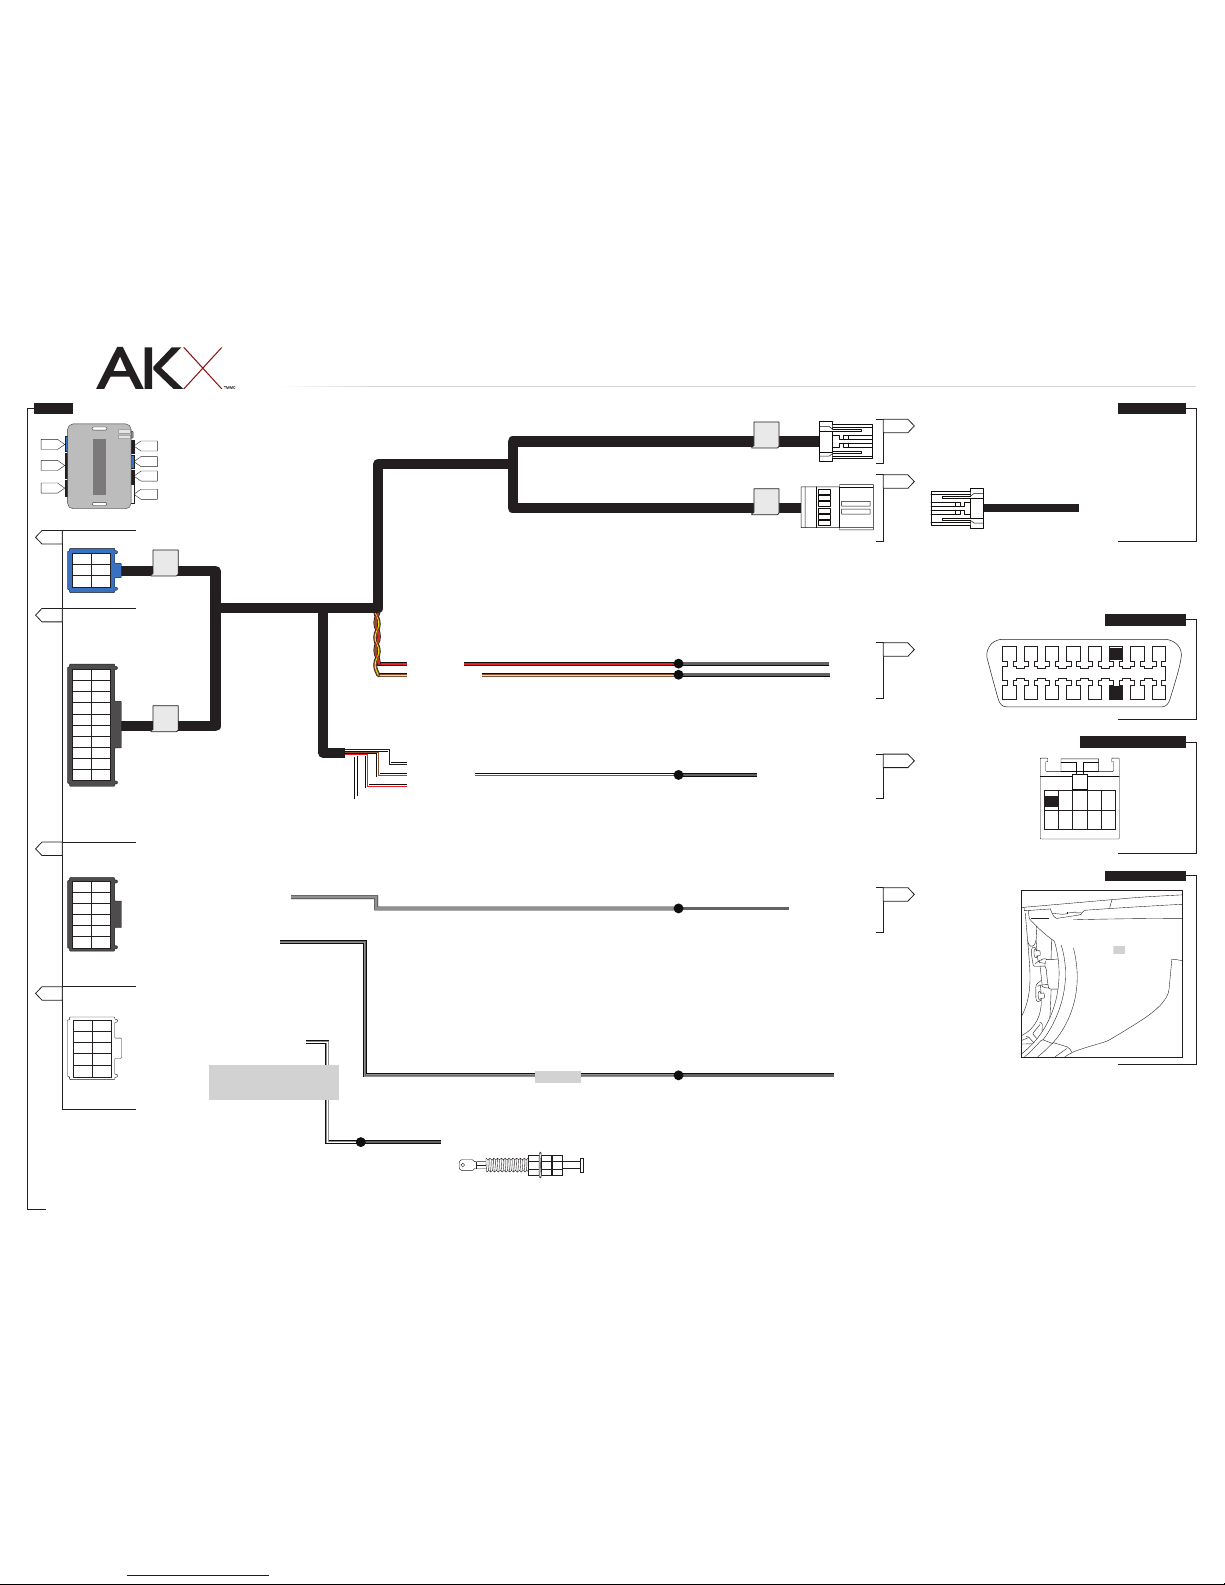
AKX AKX-CH7 User manual
Other AKX Remote Starter manuals


Popular Remote Starter manuals by other brands


Jaycar Electronics
Jaycar Electronics MB3752 instruction manual

Ultra Start
Ultra Start 72 Series owner's manual

ADS
ADS FLASHLOGIC FLRSVW1 Product guide

Black Widow Security
Black Widow Security BW RAS 400 installation manual

Vector
Vector Power City DK080706 Owner's manual & warranty

Code Alarm
Code Alarm CA-535 owner's manual

EINHELL
EINHELL EGS 3600 Directions for use

Schumacher
Schumacher INSTANT POWER IP-75C owner's manual

EINHELL
EINHELL BT-PS 1000 Directions for use

Mazda
Mazda 0000-8F-H28 installation instructions

DEI
DEI 450ESP owner's guide

Directed Electronics
Directed Electronics AutoCommand 28624TN Owner's installation guide