UTILISATION
APPLICATION
FONCTIONNEMENT
OPERATION
FR Réglage de l’horloge :
1. 12/24 h
2. Mois/Date, affichage de la température intérieure
3. Accroche murale / horloge de table
4. Piles de secours 2* pile AAA
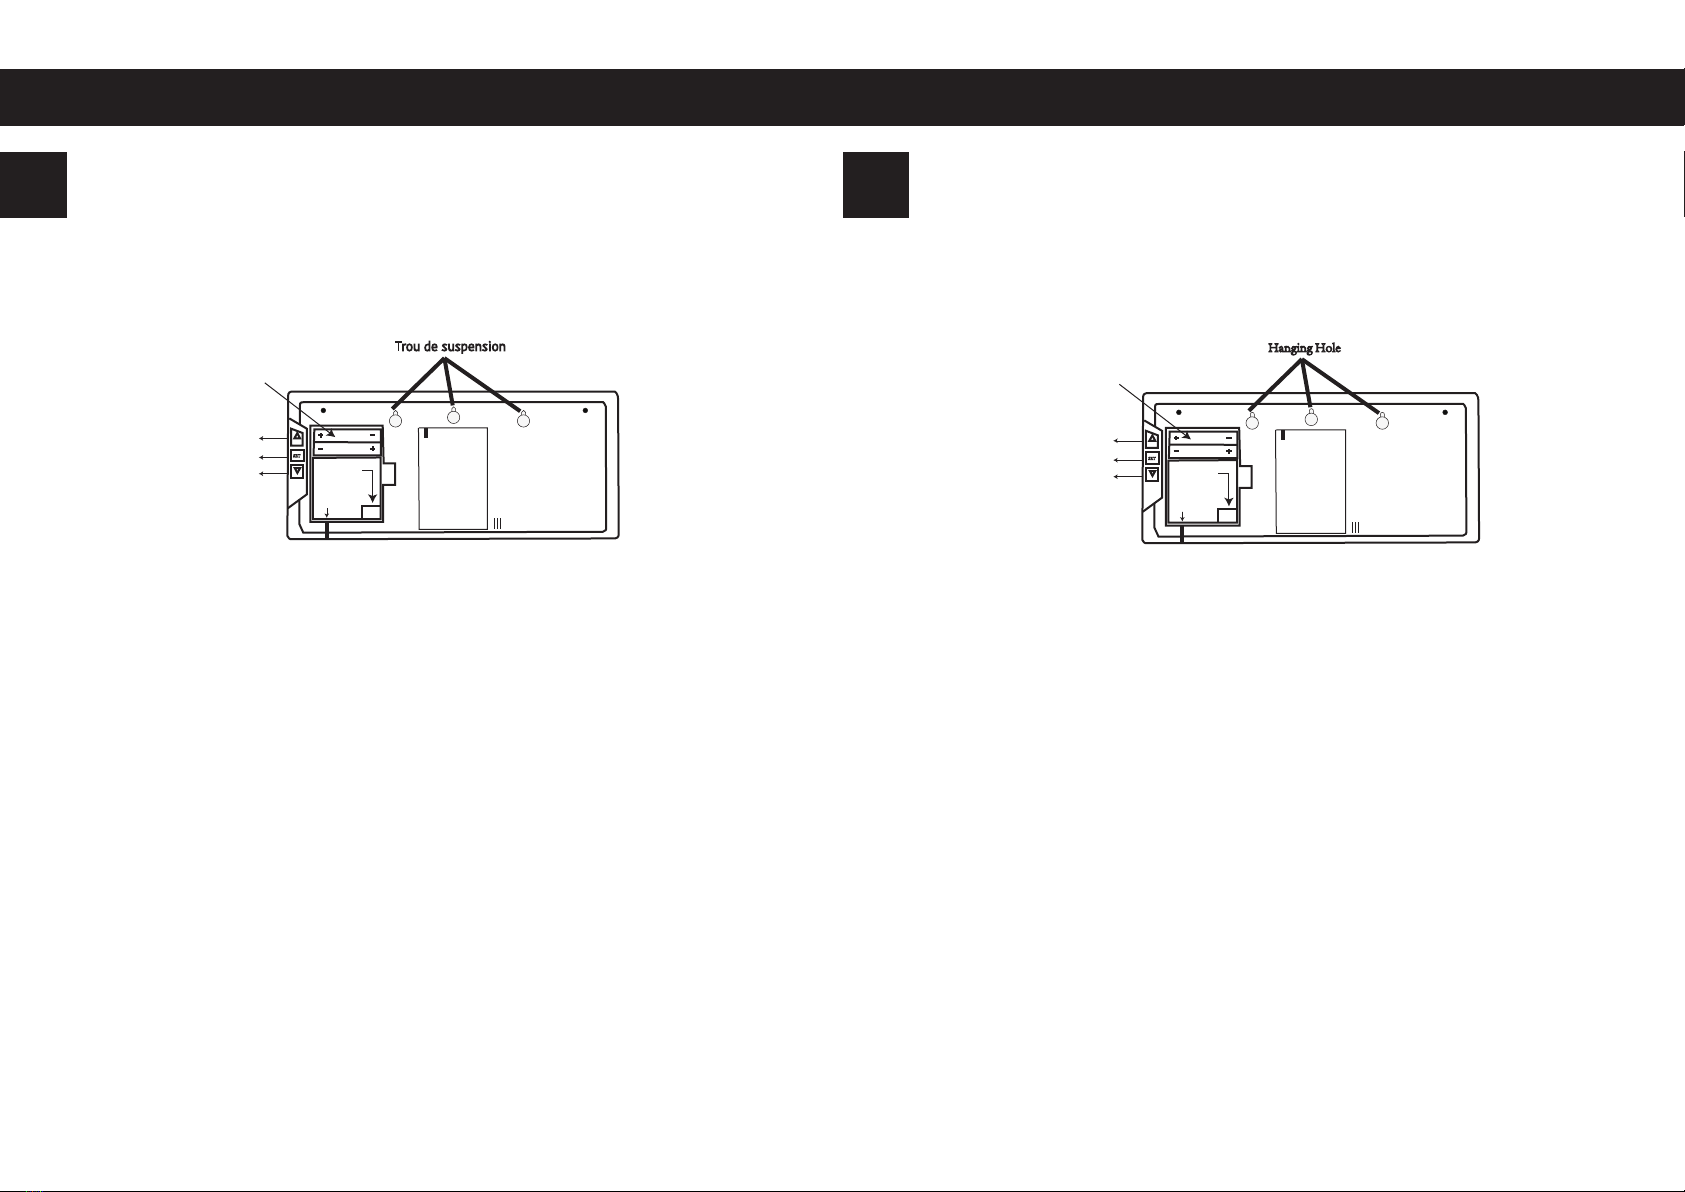
Compartiment des piles (2*AAA)
12/24h
SET
C/F
Bouton haut
Bouton de réglage
Trou de suspension
Bouton bas Alimentation
Sortie
de câble
Réglez l'heure et la date :
Appuyez sur le bouton "Set" pendant 2 secondes et entrez dans le mode de réglage,
appuyez sur les boutons "Up" et "Down" pour changer la position de clignotement que vous
voulez régler.
la position clignotante que vous voulez régler, l'ordre de réglage est : Heure, Min, Année,
Mois, Jour.
Une fois votre réglage terminé, appuyez sur le bouton "set" pour quitter et enregistrer le
réglage, ou n'appuyez sur aucun bouton pendant 10 secondes, l'horloge quittera le modèle
de réglage automatiquement.
Réglage de la température :
En mode normal, appuyez sur le bouton "Down" pour changer l'unité de température C/F.
Réglage du format de l'heure :
En mode normal, appuyez sur le bouton "Up" pour changer le mode de l'heure entre 12 et
24, lorsque le format 12 h est sélectionné, il y a un affichage "PM" en haut dans le coin
gauche, ce qui signifie l'heure de l'après-midi.
Batterie :
Veuillez utiliser 2*AAApiles pour l'horloge (non incluses), respectez la polarité lorsque vous
utilisez les piles.
Cordon :
Il y a un compartiment pour le cordon si vous n'avez pas besoin de la longueur excessive du
cordon.
EN Setting the clock :
1. 12/24 h
2. Month/Date, indoor temperature display
3. Wall / table clock
4. Battery backup 2* AAA battery
Set Time and Date :
Press the “Set Button ”for 2 seconds and enter the setting mode , Press “Up ”and
“Down”button to switch
the blinking position that you want to set, the setting order is : Hour, Min,Year,Month,Day.
After your setting finished, press “set ”button to exit and save the setting, or keep not
pressing any button for 10 seconds, clock will exit the setting model automatically.
Set Temp :
When under normal mode , press the “Down”button to switch the unit for temp C/F.
Set Time format :
When under normal model,Press the “Up“button to switch time mode between 12 and 24,
when select 12 h format, there is “PM”display on the top at the left corner ,which means the
afternoon time.
Battery :
Please use 2*AAAbattery size for the clock (not included ), noted the right polarity when
using the battery.
Cord :
There is compartment for the cord if you dont need the exceed length of the cord.
Battery compartment(2*AAA)
12/24h
SET
C/F
Up Button
Hanging Hole
Set Button
Down Button Power In
Cord Exit
alba-creation.com alba-creation.com


