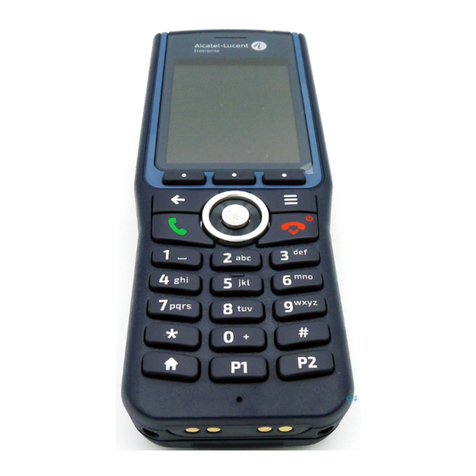
Alcatel-Lucent Enterprise OpenTouch 8168s User manual

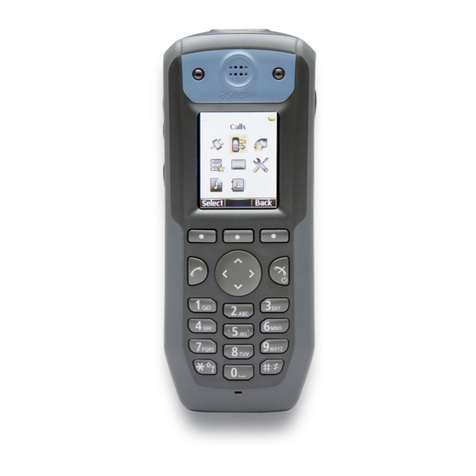
8168s WLAN Handset
8158s WLAN Handset
OpenTouch™ Suite for MLE
OXO Connect
SIP
User Manual
8AL90391ENAAed01 –06/2020

Getting to know your telephone - Phone description
8AL90391ENAAed01
2 /85
This document describes the functions offered by the 8168s WLAN Handset and 8158s WLAN Handset.
Some functions depend on the PBX/Call manager and protocol (SIP) versions, and your system may not
support all functions described in this document.
This document describes features when the device is connected to an OmniPCX Enterprise system (OXE)
or OXO Connect (OXO) or SIP third party (SIP) system.
Before reading this document, you must know which system your handset is connected to.
For more information, contact your installer or administrator.
Safety Instructions
For safe and efficient operation of the handset, observe all necessary safety precautions when using the
handset. Follow the operating instructions and adhere to all warnings and safety precautions located on the
product, and in the user manual: https://www.al-enterprise.com/products.
This product shall only be used with the following battery:
•8158S & 8168S LI-ION BATTERY PACK 3BN78427AA.
Desktop chargers must be connected with the following power supplies provided by the manufacturer:
•3BN78403AA Desktop charger Europe - Unifive UCE305-0508, Friwo FW7600/05, or PSAI05E-050
- Power supply unit AC: 100–240 V, DC: 5 V/0.65 A.
•3BN78403AB Desktop charger US-UK-AUS - Phihong PSAC05R-050 or PSAC05R-050L6-R - Power
supply unit AC: 100–240 V, DC: 5 V/1 A.
•3BN78403AC Desktop charger without PSU for countries not supporting above plugs. Refer to the
technical specification 8AL90834AA.
To fulfill Regulatory requirements the above accessories must be used.
•Changes or modifications to the equipment not expressly approved by ALE International could void
the user’s authority to operate the equipment.
•To limit the risk of interference, people with pacemakers must keep the wireless handset away from
their pacemaker (minimum distance of 6 inches (15 cm)).
•It is recommended to follow the standard acceptance procedures before using this equipment in
human safety critical areas (hospitals...).
•Switch off the telephone before changing the battery.
•You must not use your handset near gas or inflammable liquids.
•The handset includes magnetic elements that may attract sharp metallic objects. To prevent injury,
before each use ensure sharp metallic objects are not stuck to the earpiece and microphone.
•There is a danger of explosion if the battery is replaced incorrectly.
•Use only battery listed above.
•Use only recommended charging unit listed above.
•To prevent possible hearing damage, do not listen at high volume levels for long periods.
•Only use the handset in temperatures between -5°C to +45°C (23°F to 113°F).
•Do not expose batteries to freezing temperatures or direct sunlight.
•Handset has an ingress protection rating of IP44.
•Do not put the handset in charger if no charging is needed.
The labels and icons presented in this document are not contractually binding and may be modified without
prior warning. The labels and icons displayed on your phone depend on the system to which you are
connected and may differ from those specified in this document.

Getting to know your telephone - Phone description
8AL90391ENAAed01
3 /85
1Getting to know your telephone 7
1.1 Phone description 7
1.2 Status icons 9
1.3 Local menu icon 10
1.3.1 Common menu 10
1.3.2 Additional menu in SIP mode 10
1.4 Call icons 10
1.5 Main screen 11
1.6 Accessing and navigating the phone local menu 11
1.7 Alpha-numeric keyboard 12
1.7.1 Numeric keypad. 12
1.7.2 Alphabetic keypad 12
1.8 Hotkeys 12
2Getting started 13
2.1 Unboxing 13
2.2 First start-up 13
2.2.1 Installing the battery in the telephone 13
2.3 Charging your telephone battery 14
2.4 Switching on your telephone 15
2.5 Switching off your telephone 15
3Using your telephone 16
3.1 OmniPCX Enterprise 16
3.1.1 Making a call 16
3.1.2 Answer an incoming call 16
3.1.3 Making calls by name (company directory) 17
3.1.4 Calling from your personal directory 17
3.1.5 Call back one of the last numbers dialed 17
3.1.6 Make a call-back request to a busy number 17
3.1.7 Consulting your voice mailbox 18
3.1.8 Call log (History) 18
3.1.9 Consulting text messages 19
3.1.10 Sending a text message to an internal contact 19
3.1.11 Send a voice message copy 20
3.1.12 Send a voice message to a destination 20
3.1.13 Forwarding calls to another number (immediate forward) 21
3.1.14 Diverting calls to your voice mailbox 21
3.1.15 Do not disturb 21
3.1.16 Remote call forwarding* 22
3.1.17 Cancelling all forwards 22
3.1.18 Forwarding calls when your line is busy (forward if busy) 22
3.1.19 Leaving a recorded message for internal callers 22
3.1.20 Locking your telephone 23
3.1.21 Answering the general bell* 24
3.1.22 Call pickup* 24
3.1.23 Hunting groups* 24
3.1.24 Calling a contact on his/her loudspeaker* 25
3.1.25 Charging your calls directly to business accounts* 25
3.1.26 Finding out the cost of an outside call made for an internal user from your terminal 25
3.1.27 Push To Talk (PTT)* 26
3.2 OXO Connect 27
3.2.1 Making a call 27
3.2.2 Answer an incoming call 27
3.2.3 Making calls by name (company directory) 27
3.2.4 Calling from your personal directory 28
3.2.5 Call back one of the last numbers dialed 28
3.2.6 Make a call-back request to a busy number 28
3.2.7 Consulting your voice mailbox 28

Getting to know your telephone - Phone description
8AL90391ENAAed01
4 /85
3.2.8 Missed calls 29
3.2.9 Consulting text messages 29
3.2.10 Sending a written message to an internal contact 29
3.2.11 Send a voice message copy 30
3.2.12 Sending a recorded message to a number or a distribution list 31
3.2.13 Broadcasting a message on the loudspeakers of a station group* 32
3.2.14 Modify the automated attendant welcome message remotely 32
3.2.15 Selecting calls to be forwarded 32
3.2.16 Forwarding calls to another number (immediate forward) 32
3.2.17 Diverting calls to your voice mailbox 33
3.2.18 Activating/deactivating the personal assistant 33
3.2.19 Personal assistant: reaching you with one number only 33
3.2.20 Forwarding your calls from the receiving terminal ('Follow me')* 33
3.2.21 Do not disturb 33
3.2.22 Cancelling all forwards 33
3.2.23 Locking your telephone 34
3.2.24 Forwarding calls when your line is busy (forward if busy) 34
3.2.25 Answering the general bell* 34
3.2.26 Call pickup* 35
3.2.27 Hunting groups* 35
3.2.28 Calling a contact on his/her loudspeaker* 35
3.3 SIP mode 36
3.3.1 Contact card 36
3.3.2 Contacts management 36
3.3.3 Access to the company directory 38
3.3.4 Manage the call log (History) 38
3.3.5 Messaging portal (8168s Wlan Handset) 40
3.3.6 Making a call 43
3.3.7 Calling from call log 43
3.3.8 Calling from your personal directory 43
3.3.9 Calling a contact using the search by name feature 44
3.3.10 Calling by name from the central phonebook 44
3.3.11 Calling a pre-programmed number 44
3.3.12 Answer an incoming call 45
3.3.13 End the call 45
3.3.14 Decline a call with a predefined message 45
3.3.15 Locking your telephone 45
3.3.16 Consulting your voice mailbox 46
3.3.17 Push To Talk 46
4During a conversation 48
4.1 OmniPCX Enterprise 48
4.1.1 Adjust audio volume during a call 48
4.1.2 Activate/deactivate voice frequency 48
4.1.3 Microphone switched off during calls (mute) 48
4.1.4 Activating/deactivating the loudspeaker (8168s Wlan Handset) 48
4.1.5 Making a second call during a conversation 49
4.1.6 Receiving a second call 49
4.1.7 Switching between two calls (Broker call) 49
4.1.8 Transferring a call 49
4.1.9 Three-way conference with internal and/or external contacts (conference) 50
4.1.10 Placing a call on hold (hold)* 50
4.1.11 Placing an outside call on hold (parking)* 51
4.1.12 Adjust audio volume during a call 51
4.1.13 Prohibit/authorize reception of a new call during communication 51
4.1.14 Intrusion into an internal conversation (barge-in)* 51
4.2 OXO Connect 52
4.2.1 Adjust audio volume during a call 52
4.2.2 Activate/deactivate voice frequency 52

Getting to know your telephone - Phone description
8AL90391ENAAed01
5 /85
4.2.3 Microphone switched off during calls (mute) 52
4.2.4 Activating/deactivating the loudspeaker (8168s Wlan Handset) 52
4.2.5 Making a second call during a conversation 53
4.2.6 Receiving a second call 53
4.2.7 Switching between two calls (Broker call) 53
4.2.8 Transferring a call 54
4.2.9 Three-way conference with internal and/or external contacts (conference) 54
4.2.10 Placing a call on hold (hold)* 54
4.2.11 Placing an outside call on hold (parking)* 55
4.2.12 Add the contact to your local directory 55
4.3 SIP mode 56
4.3.1 Adjust audio volume during a call 56
4.3.2 Placing a call on hold 56
4.3.3 Activating/deactivating the loudspeaker (8168s Wlan Handset) 56
4.3.4 Microphone switched off during calls (mute) 56
4.3.5 Lock the keypad during a call 56
4.3.6 Make a second call 57
4.3.7 Receiving a second call 57
4.3.8 Switching between two calls (Broker call) 57
4.3.9 End the call with one of two contacts 57
4.3.10 Transferring a call 58
4.3.11 N-party conference 58
4.3.12 Activate/deactivate voice frequency 59
5Programming your telephone 60
5.1 Common to all systems 60
5.1.1 Device information 60
5.1.2 Adjusting your display 60
5.1.3 Screensaver (8168s Wlan Handset) 60
5.1.4 Selecting language of phone local menu 60
5.1.5 Activate/deactivate the Key tones 60
5.1.6 Activate/deactivate the Warning tones 61
5.1.7 Activate/deactivate the hearing aid 61
5.1.8 Configuring Bluetooth® (8168s Wlan Handset) 61
5.1.9 Installing a wired headset 61
5.2 OmniPCX Enterprise 62
5.2.1 Initializing your voice mailbox 62
5.2.2 Customizing your voice greeting 62
5.2.3 Modify the password for your voice mailbox 62
5.2.4 Modify the password for your phone set 62
5.2.5 Adjusting the audio functions 63
5.2.6 Selecting system language 64
5.2.7 Programming your personal directory 65
5.2.8 Programming an appointment reminder 66
5.2.9 Configure your phone during charging 66
5.3 OXO Connect 67
5.3.1 Initializing your voice mailbox 67
5.3.2 Customizing your voice greeting 67
5.3.3 Change your personal password 67
5.3.4 Adjusting the audio functions 68
5.3.5 Selecting system language 69
5.3.6 Programming your personal directory 70
5.3.7 Programming an appointment reminder 70
5.3.8 Configure your phone during charging 71
5.4 SIP mode 72
5.4.1 Adjusting the audio functions 72
5.4.2 Shortcuts 72
5.4.3 Define softkeys 73
5.4.4 Define hotkeys 73
Getting to know your telephone - Phone description
8AL90391ENAAed01
6 /85
5.4.5 Define navigation key 73
5.4.6 Define multifunction button 74
5.4.7 Services (8168s Wlan Handset) 74
5.4.8 Profiles 75
5.4.9 Define time and date format 76
5.4.10 Set time and date manually 76
5.4.11 Configure your phone during charging 76
6List of accessories 77
6.1 Belt clip 77
6.2 Cover for belt clip 77
6.3 Spare swivel clip package 77
6.4 Spare belt clip 77
6.5 Vertical pouch 78
6.6 Chargers 78
6.6.1 Desktop charger 78
6.6.2 Rack charger 78
6.6.3 Battery rack charger 79
6.6.4 Power supply 79
6.6.5 Battery charge level 79
6.6.6 Place or remove the battery in the telephone 80
6.7 Headphone / external microphone 80
6.8 Cleaning and disinfecting your telephone 81
7Technical specifications 82
8Ordering information 83
9Declaration of compliance 84
Quick guide 86

Getting to know your telephone - Phone description
8AL90391ENAAed01
7 /85
1 Getting to know your telephone
1.1 Phone description
•Profile button(1) (2): adjusting audio functions (short press).
•Multifunction button(3): used as a shortcut to functions with long- or double-press
modes.
•Alarm button(5): send a notification call to an alarm server (long press).
•2.0 inch TFT color display with backlight.
•Answer the call.
•Switch off ringer.
•Hang up.
•Return to first screen.
•Long press: switch on the phone / switch off the phone.

Getting to know your telephone - Phone description
8AL90391ENAAed01
8 /85
•Access the phone local menu.
•Confirm.
•Navigate.
•Left, right, up and down keys are used to define shortcuts(3).
•Move the cursor into a text.
•Softkeys: access various functions according to the configuration and
the status of the handset.
In idle mode, the softkeys can be used for specific functions defined by
the user of the handset(3).
•Access the voicemail(3).
•Long press: lock/unlock keypad.
•Short press in text mode: switch between lower case, upper case and
numbers.
•Long press in idle state: access to the company directory(1) (2).
•Mute key(3) (in idle state): turn on/off audible signals.
•Short press during incoming call (ringing): switch off ringer(3).
•Long press in conversation: activate/deactivate the mute feature(3).
•Volume up key: increase the volume of the ring tone during an incoming
call (8 steps) or increase the volume of the earpiece or loudspeaker
during a conversation (8 steps).
•Long press in conversation: loudspeaker(1) (2) (4)
•Volume down key: decrease the volume of the ring tone during an
incoming call (8 steps) or decrease the volume of the earpiece or
loudspeaker during a conversation (8 steps).
•Mute key(1) (2): long press during conversation.
•Mute key(3):
oIn idle state: turn on/off audible signals.
oShort press during incoming call (ringing): switch off ringer.
oShort press during conversation: activate/deactivate the mute feature.
•Push-to-Talk key(1) (3) (4): used to activate the microphone during a PTT group call.
•Earpiece speaker.
•Microphone.
•3.5 mm, 4-pole jack (TRRS standards: CTIA).
(1): The feature is only available when the handset is connected to OmniPCX Enterprise (NOE mode).
(2): The feature is only available when the handset is connected to OXO Connect (NOE mode).
(3): The feature is only available when the handset is connected to an SIP System (SIP mode).
(4): The feature is only available on the 8168s WLAN Handset.
(5): The feature is only available when the handset is connected to OmniPCX Enterprise and depends on
the system configuration. The administrator is able to configure this button through the WinPDM tool and
the OXE configuration menu (see TC2530). Contact your administrator for more information.

Getting to know your telephone - Status icons
8AL90391ENAAed01
9 /85
1.2 Status icons
The status icons are displayed on the welcome screen and indicate the status of the telephone. Depending
on your phone, some status icons are never displayed. Some icons depend on the system the handset is
connected to.
Battery charge level ( > > > > ).
Radio reception quality.
Programmed call-back time.
New voice or text message, call back request, missed calls.
The keypad is locked.
Your phone is locked.
Call diversion activated.
Notification.
Missed calls.
Hands-free mode activated.
Mute on (in conversation): microphone off.
During a PTT call, the microphone is silenced when the PTT button is released.
Silent mode activated. Ringer disabled.
Vibrate mode activated.
Bluetooth® enabled.
Bluetooth® headset connected.
Corded headset connected.
Profile activated.

Getting to know your telephone - Local menu icon
8AL90391ENAAed01
10 /85
1.3 Local menu icon
The MENU is accessible from the welcome screen by pressing the OK key.
It provides access to all local functions available on your phone.
All icons are described in their unselected state.
1.3.1 Common menu
Connections (system, Bluetooth®, headset):
Access the connection settings (Bluetooth® connection, headset selection, network selection,
and in-charger selection).
Profile:
Access profile (up to four different profiles can be added). The Normal profile is active by default.
Settings:
Access the general settings of the phone (key sound, economy mode, charger warning).
1.3.2 Additional menu in SIP mode
Call log:
Access the log of all incoming and outgoing calls. Call services are also listed. Call services are
configured in the Device Manager.
Shortcuts:
Define shortcuts for the softkeys, hotkeys, navigation keys, and the multifunction button.
Services:
Access pre-programmed functions.
Messages:
Consult and send voice and text messages.
Contacts:
Manage your personal directory and access the company directory. Access to the company
directory depends on your system.
In addition, a company phonebook with up to 1000 entries can be downloaded to the phone using
the Device Manager.
When connected to OmniPCX Enterprise or OXO Connect, an additional menu is accessible via the system
menu softkey: Menu.
1.4 Call icons
Incoming calls.
Call on hold.
Current call in conversation.

Getting to know your telephone - Main screen
8AL90391ENAAed01
11 /85
1.5 Main screen
The screen is an example and depends on the connected system.
Time, date and status bar
This area shows icons that give the user information about signal strength, battery status,
sound off, missed calls, new messages/voicemail, key lock, phone lock, headset connection,
Bluetooth connection/Bluetooth headset connection, and the current date and time.
Information about the user: lastname, firstname, phone number,...
Incoming call and conversation presentation screen.
Menu softkey
Access various functions according to the configuration and the status of the handset.
In idle mode, the softkeys can be used for specific functions defined by the user of the
handset(2).
(2): The feature is only available in SIP mode.
1.6 Accessing and navigating the phone local menu
Access the phone local menu.
Press the OK key.
Select a function in the phone local
menu.
Use the navigator keys and press the
OK key to select a function.
Navigating within a function.
You can move vertically along the
various labels within the function
Press the OK key to validate your
choice.
In SIP mode, you can use the following softkey to access the menu (If available): Menu.

Getting to know your telephone - Alpha-numeric keyboard
8AL90391ENAAed01
12 /85
1.7 Alpha-numeric keyboard
Your phone is equipped with alphanumeric keyboard.
1.7.1 Numeric keypad.
•A short press on a key enters the digits 0–9 and the characters * and #.
•A long press on 0 enters the character + (used, for example, to enter an international number), if the
hotkey function on key 0 is deactivated.
•A short press on a key enters the digits 0–9 and the characters * and #. A short press on a key
enters the digits 0–9 and the characters * and #.
1.7.2 Alphabetic keypad
•A short press on any of the keys 0–9 displays the first available character on that specific key. The
marked character is selected after a timeout, or when another key is pressed.
•To change to upper/lower case, short press the * key before entering the character. A short press on
the * key can also be used to display only the digits.
•To add a space in the text, short press the 0 key.
•The first character entered in a message or when adding/editing a name in the Contacts menu, is an
upper case character followed by lower case characters, unless the * key is pressed before entering
the character. To switch between Abc, ABC, abc, and 123, press the # key.
•A long press on the # key displays special characters.
•A long press on the * key changes the language used while entering text.
•Use navigation keys to move the cursor into the text.
1.8 Hotkeys
The feature is only available in SIP mode.
Any key of the keys 0 and 2–9 can be set to a hotkey. A long press on any of these numbers in idle mode is
by default a shortcut to the call contact list. The list is in alphabetical order, and the key that is pressed is
dependent on where in the list the desired contact appears.
A hotkey can be programmed to give access to frequently used functions such as dialing a specific number,
a shortcut on the menu, or sending a message.

Getting started - Unboxing
8AL90391ENAAed01
13 /85
2 Getting started
In order to have a fully operational handset, make sure that you have the following items: battery, AC/DC
adapter, and power supply.
2.1 Unboxing
Handset
Belt clip
Battery
Safety and regulatory
instructions
Cover of the belt clip
2.2 First start-up
2.2.1 Installing the battery in the telephone
The battery is placed in the phone with a power-insulating sticker. You have to remove this sticker before
the phone is switched on for the first time.
Slip the lock to the
unlocked position.
Lift the battery module.
You can then remove
the battery module.
Remove the power-
insulating sticker.

Getting started - Charging your telephone battery
8AL90391ENAAed01
14 /85
Before inserting the battery
module into the phone, make
sure that its lock is in the
unlocked position.
Place the battery in its
compartment.
While maintaining the battery
module in position, slip the lock
to the locked position.
Check that the battery module is
properly installed in its housing.
2.3 Charging your telephone battery
Use only the following chargers (not provided):
•Rack Charger 8158S/8168S
•Batteries Rack Charger 8158S/8168S
It is important to fully charge your phone before using it for the first time.
Connect the charger and place the telephone in the charging holder. An animated battery icon, indicating
ongoing charging, is displayed. A filled battery icon indicates a fully charged battery.
You can configure how the handset behaves when it is installed on the charger using the settings menu.
Refer to the chapter on configuring your telephone.
Spare batteries can be charged with a separate battery pack charger. It can charge six batteries at the
same time (see: List of accessories).
Recharge your telephone battery regularly. The telephone can be on or off when recharging the battery. If
the telephone is to remain unused or out of its charger for several weeks, remove the battery and store it
separately.
The battery charging time is usually less than 3 hours.
The charging time for the spare battery is usually 6 hours.

Getting started - Switching on your telephone
8AL90391ENAAed01
15 /85
2.4 Switching on your telephone
•Press the switch on/off key (long press).
•Your telephone is switched on.
The handset vibrates and the display lights up. If the display fails to light up or the battery icon is flashing,
recharge the battery.
If the radio reception icon doesn't appear on the telephone display:
•Check that you are in an area covered (if you are not, move close to an access point).
•Check that the telephone is properly installed in the system (consult the PABX manager).
2.5 Switching off your telephone
•Press the switch on/off key (long press).
•Select the menu: Yes.
•Your telephone is switched off.
The handset must be in idle mode. If in a menu, press the following key to return to idle mode: .

Using your telephone - OmniPCX Enterprise
8AL90391ENAAed01
16 /85
3 Using your telephone
Features depend on the connected system. Contact your administrator to find out which system your phone
is connected to:
•OmniPCX Enterprise (OXE).
•OXO Connect (OXO).
•SIP System (SIP).
3.1 OmniPCX Enterprise
This section describes how to use your telephone connected to OmniPCX Enterprise. Some features are
subject to programming and are marked by an asterisk (*). If necessary, contact the administrator of the
system.
3.1.1 Making a call
Use one of the following:
Dial directly the number for your call.
Dial.
The call is automatically started when number is entered.
Only the 8168s WLAN Handset permits hands-free mode.
End the call:
You are in communication.
Hang up.
To make an external call, dial the outside line access code before dialing your contact number.
3.1.2 Answer an incoming call
A ring signal, a vibrating alert, or both can indicate an incoming call. The ring signal and vibration can be
disabled. The handset number and name of the caller are displayed.
You are receiving a call.
Press the 'take the call' key.
OK
Select the softkey: OK.
Press the OK key.

Using your telephone - OmniPCX Enterprise
8AL90391ENAAed01
17 /85
3.1.3 Making calls by name (company directory)
Long press on the # key.
or OK
Press the OK key or softkey.
Enter the first letters of your contact's name.
Select the search mode (by last name, initials or last name-first name). Press the OK
key to validate your choice.
Select the contact to call. Press the OK key to validate your choice.
Use one of the following:
Press the 'take the call' key.
OK
Select the softkey: OK.
Press the OK key.
3.1.4 Calling from your personal directory
Menu
Open the system menu by selecting the softkey.
Personal
directory
Access to personal directory.
or OK
Press the OK key or softkey.
Use one of the following:
Press the programmed key directly (0 to 9).
Select contact from the list, or enter name or number in the search field. Press the
OK key to validate your choice.
If there are several numbers for the same contact, select the desired number. Press
the OK key to validate your choice.
3.1.5 Call back one of the last numbers dialed
Menu
Open the system menu by selecting the softkey.
Redial list
To access the 'Redial' function.
or OK
Press the OK key or softkey.
Select the N° in the last 8 issued.
or OK
Press the OK key or softkey.
You can also access the feature by selecting: Menu
→
Events
→
Redial list
3.1.6 Make a call-back request to a busy number
The number you are calling is busy.
Menu
Open the system menu by selecting the softkey.
Call back
Access call-back feature.
or OK
Press the OK key or softkey.

Using your telephone - OmniPCX Enterprise
8AL90391ENAAed01
18 /85
3.1.7 Consulting your voice mailbox
When you have received a message, the message icon is displayed on the welcome
screen.
Menu
→
Messaging
→
Voice mail
The number of new messages is displayed.
Enter your personal code.
Display number of new and old messages.
Menu
→
Review
Select the menu: Review.
Consultating messages.
While listening to messages, you can:
Rewind
Play back the message from the start.
Backward
Listen to the end of the message.
Pause
Pause while listening to message.
Forward
Enter the voicemail number.
End of message
Terminate consultation.
After consulting the message, you can:
Exit
Return to the voice mailbox welcome menu.
Delete
Delete message.
Call back
Call back the person who left the message.
Save
Save the message.
Replay
Listen to message.
Forward message
Send a copy of a message.
3.1.8 Call log (History)
The call log can be viewed and managed when the phone is in the idle state.
When you have a missed call, the message icon is displayed on the welcome screen.
Events
Press the softkey to access the call log.
If you have one or more missed calls, the name of the last caller is
displayed (Last:).
The following information can be displayed in the call log:
No last caller
No missed calls.
No unanswered
ext
No external missed calls.
No unanswered
int
No internal missed calls.
Unanswered ext
call / X
Unanswerd ext
calls
One or more external missed calls.
Press the 'OK' key to list the missed call(s) (date, hour and name).
You can call back the selected contact by pressing the 'OK' key again.
Unanswered int
call / X
Unanswered int
calls
One or more internal missed calls.
Press the 'OK' key to list the missed call(s) (date, hour and name).
You can call back the selected contact by pressing the 'OK' key again.
Actions are available from the call log:
If a missed call is displayed on the screen, select it and press the 'OK' key to call
back the last caller.
More
Access more features.
Delete
Delete the selected entry. Note that no confirmation is requested.
Delete all
Delete the entire log. Note that no confirmation is requested.

Using your telephone - OmniPCX Enterprise
8AL90391ENAAed01
19 /85
3.1.9 Consulting text messages
When you have received a message, the message icon is displayed on the welcome
screen.
Menu
→
Messaging
→
New
text message
The number of new messages is displayed.
or OK
To consult the messages.
Consultation of first unread message.
Use the up-down navigation keys to scroll the message.
Use one of the following:
Menu
→
Delete
Delete the message.
Menu
→
Recall
Call back sender of message.
Menu
→
Text
answer
Forward a message to the message originator.
Menu
→
Next
message
Go to next message.
Terminate consultation.
3.1.10 Sending a text message to an internal contact
Menu
→
Messaging
→
Text
mail
Access the text mail.
Send
Select the menu: Send.
Dial the number of your contact (dial, directories, last numbers dialed...).
Confirm.
•Predefined messages
Predefined
message
Predefined messages are listed.
Select the message to be sent.
or OK
Send message.
•Message to complete
Msg to complete
Messages to complete are listed.
Select the message to complete.
Complete the message.
or OK
Create a temporary personal message (alphabetic keypad).
•Personal message
Message to
create
Enter creation mode.
Create a temporary personal message (alphabetic keypad).
or OK
Create a temporary personal message (alphabetic keypad).

Using your telephone - OmniPCX Enterprise
8AL90391ENAAed01
20 /85
3.1.11 Send a voice message copy
Menu
→
Messaging
→
Voice mail
Access the voice mail.
Enter your personal code.
Display number of new and old messages.
Menu
→
Review
Available messages are listed.
Select message to copy by consecutive presses.
Menu
→
Forward
message
Record a comment.
End of recording.
Use one of the following:
Dial the number of your contact (dial, directories, last numbers dialed...).
Confirm.
Menu
→
Spell
name
Spell the addressee's name.
Send
Send message.
Use one of the following:
Enter another destination name.
To no longer send messages.
3.1.12 Send a voice message to a destination
Menu
→
Messaging
→
Voice mail
Access the voice mail.
Enter your personal code.
Display number of new and old messages.
Menu
→
Send
Select the menu: Send.
Start recording.
End
End of recording.
Use one of the
following:
Use one of the following:
Menu
→
Spell
name
Spell the addressee's name.
Send
Send message.
Use one of the following:
Enter another destination name.
To no longer send messages.
This manual suits for next models
1
Table of contents
Other Alcatel-Lucent Enterprise Handset manuals

Alcatel-Lucent Enterprise
Alcatel-Lucent Enterprise OpenTouch 8244 DECT User manual

Alcatel-Lucent Enterprise
Alcatel-Lucent Enterprise OpenTouch 8234 User manual

Alcatel-Lucent Enterprise
Alcatel-Lucent Enterprise 8214 User manual

Alcatel-Lucent Enterprise
Alcatel-Lucent Enterprise OpenTouch 8244 DECT User manual

Alcatel-Lucent Enterprise
Alcatel-Lucent Enterprise OpenTouch 8254 User manual