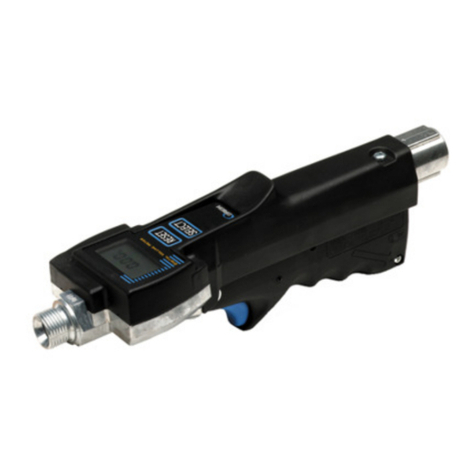
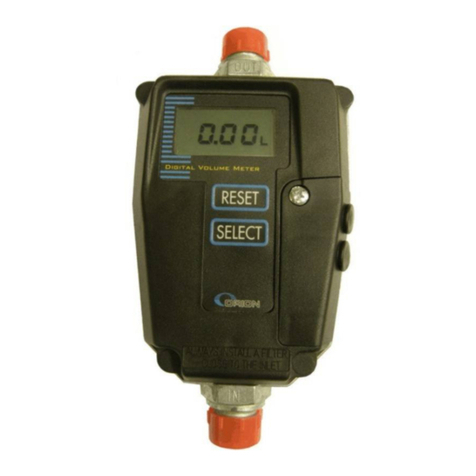
Alentec & Orion 24702 User manual

USER MANUAL / BRUKSANVISNING / MANUEL D’UTILISATION / BEDIENUNGSANLEITUNG / MANUAL DE INSTRUCCIONES
Manual 24702_EN_2B 2014
-
05
-
20
Part
No.
/
Réf.
/
Art.
Nr.
/
Cód.:
24702
HOSE END METER
PRE SET VERSION

Manual 24702_EN_2B
2(8)
General
Even though it’s designed for heavy-duty use the Meter is a High Precision Measuring Device and should be treated as such.
It is possible to calibrate the Meter to a specific oil viscosity. See instructions on page 6.
The Meter’s default setting displays volume in liters. This setting can be changed to US quarts, US pints or US gallons. See
instructions on page 7.
The Meter has the following features:
•BATCH volume counter with a range
of 0.01- 999.99 liters (or quarts/pints/
gallons) that can be reset to zero.
•VOLUME PRE-SET function with a range of 0.1 – 999.9 liters (or quarts/
pints/gallons).
•TRIP volume counter with a range of
1 - 99999 liters (or gallons *) that can be reset to zero.
•TOTAL volume counter with a range of 1 - 99999 liters (or gallons *) that cannot be reset to zero.
*) The unit of measure in TRIP and TOTAL is always gallons even when the BATCH volume counter is set for pints, quarts
or gallons.
The Meter is for use with mineral oils. It could also be used to measure pure glycol.
NOTE! The Meter is not to be used with water based products or glycol mixed with water (antifreeze fluid)!
The Meter is for “indoor use”, i.e. it should not be mounted outdoors without shelter against the elements!
NOTE! The built–in circuit board is well protected against moisture but the Meter should not to be washed with solvents or
directly sprayed with high-pressure water!
1. Battery
When the Meter is delivered it’s not yet activated. Before activating the unit, mount a 9V battery as shown in the illustrations
below.
The reason the unit is not activated before delivery is to spare the built in lithium battery that keeps the calibration memory
intact even when changing the 9V battery.
The "Low Battery indicator" is triggered when it’s time to change the 9V battery.
NOTE! Be sure to position the
spring accurately before
closing the trigger handle.

Manual 24702_EN_2B
3(8)
L
L
L
L
See separate
instruction on page 4
10 sec
2. Activation
When the battery is mounted, activate the Meter by pressing the RESET & SELECT buttons simultaneously for a few
seconds. The display will light up.
When the Meter is activated, the display will show 0.00 L.
3.
Functions
Use the SELECT button to toggle the functions of the Meter
The TRIP function can be used to keep track of dispensed volume
over a certain period of time. The TRIP function can be reset
when shown on the display.
The display will always automatically return to show the actual
dispensed volume after approx. four seconds.
NOTE! The TRIP and TOTAL counters always show when volume in US
gallon(G) even when Batch volume counter is set to show pints, quarts or
gallons. The TOTAL counter can not be reset.
L
TRIP mode indicator
TOTAL mode indicator
Low 9V
battery
indicator
UNIT OF
MEASURE
indicator
Dispensed
volume
L
PRE
-
SET
mode
indicator

Manual 24702_EN_2B
4(8)
4. Normal dispensing
Before using the Meter it should always be reset to show 0.00 on the display by pressing the RESET button.
To start dispensing, press the "safety lock" before pressing the "trigger handle". This ensures that you won’t accidentally
release oil e.g. when pulling down from a hose reel.
The "trigger handle" can be locked in the open position, and released by pressing the trigger handle once more.
5. Pre set dispensing
Press the SELECT button, or any of the UP/DOWN arrow
buttons, to activate the PRE-SET function. PRE-SET mode
is indicated with the PRE-SET mode indicator on the display
(AUTO symbol lit up).
Pre-setting of volume is then done with the UP/DOWN arrow
buttons in increments of 0.1 liters (or quarts, pints, gallons).
Hold down a key for more than 4 seconds for the increments
to change to 1.0 liters (or quarts, pints, gallons)
for faster setting of big volumes.
To start “pre-set dispensing”, proceed as when starting a
“normal dispensing” and lock the “trigger handle”
in the open position.
NOTE! When in PRE-SET mode (AUTO symbol lit up) the
dispensing must be started within 10 seconds or the meter will
return to BATCH mode.
When the pre-set volume is reached the meter will automatically
stop dispensing and an alarm will be heard.
The display will at this point switch to show the actual dispensed
volume in BATCH mode.
NOTE! Before continuing dispensing, or starting a new dispense,
the trigger handle must be pressed once to release
the pre-set mechanism.
If the dispensing is continued without resetting the display this
volume will be added to
the already dispensed figure
A new dispensing, normal or pre-set, can now be started.
O P E N
L O C K O P E N
C L O S E
L
L
L
L
L
10 sec

Manual 24702_EN_2B
5(8)
6. Spare parts list
Part No Description Position No Quantity
224 56 90 Cover1) 1 1
244 58 19 Meter chamber2) 2 1
224 5909
Valve kit 3 1
244 57 06 Locking device 4 1
204 55 97 Trigger handle 5 1
224 58 17 Strainer 6 1
204 55 94 PCB support 7 1
224 56 34 9V-Battery3) 8 1
234 56 20 O-ring chamber 9 1
234 56 19 O-ring center scr. 10 2
234 56 21 Center screw 11 2
204 57 49 Battery support 12 1
1) With electronics
2) Complete with mounted gears, lid, screws and seals.
3) Not included, type 6LR61 9V.

Manual 24702_EN_2B
6(8)
Instructions for re-calibration
1 9 8
1 0 1 0 1
New
Scale Factor
1. Check the Meter against a 2-liters measure.
If the reading on the Meter is out of calibration, note the
displayed volume (e.g. 1.98) and calculate the new Scale
Factor (e.g. 1.0101) as shown in illustration to the left.
Note! If the meter already has a Scale Factor other than
the default figure 1.0000 set it back to 1.0000 (see point
3-5.) before performing the calibration. To check the
actual Scale Factor, simultaneously press the RESET
and SELECT buttons (press RESET slightly before
SELECT).
2. Remove the hexagon screw that covers the SETUP
button.
3. With a sharp object, like a small screwdriver, short-
circuit the two soldered pads on the circuit board that
can be reached through the hole. These must remain
short-circuited during the entire setting procedure.
4. The actual Scale Factor is now shown on the display.
Set the new Scale Factor as shown in the diagram. Use
the SELECT button to move to desired position and the
RESET button to change the numbers.
5. Release the SETUP button and test the Meter against
the 2-liters measure. If the Meter reading is accurate,
replace the hexagon screw.

Manual 24702_EN_2B
7(8)
Instruction for changing the unit of measure
1. Remove the hexagon screw that covers the SETUP button.
2. With a sharp object, like a small screwdriver, short-circuit the
two soldered pads on the circuit board that can be reached
through the hole. These must remain short-circuited during the
entire setting procedure.
RESET
3. The actual Unit of Measure is now flashing on the display.
Use the RESET button to select the desired Unit of Measure.
4. Release the SETUP button and test the Meter against a
measure. If the Meter reading is accurate, replace the hexagon
screw.
STRAINER EXCHANGE
The strainer should be checked if a
decrease in flow is noticed. If necessary,
exchange it with the extra strainer
delivered with the Meter.
TECHNICAL DATA
P
max
: 735 psi (5 Mpa) T
min/max
: 32 °F / 122 °F (0°C / 50°C)
Q
min
: 1 l/min (1 q/min) Err
±max
: < 1%
Q
max
: 15 l/min (16 q/min) m: 1.88 lb (0.85 kg)

Manual 24702_EN_2B
8(8)
7. Instruction for resetting of flashing display
If the display starts flashing between SETUP and 1.0000 the Scale Factor stored in the memory of the Meter is lost. This is
due to either low voltage in the built-in 3V battery or an electrostatic discharge.
If, when disconnecting the 9V battery, the display goes totally blank (without “Low voltage indicator” symbol) the built-in
3V battery is low.
It is not necessary to replace the built-in battery, as the Meter will continue to work as normal when the 9V battery is re-
connected. The display may need to be reset as described below.
Follow the “INSTRUCTION FOR RE-CALIBRATION ” (page 6, steps 2– 5). In step 5only press SELECT once.
NOTE! When the Meter is calibrated with a Scale Factor other than the default 1.000, it’s a good idea to note the new value
somewhere so it can be re-programmed if the 3V battery runs low.
8. Pressure drop through hose end meter
0
7 / 0,05
15 / 0,10
22 / 0,15
29 / 0,20
37 / 0,25
44 / 0,30
52 / 0,35
0
29 / 0,20
59 / 0,40
88 / 0,60
118 / 0,80
150 / 1,00
177 / 1,20
Oil pressure bef ore the meter [psi / MPa]
Oil pressure after the meter [psi / MPa]
Table of contents
Other Alentec & Orion Measuring Instrument manuals
Popular Measuring Instrument manuals by other brands

UWT
UWT Nivobob NB 4000 Technical Information/Instruction manual

PCE Instruments
PCE Instruments PCE-PH 25 Operation manual

Vanguard Instruments
Vanguard Instruments Auto-Ohm 200 S3 user manual

York
York Elite 1600 ARC operating instructions

Stanley
Stanley FMHT77165 user manual

Micromax Instruments
Micromax Instruments SRM100 user guide