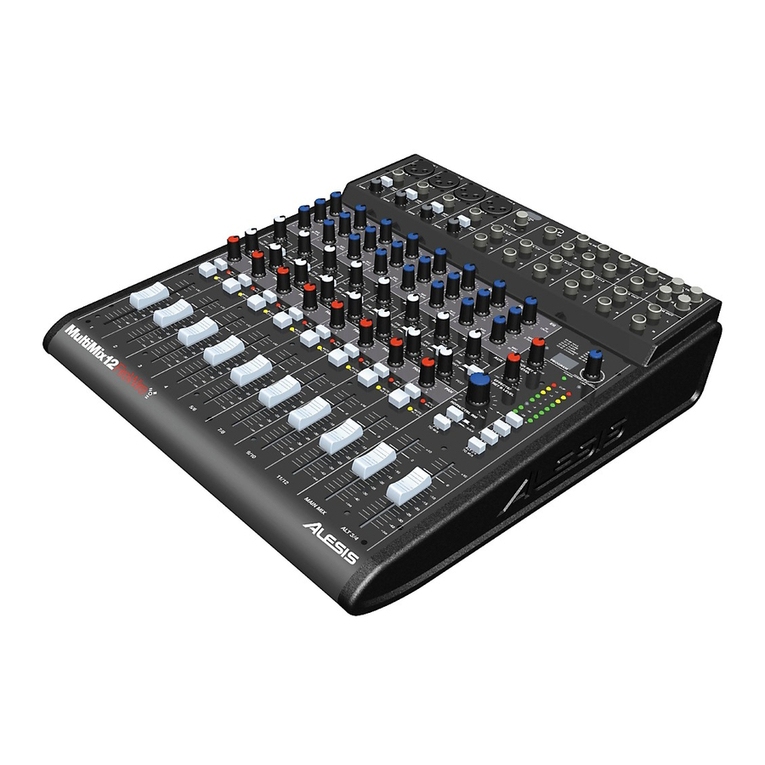
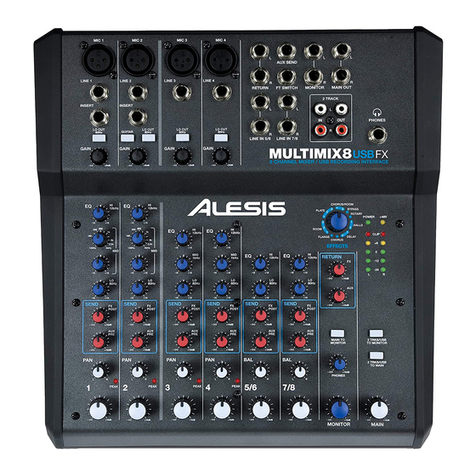
Alesis MultiMix 6 USB User manual

6-CHANNEL USB MIXER
QUICKSTART GUIDE
::: ENGLISH ( 1 – 2 ) :::
MANUAL DE INICIO RÁPIDO
::: ESPAÑOL ( 3 – 4 ) :::
GUIDE D’UTILISATION RAPIDE
::: FRANÇAIS ( 5 – 6 ) :::
GUIDA RAPIDA
::: ITALIANO ( 7 – 8 ) :::
KURZANLEITUNG
::: DEUTSCH ( 9 – 10 ) :::

1
CONNECTION DIAGRAM
Notes:
yWhen recording a guitar or bass with an active pickup, set the MultiMix 6 USB's GUITAR / LINE SWITCH to "LINE." If your
instrument uses a passive pickup, connect it to LINE INPUT 1 and set the switch to "GTR." (You may use a line-level mono
source connected to LINE INPUT 2 at the same time.)
yTo reduce electrical hum at high gain settings, keep the MultiMix 6 USB's power supply away from your guitar cable and the
MultiMix 6 USB's channel inputs.
AUDIO SETUP
The MultiMix 6 USB is a class-compliant device that can be used with any digital
audio workstation or recording software that supports USB audio. To enable your
MultiMix 6 USB to send and receive audio to and from your computer, follow the
instructions below for your computer's operating system:
WINDOWS VISTA:
1. Go to Start Menu Control Panel Sound. (If you don’t see Sound, select
Switch to Classic View, and the Sound Control Panel should become available.)
2. Click the Playback tab and select USB Audio Codec* as the default device.
3. Click the Recording tab and select USB Audio Codec* as the default device.
4. Click Properties in the lower right-hand corner.
5. In the new window, click the Advanced tab and select 2-channel, 16-bit, 44100
Hz (CD Quality) as the default format.
6. Uncheck both boxes under Exclusive Mode.
7. Click OK to close the Properties window.
8. Click OK to close the Sound control panel.
WINDOWS XP:
1. Go to Start Menu Control Panel Sounds and Audio Devices.
2. Click the Audio tab.
3. Under Sound Playback and Sound Recording, select USB Audio Codec* as the default device.
4. Click OK.
MAC:
1. Go to Applications Utilities Audio MIDI Setup.
2. In the Audio Devices tab under System Settings, select USB Audio Codec* as your Default Input and Default Output.
3. Close the window.
Mic
Guitar
CD Player
Computer
Speakers
Headphones
Power
BOX CONTENTS
yMultiMix 6 USB
yUSB cable
yPower adapter
yQuickstart Guide
ySafety Instructions & Warranty
Information booklet
B
e sure your audio software
program is set up to receive audio
via the MultiMix 6 USB. This can
usually be done in your software’s
"Preferences" or "Device Setup."
Please consult your software
manual for more information.
*If you have other USB audio
devices connected to your
computer, which may have
identical names, you may need to
try selecting each one until the
MultiMix 6 USB is recognized.

2
REAR PANEL FEATURES
1. POWER IN – Use the included power
adapter to connect the MultiMix 6 USB
to a power outlet. While the power is
switched off, plug the power supply
into the MultiMix 6 USB first, then plug
the power supply into a power outlet.
2. POWER SWITCH – Turns the MultiMix 6 USB on and off. Turn on the MultiMix 6 USB after all input
devices have been connected and before you turn on amplifiers. Turn off amplifiers before you turn off
the MultiMix 6 USB.
3. USB PORT – Use the included cable to connect the MultiMix 6 USB to a computer. MultiMix 6 USB
requires a USB 1.1 or higher (e.g. USB 2.0) connection.
TOP PANEL FEATURES
1. POWER LED – Illuminates when the
MultiMix 6 USB is on.
2. MIC INPUT – Connect a microphone
to these inputs with an XLR cable.
3. LINE INPUT – Connect line-level
devices to these inputs with 1/4"
cables.
4. HPF (High-Pass Filter) – When this
button is depressed, the channel's
high-pass filter will engage,
eliminating frequencies below 75 Hz
to reduce any low-level noise.
5. GTR / LINE SWITCH – When this
switch is in the down position,
Channel 1 will serve as a high-
impedance input for connecting
guitar or bass instruments. When the
switch is in the up position, Channel
1 will accept mic or line-level signals.
6. MAIN OUT – Use standard 1/4"
cables to connect this output to a
speaker or amplifier system. The
level of this output is controlled by
the MAIN VOL knob.
7. HEADPHONES – Connect your 1/4" headphones to this output.
8. GAIN – Adjusts the channel audio pre-fader and pre-EQ gain level.
9. CHANNEL VOLUME – Adjusts the audio level on the channel.
10. CHANNEL PAN – Adjusts the (mono) channel's position in the stereo field.
11. CHANNEL EQ (BASS) – Adjusts the low (bass) frequencies of the channel.
12. CHANNEL EQ (TREBLE) – Adjusts the high (treble) frequencies of the channel.
13. BALANCE (CH 3/4 & 5/6) – Adjusts the balance between Channels 3 and 4 and Channels 5 and 6.
14. PHANTOM POWER – This switch activates and deactivates phantom power. When activated,
phantom power supplies +48V to both XLR mic inputs. Please note that most dynamic microphones do
not require phantom power, while most condenser microphones do. Consult your microphone’s
documentation to find out whether it needs phantom power.
15. MAIN VOLUME – Adjusts the output volume of the MAIN OUT.
16. HEADPHONE VOLUME – Adjusts the volume level of the headphone output.
17. LED METERS – Monitors the audio level of the MAIN OUT.
1
23
1
2
33
3
3
6
6
3
37
88
9
12
11
10
999
12 12
13 13
14 17
11 11
16
15
10
44
5
2

3
DIAGRAMA DE CONEXIÓN
Notas:
yCuando grabe una guitarra o bajo con captor activo, ajuste el CONMUTADOR GUITARRA / LÍNEA de MultiMix 6 USB a
"LINE". Si su instrumento usa un captor pasivo, conéctelo a la ENTRADA DE LÍNEA 1 y ajuste el conmutador a "GTR".
(Puede usar al mismo tiempo una fuente mono de nivel de línea conectada a la ENTRADA DE LÍNEA 2.)
yPara reducir el zumbido eléctrico cuando se usan ajustes altos de ganancia, mantenga la fuente de alimentación de
MultiMix 6 USB alejada del cable de su guitarra y de las entradas de los canales del equipo.
CONFIGURACIÓN DE AUDIO
MultiMix 6 USB es un dispositivo que cumple especificaciones de clase y que se
puede usar con cualquier estación de trabajo o software de grabación de audio digital
compatible con el audio USB. Para permitir que MultiMix 6 USB envíe y reciba audio
hacia y desde la computadora, siga las instrucciones de más abajo correspondientes
al sistema operativo de la misma:
WINDOWS VISTA:
1. Vaya al menú Start Control Panel Sound (Inicio > Panel de control >
Sonido). (Si no ve Sound, seleccione Switch to Classic View (Cambiar a vista
clásica) —el panel de control Sound debe aparecer.)
2. Haga clic en la pestaña Playback (Reproducción) y seleccione USB Audio
Codec* (Códec de audio USB) como dispositivo predeterminado.
3. Haga clic en la pestaña Recording (Grabación) y7 seleccione USB Audio
Codec* (Códec de audio USB) como dispositivo predeterminado.
4. Haga clic en Properties (Propiedades) en la esquina inferior derecha.
5. En la nueva ventana, haga clic en la pestaña Advanced (Avanzadas) y
seleccione 2-channel, 16-bit, 44100 Hz (CD Quality) [2 canales, 16 bits, 44100
Hz (calidad de CD)] como formato predeterminado.
6. Deseleccione ambas casillas debajo de Exclusive Mode (Modo exclusivo).
7. Haga clic en OK (Aceptar) para cerrar las ventana Properties.
8. Haga clic en OK para cerrar el panel de control Sound.
WINDOWS XP:
1. Vaya al menú Start Control Panel Sounds and Audio Devices (Inicio > Panel de control > Dispositivos de sonido y
audio).
2. Haga clic en la pestaña Audio.
3. En Sound Playback (Reproducción de sonido) y Sound Recording (Grabación de sonido) seleccione USB Audio Codec*
(Códec de audio USB) como dispositivo predeterminado.
4. Haga clic en OK (Aceptar).
MAC:
1. Vaya a Applications Utilities Audio MIDI Setup (Aplicaciones -> Utilidades -> Configuración de audio MIDI).
2. En la pestaña Audio Devices (Dispositivos de audio), bajo System Settings (Configuración del sistema), seleccione USB
Audio Codec* (Códec de audio USB) como Default Input (Entrada predeterminada) y Default Output (Salida
predeterminada).
3. Cierre la ventana.
Micrófono
Guitarra
Reproductor
de CD
Computadora
Altavoces
Auriculares
Alimentación
Asegúrese de que su programa
de software de audio esté
configurado para recibir audio por
MultiMix 6 USB. Esto se puede
hacer habitualmente en
“Preferences” o “Device Setup”
(Configuración de dispositivos) de
su software. Para más
información, consulte el manual
de su soft
w
ar
e
.
*Si tiene conectados a su
computadora otros dispositivos
de audio USB que puedan tener
nombres idénticos, puede ser
necesario que pruebe a
seleccionar cada uno hasta que
se reconozca el MultiMix 6 USB.
CONTENIDO DE LA CAJ
A
yMultiMix 6 USB
yCable USB
yAdaptadora de alimentación
yGuía de inicio rapido
yFolleto de información sobre la
seguridad y la garantía

4
CARACTERÍSTICAS DEL PANEL TRASERO
1. ENTRADA DE ALIMENTACIÓN – Use el
adaptador de alimentación incluido para
conectar el MultiMix 6 USB a un tomacorriente
alimentado. Mientras está desconectada la
alimentación eléctrica, enchufe la fuente de
alimentación al MultiMix 6 USB primero, y luego al tomacorriente.
2. INTERRUPTOR DE ENCENDIDO – Enciende y apaga el MultiMix 6 USB. Encienda el MultiMix 6 USB
después de desconectar todos los dispositivos de entrada y antes de encender los amplificadores.
Apague los amplificadores antes de apagar el MultiMix 6 USB.
3. PUERTO USB – Use el cable incluido para conectar el MultiMix 6 USB a una computadora. MultiMix 6
USB requiere una conexión USB 1.1 o superior (por ej. USB 2.0).
CARACTERÍSTICAS DEL PANEL SUPERIOR
1. LED DE ENCENDIDO – Se ilumina
cuando el MultiMix 6 USB está
encendido.
2. ENTRADA DE MICRÓFONO – Conecte
a esta entrada un micrófono con un cable
XLR.
3. ENTRADAS DE LÍNEA – Estas entradas
se usan para conectar dispositivos de
nivel de línea con cables 1/4".
4. HPF (Filtro pasaaltos) – Cuando este
botón está pulsado, se activa el filtro
pasaaltos del canal, que elimina las
frecuencias inferiores a 75 Hz a fin de
reducir cualquier ruido de bajo nivel.
5. CONMUTADOR GUITARRA / LÍNEA –
Cuando este conmutador está hacia
abajo el canal 1 sirve como entrada de
alta impedancia para conectar guitarras o
bajos. Cuando está hacia arriba, el canal
1 acepta señales de micrófono o de nivel
de línea.
6. MAIN OUT (salida principal) – Use
cables 1/4" estándar para conectar esta
salida maestra a un sistema de altavoces o amplificador. El nivel de esta salida se controla con la
perilla MAIN VOL (volumen principal).
7. AURICULARES – Conecte sus auriculares de 1/4" a esta salida.
8. GANANCIA – Ajusta el nivel de ganancia preecualización y pre-fader del audio del canal.
9. VOLUMEN DE CANAL– Ajusta el nivel de audio en el canal correspondiente.
10. CHANNEL PAN (Balance del canal) – Ajusta el balance izquierda-derecha del audio del canal.
11. GRAVES (DE CANAL) – Ajusta las bajas frecuencias (graves) del audio que se reproduce en el canal
correspondiente.
12. TREBLE (DE CANAL) – Ajusta las altas frecuencias (agudos) del audio que se reproduce en el canal
correspondiente.
13. BALANCE (CH 3/4 & 5/6) – Ajusta el balance entre los canales 3 y 4 y los canales 5 y 6.
14. PHANTOM POWER – Este interruptor activa y desactiva la alimentación fantasma. Cuando se activa,
la alimentación fantasma suministra +48 V a ambas entradas de micrófono XLR. Tenga en cuenta que
la mayoría de los micrófonos dinámicos no requieren alimentación fantasma, mientras que la mayoría
de los micrófonos de condensador la requieren. Consulte la documentación de su micrófono para
averiguar si necesita alimentación fantasma.
15. MAIN VOL (volumen principal) – Ajusta el volumen de MAIN OUT (salida principal).
16. VOLUMEN DE AURICULARES – Ajusta el nivel de volumen de la salida para auriculares.
17. INDICADOR DE NIVEL ESTÉREO – Monitorea el volumen de MAIN OUT (salida principal).
1
23
1
2
33
3
3
6
6
3
37
88
9
12
11
10
999
12 12
13 13
14 17
11 11
16
15
10
44
5
2

5
SCHÉMA DE CONNEXION
Notes:
yLors de l'enregistrement d'une guitare ou d'une basse dotée de micros actifs, réglez le SÉLECTEUR GUITAR / LINE du
MultiMix 6 USB à « LINE ». Si vous utilisez un instrument équipé de micros passifs, branchez votre instrument sur
l'ENTRÉE LINE 1 et réglez le sélecteur à « GTR ». (Vous pouvez utiliser en même temps une source mono à niveau ligne
sur l'ENTRÉE LINE 2.)
yAfin de réduire le ronflement électrique à des réglages élevés, gardez le câble d’alimentation du MultiMix 6 USB éloigné du
câble de la guitare et des canaux d’entrées du MultiMix 6 USB.
CONFIGURATION AUDIO
Vous pouvez utiliser le MultiMix 6 USB avec tout poste audio numérique logiciel ou
logiciel d’enregistrement qui prend en charge les périphériques audio USB.
WINDOWS VISTA :
1. Cliquez sur Démarrer Panneau de configuration Son. (Si vous ne voyez
pas Son, sélectionnez « Basculer vers l’affichage classique » et le panneau de
configuration Son devrait s'afficher.)
2. Cliquez sur l’onglet Lecture et sélectionnez USB audio codec* comme l'appareil
par défaut.
3. Cliquez sur l’onglet Enregistrement et sélectionnez USB audio codec* comme
l'appareil par défaut.
4. Cliquez sur Propriétés dans le coin inférieur droit.
5. À partir de la nouvelle fenêtre, cliquez sur l’onglet Advancé et sélectionnez l’option
2 canaux, 16 bits, 44 100 Hz (Qualité CD) comme le format par défaut.
6. Décochez les deux options sous Mode exclusif.
7. Cliquez OK pour fermer la fenêtre Propriétés.
8. Cliquez OK pour fermer le panneau de configuration Son.
WINDOWS XP :
1. Cliquez sur Démarrer Panneau de configuration Sons et périphériques audio.
2. Cliquez sur l’onglet Audio.
3. Sous Lecture audio et Enregistrement audio, sélectionnez USB audio codec* comme l'appareil par défaut.
4. Cliquez sur OK.
MAC :
1. Allez à Applications Utilitaires Configuration audio et MIDI.
2. Dans l’onglet Sons et périphériques audio sous Réglages du système, sélectionnez USB audio codec* comme Entrée
par défaut et Sortie par défaut.
3. Fermez la fenêtre.
Microphone
Guitare
Lecteur CD
Ordinateur
Haut-parleurs
Casque d'écoute
Alimentation
CONTENU DE LA BOÎTE
yMultiMix 6 USB
yCâble USB
yCâble d'alimentation
yGuide d'utilisation rapide
yLe livret des consignes de sécurité et des
informations concernant la garantie
Assure
z
-vous que le logiciel est
configuré de manière à recevoir
de l'audio via le MultiMix 6 USB.
Vérifiez dans les paramètres
« Préférences » ou « Installation
du périphérique ». Pour de plus
amples informations, veuillez
consulter le guide d’utilisation du
logiciel.
*
Si vous avez d’autres
périphériques audio USB
branchés à votre ordinateur, qui
pourraient avoir des noms
identiques, il se peut que vous
ayez à les sélectionner un à la
suite de l’autre jusqu’à ce que le
MultiMix 6 USB soit reconnu.

6
CARACTÉRISTIQUES DU PANNEAU ARRIÈRE
1. ENTRÉE COURANT – Utilisez le câble
d’alimentation inclus pour brancher le MultiMix
6 USB dans une prise d’alimentation murale.
Lorsque le MultiMix 6 USB est hors tension,
branchez le câble d'alimentation dans le
MultiMix 6 USB, puis dans la prise de courant.
2. L'INTERRUPTEUR D'ALIMENTATION – Met l’appareil sous et hors tension. Branchez le MultiMix 6
USB dans après avoir branché tous les appareils et avant de mettre les amplificateurs sous tension.
Mettez les amplificateurs hors tension avant de mettre le MultiMix 6 USB dans hors tension.
3. PORT USB –Utilisez le câble inclus pour brancher le MultiMix 6 USB à un ordinateur pour une
communication audio numérique bidirectionnelle 16 bits. Le MultiMix 6 USB requiert une connexion
USB 1.1 ou supérieur (p. ex.USB 2.0).
CARACTÉRISTIQUES DU PANNEAU SUPÉRIEUR
1. DEL D’ALIMENTATION – S’allume lorsque
le MultiMix 6 USB est sous tension.
2. ENTRÉE MIC – Permet de brancher un
microphone à l’aide d’un câble XLR.
3. ENTRÉES LINE – Ces entrées permettent
de brancher des appareils à niveau ligne
avec des câbles 1/4".
4. HPF (filtre passe-haut) – Lorsque cette
touche est enfoncée, le filtre passe-haut du
canal est activé, éliminant les fréquences
inférieures à 75 Hz afin de réduire les bruits
indésirables.
5. SÉLECTEUR GUITAR / LINE – Lorsque ce
sélecteur est abaissé, le canal 1 peut servir
pour brancher des instruments à à grande
impédance pour guitare ou basse. Lorsqu'il
est soulevé, le canal 1 accepte les signaux
micro et à niveau ligne.
6. MAIN OUT (sortie principale) – Utilisez
des câbles 1/4" standards afin de brancher
cette sortie à un haut-parleur ou à un
système de sonorisation. Le niveau du
signal de cette sortie est commandé par le bouton MAIN VOL (volume principale).
7. CASQUE D’ÉCOUTE – Permet de brancher un casque d’écoute 1/4 po.
8. GAIN – Permet d’ajuster le niveau du signal audio pré-atténuateur et pré-égalisation.
9. VOLUME DU CANAL – Permet d'ajuster le niveau de l’audio du canal.
10. PAN – Ce potentiomètre permet de régler l'équilibre entre les signaux droits et les signaux gauches de
l’audio du canal.
11. BASS (DU CANAL) – Permet d'ajuster le niveau des basses fréquences de l’audio du canal
correspondant.
12. TREBLE (DU CANAL) – Permet d'ajuster le niveau des hautes fréquences du canal correspondant.
13. BALANCE (Canal 3/4 et 5/6) – Permet d’ajuster l’équilibre entre les canaux 3 et 4 et les canaux 5 et 6.
14. PHANTOM POWER – Cet interrupteur permet d’activer et de désactiver l’alimentation fantôme.
Lorsqu'elle est activée, l’alimentation fantôme fournit +48 V aux deux entrées micro XLR. Veuillez
noter que la plupart des microphones électrodynamiques ne nécessitent pas d’alimentation fantôme,
alors que les microphones à condensateur en ont besoin. Consultez la documentation fournie avec
votre microphone pour savoir si vous devez utiliser l'alimentation fantôme.
15. MAIN VOL (volume principal) – Ajuste les niveaux de MAIN OUT (sortie principale).
16. VOLUME DE CASQUE D’ÉCOUTE – Ce bouton ajuste les niveaux de la sortie du casque d'écoute.
17. INDICATEUR DU NIVEAU STÉRÉO – Indique le niveau stéréo de MAIN OUT (sortie principale).
1
23
1
2
33
3
3
6
6
3
37
88
9
12
11
10
999
12 12
13 13
14 17
11 11
16
15
10
44
5
2

7
SCHEMA DE COLLAGEMENTI
Notas:
yAl momento di registrare una chitarra o un basso con un pickup attivo, impostare l’INTERRUTTORE GUITAR / LINE
(chitarra / linea) del MultiMix 6 USB su "LINE". Se il vostro strumento impiega un pickup passivo, collegatelo all’INGRESSI
DI LINEA 1 e impostate l’interruttore su "GTR" (chitarra). (Si può utilizzare allo stesso tempo una fonte mono a livello di
linea collegata all’INGRESSI DI LINEA 2.)
yPer ridurre il ronzio elettrico che si verifica con impostazioni elevate di guadagno, tenere l’alimentazione del MultiMix 6 USB
lontana dal cavo della chitarra e dagli ingressi canale del MultiMix 6 USB.
CONFIGURAZIONE AUDIO
Il MultiMix 6 USB è un dispositivo compatibile che può essere utilizzato con qualsiasi
workstation audio digitale o software di registrazione che supporta audio USB. Per
abilitare il MultiMix 6 USB per inviare e ricevere audio da e verso il computer, seguire
le istruzioni di cui sotto per il sistema operativo del computer di cui si dispone:
WINDOWS VISTA:
1. Recarsi su Start Pannello di controllo Audio. (Se non viene visualizzato
Audio, selezionare “Visualizzazione classica” ed il Pannello di controllo Audio
dovrebbe diventare disponibile.)
2. Cliccare sulla linguetta Riproduzione e selezionare USB Audio CODEC* come
periferica predefinita.
3. Cliccare sulla linguetta Registrazione e selezionare USB Audio CODEC* come
periferica predefinita.
4. Cliccare su Proprietà nell’angolo inferiore destro.
5. Nella nuova finestra, cliccare sulla linguetta Avanzate e selezionare 2 canali, 16-
bit, 44100 Hz (qualità da CD) come formato predefinito.
6. Togliere il segno di spunta da entrambe le caselle in Modalità esclusiva.
7. Cliccare su OK per chiudere la finestra Proprietà.
8. Cliccare su OK per chiudere il pannello di controllo Audio.
WINDOWS XP:
1. Recarsi su Start Pannello di controllo Suoni e periferiche audio.
2. Fare clic sulla linguetta “Audio”.
3. Sotto Riproduzione suoni e Registrazione suoni selezionare USB Audio CODEC* come periferica predefinita.
4. Cliccare su “OK”.
MAC:
1. Recarsi su Applicazioni Utilità Audio MIDI Setup.
2. Nella linguetta Dispositivi Audio sotto Impostazioni di sistema, selezionare USB Audio Codec* come Ingresso
predefinito e come Uscita predefinita.
3. Chiudere la finestra.
Microfono
Chitarra
Lettore CD
Computer
Altoparlanti
Cuffie
Alimentazione
CONTENUTI DELLA CONFEZIONE
yMultiMix 6 USB
yCavo USB
yAdattatore di alimentazione
yGuida rapida
yLibretto di istruzioni di sicurezza e
garanzia
Assicuratevi che il vostro
programma audio sia configurato
per ricevere audio da MultiMix 6
USB. Questo può essere fatto
solitamente a livello delle
“Preferenze” o della
“Configurazione periferica”. Per
maggiori informazioni, consultate
il manuale del vostro software.
*Qualora fossero presenti altri
dispositivi audio USB collegati al
computer, che potrebbero avere
nomi identici, provare a
selezionarli a uno a uno fino a
quando il MultiMix 6 USB non
viene riconosciuto.

8
CARATTERISTICHE PANNELLO POSTERIORE
1. INGRESSO DI ALIMENTAZIONE – Servirsi
dell’adattatore di alimentazione in dotazione
per collegare il MultiMix 6 USB ad una presa
di alimentazione. Ad alimentazione spenta,
collegare l’alimentazione elettrica innanzitutto
nel MultiMix 6 USB, quindi ad una presa elettrica.
2. INTERRUTTORE DI ALIMENTAZIONE (POWER) – Accende e spegne il MultiMix 6 USB. Accendere il
MultiMix 6 USB dopo aver collegato tutti i dispositivi d’ingresso e prima di accendere gli amplificatori.
Spegnere gli amplificatori prima di spegnere il MultiMix 6 USB.
3. PORTA USB – Servirsi del cavo in dotazione per collegare il MultiMix 6 USB ad un computer per una
comunicazione audio digitale a 2 vie, a 16 bit. Il MultiMix 6 USB richiede una porta USB 1.1 o superiore
(es. USB 2.0).
CARATTERISTICHE PANNELLO SUPERIORE
1. LED DI ALIMENTAZIONE – Si illumina
quando il MultiMix 6 USB è acceso.
2. INGRESSO MICROFONO – Collegare
un microfono a questo ingresso
servendosi di un cavo XLR.
3. INGRESSI DI LINEA – Collegare
dispositivi a livello di linea servendosi di
i cavi 1/4".
4. HPF (filtro passa-alto) – Quando si
preme questo pulsante, il filtro passa-
alto del canale si attiva, eliminando le
frequenze al di sotto di 75 Hz per ridurre
qualsiasi rumore a basso livello.
5. INTERRUTTORE GUITAR / LINE
(Chitarra / Linea) – Quando questo
interruttore è abbassato, il Canale 1
fungerà da ingresso ad elevata
impedenza per il collegamento di
chitarre o bassi. Quando l’interruttore è
alzato, il Canale 1 accetterà segnali mic
o a livello di linea.
6. MAIN OUT (uscita principale) –
Servirsi di cavi standard 1/4" per
collegare questa uscita Master ad una cassa o ad un sistema di amplificatori. Il livello di questa uscita è
controllato tramite la manopola MAIN VOL (volume principale).
7. CUFFIE – Collegare le cuffie da 1/4" a questa uscita.
8. GAIN – Regola il livello di guadagno audio pre-fader e pre EQ del canale.
9. VOLUME – Regola il livello audio sul canale.
10. PAN CANALE – Regola l’equilibrio sinistra-destra dell’audio del canale.
11. CHANNEL BASS (bassi di canale) – Regola le frequenze basse (bass) del canale.
12. CHANNEL TREBLE (acuti di canale) – Regola le frequenze alte (treble) del canale corrispondente.
13. BALANCE (CH 3/4 & 5/6) – Regola il bilanciamento tra i canali 3 e 4 e i canali 5 e 6.
14. ALIMENTAZIONE PHANTOM – Questo interruttore attiva e disattiva l’alimentazione phantom. Quando
attivata, l’alimentazione phantom fornisce +48V a entrambi gli ingressi mic XLR. Va notato che la
maggior parte dei microfoni dinamici non richiede alimentazione phantom, mentre la maggior parte dei
microfoni a condensatore sì. Consultare la documentazione del microfono per scoprire se necessita di
alimentazione phantom.
15. MAIN VOL (VOLUME PRINCIPALE) – Regola il volume di uscita MAIN OUT (uscita principale).
16. VOLUME CUFFIE – Regola il livello del volume dell’uscita cuffie.
17. INDICATORE DI LIVELLO STEREO – Monitora il livello audio di uscita MAIN OUT (uscita principale).
1
23
1
2
33
3
3
6
6
3
37
88
9
12
11
10
999
12 12
13 13
14 17
11 11
16
15
10
44
5
2
9
ANSCHLUSSÜBERSICHT
Notes:
yWenn Sie eine Gitarre oder einen Bass mit einem aktiven Tonabnehmer aufnehmen, setzen Sie den GITARRE / LINE
SCHALTER des MultiMix 6 USB auf "LINE." Falls Ihr Instrument einen passiven Tonabnehmer verwendet, schließen Sie es
an den LINE EINGÄNG 1 an und setzen Sie den Schalter auf "GTR." (Sie können gleichzeitig eine Line-Level Mono-
Quelle, die mit LINE EINGÄNG 2 verbunden ist, verwenden.)
yUm elektrische Brummgeräusche bei hohen Gain-Einstellungen zu vermeiden, halten Sie das Netzteil des MultiMix 6 USB
vom Gitarrenkabel und den Kanaleingängen des MultiMix 6 USB fern.
AUDIO SETUP
The Der MultiMix 6 USB ist ein klassenkonformes Gerät, das mit jeder DAW
oder Aufnahmesoftware, die USB Audio unterstützt, verwendet werden kann.
Um Ihr MultiMix 6 USB zu aktivieren, um Audio an Ihren Computer zu senden
und von Ihrem Computer zu empfangen, folgen Sie untenstehenden
Anweisungen für das Betriebssystem Ihres Computers:
WINDOWS VISTA:
1. Gehen Sie auf Start Menü Systemsteuerung Sound (Falls Sie Sound
nicht sehen, wählen Sie Auf klassische Ansicht wechseln und das Sound
Bedienfeld sollte verfügbar sein.)
2. Klicken Sie auf den Reiter Wiedergabe und wählen Sie USB Audio Codec*
als Standardgerät.
3. Klicken Sie auf den Reiter Aufnahme und wählen Sie USB Audio Codec*
als Standardgerät.
4. Kicken Sie Eigenschaften in der rechten unteren Ecke.
5. Im neuen Fenster klicken Sie den Reiter Erweitert und wählen 2-Kanal, 16-
bit, 44100 Hz (CD Qualität) als Standardformat.
6. Entfernen Sie das Häkchen in beiden Kästen unter Exklusivmodus.
7. Klicken Sie OK, um das Eigenschaftenfenster zu schließen.
8. Klicken Sie OK, um das Sound Bedienfeld zu schließen.
WINDOWS XP:
1. Gehen Sie zu Start Menü Systemsteuerung Sounds und Audiogeräte.
2. Klicken Sie den Reiter Audio.
3. Unter Soundwiedergabe und Soundaufnahme wählen Sie USB Audio Codec* als Standardgerät.
4. Klicken Sie OK.
MAC:
1. Gehen Sie zu Anwendungen Dienstprogramme Audio MIDI Konfiguration.
2. Im Reiter Audiogeräte unter Systemeinstellungen, wählen Sie USB Audio Codec* als Ihren Standard-Input und
Standard-Output.
3. Schließen Sie das Fenster.
Mikrofon
Gitarre
CD Spieler
Computer
Lautsprecher
Kopfhörer
Netzeil
INHALT DER VERPACKUNG
yMultiMix 6 USB
yUSB-Kabel
yNetzeil
yKurzanleitung
yBroschüre mit den Sicherheits- und
Garantierichtlinien
*Falls Sie andere USB Audiogeräte an
Ihren Computer angeschlossen haben,
die möglicherweise identische Namen
haben, versuchen Sie jedes einzelne
zu selektieren, bis der MultiMix 6 USB
erkannt wird.
Achten Sie darauf, dass
I
hre
Audiosoftware auf den Empfang von
Audio über MultiMix 6 USB konfiguriert
ist. Dazu öffnen Sie normalerweise
die “Voreinstellungen” oder die
“Gerätekonfiguration” der Software.
Beachten Sie bitte auch die Hinweise
in der Bedienungsanleitung der
Software für weitere Informationen.

10
ÜBERSICHT ÜBER DIE RÜCKSEITE
1. POWER EINGANG – Verwenden Sie das
beiliegende Netzteil, um den MultiMix 6 USB
mit einer Steckdose zu verbinden. Verbinden
Sie, während das Gerät ausgeschaltet ist, das
Netzteil zuerst mit dem MultiMix 6 USB und
stellen Sie erst dann die Verbindung zur Steckdose her.
2. POWER SCHALTER – Mit diesem Schalter können Sie den MultiMix 6 USB einschalten, nachdem alle
Kabelverbindungen vorgenommen wurden. So vermeiden Sie Beschädigungen an Ihren Geräten.
Schalten Sie den MultiMix 6 USB vor den Verstärkern ein und schalten Sie Ihre Verstärker aus, bevor
Sie den MultiMix 6 USB ausschalten.
3. USB-ANSCHLUSS – Verwenden Sie das beiliegende Kabel, um den MultiMix 6 USB an einen
Computer für eine Zweiweg-, 16-bit digitale Tonverbindung an. Der MultiMix 6 USB benötigt zur
Verbindung USB 1.1 oder höher (z.B. USB 2.0).
ÜBERSICHT ÜBER DIE OBERSEITE
1. EIN/AUS LED – Leuchtet auf, wenn das
MultiMix 6 USB eingeschaltet ist.
2. MIKROPHONEINGANG – Zum
Anschluss eines Mikrofons mit einem
XLR-Kabel.
3. LINE EINGÄNGE – Zum Anschluss eines
Geräte mit Linepegelsignalen mit einem
1/4"-Kabel.
4. HPF (Hochpassfilter) Wenn dieser
Button gedrückt ist, wird der
Hochpassfilter des Kanals aktiviert und
Frequenzen unter 75 Hz werden
eliminiert, um Störgeräusche in niedrigem
Frequenzbereich zu reduzieren.
5. GITARRE / LINE SCHALTER – Ist dieser
Schalter nach unten gestellt, fungiert
Kanal 1 als hochohmiger Eingang, um
Gitarren oder Bässe anzuschließen. Ist
der Schalter nach oben gestellt, nimmt
Kanal 1 Mikrophon oder Line-Signale auf.
6. MAIN OUT (Hauptausgang) – Verbinden
Sie diesen Ausgang mit einem PA
System, Aktivmonitoren oder einer HiFi
Anlage. Die Lautstärke dieses Ausgangs wird mit dem MAIN VOL (Hauptvolume) Regler.
7. KOPFHÖRER – Schließen Sie hier Ihren Kopfhörer mit 6,3 mm Klinkenstecker an.
8. KANAL-GAIN – Justiert die Audio Pre-Fader und Pre-EQ Pegel im entsprechenden Kanal ein.
9. KANAL-VOLUME – Stellt die Audiopegel auf dem Kanal.
10. KANAL PANORAMA - Adjustiert die Links-Rechts-Balance des Signals auf diesem Kanal.
11. KANAL-BÄSSE – Stellt die Bässe des Signals im entsprechenden Kanal ein.
12. KANAL-MITTEN – Stellt die Mitten des Signals im entsprechenden Kanal ein.
13. BALANCE (Kanäle 3/4 & 5/6) – Adjustiert die Balance zwischen Kanal 3 und 4 und Kanal 5 und 6.
14. PHANTOMSPEISUNG – Dieser Schalter aktiviert/deaktiviert Phantomspeisung. Ist dies aktiviert, liefert
die Phantomspeisung +48V an beide XLR-Mikrophoneingänge. Bitte beachten Sie, dass die meisten
dynamischen Mikrophone keine Phantomspeisung benötigen, das aber bei den meisten
Kondensatormikrophonen der Fall ist. Sehen Sie in der Anleitung Ihres Mikrophons nach, ob Ihr
Mikrophon Phantomspeisung benötigt oder nicht.
15. MAIN VOL (Hauptvolume) – Steuert die Ausgangslautstärke des MAIN OUT (Hauptausgang).
16. KOPFHÖRERVOLUME – Stellt die Lautstärke des Kopfhörerausgangs ein.
17. STEREOPEGELANZEIGE – Zur visuellen Kontrolle des Audiopegels MAIN OUT (Hauptausgang).
1
23
1
2
33
3
3
6
6
3
37
88
9
12
11
10
999
12 12
13 13
14 17
11 11
16
15
10
44
5
2

TECHNICAL SPECIFICATIONS
INPUTS: Line (CH 1, 2): 10 KΩinput impedance
5.5 mV ~ 4.9 V RMS sensitivity for max output
Mic (CH 1, 2): 600 Ωinput impedance balanced
700 mV RMS sensitivity for max output
Line (CH 3 – 6): 700 mV RMS sensitivity for max output
HPF (CH 1, 2): 200 Hz (-1 dB), 80 Hz (-3 dB), 20 Hz (-24 dB)
OUTPUTS: Line: 7 V RMS max
Headphone: 0.5 W into 47 Ω
SIGNAL-TO-NOISE RATIO: Line: > 92 dB
(max output; JIS A-weighted) Mic: > 62 dB
DISTORTION: < 0.02%
FREQUENCY RESPONSE: Line: 20 Hz – 20 kHz (± 0.5 dB)
Mic: 20 Hz – 15 kHz (± 0.5 dB)
CHANNEL EQUALIZER: Bass: ± 14 dB @ 80 Hz
Treble: ± 14 dB @ 12 kHz
CHANNEL FADER KILL: > 90 dB @ 1 kHz
CROSSTALK: > 85 dB @ 1 kHz
INTERFACE: USB1.1 or higher
POWER ADAPTER: 10 V AC, 500 mA
* Specifications are subject to change without notice.
www.alesis.com
7-51-0302-A
This manual suits for next models
1
Table of contents
Languages:
Other Alesis Mixer manuals

Alesis
Alesis GIGAMIX Gigamix 4FX User manual

Alesis
Alesis iMultiMix 16 USB User manual

Alesis
Alesis iMultiMix9R User manual

Alesis
Alesis MultiMix8Line User manual

Alesis
Alesis ZoneMix6 Technical document

Alesis
Alesis GigaMix4CD User manual

Alesis
Alesis Multimix 8 USB 2.0 FX User manual

Alesis
Alesis 12, 16 User manual

Alesis
Alesis MultiMix8FX XA1 User manual

Alesis
Alesis GigaMix 6FX User manual