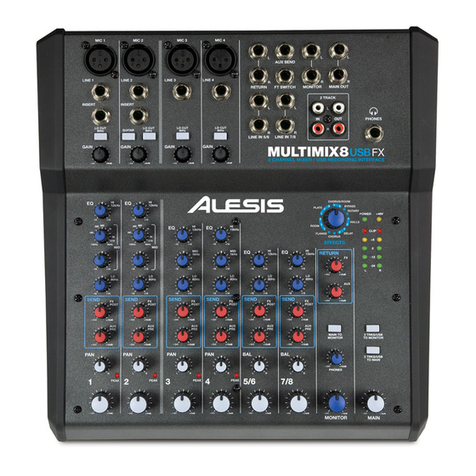
Alesis MULTIMIX 8 USB FX User manual

VIRTUAL INSTRUCTION STREAMING SOLUTIONS
USER GUIDE FOR THE
ALESIS MULTIMIX 8 USB FX MIXER
This guide walks you through setting up a Multimix 8 mixer for video recording and
streaming voice-over-music tness instruction with a computer or smart device.

MULTIMIX8USBFX
8 CHANNEL MIXER / USB RECORDING INTERFACE
MIC 1
LINE 1
INSERT
LO CUT
80Hz
GAIN
+20dB
L
AUX SEND
R
L
R
L
R
L
RETURN FT SWITCH
LINE 5/6 LINE 7/8
MONITOR
L
R
IN OUT PHONES
2 TRACK
MAIN OUT
R
L
R
LINE 2
INSERT
GUITAR LO CUT
80Hz
+20dB
GAIN
MIC 2
LO CUT
80Hz
+20dB
GAIN
LINE 3
MIC 3
LO CUT
80Hz
+20dB
GAIN
LINE 4
MIC 4
-15 +15
HI
12kHz
EQ
120Hz 4kHz
-15 +15
-15 +15
LO
80Hz
2.5k
2k
1k
650
300
180
MID
-15 +15
HI
12kHz
EQ
120Hz 4kHz
-15 +15
-15 +15
LO
80Hz
2.5k
2k
1k
650
300
180
MID -15 +15
HI
12kHz
MID
1kHz
EQ
-15 +15
-15 +15
LO
80Hz
-15 +15
HI
12kHz
MID
1kHz
EQ
-15 +15
-15 +15
LO
80Hz
-15 +15
HI
12kHz
EQ
-15 +15
LO
80Hz
-15 +15
HI
12kHz
EQ
-15 +15
LO
80Hz
+10dB
FX
POST
SEND
+10dB
AUX
PRE
+10dB
FX
POST
SEND
+10dB
AUX
PRE
+10dB
FX
POST
SEND
+10dB
AUX
PRE
+10dB
FX
POST
SEND
+10dB
AUX
PRE
+10dB
FX
POST
SEND
+10dB
AUX
PRE
+10dB
FX
POST
SEND
+10dB
AUX
PRE
+10dB
FX
POST
SEND
+10dB
AUX
PRE
+10dB
PHONES
EFFECTS
CHORUS
DELAY
ROTARY
BYPASS
CHORUS/ROOM
FLANGE
ROOM
PLATE
MAIN TO
MONITOR
2 TRKS/USB
TO MONITOR
2 TRKS/USB
TO MAIN
PAN
1
RL
PEAK
PAN
2
RL
PEAK
PAN
3
RL
PEAK
PAN
4
RL
PEAK
BAL
5/6
RL
BAL
MONITOR MAIN
7/8
RL
L
POWER
CLIP
+6
0
-12
-24
+48V
R
+10dB +10dB +10dB +10dB +10dB +10dB +10dB +10dB
11
1
1
1
3
3
2
2
2
2
2
This will allow direct audio from your wireless mic system and from your music player to be mixed
together and recorded or streamed directly through the streaming or recording software of your choice.
For maximum speech intelligibility and to minimize the possibility of feedback, this setup guide will also
demonstrate how to send music to speakers in the room for instructor reference without sending the
microphone signal to the speakers.
POWER PHANTOM
POWER POWER INPUT
USB
18V 0.8A
1. Connect the included power cable to the rear
of the mixer
2. Attach a USB cable to the USB port on the rear
of the mixer
3. Connect the other end of USB cable to your
streaming or recording device.
If your device does not have a USB A port (below) you
will need an adapter. This unit has been tested on
Mac, Windows, iOS, and Android systems.
4. Cable connection information:
A. Connect your microphone receiver to one
of the inputs on channel one. Either the 3-pin
XLR input or the ¼” input will work. Use the
cable supplied with your wireless mic system.
B. Music player connection
(Part #CMP-153)
Option A - Recommended Method
If you have a 3.5mm to dual
¼” cable connect your music
player to Channel 5/6
(Part #55-936-6)
Option B
If you have a 3.5mm to Tip-Sleeve
¼” cable connect your music
player to the LINE 2 jack
C. In order to send just the sound of the music
to speakers in the room (for instructor
reference only), connect the AUX SEND to
your speakers or sound system.
i. If your speakers/sound system have a
3.5mm input jack, use a 55-936-6 cable.
ii. If you speakers/sound system have
RCA input jacks, use a ¼” Tip-Sleeve
to dual RCA cable (part # CYR-102)
(part #CYR-102)

MULTIMIX8USBFX
8 CHANNEL MIXER / USB RECORDING INTERFACE
MIC 1
LINE 1
INSERT
LO CUT
80Hz
GAIN
+20dB
L
AUX SEND
R
L
R
L
R
L
RETURN FT SWITCH
LINE 5/6 LINE 7/8
MONITOR
L
R
IN OUT PHONES
2 TRACK
MAIN OUT
R
L
R
LINE 2
INSERT
GUITAR LO CUT
80Hz
+20dB
GAIN
MIC 2
LO CUT
80Hz
+20dB
GAIN
LINE 3
MIC 3
LO CUT
80Hz
+20dB
GAIN
LINE 4
MIC 4
-15 +15
HI
12kHz
EQ
120Hz 4kHz
-15 +15
-15 +15
LO
80Hz
2.5k
2k
1k
650
300
180
MID
-15 +15
HI
12kHz
EQ
120Hz 4kHz
-15 +15
-15 +15
LO
80Hz
2.5k
2k
1k
650
300
180
MID -15 +15
HI
12kHz
MID
1kHz
EQ
-15 +15
-15 +15
LO
80Hz
-15 +15
HI
12kHz
MID
1kHz
EQ
-15 +15
-15 +15
LO
80Hz
-15 +15
HI
12kHz
EQ
-15 +15
LO
80Hz
-15 +15
HI
12kHz
EQ
-15 +15
LO
80Hz
+10dB
FX
POST
SEND
+10dB
AUX
PRE
+10dB
FX
POST
SEND
+10dB
AUX
PRE
+10dB
FX
POST
SEND
+10dB
AUX
PRE
+10dB
FX
POST
SEND
+10dB
AUX
PRE
+10dB
FX
POST
SEND
+10dB
AUX
PRE
+10dB
FX
POST
SEND
+10dB
AUX
PRE
+10dB
FX
POST
SEND
+10dB
AUX
PRE
+10dB
PHONES
EFFECTS
CHORUS
DELAY
ROTARY
BYPASS
CHORUS/ROOM
FLANGE
ROOM
PLATE
MAIN TO
MONITOR
2 TRKS/USB
TO MONITOR
2 TRKS/USB
TO MAIN
PAN
1
RL
PEAK
PAN
2
RL
PEAK
PAN
3
RL
PEAK
PAN
4
RL
PEAK
BAL
5/6
RL
BAL
MONITOR MAIN
7/8
RL
L
POWER
CLIP
+6
0
-12
-24
+48V
R
+10dB +10dB +10dB +10dB +10dB +10dB +10dB +10dB
11
1
1
1
3
3
2
2
2
2
2
POWER PHANTOM
POWER POWER INPUT
USB
18V 0.8A
5. Power on the mixer using the
switch on the rear.
6. Information on knob settings:
A. In this diagram, the knobs shown are the only
ones that aect the sound. The rest can be
ignored. The knobs directly below the MIC 1
input jack only control the microphone signal.
The knob positions shown here are an ideal
starting place.
Generally, the black LEVEL knobs across the bottom control
the level that go to your video. From left to right, the LEVEL
1 knob will control the MIC level. Level 5/6 controls the
MUSIC level. The MAIN MIX knob controls the overall level
of the MIC and MUSIC blended together.
With the MAIN MIX and the LEVEL 1 knobs in the straight
up (noon) position, speak into your microphone and use
the black GAIN knob on channel 1 to set the general level
for your microphone.
Pay attention to the red CLIP lights. If they light up when
you speak into your microphone, the GAIN is set too high.
The red AUX knobs control the level of sound going to the
speakers in the room. This only aects what the instructor
hears and does not aect the sound going into the video
stream for the audience to hear.
The AUX PRE knobs adjust how much of each sound source
go to the speakers.
While playing music from your music player, slowly bringup
the AUX PRE knob on channel 5/6 until you get the desired
sound level in the room.
If microphone signal is needed in the speakers, turn up
the AUX PRE knob on Channel 1 slowly while talking into
the microphone until the desired level is achieved through
the speakers. In most cases, we recommend leaving this
turned down as low as possible to avoid feedback or echo.

MULTIMIX8USBFX
8 CHANNEL MIXER / USB RECORDING INTERFACE
MIC 1
LINE 1
INSERT
LO CUT
80Hz
GAIN
+20dB
L
AUX SEND
R
L
R
L
R
L
RETURN FT SWITCH
LINE 5/6 LINE 7/8
MONITOR
L
R
IN OUT PHONES
2 TRACK
MAIN OUT
R
L
R
LINE 2
INSERT
GUITAR LO CUT
80Hz
+20dB
GAIN
MIC 2
LO CUT
80Hz
+20dB
GAIN
LINE 3
MIC 3
LO CUT
80Hz
+20dB
GAIN
LINE 4
MIC 4
-15 +15
HI
12kHz
EQ
120Hz 4kHz
-15 +15
-15 +15
LO
80Hz
2.5k
2k
1k
650
300
180
MID
-15 +15
HI
12kHz
EQ
120Hz 4kHz
-15 +15
-15 +15
LO
80Hz
2.5k
2k
1k
650
300
180
MID -15 +15
HI
12kHz
MID
1kHz
EQ
-15 +15
-15 +15
LO
80Hz
-15 +15
HI
12kHz
MID
1kHz
EQ
-15 +15
-15 +15
LO
80Hz
-15 +15
HI
12kHz
EQ
-15 +15
LO
80Hz
-15 +15
HI
12kHz
EQ
-15 +15
LO
80Hz
+10dB
FX
POST
SEND
+10dB
AUX
PRE
+10dB
FX
POST
SEND
+10dB
AUX
PRE
+10dB
FX
POST
SEND
+10dB
AUX
PRE
+10dB
FX
POST
SEND
+10dB
AUX
PRE
+10dB
FX
POST
SEND
+10dB
AUX
PRE
+10dB
FX
POST
SEND
+10dB
AUX
PRE
+10dB
FX
POST
SEND
+10dB
AUX
PRE
+10dB
PHONES
EFFECTS
CHORUS
DELAY
ROTARY
BYPASS
CHORUS/ROOM
FLANGE
ROOM
PLATE
MAIN TO
MONITOR
2 TRKS/USB
TO MONITOR
2 TRKS/USB
TO MAIN
PAN
1
RL
PEAK
PAN
2
RL
PEAK
PAN
3
RL
PEAK
PAN
4
RL
PEAK
BAL
5/6
RL
BAL
MONITOR MAIN
7/8
RL
L
POWER
CLIP
+6
0
-12
-24
+48V
R
+10dB +10dB +10dB +10dB +10dB +10dB +10dB +10dB
11
1
1
1
3
3
2
2
2
2
2
B. If your music player is plugged into
channel 2, this diagram shows ideal
starting knob settings:
In this scenario, the LEVEL 1 knob will control the
MIC level. LEVEL 2 controls the MUSIC level. With
music playing and the LEVEL 2 knob in the straight up
(noon) position, turn up the black GAIN knob slowly
to get your starting music volume adjusted. The
MAIN MIX knob controls the overall level of the MIC
and MUSIC blended together.
With the MAIN MIX and the LEVEL 1 knobs in
the straight up (noon) position, speak into your
microphone and use the black GAIN knob on channel
1 to set the general level for your microphone.
Pay attention to the red CLIP and PEAK lights. If they
light up when you speak into your microphone, the
GAIN is set too high.
The red AUX knobs control the level of sound going
to the speakers in the room. This only aects what
the instructor hears and does not aect the sound
going into the video stream for the audience to hear.
The AUX PRE knobs adjust how much of each sound
source go to the speakers.
While playing music from your music player, slowly
bringup the AUX PRE knob on channel 5/6 until you
get the desired sound level in the room.
If microphone signal is needed in the speakers, turn
up the AUX PRE knob on Channel 1 slowly while
talking into the microphone until the desired level
is achieved through the speakers. In most cases,
we recommend leaving this turned down as low as
possible to avoid feedback or echo.
7. On Windows or Mac computers’ sound settings, the mixer will appear as Line (USB AUDIO CODEC).
In order to get sound from the mixer into your video or stream, you’ll need to select this as your
Input device.
A. Windows 10 – This is found under Sound -> Settings -> Input
B. Mac – This is found under Apple menu > System Preferences -> Sound -> Input.
8. On some laptop computers, connecting the C2S-2 mixer will disable the built-in speakers.
In order to enable them again (recommended), make sure that Speakers (USB AUDIO CODEC)
is NOT selected as your output device.
A. Windows 10 – This is found under Sound -> Settings -> Output
B. Mac – This is found under Apple menu > System Preferences -> Sound -> Output.
For help with computer or software settings for streaming, visit www.avnow.com/streaming-app-tips
For setup videos, please visit www.youtube.com/c/avnow
Other manuals for MULTIMIX 8 USB FX
2
Table of contents
Other Alesis Mixer manuals

Alesis
Alesis MultiMix 16 Firewire User manual

Alesis
Alesis GigaMix 6FX User manual

Alesis
Alesis GigaMix4CD User manual

Alesis
Alesis MultiMix 6 USB User manual

Alesis
Alesis iMultiMix9R User manual

Alesis
Alesis GIGAMIX Gigamix 4FX User manual

Alesis
Alesis iMULTIMIX 9R User manual

Alesis
Alesis MultiMix8Line User manual

Alesis
Alesis Multimix 8 USB 2.0 FX User manual

Alesis
Alesis ZoneMix6 Technical document