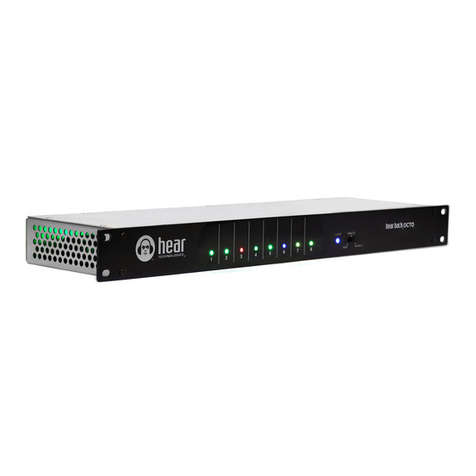
Hear Technologies back PRO User manual

PRO Intercom Footswitch User Guide 1
OVERVIEW
The Hear Back PRO Intercom Footswitch allows one
microphone to serve a dual role as both a vocal microphone
and as an intercom microphone for discrete communication
with other band members or the sound engineer.
The Intercom Footswitch features a silent mute design;
it mutes the microphone signal going to the sound board
without any pops or clicks. The microphone signal is then
routed to the Hear Back PRO Mixer along with a special
22kHz signal that automatically engages the intercom
feature on the Mixer (firmware v1.3 or higher*). The 22kHz
signal is not only above the human hearing range, it is also
at a very low level – just enough for the Hear Back PRO
Mixer to detect.
The switch is momentary, so as long as you hold your foot on
the switch, the microphone will route to the intercom instead
of the sound board. All outputs are transformer isolated from
the microphone and each other. A special phantom-power
circuit allows the microphone to be powered from the sound
board (if the microphone requires phantom power).
You can also use the footswitch in any application where an
A/B momentary footswitch is needed.
PRO Intercom Footswitch
SCAN FOR
DOWNLOADS
HOOK-UP DIAGRAM
Sound Board
PRO Intercom Footswitch
Vocal Mic
Hear Back PRO Mixer
(Firmware V1.3 or higher)

PRO Intercom Footswitch User Guide
Checking the Mixer’s Firmware Version
In order for the Intercom Footswitch to work with a Hear Back
PRO Mixer, the Mixer must have at least Version 1.3 firmware
or greater. To check the version of firmware installed on your
Mixer, start with the Mixer network cable unplugged. While
pressing the “PRESET” button, plug in the network
cable and continue to press the PRESET button until the
LEDs illuminate. Release the PRESET button.
The illuminated LEDs indicate the firmware version. The LED
on the “Master” volume knob that is lit indicates the whole
number part of the firmware version. Next, the channel with
all its LEDs lit indicates the decimal part of the firmware
version. In the example pictured, the firmware version is 1.7:
the first LED of the master volume is lit and all of the LEDs
of channel 7 are lit. Since this version of firmware is greater
than the required version 1.3, this mixer does not need to be
updated in order for the intercom footswitch to work.
If your mixer has version 1.1 or version 1.2, you will need
to follow the directions below for updating the firmware.
If your mixer has version 1.3 or greater, you can skip the
following steps for upgrading the firmware – instead follow
the directions on enabling the intercom footswitch feature.
Upgrading the Mixer’s Firmware
To upgrade your Mixer’s firmware, locate the Firmware
Update Card that is included with your Intercom Footswitch.
To upgrade your Mixer’s firmware:
1) Unplug the network cable so the Mixer is powered down.
2) Turn the Mixer upside down and remove the two screws
that secure the expansion card cover as shown (set aside
the two screws and expansion card cover).
3) Insert the Hear Back PRO Mixer Firmware Update Card
into the expansion slot as shown. Notice the “UP” printed
on one side of the card. This should be facing the same
direction as the top of the mixer.
4) After the card is inserted, connect a network cable from
the Mixer to either a Hear Back PRO Hub or Mixer Distro that
is powered on. The Mixer should power on and begin the
update process (this takes a couple of minutes to complete).
5) As the firmware updates, the LEDs will illuminate green
one-by-one to indicate the progress of programming the new
firmware into the Mixer’s memory. Next, the LEDs around
the master knob will illuminate purple one-by-one to indicate
the progress of upgrading the user interface – the final step
in the process.
6) Once all of the master LEDs are illuminated purple, wait
30 seconds. It will reboot once it is finished. After it reboots,
you are now ready to enable the Intercom Footswitch feature,
which is discussed in the next section.
2
Continuously Press
“PRESET” Button
Insert Network Cable
Remove 2 screws
and card cover
Insert Firmware Update Card
face “UP” into expansion slot
Firmware version shown by LEDs

PRO Intercom Footswitch User Guide
Enabling the Intercom Footswitch Feature on
the Hear Back PRO Mixer
For the Hear Back PRO Mixer to support the Intercom
Footswitch feature, it must have firmware version 1.3 or
greater (see “Checking the Mixer’s Firmware Version”).
To enable the Intercom Footswitch feature on your Mixer:
1. Unplug the Mixer network cable.
2. While pressing the “INTERCOM” button, plug in the
network cable and continue to press the button until
the PAN, AUX, and INTERCOM LEDs begin to flash.
Release the intercom button.
3. Press the “AUX” button until it is illuminated. This
indicates that the Intercom Footswitch feature is now
enabled.
4. If the AUX button does not illuminate, make sure that
the INTERCOM button is illuminated. If it is not, press
the INTERCOM button until it is illuminated (this
indicates that the INTERCOM function is enabled), then
press the AUX button until it is also illuminated. To save
this setting to memory, push and hold the INTERCOM
button until the Mixer reboots. Note that the INTERCOM
button LED may turn off when you push to hold; this is
normal as long as you continue to hold until the mixer
reboots.
If you ever wish to disable the Intercom Footswitch feature,
you can follow this same process. Make sure that the AUX
button LED is OFF instead of ON. This will disable the
feature.
Using the Intercom Footswitch with your
Hear Back PRO Mixer
Note that once you enable the Intercom Footswitch feature,
the AUX input becomes a dedicated Intercom Footswitch
input. This is because the Mixer must monitor the incoming
signal to detect when the footswitch is pressed. Pressing
the AUX button will change the MASTER knob’s LEDs so
that they are red, and the knob will control the input gain of
the footswitch.
Note that if you set the input gain too low, your microphone
may not be sensitive enough (people may have a hard time
hearing you). If you set the input gain too high, your intercom
may continually broadcast because there is too much noise
and it is triggering the intercom circuitry. If you see your
intercom LED ON when you are not pressing the footswitch,
try turning down the gain a little. A good place to start is to
set the gain at about 65%. Typically anything above 85% is
too high.
3
Continuously Press
“INTERCOM” Button
Insert Network Cable
Press “AUX” Button
until illuminated
After Intercom Footswitch feature
is enabled, press the AUX button to
control input gain of the footswitch
(MASTER LEDs will illuminate red)

LIMITED WARRANTY
Hear Technologies warrants the equipment against defects in materials
and labor for a period of one year from the original date of purchase. The
duration of this warranty is limited to claims made to Hear Technologies
within the periods stated with respect to parts and labor from the date
of purchase. During the warranty period, defective equipment will
be replaced or repaired to the general condition as received, at the
discretion of Hear Technologies.
All transportation is the responsibility of the purchaser or owner.
Equipment should be shipped in the original shipping box.
This warranty applies only to defects in materials and workmanship and
does not cover failure or damage due to shipping loss or damage, abuse,
misuse, misapplication, incorrect or varying power line voltages, lack
of proper maintenance, natural disasters, acts of God, or unauthorized
modifications, repairs, or any alterations done without the expressed
written consent by Hear Technologies. Hear Technologies shall not be
liable for any loss of use of the equipment, or consequential damages,
including damages to other parts of the installation in which the
equipment is a part.
Hear Technologies does not make any warranty, express or implied,
other than the warranty contained herein. No agent, representative, or
employee has the authority to increase or alter the liability, obligations,
and terms of this warranty or sale of the equipment. NOTE: It is strongly
recommended that any equipment returned to Hear Technologies be
properly packaged and insured for its full value in case of loss, handling
or shipping damage.
Hear Technologies shall not be responsible for damage or loss of
equipment during shipment.
The following are trademarks of Hear Technologies:
Hear Technologies, Hear Back, Control Your Mix, Mix Back, Extreme Extender, HearBus, and the “Jack” logo.
All names and marks of other companies belong to those respective companies.
TECHNICAL SPECIFICATIONS
Microphone Input Impedance: 600Ω
PA and Hear Back Output Impedance: 600Ω
Maximum Input: +30dBu
Microphone Input to PA Output -0.28dBu
(with 100k Input Impedance) Loss:
Microphone Input to Hear Back Output -2.80dBu
(with 100k Input Impedance) Loss:
THD on PA Output for -36dBu input: 0.05%
THD on PA Output for +4dBu input: 0.06%
THD on Hear Back Output for -36dBu Input: 0.05%
THD on Hear Back Output for +4dBu Input: 0.01%
Phantom Power Bypass: 48 volts from PA output to microphone input (phantom power present regardless
of input selected)
Pilot Tone: 22kHz @ -75dBu sine wave on Hear Back output when footswitch pressed
(oscillator powered from phantom power on the Hear Back output)
Frequency Response: Microphone Input to PA Output Frequency Response: Microphone Input to Hear Back Output
(High Frequency Boost for Intercom Clarity)
Hear Technologies®
991 Discovery Drive
Huntsville, AL 35806
www.HearTechnologies.com
Phone: 1-256-922-1200
Fax: 1-256-922-1221
Printed in U.S.A. ©2016
FEB 2023
Other Hear Technologies Mixer manuals
Popular Mixer manuals by other brands

Kenwood
Kenwood Chef and Major KMC5XX series instructions

Radio Shack
Radio Shack 4-Channel Stereo Microphone Mixer owner's manual

Paramount Fitness
Paramount Fitness SM2-25 Installation & operation manual

Oster
Oster 2612 instruction manual
Moulinex
Moulinex HM 555 Easy Max Power user manual
Linear Technology
Linear Technology 1233A Series quick start guide
