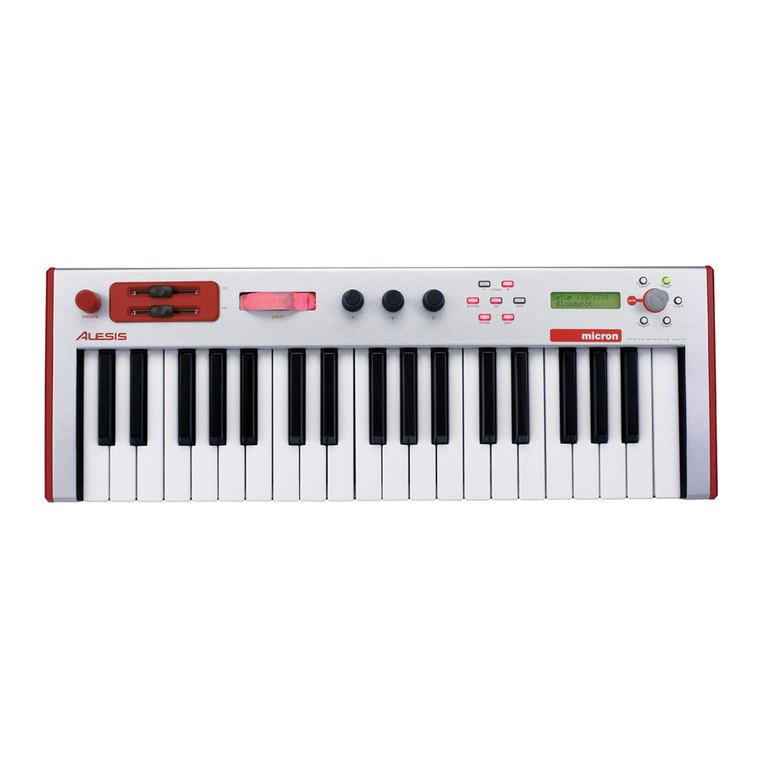
Alesis Micron Technical document

8-Voice Analog Modeling Synthesizer
Quick Start Owner’s Manual
(ENGLISH)
Manual de inicio rápido para el usuario
(ESPAÑOL)
Schnellbedienungsanleitung
(DEUTSCH)
Manuel d’utilisation du propriétaire
(FRANÇAIS)
Manuale rapido di utilizzazione
(ITALIANO)
CONTENIDO DE LA CAJA
•SINTETIZADOR
•SUMINSTRO DE ALIMENTACIÓN
CONTENU DE LA BOÎTE
•SYNTHÉTISEUR
•BLOC D’ALIMENTATION
INHALT DER VERPACKUNG
•SYNTHESIZER
•STROMANSCHLUSS
BOX CONTENTS
•SYNTHESIZER
•POWER ADAPTER
CONTENUTO DELLA CONFEZIONE
•SINTETIZZATORE
•ALIMENTAZIONE

2
This page intentionally left blank.

3
MICRON QUICK START OWNER’S MANUAL
(ENGLISH)
Connection Diagram
Connecting AC Power
Before making any power connections, make sure the Micron’s power switch is
turned off. Then, plug the power adapter into the Micron’s power socket and into
a power outlet.
Making Audio Connections
Stereo. Connect two cables from the Micron’s left and right outputs to two inputs
of an amp or mixer.
Headphones. Plug a set of headphones into the headphone jack on the rear
panel.
Connecting the Foot Pedals
• Connect a keyboard sustain pedal (not included) to the (sustain) input.
When you turn the Micron on, the Micron will automatically sense and calibrate
itself to the pedal.
• You can plug an optional continuous-controller expression pedal, such as the
Roland EV-5 pedal, into the (expr) input.

4
The Micron’s Main Controls
The Real-Time Controllers
Despite its small size, the Micron has six powerful real-time controllers. These
controls put the incredible expressivity of virtual analog synthesis at your
fingertips.

5
The Performance Buttons
The performance buttons are clustered together to the left of the display.

6
The Control Knob Circle
The Control Knob Circle’s buttons access the Micron’s five different modes:
programs, rhythms, patterns, setups, and config (configuration).
Press one of the buttons to enter its mode. Then spin the clear control knob for
different sounds.

7
Press-and-Hold Shortcuts for the Control Knob Circle
Hold down one of the [programs], [setups], [patterns], or [rhythms] buttons
while playing the keyboard to access various editing and selection shortcuts.
The text printed just above the keyboard provides a key to many of these
shortcuts.

8
Mode Jumping Shortcuts
Access each of these shortcuts by holding one of the [programs], [setups],
[patterns], or [rhythms] buttons and then pressing one of the other buttons.
[programs]
Press [setups]: set the most recent part’s program.
Press [patterns]: set the pattern’s program.
Press [rhythms]:set the most recent drum’s program (for drum
programs only).
[setups]
Press [programs]: jump to the most recent part’s program.
Press [patterns]: jump to the pattern of the most recent part (if any).
Press [rhythms]: jump to the rhythm of the most recent beat (if
any).
[patterns]
Press [programs]: jump to the pattern’s program.
Press [setups]: set the most recent part’s pattern.
Press [rhythms]: (no shortcut).
[rhythms]
Press [programs]: jump to the program of the most recent drum.
Press [setups]: set the most recent beat’s rhythm.
Press [patterns]: (no shortcut).
Other Shortcuts
In most areas, pressing the control knob twice (double click) restores the default
value.
Button-specific shortcuts:
[octave]
Press both [octave] buttons simultaneously to return to the default
octave range of C3 through C6.
[tap]
Hold [tap] and turn the control knob for fine control over the tempo.
[programs]
When editing a parameter, hold down the control knob and wiggle an
(x/y/z) knob to assign the knob to that parameter.
[setups]
For each part, hold down [setups] and move a slider or the pitch wheel
to jump to the controller assignment options for that part. Do the same
with the (x/y/z) knobs.

9
Editing on the Micron
Right out of the box, the Micron offers all the great sounds and operation that
most users will ever want. But, if you’re a power user, you’ll find a wealth of easy-
to-access editing capabilities.
To dig deep into the Micron’s capabilities, push the clear control knob to edit the
parameters associated with the current operating mode (programs, setups,
config, patterns, or rhythms). The current mode’s light will glow red once you
begin editing.
Turn the control knob to cycle through various
parameters. Push and turn the knob to edit; push
once more to accept your changes.
Push the control knob twice in quick succession to reset
a parameter to its default (factory) value.
For much more detail on editing, see the reference manual.
The [store] button lights when
you have made edits. Press
it to save your changes.

10
MICRON – MANUAL DE INICIO RÁPIDO
DEL USUARIO
(ESPAÑOL)
Diagrama de conexión
Conexión de la fuente de corriente alterna
Antes de realizar cualquier conexión eléctrica, asegúrese de que el interruptor de
alimentación del Micron esté desconectado. Luego, enchufe el adaptador de
alimentación en el zócalo del Micron y en un tomacorriente.
Conexiones de audio
Estéreo. Conecte dos cables desde las salidas derecha e izquierda del Micron a
dos entradas de un amplificador o mezclador.
Auriculares. Enchufe unos auriculares en el jack de auriculares situado en el panel
trasero.
Conexión de los pedales
• Conecte un pedal de sostenido del teclado (no incluido) a la entrada
(sostenido). Cuando encienda el Micron, el equipo detectará automáticamente el
pedal y se calibrará para este último.
• Puede enchufar un pedal de expresión opcional con controlador continuo,
como el pedal Roland EV-5, en la entrada (expr).

11
Controles Principales de Micron
Controladores de tiempo real
A pesar de su pequeño tamaño, el Micron cuenta con seis controladores potentes
de tiempo real. Estos controles le ponen al alcance de la mano la increíble
expresividad de la síntesis analógica virtual.
volumen controladores en tiempo real botones de
ejecución
pantalla círculo de la
perilla de control

12
Botones de ejecución
Los botones de rendimiento están agrupados a la izquierda de la pantalla.

13
Círculo de la perilla de control
Los botones del círculo de la perilla de control acceden a los cinco diferentes
modos del Micron: programas, ritmos, patrones, ajustes y configuración.
Presione uno de los botones para entrar en ese modo. Luego gire la perilla de
control transparente para obtener diferentes sonidos.

14
Presione y mantenga presionado los atajos para el
círculo de la perilla de control
Mantenga presionado uno de los botones de [programs], [setups], [patterns] o
[rhythms] mientras toca el teclado para acceder varios atajos de edición y
selección.
El texto impreso justo arriba del teclado proporciona una tecla para varios de
estos atajos.

15
Editar desde el Micron
Desde la caja, el Micron ofrece todos los sonidos y la operación que la mayoría de
usuarios desean siempre. No obstante, si es un usuario de potencia, encontrará
una riqueza de capacidades de edición con fácil acceso.
Para acceder todas las capacidades del Micron, presione la perilla de control
transparente para editar los parámetros asociados con el modo de funcionamiento
actual (programas, ajustes, config, patrones o ritmos). La luz del modo actual
se iluminará en rojo cuando empiece a editar.
Gire el botón de control para ciclar por los diversos
parámetros. Presione y gire la perilla para editar; presione
otra vez para aceptar sus cambios.
Presione la perilla de control dos veces rápidamente para
reajustar un parámetro a su valor predeterminado de fábrica.
Para ver más detalles sobre la edición, consulte el manual de referencia.
El botón de almacenamiento
[store] se ilumina cuando
realiza ediciones. Presiónelo
para guardar sus cambios.

16
MICRON KURZBEDIENUNGSANLEITUNG
(DEUTSCH)
Anschlussdiagramm
Anschluss an das Wechselstromnetz
Stellen Sie sicher, dass vor jeglichem Anschluss an eine Stromquelle der
Hauptschalter des Micron ausgeschaltet ist. Stecken Sie dann den Netzadapter in
die Anschlussbuchse des Micron und anschließend an eine Netzsteckdose.
Anschlüsse zur Tonwiedergabe
Stereo. Schließen Sie zwei Kabel von den linken und rechten Ausgängen des
Micron an zwei Anschlüsse eines Verstärkers oder Mischpults an.
Kopfhörer. Schließen Sie einen Kopfhörer an die Kopfhörerbuchse an der
Rückseite des Geräts an.
Anschluss der Fußpedale
• Schließen Sie ein Sustain-Pedal für das Keyboard (nicht beinhaltet) an den
Sustain-Eingang an. Sobald Sie den Micron einschalten, wird dieser das Pedal
erkennen und sich darauf abgleichen.
• Sie können wahlweise ein Expression-Pedal als Continuous Controller, wie z. B.
das Roland EV-5-Pedal, an den Expression-Eingang anschließen.

17
Hauptkontrollen
Die Echtzeit-Controller
Trotz seiner kleinen Größe hat der Micron sechs leistungsfähige Echtzeit-
Controller. Diese Steuerungen ermöglichen es Ihnen, der virtuellen
Analogsynthese eine unglaubliche Expressivität zu verleihen.

18
Die Leistungstasten
Die Leistungstasten sind als Gruppe zur Linken der Anzeige angeordnet.

19
Der Steuerregler-Kreis
Die Tasten des Steuerregler-Kreises ermöglichen Zugang zu den fünf
verschiedenen Betriebsarten des Micron: Programme, Rhythmen, Tonmuster,
Setups und Konfiguration (Einstellung).
Drücken Sie eine der Tasten, um diese Betriebsart abzurufen. Drehen Sie dann
den durchsichtigen Steuerregler, um verschiedene Töne zu erzeugen.

20
Schnellbedienung des Steuerregler-Kreises mit
drücken und festhalten
Halten Sie eine der Tasten [Progamme], [Setups], [Tonmuster] oder
[Rhythmen] gedrückt, während Sie das Keyboard bedienen, um auf verschiedene
Editier- und Auswahlfunktionen zugreifen zu können.
Die sich über dem Keyboard befindliche Beschriftung dient als Anleitung für viele
dieser Tastenkombinationen.
Other manuals for Micron
4
Table of contents
Languages:
Other Alesis Synthesizer manuals

Alesis
Alesis ANDROMEDA A6 Guide

Alesis
Alesis Ion Manual

Alesis
Alesis QS6.2 User manual

Alesis
Alesis VI61 User manual

Alesis
Alesis qs6.1 User manual

Alesis
Alesis qs6.1 User manual

Alesis
Alesis Fusion 6HD User manual

Alesis
Alesis QS7 User manual

Alesis
Alesis NanoSynth User manual

Alesis
Alesis Fusion Operation instructions

Alesis
Alesis Ion User manual

Alesis
Alesis Micron User manual

Alesis
Alesis HARMONY61 User manual

Alesis
Alesis ANDROMEDA A6 User manual

Alesis
Alesis Micron User manual

Alesis
Alesis Fusion User manual
Alesis
Alesis Vintage Synth Explorer QS7.1 User manual

Alesis
Alesis Fusion Manual

Alesis
Alesis Fusion User manual

Alesis
Alesis QSR User manual