8 1
www.alienpro.com.mx www.alienpro.com.mx
Pr obl em
Possible cause Solution
No sound;
No lights
Reciver
No sound;
Lights on
Microphone
Power button is on the OFF
position
DC power adater is not plug in
Poor connection of DC power
adapter
Turn on the power button
Plug in the DC power adapter
Check to see if the DC power
adapter is loose. C heck on the
receiver end and wall outlet end
Operate the machine in the
effective range
Turn on the microphone switch
Turn on the microphone volume
Reinstall the batteries. Make sur
e
the positive and negative end are
install correctly
Connect the to cable from t
he
receiver to a microphone input
(mixer, player, etc.)
1414
Distorted sound;
feedback
Separate the microphone furt
her
away
Replace the batteries
Reduce the volume of the
microphone
Move the receiver away from
electric equipment
The transmitter is out of range
Microphone switch is off
Microphonevolume is turn down
Batteries in the microphone
are not install properly
Receiver is not connect to an
amplifier, mixer or karaoke
player
The two microphones are too
close together
Batteries running low in
microphone
Microphone volume is too high
Distortion from other electric
wave
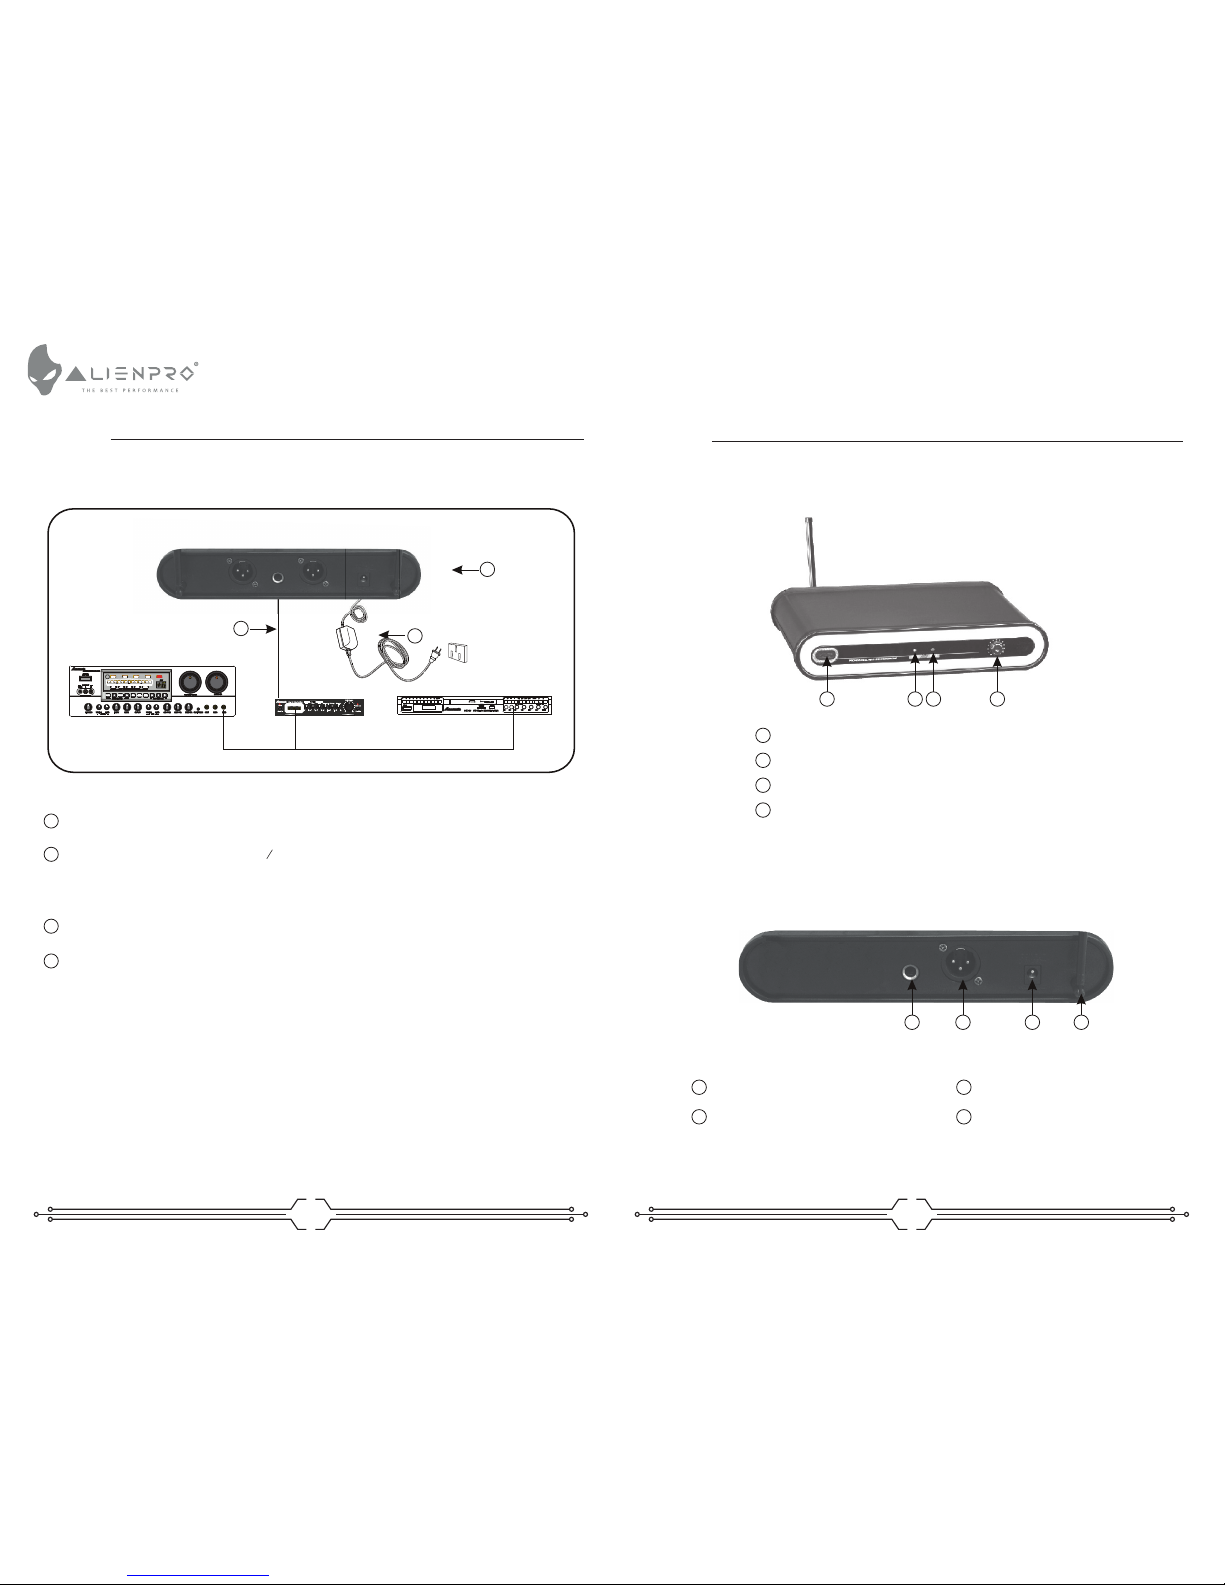
Parts checklist
Receiver
Antenna
Handheld microphone
Male to male 1/4 cable
DC power adapter
Normal AA battery
User manual
Quantity
1
1/2
1/2
1
1
2/4
1
Desktop receiver and enhanced muting, high signal/
noise ratio
Desktop receiver supports both balance & unbalance
Audio output.
Almost zero noise output when on standby.
Broad frequency response range super low distortion.
NO impact on switching receiver, ensure safety of rear
stage amplifier system and speaker.
Perfect operative status signals, LED indicater with
digital microphone.
Long practical distance. Over 100 m in ideal circumstance,
60 m radius in complex circumstances.
Modern audio compandor return your tone quality
extremely.
Troubleshooting
Packing Included
Features