manuals.online logo
Brands
  1. Home
  2. •
  3. Brands
  4. •
  5. Align-Pilates
  6. •
  7. Fitness Equipment
  8. •
  9. Align-Pilates Wall Unit & Barre Bar User manual

Align-Pilates Wall Unit & Barre Bar User manual

Other Align-Pilates Fitness Equipment manuals

Align-Pilates Ladder Barrel Mk II User manual

Align-Pilates

Align-Pilates Ladder Barrel Mk II User manual

Align-Pilates H1 Reformer Owner's manual

Align-Pilates

Align-Pilates H1 Reformer Owner's manual

Align-Pilates C2-Pro RC Reformer Owner's manual

Align-Pilates

Align-Pilates C2-Pro RC Reformer Owner's manual

Align-Pilates M2-Pro Reformer Owner's manual

Align-Pilates

Align-Pilates M2-Pro Reformer Owner's manual

Align-Pilates Combo Chair II Owner's manual

Align-Pilates

Align-Pilates Combo Chair II Owner's manual

Align-Pilates C1 User manual

Align-Pilates

Align-Pilates C1 User manual

Align-Pilates C1-Pro Reformer Owner's manual

Align-Pilates

Align-Pilates C1-Pro Reformer Owner's manual

Align-Pilates Half Cadillac Instruction Manual

Align-Pilates

Align-Pilates Half Cadillac Instruction Manual

Align-Pilates C8-Pro Reformer Owner's manual

Align-Pilates

Align-Pilates C8-Pro Reformer Owner's manual

Align-Pilates C2-Pro Owner's manual

Align-Pilates

Align-Pilates C2-Pro Owner's manual

Align-Pilates C Series Owner's manual

Align-Pilates

Align-Pilates C Series Owner's manual

Align-Pilates Planking Handles User manual

Align-Pilates

Align-Pilates Planking Handles User manual

Align-Pilates F2 Installation instructions

Align-Pilates

Align-Pilates F2 Installation instructions

Align-Pilates F1 Owner's manual

Align-Pilates

Align-Pilates F1 Owner's manual

Popular Fitness Equipment manuals by other brands

Revitive Arthritis-Knee user manual

Revitive

Revitive Arthritis-Knee user manual

Domyos BM100 operating instructions

Domyos

Domyos BM100 operating instructions

Movement EDGE PUXADA ALTA Assembly manual

Movement

Movement EDGE PUXADA ALTA Assembly manual

Lifeline LLUWB-BLK owner's manual

Lifeline

Lifeline LLUWB-BLK owner's manual

Precor CW-816 Assembly guide

Precor

Precor CW-816 Assembly guide

Balanced Body Precision Rotator Discs manual

Balanced Body

Balanced Body Precision Rotator Discs manual

G-FITNESS AIR ROWER user manual

G-FITNESS

G-FITNESS AIR ROWER user manual

CAPITAL SPORTS Dominate Edition 10028796 manual

CAPITAL SPORTS

CAPITAL SPORTS Dominate Edition 10028796 manual

Martin System TT4FK user guide

Martin System

Martin System TT4FK user guide

CIRCLE FITNESS E7 owner's manual

CIRCLE FITNESS

CIRCLE FITNESS E7 owner's manual

G-FITNESS TZ-6017 user manual

G-FITNESS

G-FITNESS TZ-6017 user manual

Accelerated Care Plus OMNISTIM FX2 CYCLE/WALK user manual

Accelerated Care Plus

Accelerated Care Plus OMNISTIM FX2 CYCLE/WALK user manual

pedalo 20230165 manual

pedalo

pedalo 20230165 manual

Saebo SaeboStim Pro Instructions for use

Saebo

Saebo SaeboStim Pro Instructions for use

Performance HyperVibe User instructions

Performance

Performance HyperVibe User instructions

Scalamobil S27 Operator's manual

Scalamobil

Scalamobil S27 Operator's manual

Precor Experience Series Service manual

Precor

Precor Experience Series Service manual

FYTTER RedMIUM BENCH BE-T6R manual

FYTTER

FYTTER RedMIUM BENCH BE-T6R manual

manuals.online logo
manuals.online logoBrands
  • About & Mission
  • Contact us
  • Privacy Policy
  • Terms and Conditions

Copyright 2025 Manuals.Online. All Rights Reserved.

Wall Unit & Barre Bar Installation Instructions
Contents
BAG 1:
4 X Double ended Dog Clips
4 x Karabiners
8 x Black Bolt Cover Inserts
4 x Sprung Locator Bolts
2 x Screw In Knobs
4 x Black Gaskets
1 x Wrench
1 x 5.5mm Allen Key
BAG 2:
4 x 30mm Black Hex-Head Bolts
8 x M8 Nylock Nuts
8 x Washers
BOX:
1 x PAIR Barre Bar Carriage Holders
1 x PAIR Spring Carriage Holders
1 x Top Maple Frame (Has Align Pilates LOGO front centre)
1 x Bottom Maple Frame
2 x Chrome Uprights
4 x Springs (2 long purple and 2 x short yellow)
1 x Barre Bar
1 x Trapeze bar
1 x Pair of Handles
1 x Pair of Foot straps
2 x Metal wall mounting plates
Installation Guide
Align-Pilates recommend using a suitably qualified Tradesman to install this product. Such a Tradesman can
assess the suitability/strength of the wall to accept the unit and can select the appropriate wall fixing to
attach the unit securely to the wall. Align-Pilates does not supply wall fixings with this product as these are
dependent on the type of wall which the unit is being attached to.
Note before Installing: The Bottom Maple Frame bar & bracket are usually installed on the floor, however
where the floor is uneven the Barre bar frame can be installed off the floor. In these cases, please keep in
mind the Barre bar in its lowest position will be 12.5cms higher than the mounting position. Similarly if
there is a skirting board present you can either a) Install the unit above the skirting board b) Remove the
section of skirting board c) Make a timber spacer to place behind the top wall mounting plate, to be of
equal thickness to the skirting board.
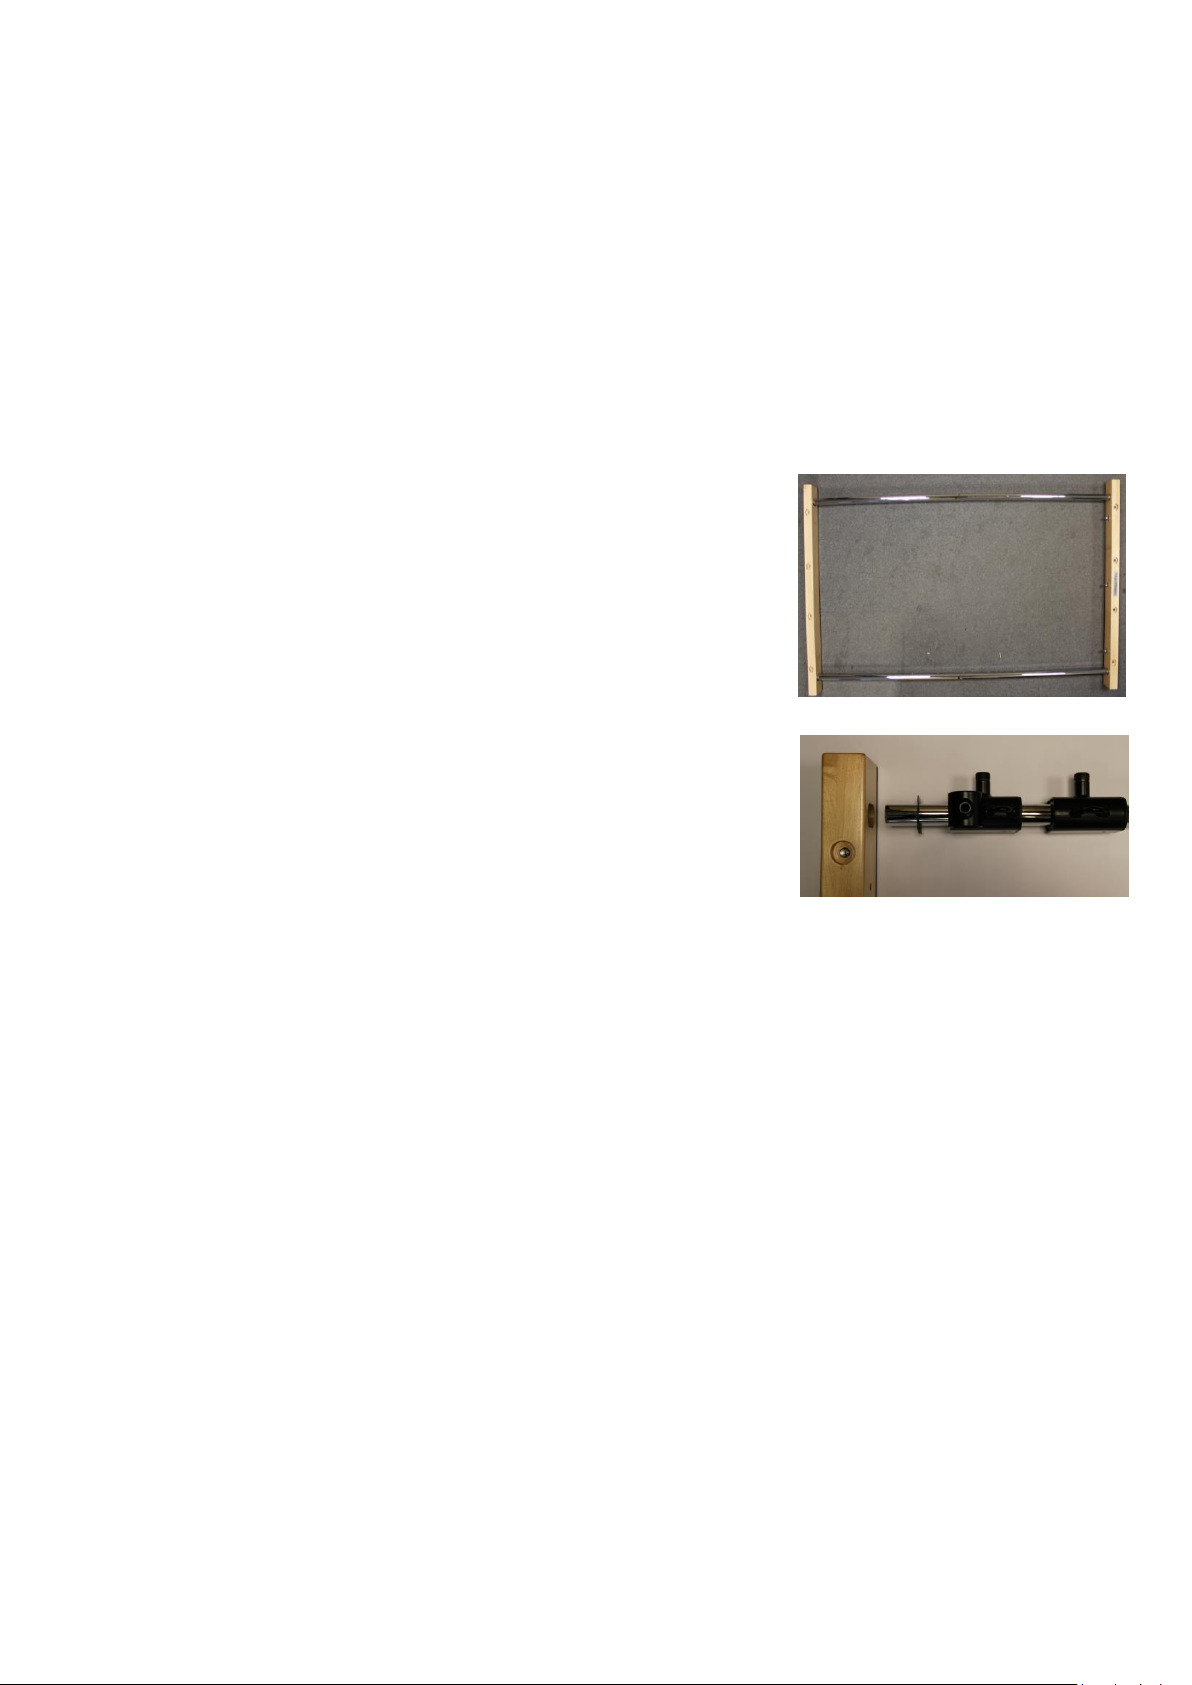
1) Lay out the chrome uprights and the top and bottom Maple
Frames on the floor as in fig 1. The maple bar with the
Align-Pilates logo plate is the top and the eyelets should face
down toward the bottom maple bar.
2) The inside of each chrome uprights has only 4 holes.
Slide on one of the spring carriage holders and
then the Barre bar carriage holder followed by the
Gasket, black face first, onto the Chrome uprights from the
bottom as shown in fig 2.
3) Using the Allen key, loosely attach the bottom maple
frame using the 30mm Black Hex headed bolt to each of
the chrome uprights. At this point double check the chrome
uprights have 10 holes facing outward and that the
carriage holders are on correctly.
4) At the top of each chrome upright, slide a Black gasket, Black side face first onto upright.
5) Using the 2 remaining Black Hex headed bolts tighten the top Maple Bracket fully and then tighten
the bottom Maple Bracket fully also.
6) Take the frame to the wall and using a SPIRIT LEVEL, ensure the top of the frame is horizontal. Mark
this position and then set aside frame.
7) Remove the metal mounting plates from the Top Maple frame. Now affix this metal bracket using
strong fixings suitable for the your wall type (seek advice from a qualified Tradesman).
8) Insert frame over top metal mounting plate and slide into position. Check Horizontal again using a
SPIRIT LEVEL and mark lower wall attachment. Again affix as above.
9) Both wall mounting plates should now be correctly attached to the wall and in position to receive
the Maple frame. slide the frame over the protruding bolts. Add washer to bolt and gradually
tighten each of the 8 nuts until the Barre Bar frame is securely attached to the wall.
10) Insert the black plastic blanking plates that cover the bolt holes.
11) Remove the white self adhesive backing of each gasket and stick in situ to the maple frame.
12) Screw in the black Sprung Locator Bolts into the Spring and Barre Bar carriages.
13) Slide Barre bar through the metal rings on each side and attach into place using the twist knobs.
14) Clip double ended dog clips to each end of the purple springs. Clip a karabiner to each end of the
short yellow springs. Clip a handle or foot strap to each of the purple springs and then attach the
top end to the spring carriage. Clip the yellow spring karabiners to the left and right metal loops in
the top of the Barre frame and the bottom karabiners to the trapeze bar.
FIG 1
FIG 2