ALLN-1 2k20 Mini Edt. User manual


≠INDICATES QUICK CHANGE KNOB can be used in place of the standard nut and bolt. This part will be moved for future configurations.
STEP 1
1. Attach (2) L-Hinge to 3rd and 5th holes (from the
back) on the 17” Perf Tube.
2. Repeat, so that you have two pieces (a left side
and a right side).
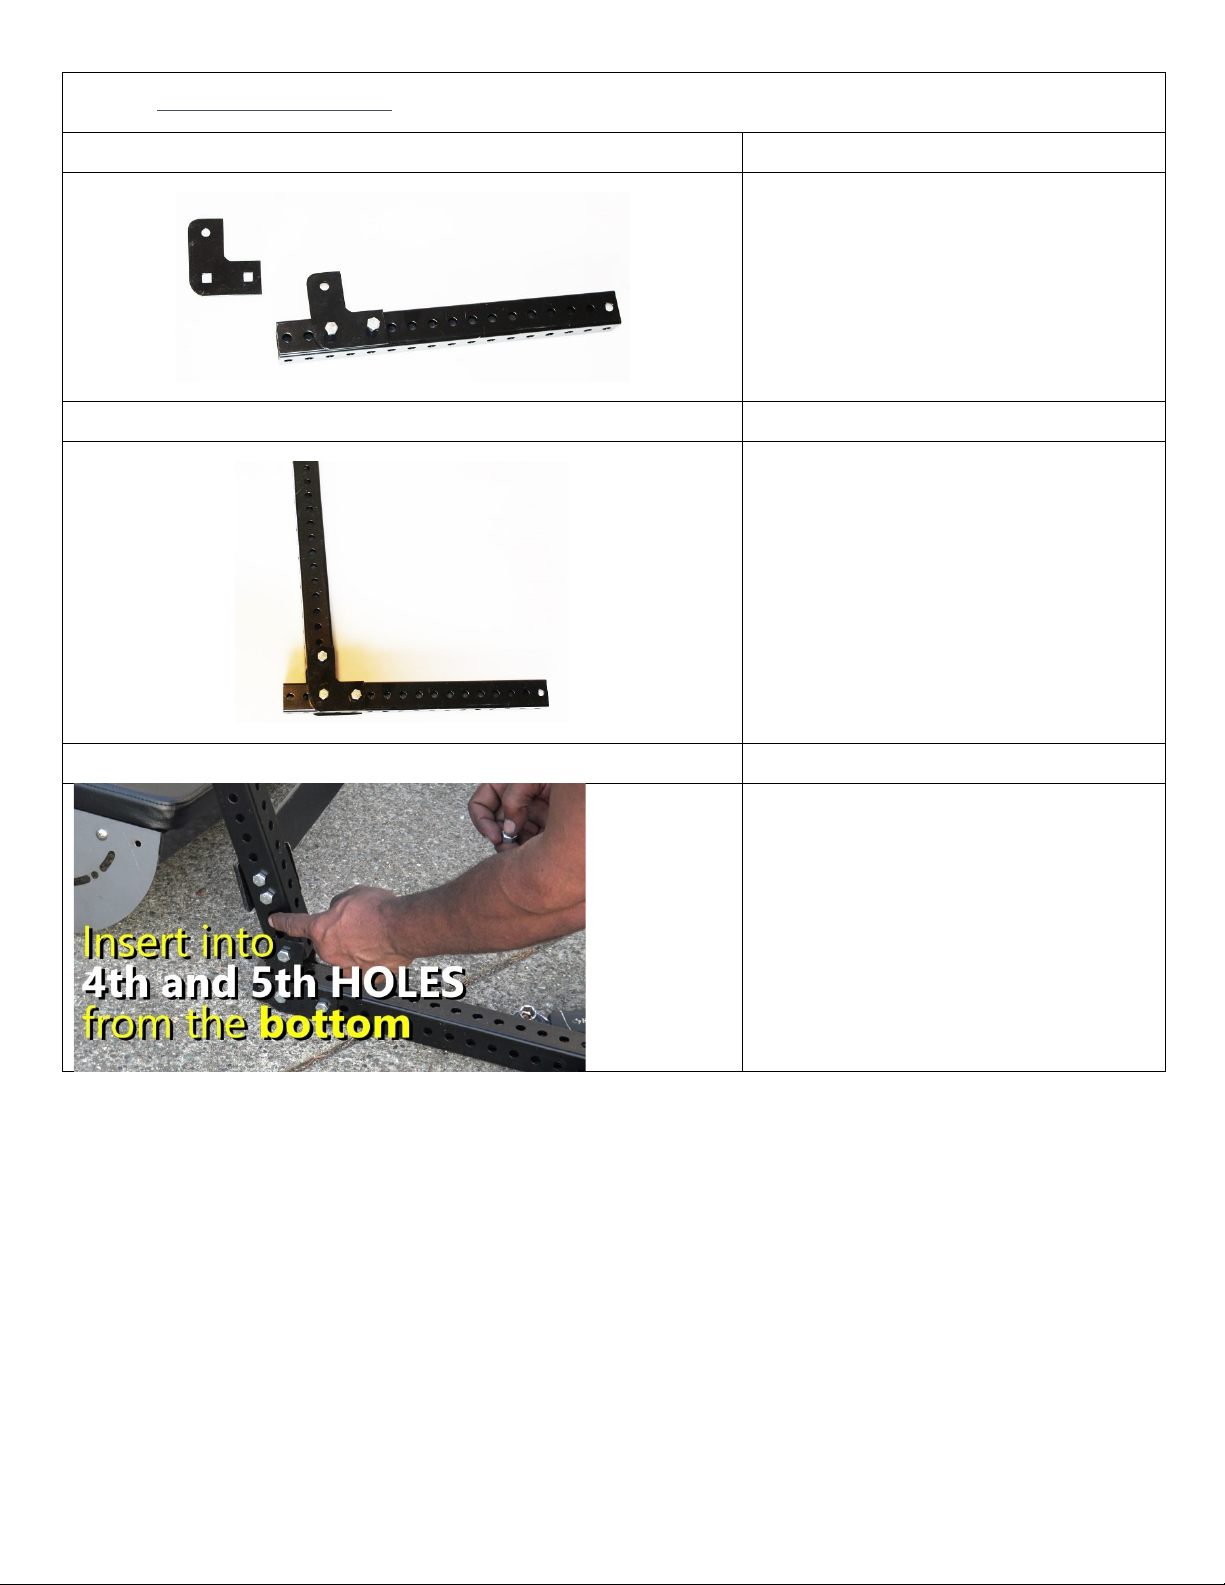
STEP 2
1. Attach the bottom hole of the 30” Perf. Tube to
the L-Hinge from Step 1.
2. Repeat, so that you have two pieces (a left side
and a right side).
STEP 3
1. Connect the Rear Stabilizer Bar to the (2) 30”
Perf. Tubes at the 4th and 5th hole.
This is also shown in the online video.

STEP 4: ATTACHING THE VERTICLE SUPPORT BARS
1. Attach the 7” Perf Tubes to the 17” Perf. Tubes (from Step1) and
the 30” Perf. Tubes (from Step1)
2. Attach at the 10th (from the back) one the 17” Perf. Tubes and the
10th hole (from the bottom) on the 30” Perf. Tube
3. Repeat for both sides.
This is also shown in the online video.
STEP 5: ATTACHING THE HORIZONTAL RUNNER BARS
1. After sliding the two sleeves on to a Horizontal Runner Bar, insert
the Horizontal Runner Bar into the 17” Perf. Tubing.
2. Use a male and female knob to secure the two pieces together.
3. Insert the female knob through the first hole of the 17” Perf.
Tubing and the second hole on the Horizontal Runner Bar
4. Repeat for both sides.
This is also shown in the online video.
STEP 6: ATTACHING THE VERTICLE RUNNER (Long)
1. Locate the second set of 17” Perf. Tubes, and attach 2 Hex Plates
to the bottom 2 bottoms holes of a 17” Perf. Tube.

2. Secure together using (2) 2 ½” inch nuts and bolt, into the vertical
holes of Hex Plate.
3. Place Vertical Runner onto the sleeve of the Horizontal Runner
Bar
4. Secure together using (2) 3”inch bolts and female knobs, into the
horizontal holes of Hex Plate
5. Repeat for both sides.
This is also shown in the online video..
STEP 7: ATTACHING THE VERTICLE RUNNER (Short)
1. Locate the 7” Perf. Tubing and remaining Hex Plates
2. Repeat all the instructions from Step 6, to assemble and attach
the Vertical Runners (Short) to the second sleeve on the
Horizontal Runner.
3. Repeat for both sides.
This is also shown in the online video.
STEP 8: ATTACHING THE VERTICLE RUNNER (Short)
This manual suits for next models
1
Table of contents
Popular Fitness Equipment manuals by other brands


G-FITNESS
G-FITNESS AIR ROWER user manual

CAPITAL SPORTS
CAPITAL SPORTS Dominate Edition 10028796 manual

Martin System
Martin System TT4FK user guide

CIRCLE FITNESS
CIRCLE FITNESS E7 owner's manual

G-FITNESS
G-FITNESS TZ-6017 user manual

Accelerated Care Plus
Accelerated Care Plus OMNISTIM FX2 CYCLE/WALK user manual


