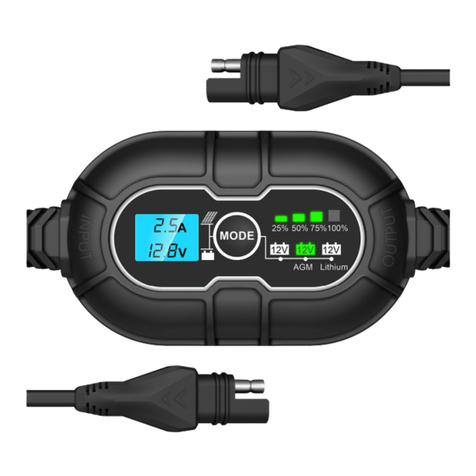
ALLTO SOLAR AS-SL-S01 User manual

Please read all of the installation instructions carefully before installing the product. Improper installation will void
manufacturer’s warranty. The installation instructions are written as guidelines to assist in installing the system.
Please contact us with the email if you are not comfortable installing the product. Prior to using and installing the solar
battery charger, please read the safety information provided in this user manual. Be sure to use the product as
outlined in this user manual. Altercation or modifications carried out without appropriate authorization may invalidate
the user's right to operate the equipment.
Solar Pendant Light
User Manual

1. INTRODUCTION
2. PRE-INSTALLATION
2.1) The solar string lights are shipped with the batteries pre-installed. Before starting any installation, test the bulb for
illumination.
a) Screw in one of included LED bulbs to the light socket.
b)Connect the solar panel to the connector on the barn light.
c) Press on/off button on the back of the solar panel.
d) The bulb should now illuminate.Once the bulb is illuminated, turn the switch to OFF with
remote control, the bulb
should turn off immediately.
2.2) Ensure your solar panel is placed so that its exposure
to
sunlight is optimized. Be aware of objects such as trees or property overhangs that may impede the panel's ability to
generate a charge. The solar panel can be mounted onto walls or roofs, or simply inset it to ground.
2.3) Prior to using your solar pendent light, the solar panel needs sunlight for a period of 1-2 days. This initial charge
should be done without the string lights connected or with the solar panel in the OFF position after 1-2 days, your
included batteries will be fully charged.
3. INSTALL SOLAR PANEL-THE SOLAR PANEL HAS TWO MOUNT OPTIONS
3.1 MOUNT ON ROOF/WALL
1. Install the screws utilizing the outer hole of the mounting bracket to secure the bracket to the chosen surface.
2. Attach solar panel to mount bracket and secure them with wing screw.
3. Adjust the solar panel to the desired angle to optimize sun exposure.
4. The angle of solar panel can be adjusted to maximize sun exposure by loosening, adjusting and then re-tightening the
side screw located on the solar panel’s protruding arm.

3.2 MOUNT TO GROUND
1. Attach solar panel to mount bracket and secure them with wing screw.
2. To utilize the ground stake, connect the two parts of stake together.
3. Fit the grooved section into the protruding arm of the solar panel. The stake can be used to mount the solar panel into
the ground.
4. Adjust the solar panel to the desired angle to optimize sun exposure.
5. The angle of solar panel can be adjusted to maximize sun exposure by loosening, adjusting and then re-tightening the
side screw located on the solar panel’s protruding arm.
4. INSTALL SOLAR STRING LIGHT
The solar string lights have a variety of possible ways to be mounted. The following are examples of the most common
ways:
1) Identify the metal wall bracket included with the solar pendent light.
Place the mental wall bracket to flat surface, mark the holes positions
with pencil on the surface, drill hole on the wall.
2) Place this bracket on your chosen surface and use the included
screws to mount the bracket. The canopy base of the light fixture mounts
onto this bracket and is secured using the two small included screws.
Note- There is a hole in the canopy base to allow the cable to pass
through. Ensure the pendent light cable is lined up with this hole and the
length is appropriate prior to attaching the canopy base.
3) Attach the canopy base to the mental bracket, make sure the screw
go through the base, then firmly secure.
4) Attach lamp shade over the socket and then re-screw the plastic seal
until the lamp shade is firmly installed. Screw in one of included bulbs to
the sockets. One of light bulb is 6000K white, anther is 3500K warm.
5) Connect the cable from the solar panel to the cable from the barn light.
Ensure this connection is tight and the plastic screw sheath covers the
connection point.

6). OPERATION:
After the initial 1-2 days charge, the solar barn light is ready to use. Press on/off button on the back of the solar panel,
the bulb should illuminate immediately. Everything is set up, you can control the light thru the remote control.
7). Light Mode Setting
Mode-1 Regular ON/OFF
Manually control on or off and adjust the brightness, when press “ON”, the light will remain on all days and nights until
battery is dead; when press “off”, the light will turn off immediately.
Mode-2 Dusk to Dawn +Timing (Light will not be illuminated as long as there is sunlight)
a). Light will turn on in dusk and turn off in dawn automatically. Make sure the light is on before setting this mode, press
“Auto” button, the light will flash to confirm and then enter to selected mode.
b). Light will turn on in dusk automatically and turn off after the timing 2-4-6-8 hours. Make sure the light is on before
setting this mode, press “Auto” button, and then press designed timing hours, the light will be flash to confirm the setting
and enter to selected mode.
5.CARE AND MAINTAIN:
Ensure the solar panel remains in a position that optimizes exposure to the sun, especially during the winter months.
The solar panel should be cleaned with a damp cotton cloth on a regular basis. This will ensure optimal performance
and battery charging.
Utilize the same technique to clean the light bulbs of the solar string lights.
Never let any abrasive material come into contact with the solar panel or bulbs.
6.WARRANTY:
Thank you for purchasing the solar battery charger , should you experience any defects due to the manufacture of this
product, we will provide you with extended 12 months warranty. You are entitled to a replacement or refund for a major
failure. If you have any questions, feel free to contact us by email support-us@alltosolar.com, we will get back to you
within 12H and MAKE IT RIGHT!!
www.alltosolar.com
ALLTO SOLAR TEAM
Table of contents
Other ALLTO SOLAR Inverter manuals