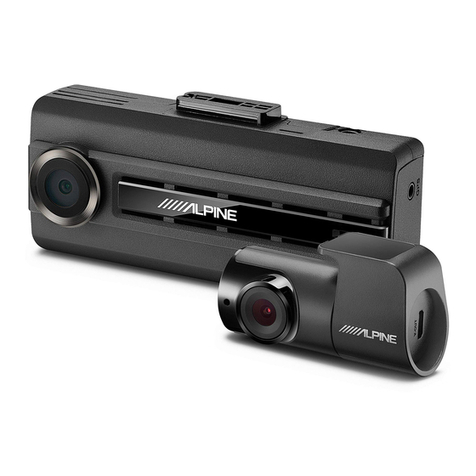
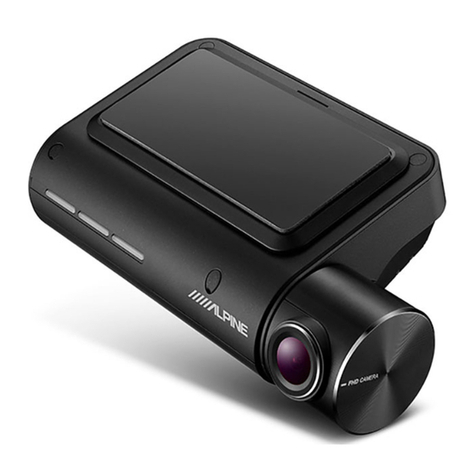
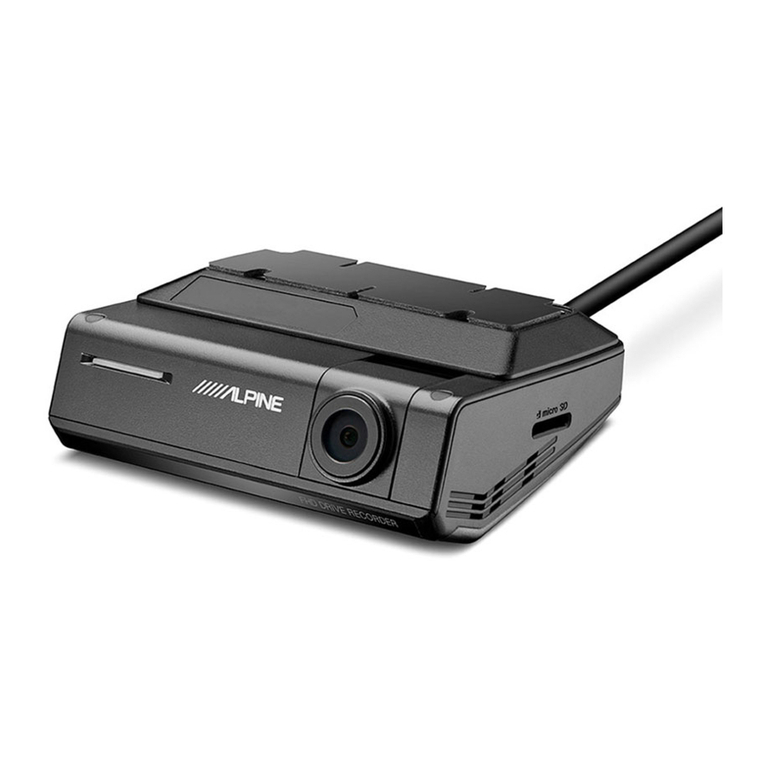
Alpine DVR-F200 User manual

Instore "130"youcanfind and buy almostall necessary goodsforyourauto in
Kyiv and other cities,delivery by ground andpostal services.Ourexperienced
consultantswill provide youwithexhaustive informationand helpyoutochose
the very particular thing. We are waiting foryou atthe address
https://130.com.ua
PHONES
0 (800) 800 130
(050) 462 0 130
(063) 462 0 130
(067) 462 0 130
Internet storeof
autogoods
CARRECEIVERS —Receivers •Mediareceiversandstations•Nativereceivers •CD/DVD changers •FM-modulators/USBadapters•Flashmemory•Faciaplates and adapters •Antennas •Accessories |
CARAUDIO —Car audiospeakers •Amplifiers•Subwoofers •Processors•Crossovers •Headphones•Accessories|TRIPCOMPUTERS —Universalcomputers •Modelcomputers •Accessories|
GPSNAVIGATORS —PortableGPS•Built-in GPS•GPSmodules •GPStrackers •Antennas forGPSnavigators•Accessories|VIDEO —DVR •TVsetsand monitors•Car TVtuners•Cameras •Videomodules
•Transcoders •Car TVantennas•Accessories|SECURITYSYSTEMS —Car alarms •Bikealarms •Mechanicalblockers •Immobilizers •Sensors •Accessories |OPTICANDLIGHT —Xenon•Bixenon •Lamps
•LED •Stroboscopes •OpticandHeadlights •Washers •Light,rainsensors •Accessories |PARKTRONICS ANDMIRRORS —Rear parktronics•Frontparktronics •Combined parktronics •Rear-viewmirrors
•Accessories |HEATINGANDCOOLING —Seat heaters •Mirrorsheaters •Screen-wipers heaters •Engineheaters •Auto-refrigerators •Airconditioningunits •Accessories |TUNING —Vibro-isolation
•Noise-isolation •Tintfilms •Accessories |ACCESSORIES —Radar-detectors•Handsfree,Bluetooth•Windowlifters•Compressors •Beeps,loudspeakers •Measuring instruments •Cleaners •Carsits
•Miscellaneous|MOUNTING —Installationkits •Upholstery•Grilles•Tubes•Cableand wire •Tools•Miscellaneous|POWER —Batteries •Converters •Start-chargingequipment•Capacitors
•Accessories |MARINE AUDIOANDELECTRONICS —Marinereceivers•Marineaudiospeakers •Marinesubwoofers •Marineamplifiers•Accessories |CARCARE PRODUCTS —Additives •Washer fluid •
Care accessories •Car polish •Flavors •Adhesives andsealants |LIQUIDANDOIL —Motoroil•Transmissionoil •Brakefluid •Antifreeze•Technicallubricant
SKYPE
km-130

FOR CAR USE ONLY/ POUR APPLICATION AUTOMOBILE UNIQUEMENT/ NUR FÜR
AUTOMOBIL GEBRAUCH/ PARA USO EN AUTOMÓVILES/ SOLO PER L’UTILIZZO IN
AUTOMOBILE/ ТОЛЬКО ДЛЯ ИСПОЛЬЗОВАНИЯ В АВТОМОБИЛЯХ
WIFI DASH CAM
DVR-F200
• OWNER’S MANUAL
Please read before using this equipment.
• MODE D’EMPLOI
Veuillez lire avant d’utiliser cet appareil.
• BEDIENUNGSANLEITUNG
Lesen Sie diese Bedienungsanleitung bitte vor
Gebrauch des Gerätes.
• MANUAL DE OPERACIÓN
Léalo antes de utilizar este equipo.
• ISTRUZIONI PER L’USO
Si prega di leggere prima di utilizzare il attrezzatura.
• РУКОВОДСТВО ПО ЭКСПЛУАТАЦИИ
Прочтите настоящее руководство перед
началом использования оборудования.
Autogoods “130”
130.com.ua

Before using the product
About the product
This product records videos while the vehicle is operating. Use this product only for reference when
investigating incidents or road accidents. This product is not guaranteed to record and cloud service for
ALL events. The device may not properly record accidents with small impacts that are too minor to activate
the impact sensor or accidents with massive impacts that cause the vehicle’s battery voltage to deviate.
Video recording does not begin until the product is completely turned on (booted up). To ensure that all
vehicle events are recorded, wait until the product is completely booted up after turning it on, and then
begin operating the vehicle.
Alpine Electronics is not responsible for any loss caused by an accident, nor is it responsible for providing
any support regarding the outcome of an accident.
Depending on the vehicle's configuration or operating conditions, such as the installation of remote door
lock devices, ECU settings, or TPMS settings, some product features may not be supported, and different
firmware versions may influence the product's performance or features.
About the user guide
The information provided in the guide may change when the manufacturer updates its service policy.
This user guide is intended for Alpine DVR-F200 models only, and it may contain technical errors, editorial
errors, or missing information.
Copyrights
All rights for the content and maps in this guide are reserved by THINKWARE and are protected under
copyright laws. All unauthorized duplication, revision, publication, or distribution of this guide without
written consent from THINKWARE is prohibited and is eligible for criminal charges.
Registered trademarks
THINKWARE F200 is a registered trademark of THINKWARE.
Other product logos and service names in this guide are trademarks of the relevant companies.
Autogoods “130”
130.com.ua

3
Contents
Safety information 5
1. Product overview 8
1.1 Included items 8
1.1.1 Standard items 8
1.1.2 Accessories (sold separately) 8
1.2 Part names 9
1.2.1 Front camera (main unit) - front view 9
1.2.2 Front camera (main unit) - rear view 10
1.2.3 Rear camera (optional) 10
1.3 Removing and inserting the memory card 11
2. Installing the product 12
2.1 Installing the front camera (main unit) 12
2.1.1 Selecting an installation location 12
2.1.2 Securing the product 12
2.1.3 Connecting the power cable 14
2.2 Installing the rear camera (optional) 15
2.2.1 Selecting an installation location 15
2.2.2 Securing the rear camera 16
2.2.3 Connecting the rear camera cable 17
3. Using recording features 18
3.1 Turning the product on or off 18
3.2 Learning about file storage locations 18
3.3 Using the continuous recording feature 19
3.4 Recording manually 19
3.5 Using parking mode 20
4. Using the mobile viewer 21
4.1 Connect the product to a smartphone 21
4.1.1 Connecting the product to an Android
device 21
4.1.2 Connecting the product to an iOS device 22
4.2 Mobile viewer screen layout 23
4.3 Playing recorded videos on the mobile viewer 24
4.4 Video control menu overview 24
5. Using the PC viewer 25
5.1 System requirements 25
5.2 PC viewer for Windows 25
5.2.1 Installing the PC viewer (for Windows) 25
5.2.2 PC viewer screen layout (for Windows) 26
5.2.3 Playing recorded videos on the PC viewer
(for Windows) 27
5.2.4 Video control menu overview
(for Windows) 28
5.3 PC viewer for Mac 29
5.3.1 Installing the PC viewer (for Mac) 29
5.3.2 PC viewer screen layout (for Mac) 30
5.3.3 Playing recorded videos on the
PC viewer (for Mac) 31
5.3.4 Video control menu overview (for Mac) 32
6. Settings 33
6.1 Managing the memory card 33
6.1.1 Partitioning the memory card 33
6.1.2 Formatting the memory card 33
6.1.3 Configuring the video overwriting
function 33
6.2 Setting the camera 34
6.2.1 Setting the brightness of the
front camera 34
6.2.2 Setting the brightness of the
rear camera 34
6.3 Setting recording features 35
6.3.1 Setting the continuous impact detection
sensitivity 35
6.3.2 Setting parking mode 35
6.3.3 Setting the impact sensitivity in
parking mode 35
6.3.4 Setting the motion detection sensitivity 36
6.3.5 Setting the record timer feature 36
6.3.6 Setting the battery protection feature 37
6.3.7 Setting the battery cutoff voltage feature 37
6.3.8 Setting the battery protection feature
for wintertime 37
Autogoods “130”
130.com.ua

4
6.4 Setting road safety features 38
6.4.1 Setting the safety cameras 38
6.4.2 Setting the mobile zone alert 38
6.5 Configuring the system settings 38
6.5.1 Setting the display language 38
6.5.2 Adjusting the system volume 39
6.5.3 Setting the time zone 39
6.5.4 Setting the daylight saving time 39
6.5.5 Setting the speed unit 40
6.5.6 Setting the speed stamp 40
7. Accessing the product information 41
7.1 Viewing the product information 41
7.2 Accessing and configuring the GPS 41
8. Upgrading the firmware 42
9. Troubleshooting 43
10. Specifications 44
Autogoods “130”
130.com.ua

5
Safety information
Read the following safety information to properly use the product.
Safety symbols in this guide
"Warning" - Indicates a potential hazard which, if not avoided, may result in injury or death.
"Caution" - Indicates a potential hazard which, if not avoided, may result in minor injury or property damage.
"Note" - Provides useful information to help users better utilize the product's features.
Safety information for proper use
Driving and product operation
• Do not operate the product while driving a vehicle. Distraction while driving may cause accidents and
result in injury or death.
• Install the product in places where the driver's view is not obstructed. Obstruction of the driver’s vision
may cause accidents and result in injury or death. Check with your state and municipal laws before
mounting the product to the windshield.
Autogoods “130”
130.com.ua

6
Power supply
• Do not operate or handle the power cable with wet hands. Doing so may result in electrocution.
• Do not use damaged power cables. Doing so may result in electrical fire or electrocution.
• Keep the power cable away from all heat sources. Failure to do so may cause the power cord insulation to
melt, resulting in electrical fire or electrocution.
• Use the power cable with the correct connector and make sure the power cable is connected securely
and is firmly in place. Failure to do so may result in electrical fire or electrocution.
• Do not modify or cut the power cable. Also, do not place heavy objects on the power cable or pull, insert,
or bend the power cable using excessive force. Doing so may result in electrical fire or electrocution.
• Use only genuine accessories from Alpine Electronics or an authorized Alpine Electronics dealer. Alpine
Electronics does not guarantee compatibility and normal operation of third-party accessories.
• When connecting the power cable to the product, ensure that the connection between the cable plug
and the power cable connector on the product is secure. If the connection is loose, the power cable may
become disconnected due to vehicle vibration. Video recording is not available if the power connector is
disconnected.
Children and pets
• Ensure that the product is out of the reach of children and pets. If the product breaks, it may result in fatal
damage.
Autogoods “130”
130.com.ua

7
Other information about the product
Product management and operation
• Do not expose the product to direct sunlight or intense light. The lens or internal circuitry may fail
otherwise.
• Use the product at a temperature between 14°F and 140°F (-10°C to 60°C) and store the product at a
temperature between -4°F and 158°F (-20°C to 70°C). The product may not function as designed and some
permanent physical damages may result if it is operated or stored out of the specified temperature ranges.
Such damages are not covered by the warranty.
• Frequently check the product for the proper installation position. Impact caused by extreme road
conditions may alter the installation position. Ensure that the product is positioned as instructed in this
guide.
• Do not apply excessive force when pressing the buttons. Doing so may damage the buttons.
• Do not use chemical cleaners or solvents to clean the product. Doing so may damage plastic components
of the product. Clean the product using a clean, soft, and dry fabric.
• Do not disassemble the product or subject the product to impact. Doing so may damage the product.
Unauthorized disassembly of the product voids the product warranty.
• Handle with care. If you drop, mishandle, or expose the product to external shocks, it may cause damage
and/or result in the malfunction of the product.
• Do not attempt to insert foreign objects into the device.
• Avoid excessive humidity and do not allow any water to enter the product. Electronic components inside
the product may fail if exposed to humidity or water.
• Depending on the make and model of your car, the power may be constantly supplied to the dash cam
even when the ignition is turned off. Installation of the device to a continuously powered 12V outlet could
result in vehicle battery drainage.
• This device is designed to record video while the vehicle is in operation. The quality of the video might be
affected by weather conditions and the road environment, such as whether it is day or night, presence of
street lighting, entering/exiting tunnels, and the surrounding temperature.
• Alpine Electronics is NOT responsible for the loss of any recorded video during operation.
• Although the device was designed to withstand high-impact car collisions, Alpine Electronics does not
guarantee the recording of accidents when the device is damaged as a result of the accident.
• Keep the windshield and camera lens clean for optimal video quality. Particles and substances on the
camera lens or windshield may reduce the quality of the recorded videos.
• This device is intended to be used inside the vehicle only.
Autogoods “130”
130.com.ua

8
1. Product overview
1.1 Included items
Ensure that all the items are included when you open the product box.
1.1.1 Standard items
Front camera (main unit) Mount Car charger Adhesive cable holder
GND
ACC
BATTERY
MicroSD memory card
with adapter
(consumable)
Quick start guide /
User guide
(stored in the microSD card)
Hardwiring cable External GPS receiver
The standard items may change without prior notice.
1.1.2 Accessories (sold separately)
Rear camera
• GPS reception may be affected by interference from the vehicle's windshield, particularly those treated
with anti-UV protective coating, or built-in defroster. It is recommended that an external GPS receiver is
used when the GPS signal is weak or when you cannot get a GPS signal.
• To connect the external GPS receiver to the front camera, carefully remove the front camera's GPS port
cover with a pry tool or a small flat-head screwdriver to access the port.
Autogoods “130”
130.com.ua

Product overview
9
1.2 Part names
1.2.1 Front camera (main unit) - front view
DC-IN power port
Used to connect the
power cable.
GPS port
Used to connect the
external GPS receiver
(optional).
V-IN input port
Used to connect the
rear camera (optional).
Speaker
Outputs the voice guide and buzzer
sounds to indicate the product’s status.
Front camera lens
Records the front view.
Mount connector
Used to connect the mount.
Autogoods “130”
130.com.ua

Product overview
10
1.2.2 Front camera (main unit) - rear view
Wi-Fi button
Press to connect the product to a
smartphone via Wi-Fi network.
STATUS LED
Indicates the
recording status.
Wi-Fi LED
Indicates the Wi-Fi
connection status.
Microphone
Used for voice recording.
Memory card slot
Insert a memory card to save recordings.
REC button
• Short Press: Starts manual recording
• Press and hold for 3 seconds: Audio
recording ON/OFF
• Press and hold for 5 seconds:
Memory card format
1.2.3 Rear camera (optional)
Adhesive mount
Used to fix the rear camera in the vehicle.
Rear camera lens
Records the rear view.
Security LED
Indicates that the video is being recorded.
Connection port
Used to connect the rear
camera to the front camera
using a rear camera cable.
Autogoods “130”
130.com.ua

Product overview
11
1.3 Removing and inserting the memory card
Follow the instructions to remove the memory card from the product or to insert the memory card into the
product.
Removing the memory card
Ensure that the product is turned off, and then gently push the
bottom of the memory card with your fingernail. The lower
part of the memory card will be exposed.
Remove it from the product.
Inserting the memory card
Insert the memory card into the memory card slot, paying
attention to the direction of the memory card, and then push
the memory card into the slot until you hear a click.
Before inserting the memory card, ensure that the metal
contacts on the memory card are facing toward the lens of
the product.
• Ensure that the product is turned off before removing the memory card. The recorded video files may be
corrupted or lost if you remove the memory card while the product is on.
• Ensure that the memory card is in the correct direction before inserting it into the product. The memory
card slot or the memory card may be damaged if it is inserted incorrectly.
• Use only authentic memory cards from Alpine Electronics. Alpine Electronics does not guarantee
compatibility and normal operation of third-party memory cards.
To prevent loss of recorded video files, periodically back up the video files on a separate storage device.
Autogoods “130”
130.com.ua

12
2. Installing the product
2.1 Installing the front camera (main unit)
Follow the instructions to properly install the product.
2.1.1 Selecting an installation location
Select an installation location that can record the
entire view in front of the vehicle without obstructing
the driver’s vision. Ensure that the front camera lens
is located in the center of the windshield.
20 cm
If a GPS navigating device is installed on the dashboard,
its GPS reception may be affected depending on the
dashboard camera's installation location.
Adjust the installation location of the GPS navigating
device to ensure that the two devices are separated by
at least 20 centimeters (approximately 8 inches).
2.1.2 Securing the product
Follow the instructions to secure the product at the installation location.
1
1
2
Align the mount to the mount rail on the product,
and then slide it until you hear a click (
➊
). Then,
carefully remove the protective film (
➋
).
2
After determining the installation location, wipe the installation location on the windshield with a dry
cloth.
Autogoods “130”
130.com.ua

Installing the product
13
3
1
2
Remove the protective film from the adhesive mount,
and then press the mount to the installation location.
4
1
2
Remove the product from the mount and push the
mount against the windshield to ensure that the
mount is firmly fixed.
5
Align the product to the mount, and then slide it into
the locking position until you hear a click.
• The product may fall and be damaged during vehicle operation if it is not firmly fixed to the mount.
• If you need to remove the mount from the windshield to alter the installation location, be careful not
to damage the windshield’s film coat.
6
Set the vertical angle of the camera appropriately
and tighten the screw of the mount firmly by using a
flat-head screwdriver or a coin.
To confirm the camera angle, record a video after installation and check the video using the mobile
viewer or the PC viewer. If necessary, adjust the camera angle again.
For more information about the mobile viewer or the PC viewer, refer to "4. Using the mobile viewer" on
page 21 or "5. Using the PC viewer" on page 25.
Autogoods “130”
130.com.ua

Installing the product
14
2.1.3 Connecting the power cable
When the engine and electrical accessories are turned off, connect the car charger.
The hardwiring cable (optional) must be professionally installed to the vehicle by a trained mechanic.
2
1
Connect the cigar socket power cable to the product’s
DC-IN power connector and insert the cigar jack into the
vehicle’s power socket.
The location and specifications of the power socket may differ by vehicle make and model.
• Use the authentic Alpine Electronics cigar socket power cable (optional). If you use another
manufacturer's cable, the product may be damaged or electrical fire or electrocution may result due to
the voltage difference.
• Do not cut or modify the power cable yourself. Doing so may damage the product or the vehicle.
• For safe driving, arrange the cables to prevent the driver's vision from being obstructed or interfering with
driving.
Autogoods “130”
130.com.ua

Installing the product
15
2.2 Installing the rear camera (optional)
Refer to the following instructions to properly install the rear camera.
2.2.1 Selecting an installation location
Select a location on the rear windshield where there
is no defrost grid wire and the camera can record
the entire rear view.
• For vehicles with a sunshade attached to the rear windshield, you must select a location where using the
sunshade will not interfere with camera operation.
• The adhesive part of the rear camera should not touch the defrost grid.
Autogoods “130”
130.com.ua

Installing the product
16
2.2.2 Securing the rear camera
Refer to the following instructions to secure the product to the installation location.
1
After determining the installation location, wipe the installation surface of the windshield with a dry
cloth.
Check the installation location before you secure the rear camera to the rear windshield. After
securing the rear camera to the windshield, it is hard to remove the camera or change the installation
location due to the strong adhesive.
2
2
1
Remove the protective film from the adhesive mount
and camera lens.
3
Attach the product with the THINKWARE logo facing
indoors and press the adhesive tape firmly to secure
the camera.
If the product is fixed in reverse, the rear view
will be recorded upside down.
4
Adjust the camera's vertical angle.
Autogoods “130”
130.com.ua

Installing the product
17
2.2.3 Connecting the rear camera cable
Power off the product and connect the rear camera cable to the front camera (main unit).
1
Connect one end of the rear camera cable to the
front camera’s V-IN port.
2
Connect the other end of the rear camera cable to
the rear camera's connection port.
For safe driving, arrange the cables to prevent the driver's vision from being obstructed or interfering
with driving.
3
Turn on the ACC or start the engine to check if the product is powered on. After the product is powered
on, the Status LED and the voice guidance will be turned on.
The product is powered on when the ACC mode is turned on or when the engine starts.
Autogoods “130”
130.com.ua

18
3. Using recording features
3.1 Turning the product on or off
The product is turned on automatically and continuous recording starts when you turn on the ACC or start
the engine.
Wait until the product is completely booted up after turning it on, and then begin operating the vehicle. The
video recording does not begin until the product is completely turned on (booted up).
3.2 Learning about file storage locations
Videos are stored in the following folders according to their recording mode.
On the mobile viewer Continuous Continuous
Incident
Manual
Recording
Motion
Detection Parking Incident
In the memory card
Play videos on Window/Mac computer or using the Thinkware mobile app. If you play videos by inserting
the memory card in devices such as a smartphone or a tablet PC, the video files may be lost.
A file name is composed of the recording start date and time, and the recording option.
REC_2018_07_01_10_25_30_
F.MP4
REC_2018_07_01_10_25_30_R.MP4
REC_2018_07_01_10_25_30_GS.MP4
Recording conditions
• F: Front camera
• R: Rear camera (when optional
rear camera is equipped)
Autogoods “130”
130.com.ua

Using recording features
19
3.3 Using the continuous recording feature
Connect the power cable to the product’s DC-IN power port and then turn on the vehicle’s electrical
accessories or start the engine. The status LED and the voice guide are turned on, and the continuous
recording starts.
During continuous recording, the product operates as follows.
Mode Operation description Recording LED (REC)
Continuous
recording
During driving, videos are recorded in 1 minute segments and stored
in the "cont_rec" folder. (light on)
Incident
continuous
recording*
When an impact to the vehicle is detected, a video is recorded for 20
seconds, from 10 seconds before the detection to 10 seconds after
the detection, and stored in the "evt_rec" folder.
(flickers)
* When an impact to the vehicle is detected during continuous recording, incident continuous recording starts with a
buzzer sound.
• Wait until the product is completely booted up after turning it on, and then begin operating the vehicle. The
video recording does not begin until the product is completely turned on (booted up).
• When incident continuous recording starts, the buzzer sounds as a notification. This function saves you
time when checking the status LED to know the operating status of the product.
• To enable recording, you must insert a memory card into the product.
3.4 Recording manually
You can record a scene you want to capture while driving and store it as a separate file.
To start manual recording, press the REC button. Then, manual recording will start with the voice guide.
During manual recording, the product operates as follows.
Mode Operation description Recording LED (REC)
Manual
recording
When you press the REC button, a video will be recorded for 1 minute, from
10 seconds before to 50 seconds after pressing the button, and stored in
the "manual_rec" folder.
(flickers)
Autogoods “130”
130.com.ua
Table of contents
Other Alpine Dashcam manuals

Alpine
Alpine DVR-C320R User manual

Alpine
Alpine HCE-C157D User manual

Alpine
Alpine HCE-C155 User manual

Alpine
Alpine DVR-F800PRO User manual

Alpine
Alpine TOPVIEW HCE-C500 User manual

Alpine
Alpine HCE-C107D User manual

Alpine
Alpine HCE-TG130GM User manual

Alpine
Alpine HCE-C210RD User manual

Alpine
Alpine KIT-R1AU User manual

Alpine
Alpine HCE-C200R User manual

Alpine
Alpine DVR-F800PRO User manual

Alpine
Alpine HCE-C210RD User manual

Alpine
Alpine HCE-C125 User manual

Alpine
Alpine HCE-TG130GM User manual

Alpine
Alpine KCX-C200B User manual

Alpine
Alpine HCE-C155 User manual

Alpine
Alpine DVR-C320R User manual

Alpine
Alpine RCV-C310 User manual

Alpine
Alpine HCE-C252RD User manual

Alpine
Alpine HCE-C155 User manual