manuals.online logo
Brands
  1. Home
  2. •
  3. Brands
  4. •
  5. Alpine
  6. •
  7. Dashcam
  8. •
  9. Alpine HCE-TG130GM User manual

Alpine HCE-TG130GM User manual

FOR
CAR
USE
ONLY/POUR APPLICATION AUTOMOBILE/PARA USO
EN
AUTOMOVILES
~LPINE
~
HCE-TG130GM
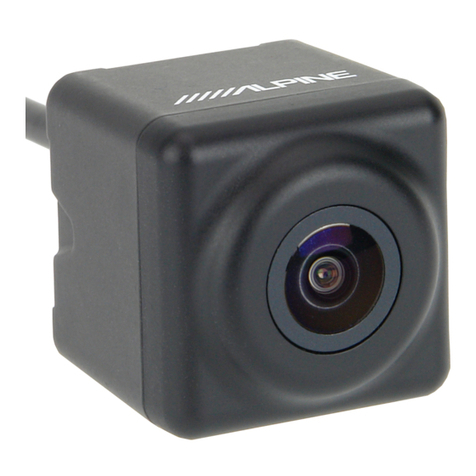
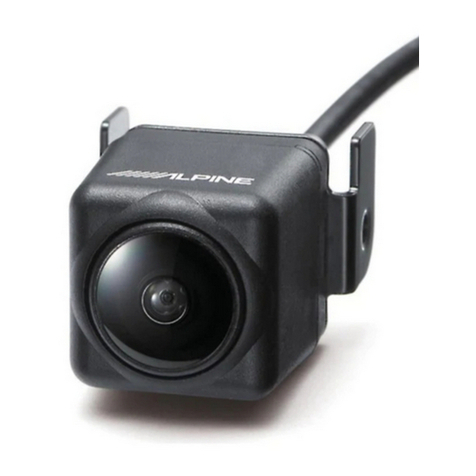
Tailgate Handle Multi-view Camera
for select GM Trucks (2007-2013)
Chevrolet I GMC
HCE-TG130GM
Owner's Manual
e Model: Full SizeTruck
• Model Year: 2007-2013
• Trim Level: Compatible with all trim levels
CHEVROLET
Model
SILVERADO
Year
2007-2013
SILVERADO 2500HD
2007-2013
SILVERADO 3500HD
2007-2013
SIERRA
2007-2013
GMC SIERRA 2500HD
2007-2013
SIERRA 3500HD
2007-2013
*
The specified vehicles have been tested and have
met
compatibility
specs
at
the
time
of
testing. Compatibility is
not
guaranteed
if
the
manufacturer has made
production
changes
to
the
listed vehicles above.
ALPINE
ELECTRONICS
MARKETING,
INC.
1·
7Yukigaya-Otsukamachi,
Ot
a-ku
To
ky
o 145-0067, Japan
Tel.:
03
-
54
99·4531
ALPINE
ELECTRONICS
OF
AMERICA, INC.
19145
Gr
amercy Place
Torrance, California 90501 U.S.A.
Tel.: 1-800-ALPINE-1
(1-
800-257-4631)
ALPINE
ELECTRONICS
(BENELUX)
GMBH
Le
uv
ensesteenweg 510-B6,
1
93
0 Zaventem, Belgium
Tel.: 0
2-72
5 1315
ALPINE
ELECTRONICS
OF
AUSTRALIA
PTY,
LTD.
161-1
65 Prin
ce
ss Hig
hw
ay, Hallam
Victoria 3803,
Au
s
tr
alia
Tel.:
03
·8787-12
00
ALPINE
ELECTRONICS
GMBH
Wilhelm-Wagenfeld-Stra
se
1-3
80807
Munchen, Germa
ny
Tel.: 089-
32
42 640
ALPINE
ELECTRONICS
OF
U.K
.,
LTD.
ALPINE House
Fletchamste
ad
Highway, Cove
nt
ry C
CV
4
9T
W, U.K.
Te
l.
:0870-33
33
763
ALPINE
ELECTRONICS
FRANCE
S.A.R.L.
(RCS PONTOISE B 338 101
28
0)
98,
Ru
e
de
Ia Belle Etoile, Z.l. Paris No
rd
II
,
B
.P.
50016, 95945 Roissy Charles
de
Gaulle
Cedex, France
Tel.: 01-48638989
ALPINE
IT
ALIA
S.P.A.
Viale
C.
Colombo 8, 2
00
90
Tr
ezzano
Sui Naviglio (MI), Italy
Te
l.
: 0
2-
484781
ALPINE
ELECTRONICS
DE
ESPANA,
S.A.
Po
rtal
de
Gamarra 36, Pabell6n, 32
01
013 Viloria (Aiava)-APDO 133,
Sp
ain
Te
l.
: 94
5·28
3588
D
es
igned
by
AL
P
IN
EJapan
Pri
nt
ed
in
Korea
68M
141
28
K46-0
M3514597010
Tha
nk
you for
pur
ch
as
ing
thi
sAlpine product.
Pl
ease
ta
ke
a
mom
e
nt
to
prot
ec
t your purch
ase
by registering
your
pr
oduct
now
at
th
e
following addre
ss:
www
.a
lpine usa.com/reg
is
t
ra
tion.
You
will be
inf
ormed
of
product a
nd
sof
twar
e updat
es
(ifapplicable
),
sp
ec
ial
pr
omotions, newsa
bout
Alpine.
Merci d'avoir achete ce
pr
oduit Alpine. Nous vousinvitonsa
consacrer un mome
nt
a
Ia
protection de
votr
e ach
at
en e
nr
egistra
nt
vo
tr
e
produit d
es
ma
int
ena
nt
a l'adr
es
se
suivante:
www
.a
lpine-usa .com/regis
tr
a
tion
.
Vousserezte
nu
informe desmi
ses
a
jour
d
es
produitset d
es
logiciels
(l
e
cas
ec
h
ea
nt
),
des
pr
om
ot
ionssp
ec
ial
es
, de l'ac
tu
a
lit
ed'Aipin
e.
Gr
acias
por
adquirir
es
te producto Alpine.Con
so
lo
unos pocospa
so
s
podr
a
pr
oteger su product
o,
regi
st
ra
ndolo
a
tr
av
es
de Ia siguie
nt
e
dir
ec
ci6n: www.alpine-usa.com/registr
at
ion.
Recibira informacion sobre nuev
os
productosy softwar
e,
pro
mo
cion
es
es
pecial
es,
novedades sobre
Al
pine.
English
.ffiwARNING
This symbol
means
important
instructions. Failure
to
heed
them
can
result
in
serious
injury
or
death
.
WHEN USING A
CAMERA
SYSTEM, THE DRIVER
MUST
VISUALLY
CHECK ACTUALCONDITIONS
AROUND
THE VEHICLE.
MAKE
SURE THERE ARE
NO
PERSONS OR
ANIMALS
IN
THEAREA
IN
WHICH
YOU ARE
MANOEUVRING
OTHERWISEYOU
COULD
INJURE
THEM
.
A
'amer
a assists
the
driver
b}'
se
ndi
ng
images
to
the
scrc~n
show
i
ng
(Onditions in view
of
the
camera.
"Jhe
camera
uses a wi
de
-a
ng
le l
en
s.
Titcreforc,
ther
e is a difference
in
dis
tan
ce persp
ect
ive between
what
is
no
rmallyseen
and
what
appear
s
on
the
screen. Also,
the
imag
es
show
n
by
the
rearview
camera
are reversed, so as to
appear
the
same
as what is seen
through
the
rearview mirror.
'
Th
e
ca
mera
may
not
perform
to
full capability
due
to
variables
such
as: weather
co
nditions such
as
ha
rd
rain, sno
w,
fog
or mud
ex
tr
emely
high or l
ow
tem
pe
ratures
ne
ar
ca
mera
slope ofve
hicl
e and/or
ro
adway
direct exposure
to
ve
ry
br
ight
li
ght
such
as hcadlamp or bright sunlight
mo
ving from
very
dark
to
ve
ry bri
ght
light and vice versa such as
in
parking garages
or
t
unn
els
extrem
elylowlight areas
walls
or
objects
that
are located diagonally
in
relation to
the
camera
changes
to
height
of
vehicle d
ue
ro l
oading
capacity
or
hydr
aulic
suspensions
obstacles located at the
corne
r
of
t
he
vehicle
DO
NOT
DISASSEMBLE
OR
ALTER
.
Doing so
may
result
in
an
accident, fire or elec
tri
c shock.
KEEP
SMALL
OBJECTS
SUCH
AS
BOLTS
OR
SCREWS
OUT
OF
THE
REACH
OF
CHILDREN.
Swa
ll
o\\'
ing
them
may
result
in
se
ri
ous in
ju
r
y.
If
swall
ow
ed, c
on
sult a
Do
ct
or
i
mm
ediatel
y.
USE
THE
CORRECT
AMPERE
RATING
WHEN
REPLACING
FUSES.
Pai
lur
e
to
do
so may result in fire
or
el
ec
tric shoc
k.
USE
ONLY
IN
CARS
WITH A 12
VOLT
NEGATIVE
GROUND.
(
Ch
ec
k with your dealer
if
you are not
su
re.) Failure
to
do
:so
may
re5u
lt
in
fi
re
, etc.
BEFORE
WIRING, DISCONNECT
THE
CABLE
FROM
THE
NEGATIVE
BATIERYTERMINAL.
Failure to do so may result
in
electric s
ho
ck
or
in
jur
y
du
e to electrical
sho
rt
s.
DONOT
USE
BOLTS
OR
NUTS
IN
THE
BRAKE
OR
STEERING
SYSTEMS
TO
MAKEGROUND CONNECTIONS.
Bolts
nr
nuts used
fO
r the brake
or
steering systems
(or
any
oth
er
s
af
ety·
r
el
ated system), or
tanks
s
hould
NEVER
be
usedfor
imtallation
s ()r gro
und
conn
ec
tio
ns
. Using such
parts
could disable control
of
th
e vehicle
an
d c
aus
e
li
re etc.
DONOT DAMAGE
PIPE
OR
WIRING
WHEN
DRILLING
HOLES.
When
drilling holes in
th
e
cha
ss
is for installation, take precautions so a
.s
no
t
to
con
tact, damage or
ob
str
uct
pipes,
fud
li
ne
s, tanks or electrical wiring.
Failure
to
take such
pre
ca
utions
may
result
in
fire.
MINIMISE
DISPLAY
VIEWINGWHILE DRIVING.
Viewing the
di
splay
ma
y distract the
driver
f
rom
lo
okin
g ahead of t
he
vehicle
and
cause
an
accident.
DONOT
SPLICE
INTO
ELECTRICAL
CABLES.
~
eve
r
cut away cable insulation
to
su
pp
ly
pow~;:r
to
other
equ
ip
men
t. Doing
so
will exceed
th
e c
urr
e
nt
c
arry
i
ng
ca
p
ad
ty
of the
wir
e
and
resu
lt
in
ti
re
or
ek c
tr
ic .shock.
DONOT INSTALL IN
LOCATIONS
WHICH MIGHTHINDER
VEHICLE
OPERATION
,
SUCH
AS
THE
STEERING
WHEEL
OR
GEAR
LEVER
.
Do
ingso m
ay
ob
s
truc
t forward vision or
hamper
mov
e
men
t etc
an
d results
in
se
rious accident.
DONOT ALLOW
CABLES
TO
BECOME
ENTANGLED
IN
SURROUNDING
OBJECTS
.
Arrangt
wi
r
il
lg
and
cabb
in
comp
li
ance with t
he
man
ua
l to prevent
ob
s
tru
ctions
wh
en
drivin
g.
Ca
blesor wiring that obs
tru
ct
or
han
g up
()/l
places su
ch
as the st
eer
ing wheel, gear leve
r,
br
ak
e
pe
dals,
et
c. can be
ex
tr
emely ha
za
rdous.
DONOT
ROUTE
ELECTRICAL
CABLES
NEAR
HOT
OR
MOVING
PARTS
R
our
e
th
e cables
and
>v
iring a
wa
y from hot
or
mo
v
in
g parts, a
nd
fi
x
them
securely to avoid
heat/me
chanical
da
mage
to th
ecable
insu
la
ti
on
, which
m
ay
re
s
ult
in shortcircuit, fire or
eled
ric shock.
MAKE
THE
CORRECT
CONNECTIONS.
When
making
conn
ections to the vehicle's
el
t•ctrical system, be
awar
e of
t
he
factory instfl
ll
ed
co
m
po
n
ent
s (e.g. on-
board
computer
).
Do
nol tap into
these lea
ds
to
pr
ovide power f
or
this unit.
Wh
en
conn
ecting
th
e device to
the fuse
bo
x, make sure
th
e fuse f
or
th
e inte
nde
d circuit of
th
e device h
as
the
appro
priate amperage.
failure
to
do
so may result in ftre
or
damage to
the
uni
t and
/or
th
e vehicle.
Wh
en in
do
ubt, c
onsu
lt your Alpi
ne
d
ea
ler.
USE
THIS PRODUCTFOR MOBILE 12
VOLT
APPLICATIONS.
Usc for o
th
er
Lha
n ils desig
ned
app
li
ca
ti
on
may
re
sult
in
fire, ele
ct
r
ic
sh
oc
k
or orher
injur
y.
Fran~ais
.ffi
AVERTISSEMENT
Ce
symbole
designe
des
instructions
importantes.
Le
non-respect
de
ces instructions
peut
entra1ner
de
graves
blessures, voire
Ia
mort,
LORSQU'ILUTILISE
UN
SYSTtME
DE
CAM£RA,
LECONDUCTEUR
DOITVERIFIERVISUELLEMENT
LES
CONDITIONS ACTUELLES
AUTOUR
DU
VEHICULE.IL
DOlT
S'ASSURER
QU
'AUCUNE
PERSONNE ET
QU
'AUCUN
ANIMAL
NE
SE
TROUVE DANS SON
CHAMP
DE
MANOEUVRE
AFIN D'EVITER
TOUT
ACCIDENT.
La
ca
m
era
permct
de g
uid
er
le
conduct
e
ur
p
ar
l'
envoi d
'i
magcs
a
l'
&cr
an
qui
indiquent
l
es
con
ditions
a
l'
arrie
re
du
ve
h
icule
.
Pa
r
consequent,
il
existe
un
e diffe
rence
entre
la
distan
ce
p
eryue
a
l'ecran
et
la
distance
n~elle.
Pa
r
ailleurs,
les
images
affichees
par
la
camera
de
recul
sont
in
vc
rs&cs afin qu'clles
apparaissent
tell
es
que
si
vous
regardiez
dans
le
n!tro
vise
ur.
II
est
poss
ible
que
la
ca
m
era
ne
fonc
ti
o
nn
e
pas
correctement
dans
le
s
cas
su
i
vants:
c
ond
itions mCtCorologiq\Jes
(ph
1i
cs violcntes, neige, brouillard)
temperatu
res ext
re
mes aproximite de la
camera
inclinais
on
du
vC
hi
cu
lc cVou
de
la route
expositi
on
dir
ecte aune
sou
rce lumineuse
int
en
se, n
otamment
aux
phare
s
d'un
vChicule ou au soleil
passage
de
licux
tr
Cs
s
om
b
rc
s (des parkings
ou
de
s tunnels) ades licux
tres
lumine
ux, et vice versa
cndroits
cxtrCmcmcnt
so
mbrcs
mur~
ou
objet
s situes en diagonale
par
r
apport
aIa c
ame
ra
cha
ngcm
en
t de haut
eu
r duvehicule
dU
ala
ca
pacitC de
cha
rge
ou
aux
suspensions hydrau!iq
ue
s
objets sit
ues
aI'
ang
le du
ve
hic
ul
e
NE
PAS
DESASSEMBLER
NlMODIFIER
L'APPAREIL.
II
y a ris
qu
e d'ac
cide
nL, d'
in
ce
nd
ie
ou
de c
ho
c e!ecL
ri
qu
e.
GARDER
LES
PETITS
OBJETS
COM
ME
LES
VIS
HORS
DE
PORTEE
DES
ENFANTS.
Lingestion
de
tels
obj
ets
peut
entrainer
de
gr
aves blessu
re
s. En cas
d'
in
gestion,
con
su
lter
im
med
iatem
ent
un
medecin
UTILISER
DES
FUSIBLES
DE
L'AMPERAGE
APPROPRIE
.
11
y a
ri
sque d'incendie
ou
de decharge electrique.
A
UTILISER
UNIQUEMENT
SUR
DES
VOITURES
A
MASSE
NEGATIVE
DE
12VOLTS.
(Ve
rifiez
au
pres
de
vo
tr
e
con
ce
ss
ionnaire si vous n'en etes pas c
ertain
.)
II
y a
risque d'incendie, etc.
AVANT
TOUTE
CONNEXION,
DEBRANCHER
LE
CABLE
DE
LA
BORNE
NEGATIVE
DE
LA
BATTERIE.
II
y a risque
de
choc
i!lec
t
dque
ou
de
blessure
par
co
urL
sc
ir
cu
its.
NE
PAS
UTILISER
DES
ECROUS
Nl
DES
BOULONS DU
CIRCUIT
DE
FREINAGE
OU
DE
DIRECTION
POUR
LES
CONNEXIONS
DE
MASSE
.
Le
s
boulon
s
et
l
es
ec
r
om
uti
li
ses
pour
les cir
cu
it
s de frei
na
ge
et
de
direction
(ou de t
out
au
tr
e syst
eme
de securite)
ou
les rese
rvo
irs ne peu
ven
t JAMAIS
e
tr
e
ut
ilises
pour
l'insta
ll
ation
ou
la
li
ais
on
aIa masse.
L'u
tilisation de ces
or
ganes
pe
ut
dCs
activer le systi!me
de
co
nt
rO
ie
du
vehicule
et
c
auser
un
incen
die, etc
NE
PAS
ENDOMMAGER
DE
CONDUITES
Nl
DE
CABLES
LORS
DU
FORAGE
DES
TROUS
.
Lors
du
forage de trous
dans
le c
ha
ssis
en
vue de
!"in
sta
ll
at
io
n, veiller a
ne
pa
s
entrer
en
contac
t, endo
mmager
ni
obstr
uer de
co
n
du
ites, de tuyau
x:
a
carburant
ou
de
fils
elec
tr
iques.
Le
n
on-r
espect de cettc
pr
ecaution
pc
ut
entralner
un
inc
endi
e.
MINIMISERL'AFFICHAGE
EN
COURS
DE
CONDUITE.
La visua
li
sati
on
de
l'affichage
peut
distraire le c
ondu
cteur
de
la c
onduite
du
vt'hicule et,
partant
,
de
pro
voquer
un
accident.
NE
PAS
DENUDER
LES
CABLES
ELECTRIQUES.
Ne
jamais
enlev
er
la ga
ine
isolantc
pour
alim
en
tcr
un
au
tr
e appareil.
II
y a
risque de dCpassement de Ia capacitt' de
co
ur
a
nt
et
,
par
t
ant
, d'in
cendie
ou
de
ch
oc
e!
ec
tri
que.
NE
PAS
INSTALLER
A
DES
ENDROITS
SUS
CEPT
IBL
ES
D'
ENTRAVER
LACONDUITE DU
VEHICULE,
COM
ME
LE
VOLANTOU
LE
LEVIER
DE
VI
TE
SSES.
La
vue
vers l'av;Jnt
pou
rr
ait
etre
obstr
u
t'
c
ou
lcs mou
veme
nts genes, etc., ct
provo
qu
er
un
accident grave.
NE
PAS
COINCER
LES
CABLES
AVEC
DES
OBJETS
VOISINS.
Pos
itionner
les
cab
les
conft
lr
mem
e
nt
au
ma
nuel
de
man
iere a&vit
er
toute
ob
s
tru
cti
on
en
cou
rs de c
onduit
e.
Les cables qui o
bs
tru
ent ou
dC
pa
ssc
nt
A
de
s e
ndr
oits tcls
qu
e
lc
volant, le levier
de
changcmc
nt
de vitesses, Ia
pt:':dale
de ti·ein. etc., pe
uvt>n
t s'av
erer
t.>
xtreme
me
nt
dan
gereux.
VEILL
EZ
A
NE
PAS
AC
HEMINER
LES
CABLES
£L
EC
TRIQUESA
PROXIMIT£
DE
PI
E
CES
MOBILES
OU CHAUDES.
Achcminez lcs cables
i1
ICcart
de
s pi
Cccs
mobiles ou ch
aude
s ct hxez-les
solidcme
nt
afin
de
nc
pa
s
cndo
mm
agcr
l'L
solant. Dans le
ca
s co
ntra
ire, un
co
urt
-circuit ris
que
de
se
pro
du
ire, ce
qui
peut
provo
qucr
une secouss.e
dectrique ou
un
in
cen
di
c.
.ffi
ADVERTENCIA
Estes1mbolo indica
que
las instruccionesson
importantes.
De
no
tenerse
en
cuenta,
pod
ria
ocasionarseheridas graveso
muerte
.
Espanol
51
SE
UTILIZA
UN
SISTEMA DE CAMARA, ELCONDUCTOR DEBE
COMPROBARVISUALMENTE LAS CONDICIONESREALES
EN
TORNO
AL
VEHiCULO. DEBE ASEGURARSE
DE
QUE
NO
HAY
PERSONAS
Nl
ANIMALESEN LA
ZONA
EN
LAQUE
SE
PRETENDE
MANIOBRAR.
EN
CASOCONTRARIO, PODRIA PROVOCAR DANOS.
U
na
dm
a
ra
ayuda al
conduclor
m
edi
::
mte el en
vio
d e l
as
im<igen
es
a
Ia
pan
talia
para
cornprobar
l
as
co
ndi
ciones
en to
rno
al
vehiculo
a
traves
de
la
d.
rn
a
ra.
La
drnara
uti
li
za
un
ob
jet
i
vo
gran
a
ngula
r.
Po
r
lo
tanto,
ex
i
ste
una
diferencia
de
per
s
pecti
va
en
la
distancia
que
seve
en
r
ca
lid
ad
yla q
ue
aparece
en
Ia
panta
lla.
As
im is
mo,
las
im<lgen
cs
m
ostradas
en
la
dmara
de
visiOn
trase
ra apar
ecen
invertidas
para
qu
e
e
quiv
al
ga
n a
la
s
que
se
ven
en
el
esp
ejo
re
tr
ov
isor.
La
d.
m
ara
pu
e
de
no
funcionar
a ple
na
capa
ci
d ad
por
di
s
tinto
s
moti
vos
,
como
:
condi
ci
ones dimatol
Og
icas,
por
ejcmplo, aguaccros,
nc
vada
s,
nicblao barro
te
mp
er
at
u
ra<>
de
masi
ado
altas o bajas en l
as
proxi
midades
de Ia
c<lm
ara
incli
nadb
n
de
lvehicu
lo
y/o
de
Ia c
ar
relera
ex
posiciOn dirccta a
fucn
tes
de
l
uz
muy
in
tensas, co
mo
faros o Ia
lu
z
s
ola
r directa
ca
mbio dnisticoy repentino
de
condiciones
de
poc
a
luminosidad
a
muc
ha l
um
i
no
sidad, y viccvers
a,
por
cjcmplo en
apa
rcamientos o t
Unel
cs
wnas
con m
uy
poca
ilumi
naci6n
mur
os y objetos s
ituados
en diago
na
l
con
rciad 6n
al
a c<imara
cambios en Ia altura del vehiculo
de
bi
do
a au
men
to
de
carga o
suspensi
On
hidniulica
objctos s
it
uados
en la
esqu
i
na
del vchicu\o
NO
DESMONTE
Nl
ALTERE
LA UNlOAD.
Si
lo hace,
po
d
ni
oc
as
ion
ar
un
acddente
, un incendio o
una
descarga electrica.
MANTENGA
LOS
OBJETOS
PEQUENOS
, COMO
LOS
TORNILLOS,
FUERA
DEL
ALCANCE
DE
LOS
NINOS.
La ingesti
On
de
estos objetos
puede
p
ro
vocar lesiones graves.
Si
es
lo
oc
urr
e.
co
nsulte
co
n
un
me
di
co i
nm
e
diatame
nre.
UTI
LICE
EL
AMPERAJE
COR
RECTO
CUANDOCAMBIE
FUSIBLES.
De
lo
co
nt
rario
, pucdc producirsc un inccndio o u
na
descarga
elt
ctJi
ca
.
UTI
LICE
LA UNlOADSOLA
MENTE
EN
VEHiCULOS
QUE
TENGAN
12
VOLTIOS
CON
NEGATIVO
AMASA.
(Con-suite a
su
distribuidor en
caso
de
dud
a
.)
De
no
ser
a
s{,
pod
ria ocasi
onar
un
incendio, etc
ANTES
DE
EFECTUAR
LAINSTALACI6N,
DESCONECTE
EL
CABLE
DEL
TERMINAL NEGATIVO
DE
LA
BATE
RIA.
De
no
hacer
lo
asi,
po
dri
a ocas
ion
ar u
na
de
scarga el
ect
rica o h
er
idas d
eb
id
o
a
co
rt
ocircuitos elCctricos.
NOUTILICE
TUERCAS
0
PERNOS
EN
EL
SISTEMA
DE
FRENOS
0
DE
DIRECCI6N
PARA
REALIZAR
LAS
CONEXIONES
AMASA.
Los pernos o tue
rca
s emplea
do
s en l
os
sist
emas
de
fre
no
o
de
direcdOn
(o
en
c
ua
lqu
ier
ot
ro
siste
ma
rela
cionado
co
n
la
segu
ri
dad
del
vehk
u
lo
),
o l
os
de
pb
sit
os
, NUNCA d
eben
ut
ili
zar
separa i
ns
talaciones
de
cab
lcad
o
o conexilm a m
asa
.
Si
ut
iliza tales
part
es
pod
ni
i
nca
pacitar el control del
vehfculo y p
ro
v
oc
ar
un
in
ce
ndio
, etc
EVITE
DANAR
LOS
TUBOS
Y
EL
CABLEADD
CUANDOTALADRE
AGUJEROS.
Si
tala
dr
a agujc
ros
end
cha
sis
dur
an
te
Ia
in
st
al
ad
On
, to
me
las precauciones
n
ec
csarias
para
no
.r
ozar, dafiar u obst
ruir
l
os
tubas
, las t
uberia
s de
co
mbu
st
ibl
e, l
os
depOsitos o el
cab
l
eado
e!
Cctrico.
De
lo c
ontra
rio,
pod
ria
pro
vocar
un
incen
dio.
REDUZCA
AL
MAXIMO LA VISUALIZACI6N
DE
LA
PANTALLA
MIENTRAS
CONDUCE.
El
co
nd uctor p
uede
distraer su atenci6n
de
Ia carre
tera
mientras
mi
ra Ia
panta
ll
a yocasio
na
r
un
accid
cn
te.
NOEMPALME
CABLES
ELECTRICOS.
Nunca corte cl aislamiento de un
ca
ble para
sum
i
nistrar
ene
rg
ia a otro
equ
ipo. Esto ha
ce
que
Ia
capa
cidad
po
rtado
ra del ca
bl
e
se
su
pcr
c y
pued
e ser
la c
au
sa
de
incendi
os
o
de
scargas e!Cctricas.
NO
INSTALE
EL
EQUIPO
EN
LUGARES
QUE
PUEDAN
INTERFERIR
CON
LAOPERACI6N
DEL
VEHICULO, COMO
EL
VOLANTE
DE
DIRECCI6N 0
LACAJA
DE
CAM
BIOS
DE
VELOCIDAD.
Esto
po
dria
ob
staculi
zar
la visibilidad ydificultar el movimiento, e
tc
y
provnc
ar
accidentes graves.
IMPIDA
QUE
LOS
CABLES
SE
ENREDEN
CON
LOS
OBJETOS
SITUADOS
ALRED
ED
OR.
Di
sp
onga Ia
ins
ta
laci6n
c!
Ccrrica y los cables confor
me
a lo descrito en
d
manua
l
pa
ra evit
ar
obst
3.c
ul
os
durant
e
Ia
co
nd
ucci
On
.
Lo
s c
ab
les que
obs
t
acu
li
zan Ia co
nd
ucci6n o
qu
e
cuc
lgan
de
pa
rtes del
ve
hiculo
co
mo
el
volanlc de
di
rccci6n, Ia pal
anca
de
c
am
bi
os
, los
pcd
alcs de freno, etc., sc
co
nsidt:ran ex:tr
emadament
e
pe
li
gr
os
os
.
NO
COLOQUE
CABLES
EL£CTRICOS
CERCA
DE
PIEZAS
CALIENTES
0
M6VILES.
Aleje los cabl
es
de las piezas m6vilcs o calicntes y f
ij
clos
con
seguridad
para
que-
no sc pro
du
zcan daflos
par
tc
mperatura
/mc
d.n
ica en cl aisla
nt
c del
c
ab
le. Si no sigue estas instrucciones,
po
dria prnvocar
un
cor
tocir
cuito. un
in
ce
nd
iu o
suf
rir
una
descarga electrica.
English
CHECK
THAT
THE
CAMERA MOUNTINGS
IS
ATTACHED
SECURELY,
AND
THAT
THE
SCREWS
ARE
TIGHT
BEFORE
DRIVING.
Failure to do
so
may result in an accident
WHEN INSTALLINGOR
CHECKING
A CAMERA,DO
SO
AFTER PARKING
THECAR IN A
LEVEL,
SAFE
PLACE,
TURNING
OFF
THE
ENGINE,
AND
APPLYING
THE
HAND
BRAKE.
Failure
to
do
so
may
result
in
an
accident
.
WHEN USINGA DRILL
TO
MAKE A HOLE,TAKEPRECAUTIONS
SUCH
AS
WEARING
GOGGLES
SO
FRAGMENTS DO
NOT
GET
INTOTHE
EVES
.
Failure
to
do
so
may
result
in
injur
y.
&cAUTION
This symbol
means
important
instructions. Failure
to
heed
them
can
result
in
injury
or
material
property
damage.
HAVETHE WIRING
AND
INSTALLATION DONE
BY
EXPERTS.
T
he
wir
ing
and
installa
tion
of
thi
s
unit
re
quire
s
specia
l t
ec
hnica
l skill and
experien
ce
.
To
ensure
safety,
al
ways
contact the d
ea
ler
wh
ere you purchased
this prod
uct
to have the work done.
ARRANGETHE WIRING
SO
IT
IS
NOTCRIMPED
OR
PINCHED
BY
A
SHARP METAL
EDGE.
Route
the
ca
bles
and
wiring
aw
ay
f
rom
moving
part
s
(lik
e
th
e seat rails)
or
s
harp
or
po
inted edges.
'\hi
s will prevent crimping
and
damage
to
the
w
iri
ng
.
USE
SPECIFIED
ACCESSORY
PARTS
AND
INSTALLTHEM
SECURELY.
Re
su
re
t.o
use o
nly
the
specified acce
ssory
pa
rts. Use
of
other
th
an
designated parts may damage this unit inte
rn
ally or may not secure
ly
insta
ll
t
he
u
nit
in place. This
may
cause
parts
to
become
k
lOSe
resu
lting
in
ha
zar
ds
or p
rod
uc
t fa
ilur
e.
CONNECTLEADS
PROPERLY
Be
sure
to
conne
ct
the
co
lour
coded
leads a
cc
ording
to
the
diagr
am.
I
ncorrect
con
nections
may
c
ause
t
he
un
it
to
ma
lfunc
tion
or
ca
use
da
m
ag
e
to t
he
veh
icle's electr
ica
l
system
.
HALT
USE
IMMEDIATELY
IF
A PROBLEM
APPEARS.
Fa
ilur
e to
do
so
may
c
ause
pasona
l in
jur
r or
damage
to th
e
producl.
Rclllrn
it to y
our
authorized
Alpine
deal
er
or
th
e
neare
st
Alpine
Service
Center
f
or
r
epairing.
NOTICE
About
Care
of
D
evice
To
pr
event
th
e
camera
l
ens,
mount
i
ng
and
cord
s
from
c
hangin
g
color
or
s
ha
pe,
or
from
deteriorating,
wi
pe
with
a
chem
icalfree,
damp
do
th.
Be
sure
to
dis
connect
th
e
cab
le f
ro
m
th
e (
~
)
battery
post
before
ins
talling
your
HCE-TG130GM.
This
\'1-·ill
reduce
any
c
han
ce
of
dam
age
to
the
u
nit
in
case
of
a
short
-
circ
ui
t.
Be s
ure
to
connect
the
co
l
or
coded
l
ea
ds acc
ording
to
th
e
dia
gra
m .
I
nco
rr
ect
connect
ion
s
may
ca
u
se
t
he
unit
to
mal
funct
i
on
or
damage
ttl
the
ve
hi
cles el
ect
ri
ca
l system.
Wh
en
maki
ng
con
n
ect
ions
to
th
e
veh
icles. el
ectr
i
ca
l sys
tem
,
be
aware
of
the fa
ctory
in
stalled
co
mp
one
nt
s (e.g.
on
-
board
co
mputer)
.
Do
no
t tap
in
to
th
es
e l
eads
to
provide
powe
r for
thi
s u
nit.
When
conne
cti
ng
the
HCE-
TG130GM
to th
e f
use
box
,
make
su
re
the
fuse for the
inten
de
d
circuit
of
the
HCE
-'J'G1
30GM
ha
s
the
appropriat
e
amperage
. Fa
ilur
e
to
do
so
may
res
ult
in
damage
to
th
e
unit
and/or
the
veh
icle. When in
do
ubt
,
co
n
su
lt y
ou
r A
lpin
e
dea
le
r.
About
RearCamera
The
rear
c
amera
is
optimized
for use in
thi
s system . as a
dedicated
p
rodu
ct,
it
sho
uld
not
be
used. in ot
her
sys
tems.
About
Powe
r
Con
n
ection
Connect
th
e reverse inp
ut
wi
re
(
orang
e
/wh
it
e) to
th
e
pm-..-er
w
ir
e o
ft
he
rever
se
lam p.
Co
nsult
your A
lpine
d
ea
ler for
det
ails.
Co
nfirm
th
at
this
c
onn
ec
t
ion
is
made
to
the
nega
tive s
id
e
of
the
reverse l
amp
.
Fran~ais
RACCORDEZ
LES
CABLES
CORRECTEMENT.
Lor
sque
vous
raccord
e:t des
d.b
l
es
au
systeme elec
triqu
e
du
vehicule, t
enez
cnm
pte
des
composants
instaliCs
en
usin
e
(no
t
amment
de l()fdinatt:ur de
bar
d
).
N'utilise
z.
p
as
ces
fil
s
r()ur
ali
mcnter
l'apparei
l.
Lorsque
vous
raccord
ez
l'appareil all
boitier
afusibl
es,
vtrifiez
que
le
fusible
co
rre
spo
nda
nt
au
circuit de l'appareil dis
po
se
de
l'ampCrage approprie.
Da
ns
le cas
con
traire
,
vous
risquez
de
pr
ovoquer
un i
nce
ndie
ou
dendnmm
ager l'
appare
il
et/ou
le
vehicule.
En
cas de
doutc
, a
dr
essez-vous a
votre
re
vendcur
Alpine.
UTILISER
CET
APPAREIL
POUR
DES
APPLICATIONS MOBILES
DE
12
V.
T
ou
te
utilisation
autr
e
qu
e \'application d€signf:e
co
mporl
e
un
risque
d'
in
cend
ie,
de
choc
elect
ri
qu~
ou
de
bles
sure
.
AVANT LACONDUITE,
V~RIFIEZ
QUE
LE
SUPPORT
DE LA
CAM~RA
EST
CORRECTEMENT
FIXE
ET
QUE
LES
VIS SONT
BIEN
SERREES.
Fau
te
de
quoi
.
vous
pour
ri
cz
avoir
un
accident.
POUR
INSTALLER
LA
CAM
E
RA
OU
POURV~RIFIER
QU'
ELLE
EST
CORRECTEMENT
INSTALLEE,GAREZ
VOTRE
VEHICULEDANS
UN
LIEU
SUR
ET
SUR
UNE
SURFACE
PLANE,
COUPEZ
LE
MOTEUR
ET
METTEZ
LE
FREIN
A MAIN.
Faute
de
quai,
Yous
pourrie
z avo
ir
un
accident.
51
VOUS UTILISEZ UNE
PERCEUSE
POUR
FA
IRE
UN
TROU, VEILLEZ
A
BIEN
VOUS
PROTEGER
AVEC
DES
LUNETTES
SPECIALES
AFIN
QU'AUCUN
D~BRIS
NE
P~NtTRE
DANS
VOS
YEUX.
Faut
e de qu()i,
vou
s
po
urri
ez
vous b
lesser
.
&ATTENTION
Ce
symbole
designe
des
instructions
importantes.
Le
non-respect
de
ces
instructions
peut
entrainer
des
blessures
ou
des
dommages
materiels
.
FA
IRE
INSTALLER
LE
CABL.\GE
ET
L'APPAREIL
PAR
DES
PROFESSION
NELS.
Le
d.b
lage
et
]
'installa
t
io
n
de
cet
app
areil
requier
t des compc!tences
techniqu
es
et
de
l'experi
ence
. P
ou
r
garant
ir Ia s
t'curile
, fa
ir
e
prodder
a
l'install
atio
n de
ee
l
appa
reil par
le
di
s
tribut
eur
qui
vo
us l'a
vendu.
FA
IRE
CHEMINER
LE
CABLAGE
DE
MANIERE A
NE
PAS
LE
COINCER
CONTRE
UNE
ARETE
METALLIQUE.
Faire
cheminer
le
s
cib
l
es
a!
&a
rt
d
e
~
pit:ces m
ob
il
es
(co
mme
le
s
ra
ils
d'un
siege)
et
des
arCtcs a
cC
r
Ccs
ou
pointucs.
Ce
la t'vit
era
ains
i de
co
i
nc
er
et
d'en
do
mm
ager
l
es
cables.
UTILISER
LES
ACCESSOIRES
SPECIFIES
ET
LES
INSTALLER
CORRECTEMENT.
Utiliser un
iquem
ent l
es
accesso
ir
es
spt
cifi
ts
. I:utilisation d'autr
es
co
m
pos
ants
q
ue
l
es
com
p
os:mt
s specifies
pent
caus
er
des
do
rnm
ages
intern
es a
ce
t
appa
reil
ou
son
install
ation
risqu
e de ne
pa
s
c!t
re effectut!e
c
or
recternent. L
es
pi
eces
utilisees
risquent
de
se
de
s
sc
rr
er
et
de
prov
oqu
er
des
domm
ages
ou
un
e
defa
il
lance
de
l'a
pp
areil.
RACCORDER
CORRECTEMENT
LES
CABLES
S'ass
ur
er
de
r
accor
d
er
l
es
conducteu
rs
co
des
en
couleur
confo
r
me
ment
au s
chema.
De
mauvaises
con
ne
xions
peuvent
entr
ainer
un
ma
uvais
fonctionnement
ou
e
nd
omm
"ger le
systeme
elect
riqu
e du vChi
cul
e.
INTERROMPRE
TO
UTE
UTI
LIS
ATION
EN
CAS
DE
PROBLEME.
Le
non
-
re
spe
ct
de
ce
ue
pr
ec
<J
utio
n
peut
en
traine
r
de
s ble
ssures
ou
end
ommag
er l'
appa
reil. Ret
ourner
l'appareil
aupres
du
distribu
teur
Alp
ine
agree
ou
un
centre
de
servic
e ap
res
-ve
nt
e
Alp
i
ne
en
vue de Ia reparat
ion
.
AVIS
A
propos
de
l'entr
e
tien
de I
appare
il
Pour
eviler
qu
e l'
ob
_ject
if
change de
cou
leur,
que
le su
pport
sc
dC
formc
ou
qu
e lcs cables se
dCt
Cri
or
e
nt
, ncttoyez-les avec
un
chi
ff-
On
hu
mide
en
fibres n
ature
Ji
es
.
S'ass
ur
er
de
d
Cc
on
ncc
t
cr
le
db
le
du
p6le (
~
)
de la
batterie
ava
nt
\'ins
ta
ll
ation
du H
CE
-TG13
0GM
. Ceci
redu
it l
es
ri
sq
ues
de
nd
ommager
l'unitC
en
cas de
co
urt-circuit.
.S'
ass
ur
er d
t:
co
nn
ec
t
er
l
e
~
c
onducteurs
code~
en couleur
se
con
f
ormant
au
sc
hema.
Des
c
onnexions
in
c
orr
ec
res
pe
uvent
oc
cas
io
nn
er le m
an
uvais
fonctio
nnem
e
nt
de \'
un
it( ou le
de
gat du sysreme el
ec
trique
du
vf
hi
cule.
Lors de
Ia
connex
ion des
(
~h
i
es
au
syst
eme
elec
tr
i
qu
e du vehicule, il faut
etre
consdent
des
cvmp
o
~
ants
ins
ta
lles
en
usine (tel
qu'un
ord
inateur
debord
). S'ass
ur
er
de
ne
pas
branchc
r
aces
condu
ct
curs
pour
fo
urnir
!'alime
ntation
ac
ette
unit
(.
Lors
de
la
con
nexion du HC
F.
-
TG
I3
0GM
au
boitier afusible. s'assurcr que le
fu
sible du circuit
dC
sig
nC
p
ou
r
lc
HCE
-
TG13
0GM
a !'
ampe
rage <lpproprie.
Si
non, l
'u
nite et/ou le vehicule
peu
vent
e
tr
e
endomm
a
gfs
. En cas
de
dou
te, consult
er
le reve
nd
eu
r Alpine.
A
propos
de Ia c
am
e
ra
de
recul
La
ca
me
ra de recul a
et
e
)p
e
cillem
ent cont,:ue
pour
un
e utilisation
dans
ce syst
i::
me
. Par
cons
e
qu
en t. c\le nc dc
vr
ait
pa
s Ct
rc
u
t
ili
se
~·
dans
d'
autres
sys
temes
.
A
propos
du
r
a,
,
or
d d'al
im
en
ta
tion
Raccor
dez
. le
fi
l d
t>
n
tr
te
du feu
de
n·
..:u
l
(orange/b
lan
..:
) uu c
ab
le
d'
alimcntation
du
fe
u de recu
l.
Cons
ultez
vo
tr
e
re
vcm:teur
Al
pin
e pour
plus
de
detai
ls
. Vt!rifiez q
ue
ce
racco
r
dem
ent
est effec
tue
du
cOte n
eg
atif
du
fe
u
de
rec
ul.
Espaiiol
REA
LICE
LAS
CONEXIONES
CORRECTAMENTE.
Cuando
r
ca
li
cc
l
as
co
n
cx
i
ones
del
sistema elecrri
co
d
el
vch
icu
l
o,
debe
t
ene
r
EN
CUENTA los
co
m
po
n
entes
in
stala
do
s
de
fabrica
(par
ej
em
plo
,
el
o
rdcnado
r de a
bo
rdo).
No
utilice estoscables
para
ali
menta
r Ia
unida
d.
Cua
nd
o
conec
le
el
dis
pos
itivo a
Ia
caja de f
usib
les, aseg
Ur
ese
de
que
el
fu
~
i
b
l
e
co
r
respo
ndie
nte
a
cada
circuito
del
disp
osi
tivo tie
ne
el
amperajc
adecua
dn
. Si no lo
ha
ce,
podria
pro
voc
ar
un
incendio
o
da
iiar
Ia
unidad
y/o
cl vchic
ul
o. Si
tiene
dudas, pOngasc
en
contacto
co
n
su
di
stribuidor
Alpine
.
UTILICE
ESTE
PRODUCTO
CON
APLICACIONES MOVILES
DE
12
V.
Si
seem
pl
ea
p
ara
olr
a aplicaci(m distinta de Ia pr
ev
ista, p
od
rfa
produ
ci
rsc
un
in
cen
dio
, una desca
rga
elCctri
ca
u
otras
lesi
ones
.
ANTES DE INICIARLAMARCHA, VERIFIQUE QUE
EL
SOPORTE
DE LA
CAMARA
SE
HA
FIJADO
CORRECTAMEN
TEV
QUE
LOS
TORNILLOS
ESTAN
BIEN
APRETADOS.
De
lo
contrario, p
odria
te
ner
un
accide
nt
e.
AL INSTALAR LA CAMARA, 0 DURANTELACOMPROBACION
DE
SU
INSTALACION,
LLEVE
A CABO LA VERIFICACION
CON
EL
VEHiCULO
APARCADO
EN
UN LUGAR
SEGURO
YNIVELADO,
CON
EL
MOTOR
APAGADOV
CON
EL
FRENO
DE
MANO
PUESTO.
De
lo c
on
trario,
po
d
ria
tcncr
un
accide
nt
e.
51
UTILIZA
UN
TALA
ORO
PARA
HACER
LOS
AGUJEROS,
PROTEJASE
ADECUADAMENTE
CON
GAFAS
PRO
TE
CTORAS
PARA
EVITARQUE
LOS
POSIBLES
FRAGMENTOS
LE
ALCANCEN
LOS
OJOS.
De
lo w nt
rar
i
o,
p
odri
a
hac
erse
daflo.
& PRUDENCIA
Este simbolo indica
que
las
instrucciones
son
importantes.
De
no
tenerse
en
cuenta,
pod
ria
ocasionarse
heridas
graveso dai\os materiales.
CONFiE
EL
CABLEADOV LAINSTALACION A PROFESIONALES.
£1
cab
l
eado
y
Ia
instalaci{m de este equipo requieren
una
competencia y expericn-
da
tc!c
nicaconfirmada. Para garantiz.arIa seguridad, p6ngase siempre
en
contacto
con el distrib
uid
or
al
que
ha c
omp
rado
el
eq
uipo paraconfiarle estas
ta
reas.
DISPONGA
EL
CABLEADO
DE
FORMA
QUE
LOS
CABLES
NOSE DOBLEN,
NOSE CONTRAIGAN
Nl
ROCEN
UN
BORDE
METALICO
AFILADO.
Aleje l
os
cab
l
es
y el cabl
eado
de
pieza
s m
6v
il
es
(como
l
os
railes
de
l
os
as
ientos) o d
t::
hor
de
s
punt
i
ag
udo
s o aliiados.
De
esta
f
or
ma
t::vi
tan\.
dobl
eces
y daflos en d
ca
bleado.
U
TI
LICE
LOS
ACCESORIOS
ESPECIFICADOS
E
INSTALELOS
CORRECTAMENTE
.
Ascg
Ure
sc
de
uti
li
zar
lo
s acccsorios cspccificados
so
l
ame
nte
. La utiliz
ad6n
de
o
tra
s piezas no
designada
s
pue
de
se
r Ia
ca
usa de daftos
en
el
interior
de
Ia
unidad
ode
un
a
in
sta
l
ac
iOn
in
corrcc
ta
. Las piezas
pue
den
aflojarse, lo que,
ade
m
as
de
ser
pe
ligr
oso,
pued
e
pr
ovocar
averla
s.
CONECTE
LOS
CABLES
CORRECT
AMENTE
Aseg
ltr
ese de
conecta
r l
os
co
nd
uc
t
ores
co
n
dav
e de col
or
es
segl
m
el
dl
ag
rama. Si realiza las
con
ex
iones
in
co
rre
cramen
te,
po
dria
averiar
Ia
unid
ad
o da
fl
ar
cl
sis
tem
a electrico
del
vehk.ulo.
DEJE
DE
USAR
LA UNIDAOINMEOIATAMENTE Sl
APARECE
ALGON
PROBUMA.
Su u
so
en
estas
c
on
d
icion
es
podria
ocas
ionar
lc
s
io
nes
personates
o daftos
al
pro
ducto.
Ll
ev
e la u
nidad
a
un
distri
bui
d
or
A
lpin
e
aut
or
izado
o al
Ce
ntro
de s
crv
i
cio
Alpine
mas
prOx
imo
pa
ra repa
rarl
a.
AVISO
Observacione
s
sob
re el
cuid
a
do
del
dispos
i
ti
vo
Para e
vitar
que
ca
m
hi
e la forma y el
co
lor
de
Ia lente, el s
oporte
o los
cab
l
es
de
Ia
cama
ra y
para
i
mpc
dir
qu
e se
t_ie
te
rior
en,
rea
lice Ia
limpi
eza
con
un pa
fl
o hUme
do
y sin
produc
tos
quim
icos.
AscgUresc
de
desco
nec
tar
el
cab
le d
el
polo (- ) de Ia
bateria
ant
es de
insta
la
r
su
HCE
-TC
130C~M
.
E
sto
red
ucira
las
posib
i
lidad
es de avcriar Ia
uni
dad en
caso
de
co
rtocircuito
.
Aseg
Ur
ese
de
c
on
ect
ar
los conductor
es
cun dave
de
co
l
ore
s scglln
el
dia
grama.
t.:nas conexiones incorrect
as
puedcn ocasionar un m
al
funcionami
cn
to
de
Ia
unidad o
pu
e
den
daiiar d sistema
t:lec
lr
ico d
el
vchiculo.
Cuando haga l
as
concxioncs
al
siste
ma
d
Cc
trico del vehiculo, tenga en cucnta
los
<:o
mpo
nen
tes
que
vie
nen
inslal
<ldos
de
ft.
brica (como
un
co
mputador
incorporado, por cjcmplo).
No
conccte a estos
condu
ctores parapmporc
iom1r
a
li
mentaci
6n
a es
ta
unidad. AI conc
cta
r
el
HCE-TG130GMa Ia caja
de
fusi-
bles, ascgUresc de que d
fu
sible desig
nad
o para d
ci
rcuito del HCE-
TGI31.K
iM
sea
de
l ampera
je
adecuado. De
lo
cont
rJr
io
, Ia unid
ad
y/o el vehiculo podnin
s
uf
rirda
ii.
os.Cuando tenga dudas,
co
nsulte a
su
distribuid
or
Alpine.
Observacio
n
es
s
ab
re
Ia c
<i
mar
a
tra
s
cr
a
La
dmara
tra
ser
a
esti
op
ti
mizada
pa
ra su
uso
en
este si
stema
.
Es
un
p
rodu
cto
exclusivament
c pcn
sa
do p
ara
cste si
st
ema y no debt: u
ti
lizarse
p
ar
a
ot
ros
ti
nes
.
Observadon
es
so
br
e las
con
exi
on
es
elec
tric
as
C
on
~t
c
t
e
d
ca
ble
de
~n
tr
a
da
inver
so
(
nar
anja
/blanco) al
ca
ble
de
a
limcnt
a
ci
On
de
la
lu
z
de
marcha
atri
s.
Con
sulte a su
pro
vec
dor
Alpine
para o
bt
ene
r
mas
info
rmacilm
. Confirme
qu
eSt! ha c
on
ec
ta
do
al
polo
ncgativo
de
Ia luz de
marcha
atd s.
Specifications /Specifications /Especificaciones
HCE-TG130GM HCE-TG130GM HCE-
TG
130GM
Po
we
r Requirements 6
.0
V
DC
(54
to
9.0VDC
Al
iment
ation nece
ssa
ire 6,0V contrnu Requ
is
itos
de
alime
nt
aci6n
6,
0V
CC
(
se
permiren
allowable) (5
.4
a
9V acceptable)
de
sd
e 5,4 a9,0 V
CC
)
Ground Type Negative gr
oun
d type Type
de
Mas
se
M
asse
negative T
ipo
de roma de tier
ra
Tipo
to
ma
de
tie
rr
a
Max.P
owe
r Consumpti
on
0.8W(60V) Con
so
mma
ti
on maximale
O,BW
(6,
0V) negativa
-
--
-
--
Out
pu
t Image
Mir
ror image,
CV
BS
(N
TSC
Sortie Ima
ge
Image miroir, CV
BS
Con
su
mo elect
rico max 0
,8W
(6,0
V)
vid
eo
signal)
(s
ignal vid
eo
NTS
C)
Sa
lida de imagen Imagen e
sp
ecular, CVBS
Image ou
tput
for 16:9 Format 16:9 p
ou
r ecr
ans
(se
i\al
de
video N
TSC)
wide-screen larges
Sa
lida de ima
gen
para
Ima
ge
Output
Imp
edance
750
(1vp-p) I
mp
edance So
rt
ie
Im
age
750
(1
vp
-p
) pantalla panorami
ca
de 16:9
Image Sensor 1
/4
inch CM
OS
im
age
sensor,aspect
ra
tio 1
6:
9 Capteur d
'i
ma
ge
Capreur d'i
ma
ge 1
/4
de
pouce,ratio 1
6:
9 l
mp
edan
c;a
de
sa
lida
75
0 (1vp-p)
de ima
ge
n
E
ff
e
ct
ive
Number
of
Pixels 1280 (horizontal)x720
(vertical) approximately
0.93
Me
ga
pixels
No
mbr
e
de
pixelseffe
ctif
s 1280 (horizo
nt
al)x
72
0 (ve
rt
r
ca
l)
environ
0,
93
Me
gapixels
- -
Sensor de imagen Sens
or
de
im
agen
CMOS
de
1/
4 pulg., rel
ac
i6n de
aspec
to
16:9
LensSe
ct
i
or
Focal leng
th
f=
0.
9m
m,
brig
htne
ss
F=1
.8
l.
entille
Di
stance focale
f=
0,
9mm,
l.
um1n
osite
F=1
.8
--
Num
er
o e
fe
ctivo 1280
(ho
rizontal)x
de
pixeles 720 (verti
ca
l)
Angle
of
Field
Ap
proximate
ly
180° Cha
mp
de vision Environ 180°
ap
roximadame
nt
e
hor
izo
nt
ally,
ap
proximately
ho
nzo
nt
al
em
ent, env.ron
0,
93
me
gapixel
es
142° vertically 142° ve
rt
ic
al
ement Secci6n
de
Ia le
nt
e L
ong
itud focal f=0,9 mm,
A
ut
omatic image A
ut
o
mat
ic expo
su
re F
on
ction d'aju
st
e
ment
Contr
61e
aut
omat
i
que
b
ril
lo F
=1
,8
A
dju
sti
ng
Function adjustm
ent
automatic
wh
ite
balance adj
us
t
men
t
Syn
ch
ron
iz
ation
Sys
te
m I
nt
ernal
sy
nc
hr
oni
za
tion
automarique de l'
im
age
de
!'exposition, reglage
a
utom
atique de Ia balance
desblan
cs
Angulo
de
ca
rnpo Aproximadamente
180° horizontalment
e,
ap
r
ox
irnadame
nt
e
Luminance S/N
41
dB
or
more
R
es
olut
ion
(ho
ri
zontal) 330TV lin
es
or
mor
e
(c
enter
ar
e
a)
Systeme de Synchron
is
at
ion interne
synchronisation
R
appo
rt
S1gnai
/B
ru
rt
41dB
ou
plus
14
2°
vertical
ment
e
Func
i6
n de ajuste de Ajuste
de
exposic
io
n
im
agen automatico au
tomat
ico,a
Ju
s
te
de
b
al
ance
de
blancos
Illumination
Rang
e
Ap
pr
oximately 1
.5
Lx
to
1
OO
kL
x
Re
so
l
ut
i
on
(
hor
izontal
e)
330 I
ignes
de
Te
levision
(centrale) aut
omat
ico
Sistemade sincronizaci
6n
Sincr
oni
zaci6n i
nt
erna
Op
erating Temperature Camera
sec
tion: -
22
to
Range +
15
8F(-30 to +70°
()
Pl
age d
'i
llumination approxi
mat
ivement
1,5 a
IO
Okl x Luminancia
se
n
al/r
uido
41
dBo m
as
StorageT
em
perature Camera
sec
tron: -40
to
Ra
ng
e
+
185F (
-40 to +
85
°()
Tempera
tu
re
de
C
am
era -22 a +
158
F
foncrionne
me
nt (-3o a +
?oo
c)
-
Resoluci6n (horizontal) 330 lineas
de
TV o mas
(
area
central)
E
xt
ernal
dimen
sions Camera
sec
tion:
(WxHxD) 23.6x2
3.
6x25.8mm
Temperature de stockage Camer
a:
-4
0 a
+
185F
(
-40 a
-+
SS"
C)
A
lc
ance de Ia 1l
umin
ac
i6n Aproximadarnen
te
de
1
,Sl
x a 1
OO
k
lx
(excluding projecti
on
on
D1
mens
io
ns
externes Camera: lntervalo de temperatura
Secc
i6n de Ia
ca
mar
a:
th
e rea
r)
(LxH
xP)
23
,6
x7
3,6x25.8mrn (s
auf
de funcionarnien
to
de -22 a + 15
8F
Weight C
am
era section:
33
g partie arriere
de
Ia camera)
(d
e -30 a
+7
0°C
)
(incl
ud
ing cable b
ut
not Poids Camera 33g
(y
com
pr
is lntervalo de
te
mperatu
ra
Se
cci
6n
de
Ia
cl
mara:
inclu
di
ng
br
acket and le
ca
ble m
ai
spassu
ppo
rt de almace
na
miento
de
-4
0a
+
185
F
screw)
et
Ia
VI
S)
(de -40 a +85°C)
Di
me
nsionesexternas
Se
cci6n de Ia camara:
(ancho
xal
t
oxp
ro
f.)
23,6x
23
,6x25,8
mm
(e
xclu
yendo
el
sa
lie
nte
en
Ia parte
tr
asera)
Peso Secci6n de Iacamara:
33
gr
(inclu1do el cable sin
so
p
or
te ni tornillo)
Operation /Utilisation /Funcionamiento
English
•
REAR
VI
EW
CAMERA
(HCE-
TG
1
30GM)
is designed
for
use
with Alpi
ne
AV
head units
or
nav
ig
at
ion systems with touch-
screen operation.
Franc;ais
• Vous devez utiliser Ia REAR VI
EW
CAMERA
(HCE-
TG130GM) exclusivementavec des unites principales
AV
ou
des syste
me
s de
navi
gation
munis
d'un ecran tactile de marque
Alpine.
· Espanol
·La
REAR
VIEW
CA
M
ERA
(HCE-TG130GM) esta disefiada
para su uso con
un
id
adesprincipales
AV
de Alpine o con
sist
emas
de
na
vegaci6n con tecnologia tactil.
Rearview Camera Operation /Utilisation
de
Ia camera
de
recui/Funcionamiento
de
Ia
camara
de
marcha atras
Turning the Rearview Camera On and Off/Activation
et
desactivation
de
Ia camera
de
recui/Encendido
y
apagado
de
Ia
camara de marcha atras
English
1 Place
the
vehicle's transmission
into
reverse.
Thevideo images b
eh
ind thevehicle and its surr
oun
dings
ar
e
di
sp
la
y
ed
wh
il
e in rever
se
.
2 Shifting out
of
reverse returns
the
display
to
whateverwas being shown before backing up.
Re
fer
also to the
Own
ers
Manua
l
of
the co
nn
ec
ted
monitor
/
navigation system.
Be sure to al
so
check behind
and
around
the car visually.
Us
e
the camera image to assist
in
show
in
g conditions behind
and
aro
und
the
ca
r.
De
pend
ing on where the
unit
is installed,
act
ual conditions
may
differfrom
th
e displa
ye
d image.
·
Franc;ais
Placez le levier
de
vitesses
du
vehicule
en
position
de
marche arriere.
Les
Imag
es
video de l'arriere et d
es
ale
nt
o
ur
s
du
veh
iC
Uif
s'a
ffiche
nt
lorsque le levier de vit
es
s
es
est place sur Ia
posi
tio
n
dema
rche arr
ie
re.
2
Si
vous placez le levier
de
vitesses dans
uneposition autre
que
Ia marche arriere, le
moniteur revient
a
l'ecran precedent.
Reportez-vous egaleme
nt
au
mo
de d'emploi
du
mo
niteur!
systeme de navigation connecte.
N'oubliez pas de verifier
au
ssi visuelleme
nt
les conditions
a
larriere et
autour
du vehicul
e.
Utilisez /'i
ma
ge de Ia
came
ra
co
mm
e un guide
mo
ntrallt l
es
conditions
tll
arriere
et
tout
autour
du
vehicule.
Selon
/'u
n
it
e installee, les conditions reell
es
peuv
e
nt
et
re
diff
ere
nt
es de
ce
lles apparaissant sur /'image.
· Espanol
1 Coloque Ia transmision delvehiculo en marcha
atras.
L
as
imagen
es
de
video de
tr
as
del vehiculo y
su
s
proximidades
se
visualizan durante Ia mar
ch
aatr
as.
2
Si
anula Ia marcha atras, volvera a Ia pantalla
que
se
visualizaba antes
de
empezara ir
marcha atras.
Consulte
el
Manual de instrucciones del siste
ma
de
monitor
o
navegaci6n conectado.
Asegurese
de
t
am
bien comprobar
po
r det
ra
sy alrededor
del cache con
Ia
vista. Uti/ice
Ia
ima
gen de Ia camara para
c
ono
ce
r Ia condici6n
por
de
tn
is
y
alrededordel
ca
che.
En
fun
ci6n de
Ia
unidad
instalada, las condicion
es
reales
pod
ri
an diferir de
lo
qu
e aparece en Ia
im
agen.
Changing
the
Rear Image Configuration /Modification de Ia configuration
de
l'image arriere /Cambio
de
Ia
configuracion
de
Ia imagen trasera
English
1 Touch the screen while
the
camera image
is
displayed.
2 Touch [Back], [Panorama], [Corner] or [Top]
to
choose the viewing angle.
[Back]: Rear View
Displ
ays
an image
of
the
area
behind the vehicle.
Use
th
is
when backing
into
a parking space.
[Panorama]: Panorama View
Disp
la
ysa general perspective
of
what
isbehind the
ca
r.
Use
th
iswhen you wa
nt
to check mainly behind the
ca
r.
[Top]: Ground View
Displ
ays
an
image from above
down
to
the
lower section
of
the
ca
r.
Use
this when
to
deter
min
e the c
ar's
position in
re
lation
to
the
curb, et
c.
[Corner]: CornerView
Displa
ys
a
div
ided image l
ef
t and ri
ght
of ce
ntr
e.U
se
this
mainly
wh
en checking the leftand ri
gh
t directional view.
Franc;ais
Espanol
1 Appuyez sur l'ecran lorsque !'image
de
Ia 1 Toque Ia pantalla cuando aparezca Ia imagen
camera est affichee.
de
Ia camara.
2 Appuyez sur Iatouche [Back], [Panorama], 2 Toque [Back], [Panorama], [Corner] o [Top]
[Corner] ou [Top] pourchoisir un angle
de
vue. para elegirel angulo
de
vision.
[Back]: Vue arriere [Back]:Vision trasera
Affiche l'image
co
rrespondant
a
Ia
zone
se
trouvant de
rr
iere Muestra una imagen
de
Ia zonasituada detr
as
del vehiculo.
le vehicule.
Ut
ili
se
z cette image lorsque vousvous garez en Uti
lice
es
taopcion cuando
vaya
marcha atras para
apa
r
car.
fa
i
sa
nt
ma
rc
he arrier
e.
[Panorama]:Vision panoramica
[Panorama]:Vue panoramique
Muestra u
na
perspectiva general deaquello que
se
encue
ntr
a
Affiche une perspecti
ve
generale de
ce
qui
se
trou
ve
a
l'arriere por
de
tr
as
del coche. Utilice
es
te m
odo
cuar
do de
see
du vehicul
e.
Utili
sez
-
la
si vous souhait
ez
principalement co
mp
robar principal
men
te Ia partetrase
ra
del coch
e.
ve
ri
fi
er
l'arriere du vehicul
e.
[Top]: Vision inferior
[Top]:Vue Plongeante
Muestra una imagen desde Ia partesuperior del coche hasta
Affiche une image
de
haut en
bas
jus
qu
'au
bas
de
Iavoi
tu
re.
Ia
seccion inferi
or
del mismo. Utilicela cuando
de
see concr
et
ar
Utili
sez
-la pour determiner
Ia
p
os
i
tio
n
du
vehicule p
ar
rapport Ia posicion
de
l cache en relacion a un bord
ill
o, etc.
au virage, et
c.
[Corner]:Vision
de
esquina
[Corner]: Vue
de
co
in
Muestra una imagen
di
vidi
da
a izquier
da
y
derecha del
Affiche une imagedivisee des partiessitu
ees
ag
au
che
eta
ce
ntr
o.Utilicela princi
pa
lmente a Ia hora de
co
nsultar
Ia
vision
droite du centre. Utili
se
z-
la
princi
pa
leme
nt
pour
ve
rifier Ia vue direccional izquie
rda
y
derec
ha.
versla gauche
et
vers
Ia
droite.
RearView /Vue arriere
I
Vision trasera Panorama View /Vue
panoramique
I
Vision panoramica Ground
View
/VuePlongeante
I
Vision inferior CornerView /Vue
de
coin
I
Visi
on
de
esquina
Installation
Kit
Parts
/Pieces
de
Ia
trousse d'installation /Piezas
del
kit
de
instalaci6n
Tailgate
handle
surround
/Encadrement
de
Ia poignee
du
hayon arriere
/Marco
para Ia
manija
de
Ia puerta trasera
Main Harness Fluted Tubing /Tubes a
cannelures
du
faisceau
principai!Tubos
acanalados
del
arnes
principal
Tailgate
handle
overlay
/Revetement
de
Ia
poignee
du
hayon arriere
I
Revestimiento
de
Ia manija
de
Ia
puerta
trasera
Owner's
manual/Guide
d'utilisation
I
Manual
de
operaci6n
r
Main
Harness/Faisceau
principal/Ames
principal
Adhesive Foam Pads
/Coussinets
adhesifs
en
mousse
/Aimohadillas
de
espuma
adhesivas
(10) 8
inch
wire
ties
/(10) liens
metalliques
de
8
po
(20 em)
/Bridas
para
cables
de
8
pulgadas
(20 em)
(1
0)
Registration
Card
/Fiche
d'inscription
I
Tarjeta
de
registro
D
Key
Locations
/Emplacements
cles
/Ubicaciones
clave
Direct
connect
to
radio
I
Connexion
directe
a
Ia
radio
I
Entry
point
to
cab
illustration
I
Illustration
des
points
d'
entree
dans
Ia
cabine
/llustraci6n
del
punto
de
ingreso
a Ia cabina
See
di
a
gram
be
low
for
e
ntry
point
to
cab
/Consultez
le
schema
ci-dessous
pour
de
Ia
camera
Head
Unit/
Module
de
tete
/Unidad
Harness
Rubber
Grommets
/Passe-
cables
en
caoutchouc
du
faisceau I
Pasacables
de
goma
del
arnes
Handle
Mounting
bolt
/Boulon
de
fixation
aIa
poignee
/Perno
de
montaje
para Ia
manija
~'
( 0 \
,'-._./
:
r
.y
..
.:::\
'~_)
3M
Handle
mounting
Tape
/Adhesif
de
fixation
de
poignee
3M
/Cinta
para
montaje
para
Ia manija 3M
Camera
mounts
in
tailgate
latch
/Fixations
de
Ia
camera
sur
le
verrou
du
hayon
arriere
/La
camara
se
monta
en
el
pestillo
de
Ia
puerta
trasera
connaitre
les
points
d'
entree
connectee
a
Ia
dans
Ia
cabine
I
Consulte
el
radio
/La
entrada
diagrama
mas a
bajo
para
de
Ia
camara
se
conocer
el
punto
de
ingreso
a
conecta
a Ia radio
Ia
cabina
Tie
into
back
-
up
lights
/A
attacher
aux
feux
arriere
/Conectar
a
las
luces
de
reversa
Factory
Tailgate
handle
surround
removal
1 Lower the tailgate
to
open position and remove lower access
cover by removing
(4)
Torx T27.
n n
2 Remove one M8 x 25mm using a 13 mm socket. (Remove the
lowest
of
the
(3)
bolts
which are a triangle pattern see illustration
below. u
3 Disengage the
(3)
clips on factory surround locations shown below
and remove the tailgate handle cover from the outside of the tailgate.
The handle will remain
in
place only the surround will be removed.
'-----------r
~--~oM
4 With the handle surround
completely
removed, route all wires
from tailgate handle camera through
to
the lower access cover.
Not
used
for
HCE-TG130GM
5 Snap in the handle surround and engage the
(2)
clips
to
hold
it
in
place. Only
(2)
clips are used and M6 bolt
for
3rd attachment point.
6 Use the M6 x
25
mm machine
screw
with
lock
and flat washer
to
bolt
in the handle surround.
u
Routing
the
LED
light
wires
to
tront
1 Once the cables are routed out
of
the lower access hole start
to
bundle them together and cover with Fluted tubing getting ready
to
run wiring
to
cab.
2 With fluted tubing installed slip one
of
the
two
the rubber
grommets over the end and slide it
back
towards where the cable
exists the tailgate. Careful
to
make sure the grommet is facing
the correct
way
for
installation.
Feed the cable with tubing installed through the round opening
in the
body
below
the center
of
the bed. Push the grommet into
place and see illustration below
for
reference.
\
3 Routing the cable up
to
the cab is done
by
paralleling the factory
harness run on
the
Driver's side
of
the
truck
under
the
bed.
Note: be careful
to
allow the
back
up
positive and negative leads
to
route
to
the
Driver's rear taillight
to
connect
to
the
backup
input leads.
Routing
the
camera
wires
to
backup
lead
tie
in
1 With the Tailgate
down
extract
the
(2)
Phillips head
tap
screws
that
hold in
the
driver's side taillight.
And
remove
the
taillight.
I
I
R @
0
0 0
2 The wiring can either
be
routed
up
from
the
harness
below
or
routed
down
then
tied
into
the
harness red and
black
wires.
There is a
clear
path
that
the
factory
wiring
goes
down
the
main
harness
follow
that
route.
3
Notice
that
the
backup
lamp
is
at
the
bottom
position
of
the
taillight. Tie in the LED light
leads
Red (+) and
Black
(-)from
the
camera
to
the
Green
for(+)
and
Black
for(
-)
of
the taillights.
Routing
the
camera
wires
to
front
1 See illustration
below
for
routing
path
of
of
camera
data
cable
from
taillight
to
dashboard
.
It
will parallel
the
factory
harness and
wire
tie
to
it
at
regular intervals. There are
(1
0)
wiretires supplied
with
the
kit. Use wire
ties
for
this
operation.
\
Note:
Ensure
that
the
headunit
has
the
Orange/white lead
tied
in
properly into
the
backup
trigger
lead. This will allow
the
camera
to
come
on
each
time
the
vehicle is placed
into
reverse
2 Once
the
cable
is
routed
to
the
Front seat area
under
the
truck
look
for
a large round
rubber
grommet
that
is an ideal
place
to
run the cable
from
the
outside
to
inside
the
cab. See illustration
below
for
location.
Driver's seat
floor
area
3
Aft
er e
nt
ering
th
e
cab
continu
e
to
route
th
e camera
dat
a ca
bl
e
to
the
back
of
the
radio
and
connect
to
the
camera
input
pigtail
cable using the
direct
connector
connection.
If
dash
disassembly
instructions are needed then refer
to
X009-GM
or
X009-GM2.
Fidele ason engagement
de
ne fournir que des produits
de
qualite, ALPINE ELECTRONICS OF AMERICA, INC. («Alpine
n)
est heureus
e
de
vous
offrir
cette garantie. Nous
vous
suggerons
dele
lire attentivement
et
en entier. Si vous avez Ia moindre question, veuillez
communiquer avec l'un
de
nosconcessionnaires ou appelerdirectement Alpine aux numeros listes ci-dessous.
ePRODUITS
COUVERTS
PAR
LA
GARANTIE
Cette garantiecouvre les produits
audio
de
voiture
(«
le produit »). Elle ne couvre les
produits
que
dans
le pays ou its ont ete achetes.
eDUREE
DE
LA
GARANTIE
Cette garantie
est
en vigueur
pendant
un
an
a
compter
de Ia
date
d'achat
par
le
client initial.
ePERSONNES
PROTEGEES
PAR
lA
GARANTIE
Seull'acheteur
original
du
produit, s'il reside
aux
Etats-Unis,
aPorto Rico ou au Canada,
peut
se prevaloir
de
Ia garantie.
eCE
QUI
EST
COUVERT
Cette garantie couvre tous les defauts
de
materiaux
et
de fabrication (pieces et main d'reuvre)
du
produit.
eCE
QUI
N'EST
PAS
COUVERT
Cette garantie ne couvre pas ce qui suit:
CD
Les dommages survenus durant
le
transport
des
produits
renvoyes aAlpine pour etre repares (les reclamations doivent
etre adressees au transporteur);
CZ>
Les degats provoques par
un
accident
ou
une mauvaise utilisation;
@ Tout
degat
provoque
par
negligence, usage inapproprie;
mauvaise utilisation ou par le non-respect
des
instructions
indiquees dans le manuel de l'utilisateur;
@)
Les
dommages
dus
aIa force majeure, notamment aux
tremblements
de
terre,
au
feu, aux inondations, aux tempetes
ou
aux
autres cataclysmes naturels, ainsi
que
les frais
ou
les
depenses relatifs al'eniEwement
ou
aIa reinstallation
du
produit
;
@ Les services rendus
par
une personne, physique
ou
morale
non autorisee;
® Les produits dont le numero de serie a ete efface, modifie ou retire;
('j)
Les
produits
qui
ont ete adaptes
ou
modifiessans le
consentement d'Aipine;
® Les
produits
qui ne
sont
pas distribues par Alpine aux
Etats-Unis, aPorto Rico ou au Canada;
®
Les
produits
qui
n'ont
pas
ete
achetes
par
l'entremise
d'un
concesslonnalre
Alpine
autorise.
eCOMMENT
SE
PREVALOIR
DE
lA
GARANTIE
CD
II
VOUS
taut reniettre le produit necessitant
des
reparations a
un centre
de
service autorise Alpine ou aAlpine
meme
et
en
assumer lesfrais detransport. Alpine a le
choix
entrereparer
le produit
ou
le remplacer
par
un produitne
uf
ou revise, le tout
sansfrais
pour
vous. Si les reparations sont
couvert
es
par
Ia
garantie
et
si le produit a ete envoye a
un
centre
de
service
Alpine
ou
aAlpine,
le
paiement
des
frais
de
reexpedition
du
produit incombe Alpine.
~
Vous devez donner une description detaillee
des
problemes
qui
sont
al'origine
de
votre demande
de
reparation.
@ Vous devez joindre Ia preuve de votre achat du
produit
.
@)
Vous devez embailer soigneusement le produit
pour
eviter
tout
dommage
durantson transport. Pour eviter Ia perte
du
paquet, il
est
conseille
de
choisir un transporteur
qui
propose
un service
de
suivi
des
envois.
eUMITATION
DES
GARANTIES
TACITES
LA DUREE DE TOUTES LES GARANTIES TACITES, Y COMPRIS
LA GARANTIE D'ADAPTATION AL'UTILISATION ET
LA
GARANTIE
DE
QUALITI~
.
MARCHANDE, EST UMITEE ACELLE
DE
LA
GARANTIE EXPRESSE DETERMINEE CI-DESSUS. PERSONNE
N'EST AUTORISE AENGAGER AUTREMENT LA RESPONSABILITE
D'ALPINE DANS
LE
CADRE
DE
LA
VENTE
D'UN PRODUIT.
eEXCLUSIONS
DE
LA
GARANTIE
ALPINE STIPULE EXPRESSEMENT QU'ELLE N'EST
PAS
RESPONSABLE
DES
DOMMAGES ACCESSOIRES
ET
INDIRECTS
PROVOQUES PARLE PRODUIT. LES DOMMAGES ACCESSOIRES
SONT LES FRAtS
DE
TRANSPORT DU PRODUIT VERS
UN CENTRE DE SERVICE ALPINE,
LA
PERTE
DE
TEMPS
DE
L'ACHETEUR ORIGINAL, LA PERTE D'UTILISATION DU PRODUIT,
LES BILLETS D'AUTOBUS,
LA
LOCATION
DE
VOITURES ET TOUS
LES
AUTRES FRAtS LIES ALA GARDE DU PRODUIT. LES
DOMMAGES INDIRECTS SONT LES FRAtS
DE
REPARATION OU DE
REM
PLACEMENT D'AUTRES BIENS ENDOMMAGES SUITE AU
MAUVAIS FONCTIONNEMENT
DU
PRODUIT.
LES
RECOURS PREVUS
PAR
LES PRESENTES EXCLUENT ET
REMPLACENT TOUTE AUTRE FORME
DE
RECOURS.
ellEN
ENTRE
lA
GARANTIE
ET
lA
lOI
La garantievous donne
des
droits specifiques, mais vous pouvez
aussi jouir d'autres droits, qui varient
d'un
Etat ou
d'une
province a
l'autre.
En
outre, certains Etat
et
certaines provinces interdisent
de
limiter Ia duree des garanties tacites ou d'exclure les
dommages
acc
essoires
ou
indirects. Dans ce
cas
,les limites et les exclusions
de
Ia garantie peuvent ne pas s'appliqueravous.
eClAUSE
APPLICABLE
AU
CANADA
SEULEMENT
Pour
que
Ia garantie
soit
valable, il taut qu'un centre d'installation
autorise
ait
installe le systeme audioAlpine
dans
votre vehicule
et
qu'il
ait
ensuite appose son
cachet
surIa garantie.
eNUMEROS
D'APPEL
DU
SERVICE
A
lA
CLIENTElE
Si vous avez besoin
de
nos services, veuillez appeler Alpine aux
numeros ci-dessous
pour
le centre
de
service autorise Alpine le
plus proche.
SERVICE A
LA
CLIENTELE 1-800-421-2284,
ext.
860304
ASSISTANCE TECHNIQUE 1-800-TECH-101 (1-800-832-4101)
Ou consultez notre site Web al'adresse http://www.alpine-usa.com
ALPINE ELECTRONIQUE DE L'AMERIQUE, INC.,19145 Gramercy Place, Torrance, California 90501, U.S.A.
N'envoyez
pas
de
produits
a
cette
adresse.
Appelez notre numero gratuit ou visitez notre site Web si
vous
recherchez un centre
de
service.
/U$1LPINE~
ALPINE
ELECTRONICS
OF
AMERICA,
INC.
("Alpine"), is dedicated to quality craftsmanship and is pleased to offer this
Warranty.
We
suggest that you
read
it thoroughly. Should you have any questions, please contact your Dealer or contact
Alpine at one ofthe telephone numbers listed below.
ePRODUCTS
COVERED:
This Warranty covers Car Audio Accessories ("the product").
Products purchased in the Canada are covered only
in the Canada. Products purchased
in
the U.S.A. are
covered only in the U.S.A.
eLENGTH
OF
WARRANTY:
This Warranty is in effect
for
one year from the date
of
the
first consumer purchase.
eWHO
IS
COVERED:
This Warranty only covers
the
original purchaser
of
the
product, who must reside in the United States, Puerto
Rico
or
Canada.
eWHAT
IS
COVERED:
This Warranty covers defects in materials
or
workmanship
(parts and labor)
in
the product.
eWHAT
IS
NOT
COVERED:
This Warranty does not cover the following:
CD
Damage occurring during shipment
of
the product
to
Alpine
for
repair (claims must be presented
to
the
carrier).
(2)
Damage caused
by
accident
or
abuse.
@ Damage caused
by
negligence, misuse, improper
operation
or
failure
to
follow instructions contained
in
the Owner's manual.
@ Damage caused
by
act
of
God, including without
limitation, earthquake, fire, flood, storms
or
other acts
of
nature. Any cost
or
expense related
to
the removal
or
reinstallation
of
the product.
@ Service performed by an unauthorized person,
company
or
association.
@ Any product which has the serial number defaced,
altered
or
removed.
(J)
Any product which has been adjusted, altered
or
modified without Alpine's consent.
@ Any product
not
distributed
by
Alpine within the United
States, Puerto Rico
or
Canada.
®
Any
product
not
purchased
from
an
Authorized
Alpine
Dealer.
eHOW
TO
OBTAIN
WARRANTY
SERVICE:
CD
You
are responsible for delivery
of
the product
to
an
Authorized Alpine Service Center
or
Alpine
for
repair
and for payment
of
any initial shipping charges. Alpine
will,
at
its option, repair
or
replace the product with a
new
or
reconditioned product without charge. If
the
repairs are covered
by
the warranty, and if the product
was shipped
to
an Authorized Alpine Service Center
or
Alpine, Alpine will pay the return shipping charges.
(2)
You
should provide a detailed description
of
the
problem(s)
for
which service is required.
@
You
must supply proof
of
your purchase
of
the
product.
@
You
must package the
product
securely
to
avoid
damage during shipment.
To
prevent lost packages
it is recommended
to
use a carrier that provides a
tracking service.
eHOW
WE
LIMIT
IMPLIED
WARRANTIES:
ANY IMPLIED WARRANTIES INCLUDING FITNESS
FOR
USE
AND MERCHANTABILITY ARE LIMITED
IN
DURATION
TO
THE
PERIOD
OF
THE EXPRESS
WARRANTY
SET
FORTH
ABOVE AND
NO
PERSON
IS
AUTHORIZED
TO
ASSUME
FOR
ALPINE ANY OTHER
LIABILITY
IN
CONNECTION WITH THE SALE
OF
THE
PRODUCT.
eHOW
WE
EXCLUDE
CERTAIN
DAMAGES:
ALPINE EXPRESSLY DISCLAIMS LIABILITY
FOR
INCIDENTAL AND CONSEQUENTIAL DAMAGES
CAUSED BY THE PRODUCT. THE TERM "INCIDENTAL
DAMAGES"
REFERS
TO
EXPENSES OF
TRANSPORTING THE PRODUCT TO THE ALPINE
SERVICE CENTER, LOSS OF THE ORIGINAL
PURCHASER'S TIME, LOSS OF THE USE
OF
THE
PRODUCT, BUS
FARES,
CAR RENTALS
OR
OTHERS
COSTS RELATING
TO
THE CARE AND CUSTODY
OF
THE PRODUCT. THE TERM "CONSEQUENTIAL
DAMAGES" REFERS
TO
THE COST
OF
REPAIRING
OR
REPLACING OTHER PROPERTY WHICH
IS
DAMAGED
WHEN THIS PRODUCT DOES NOT WORK
PROPERLY.
THE REMEDIES PROVIDED UNDER THIS WARRANTY
ARE EXCLUSIVE AND
IN
LIEU OF ALL OTHERS.
eHOW
STATE/PROVINCIAL
LAW
RELATES
TO
THE
WARRANTY:
This Warranty gives you specific legal rights, and you
may also have other rights which vary from state
to
state and province
to
province.
In
addition, some states/
provinces
do
not allow limitations on
how
long
an
implied
warranty lasts, and some
do
not allow the exclusion
or
limitation
of
incidental
or
consequential damages.
Accordingly, limitations as
to
these matters contained
herein may
not
apply
to
you.
eiN
CANADA
ONLY:
This Warranty is not valid unless
your
Alpine car
audio product has been installed in
your
vehicle
by
an
Authorized Installation Center, and this warranty stamped
upon installation by the installation center.
eHOW
TO
CONTACT
CUSTOMER
SERVICE:
Should the product require service, please call the
following number
for
your nearest Authorized Alpine
Service Center.
CUSTOMER SERVICE 1-800-421-2284, ext. 860304
TECH
SUPPORT
1-800-TECH-101 (1-800-832-4101)
Or visit our website at; http://www.alpine-usa.com
ALPINE ELECTRONICS OF AMERICA, INC., 19145 Gramercy Place, Torrance, California 90501, U.S.A.
Do
not
send
products
to
this
address.
Call the toll free telephone number
or
visit the website
to
locate a service center.

Other manuals for HCE-TG130GM

1

Other Alpine Dashcam manuals

Alpine HCE-C252RD User manual

Alpine

Alpine HCE-C252RD User manual

Alpine HCE-C155 User manual

Alpine

Alpine HCE-C155 User manual

Alpine HCE-C107D User manual

Alpine

Alpine HCE-C107D User manual

Alpine HCE-C200R User manual

Alpine

Alpine HCE-C200R User manual

Alpine TOPVIEW HCE-C500 User manual

Alpine

Alpine TOPVIEW HCE-C500 User manual

Alpine HCE-C210RD User manual

Alpine

Alpine HCE-C210RD User manual

Alpine HCE-C210RD User manual

Alpine

Alpine HCE-C210RD User manual

Alpine HCE-C155 User manual

Alpine

Alpine HCE-C155 User manual

Alpine HCE-C157D User manual

Alpine

Alpine HCE-C157D User manual

Alpine KCX-C200B User manual

Alpine

Alpine KCX-C200B User manual

Alpine DVR-F800PRO User manual

Alpine

Alpine DVR-F800PRO User manual

Alpine RCV-C310 User manual

Alpine

Alpine RCV-C310 User manual

Alpine DVR-C320S User manual

Alpine

Alpine DVR-C320S User manual

Alpine DVR-C320R User manual

Alpine

Alpine DVR-C320R User manual

Alpine DVR-F800PRO User manual

Alpine

Alpine DVR-F800PRO User manual

Alpine HCE-C210RD User manual

Alpine

Alpine HCE-C210RD User manual

Alpine HCE-C2100RD User manual

Alpine

Alpine HCE-C2100RD User manual

Alpine DVR-F200 User manual

Alpine

Alpine DVR-F200 User manual

Alpine HCE-C107D User manual

Alpine

Alpine HCE-C107D User manual

Alpine KIT-R1AU User manual

Alpine

Alpine KIT-R1AU User manual

Alpine HCE-C155 User manual

Alpine

Alpine HCE-C155 User manual

Alpine HCE-C125 User manual

Alpine

Alpine HCE-C125 User manual

Alpine HCE-TG130GM User manual

Alpine

Alpine HCE-TG130GM User manual

Alpine DVR-C310R User manual

Alpine

Alpine DVR-C310R User manual

Popular Dashcam manuals by other brands

Akaso DL9 user manual

Akaso

Akaso DL9 user manual

Smarty HDBX1500 user guide

Smarty

Smarty HDBX1500 user guide

Pittasoft Blakvue DR500-HD manual

Pittasoft

Pittasoft Blakvue DR500-HD manual

Xiaoyi YI Dash Cam Nightscape manual

Xiaoyi

Xiaoyi YI Dash Cam Nightscape manual

Gnet G-On user manual

Gnet

Gnet G-On user manual

Eborn G-01 owner's manual

Eborn

Eborn G-01 owner's manual

Viofo A139 user manual

Viofo

Viofo A139 user manual

AUTOWOEL D330GD user manual

AUTOWOEL

AUTOWOEL D330GD user manual

Vacron VVG-MDE50 Operation manual

Vacron

Vacron VVG-MDE50 Operation manual

Thinkware H100 user manual

Thinkware

Thinkware H100 user manual

ring RSDCR1000 manual

ring

ring RSDCR1000 manual

Boyo VTK380HD user manual

Boyo

Boyo VTK380HD user manual

Amacam AM-81 quick start guide

Amacam

Amacam AM-81 quick start guide

Mio MiVue 338 manual

Mio

Mio MiVue 338 manual

Thinkware F750 installation guide

Thinkware

Thinkware F750 installation guide

Thinkware X500 user manual

Thinkware

Thinkware X500 user manual

QVIA AR790 user manual

QVIA

QVIA AR790 user manual

Safety Track UCIT 2 Desktop viewer user guide

Safety Track

Safety Track UCIT 2 Desktop viewer user guide

manuals.online logo
manuals.online logoBrands
  • About & Mission
  • Contact us
  • Privacy Policy
  • Terms and Conditions

Copyright 2025 Manuals.Online. All Rights Reserved.