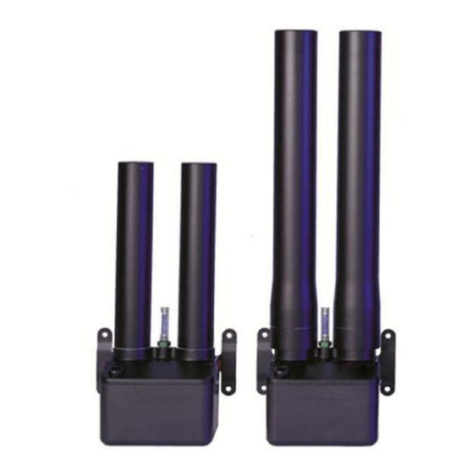
Altec AIR P013464 User manual

Altec AIR, LLC Quiet Dryer User’s Guide
100510468 –REV C
Quiet Dryer
User’s Guide
Includes:
Filter Kit (51365-R) Installation & Maintenance

Altec AIR, LLC Quiet Dryer User’s Guide
Page 2 of 25 100510468 –REV C
1. Welcome & Congratulations
Congratulations on your purchase of a new ALTEC AIR Refrigerated Non-Cycling
Series Air Dryer! We here at ALTEC AIR are very proud of our products and we are
committed to providing you with the best value and service possible.
We are sure that you will be satisfied with your new Air Dryer and would like to thank
you for choosing ALTEC AIR for your Air Dryer requirements. We also hope that you
will continue to choose us for your future compressed air treatment purchases.
For information about this and other ALTEC AIR products, please visit us on the web at:
www.AltecAIR.com
2. Introduction
PLEASE READ THIS USER’S GUIDE THOROUGHLY AND SAVE FOR
FUTURE REFERENCE.
This User’s Guide is provided for the benefit of our customers and contains information
and direction specific to the Altec AIR P013464 QUIET DRYER. It will cover topics
including safety, specifications, installation, testing, maintenance, and troubleshooting
issues. Observation and compliance with this User’s Guide will ensure the maximum life
and efficiency of your Quiet Dryer.
This User’s Guide should be read thoroughly prior to installing, operating, or servicing
the Quiet Dryer in order to become familiar with the recommended procedures. This will
minimize the possibility of personal injury or damage to the dryer due to improper
operation or handling.

Altec AIR, LLC Quiet Dryer User’s Guide
Page 3 of 25 100510468 –REV C
3. Table of Contents
1. Welcome & Congratulations .......................... 2
2. Introduction ..................................................... 2
3. Table of Contents............................................. 3
4. Safety & Warning Information...................... 4
5. Overview & Specifications.............................. 5
5.1 Product Description.................................... 5
5.2 Key Features............................................... 5
5.3 Technical Specifications............................. 5
6. Installing Your Quiet Dryer ........................... 6
6.1 Safety & Warning Information................... 6
6.2 Before You Begin....................................... 7
6.3 Included Contents....................................... 8
6.4 Required Tools and Materials..................... 8
6.5 Installation Steps......................................... 9
6.6 Installation Checklist ................................ 14
7. Maintaining Your Quiet Dryer .................... 15
7.1 Safety & Warning Information................. 15
7.2 Maintenance Log Sheet ............................ 16
7.3 Verifying Consistent Timer Cycling......... 16
7.4 Replacing the Purge Muffler .................... 17
7.5 Replacing the Filter Element .................... 17
8. Replacement Parts & Accessories ................ 19
8.1 Front of Dryer........................................... 19
8.2 Back of Dryer ........................................... 20
8.3 Accessories for your Quiet Dryer ............. 21
8.4 Ordering Parts from Altec AIR................. 21
9. Appendix ........................................................ 22
9.1 Wiring Diagram........................................ 22
10. Limited Warranty Agreement.................... 23
11. Contacting Altec AIR .................................. 24
11.1 General.................................................... 24
11.2 Sales........................................................ 24
11.3 Service .................................................... 24
11.4 Technical Support................................... 24
12. Maintenance Log Sheet............................... 25
13. Notes.............................................................. 25

Altec AIR, LLC Quiet Dryer User’s Guide
Page 4 of 25 100510468 –REV C
4. Safety & Warning Information
This section contains general information about safety and warning points to consider and
adhere to during installation and maintenance of your Quiet Dryer. PLEASE READ
THIS SECTION BEFORE PERFORMING ANY OPERATION OR PROCEDURE ON
YOUR QUIET DRYER.
Additional warnings specific to an operation or procedure will also be presented
throughout the following sections. These will include the symbol as well as a label of
“WARNING!”, “CAUTION!”, or “IMPORTANT!”Please be sure to pay close
attention for these warnings and read them as you encounter them.
IMPORTANT!
Performing procedures not described in this User’s Guide MAY VOID
THE WARRANTY.
IMPORTANT!
Appropriate inlet filtration is MANDATORY and outlet filtration is
recommended for all applications.
IMPORTANT!
Each Quiet Dryer is sized for specific operating conditions. For
OPTIMUM performance, the maximum available operating pressure
should be maintained across the unit. Any pressure reduction or flow
control should be done downstream of the unit.

Altec AIR, LLC Quiet Dryer User’s Guide
Page 5 of 25 100510468 –REV C
5. Overview & Specifications
5.1 Product Description
The Altec AIR P013464 Quiet Dryer is a compact, regenerative air dryer designed to
dry compressed air to a pressure dewpoint (PDP) of -70°C (-94°F) at the rated inlet
conditions. The pressure-swing adsorption (PSA) process used is fully automatic and
will remain consistent with minimal required periodic maintenance.
5.2 Key Features
•Incorporates Quiet-Purge technology to minimize decibel level
•Fully re-pressurizing design for steady outlet pressure
•Max outlet flow of 9 SCFM (250 LPM) @ 90 PSIG
5.3 Technical Specifications
Dimensions
22.5"H x 15.2"W x 5.6"D
Voltage Requirements
220 VAC, 1 Phase, 50/60 Hz
Electrical Connections
Screw Terminals
Operating Ambient Temperature
33°F to 125°F (0.5°C to 52°C)
Inlet Air Conditions
≤ 86°F (30°C) Recommended @90 PSIG
125°F (52°C) Maximum
Cycle Timer
Solid State with Memory
Purge Cycle
44 seconds purge; 12 seconds re-pressurizing
60 seconds per side continuous
Separation Media
Activated Alumina
Noise Level
72 dBA
Inlet / Outlet Connections
12MM Push-to-Lock Fittings

Altec AIR, LLC Quiet Dryer User’s Guide
Page 6 of 25 100510468 –REV C
6. Installing Your Quiet Dryer
6.1 Safety & Warning Information
WARNING!
Extreme care should be exercised to avoid contact with live
electrical circuits. Many procedures performed during installation
of this Quiet Dryer require the equipment to be running, creating a
situation for potential electrical shock. It is highly recommended
that you remove all jewelry before performing any procedures.
CAUTION!
Proper Installation & Maintenance as outlined in this User’s Guide
is extremely important to ensure the reliability and longevity of the
equipment as well as prevent damage or personal injury.
CAUTION!
Incoming power to dryer must be 220 VAC, 1 Phase, 50/60 Hz
CAUTION!
Do NOT exceed the SCFM outlet flow capacity of the dryer. Be
aware of what your dryer is rated for before you install your
P013464 Quiet Dryer.

Altec AIR, LLC Quiet Dryer User’s Guide
Page 7 of 25 100510468 –REV C
6.2 Before You Begin
6.2.1 Carefully inspect the entire unit including the shipping box for ANY
DAMAGE CAUSED BY SHIPPING. If any shipping damage is
detected, it is important to file a claim with the shipping company prior
to continuing the installation procedures.
6.2.2 Read the entire Installing Your Quiet Dryer section to familiarize yourself
with the components and procedures before performing the installation.
6.2.3 Verify the installation location of the Quiet Dryer:
•Ambient temperature is between 33° and 125°F
NOTE: Higher temperatures will decrease component lifespan.
•Meets the following power requirements:
•220 VAC, 1 Phase, 50/60 Hz

Altec AIR, LLC Quiet Dryer User’s Guide
Page 8 of 25 100510468 –REV C
6.3 Included Contents
(1) P013464 Quiet Dryer
(1) User’s Guide
51354-R Filter Kit Contents (if applicable):
(1) 5 Micron Particulate Prefilter
(1) 0.01 Micron Coalescing
Prefilter
(1) L-Bracket
(1) 0.5 Micron Particulate
Afterfilter
(1) Regulator w/ Gauge
(2) Joiner Set
6.4 Required Tools and Materials
•Mounting hardware (as required)
•Small adjustable wrench
•Medium adjustable wrench
•Philips head screwdriver
•Needle nose pliers
•Cup of soapy water
•1-inch paint brush (recommended)

Altec AIR, LLC Quiet Dryer User’s Guide
Page 9 of 25 100510468 –REV C
6.5 Installation Steps
6.5.1 Remove the P013464 Quiet Dryer from packaging.
6.5.2 Inspect the Quiet Dyer for
loose parts, wiring, tubing or
damage.
IMPORTANT: If ANY
SHIPPING DAMAGE is
detected, file a claim with the
shipping company prior to continuing the installation procedures.
6.5.3 Place the P013464 Quiet Dryer at the operating location.
6.5.4 Remove the plugs from the
Inlet & Outlet ports by
holding in the ferrule while
pulling on the plug.
IMPORTANT!
To properly operate the Quiet Dryer, Altec AIR recommends that all
essential elements, air filtration and regulator components be
installed.

Altec AIR, LLC Quiet Dryer User’s Guide
Page 10 of 25 100510468 –REV C
NOTE: If installing the 51365-R Filter Kit, proceed to the next steps.
If NOT installing the 51365-R Filter Kit, proceed to step 6.5.14 .
CAUTION: When installing a typical complete Quiet Dryer, or Point-of-Use
System, Altec AIR recommends assembling ALL components before
mounting the P013464 Quiet Dryer.
6.5.5 Assemble the Outlet
Pressure Regulator.
6.5.6 Attach the Regulator
Assembly to the Outlet Filter
using the included Joiner Set.
6.5.7 Remove the bowl from the 5
Micron Particulate Prefilter.

Altec AIR, LLC Quiet Dryer User’s Guide
Page 11 of 25 100510468 –REV C
6.5.8 Attach the L-Bracket to the
5 Micron Particulate Prefilter.
6.5.9 Replace the bowl on the
5 Micron Particulate Prefilter.
6.5.10 Remove the Bracket from
the other included Joiner Set.
6.5.11 Attach the 5 Micron
Particulate Prefilter to the
0.01 Micron Coalescing
Prefilter using the Joiner Set
(Bracket removed).

Altec AIR, LLC Quiet Dryer User’s Guide
Page 12 of 25 100510468 –REV C
6.5.12 Attach the Inlet and Outlet
Filter Assemblies to the back
of the Quiet Dryer Frame.
6.5.13 Using necessary fittings,
connect the Air Source and
Process supply lines:
6.5.13..1 Connect Air
Source to the input
port on the 5
Micron Particulate
Prefilter.
6.5.13..2 Connect a hose from the outlet port of the 0.01 Micron
Coalescing Afterfilter to the Input port on the Quiet Dryer.
6.5.13..3 Connect a hose from the Outlet port on the Quiet Dryer to the
input port on the 0.5 Micron Particulate Afterfilter.
6.5.13..4 Connect Process Supply to the outlet port on the Regulator.

Altec AIR, LLC Quiet Dryer User’s Guide
Page 13 of 25 100510468 –REV C
6.5.14 Connect the Air Source
and Process supply lines:
6.5.14..1 Connect air
source supply line
to the Input port.
6.5.14..2 Connect the process supply line to the Outlet port.
NOTE: This instruction step only applies when NOT installing the
51365-R Filter Kit.
6.5.15 Wire 220 VAC power to
the Solid-State Timer.
WARNING:
Make sure that power has
been disabled to the wires
prior to connecting them.
6.5.16 Energize the 220 VAC power supply circuit to the Quiet Dryer.
6.5.17 Adjust Outlet Pressure
Regulator as required (if
installed).

Altec AIR, LLC Quiet Dryer User’s Guide
Page 14 of 25 100510468 –REV C
6.5.18 Using necessary hardware (not supplied), mount the Quiet Dryer in its
final location.
6.5.19 Check for air leaks:
NOTE: This is a general procedure that can be applied to any fitting or hose
that has air pressure in it.
•Listen for any ‘hissing’ sounds which may indicate a fitting or hose air
leak.
•Use a 1-inch paint brush to
dab soapy water on the
air fitting or hose
connection to be tested.
If air bubbles appear at the
connection, this indicates that
air is leaking from the
connection.
If any leaks are detected, take steps to seal them off (as necessary):
•Tighten the fitting
•Re-connect the hose end
•Replace the fitting / hose / component
6.6 Installation Checklist
No shipping damage was detected.
Securely mounted to installation location.
No air leaks are present.

Altec AIR, LLC Quiet Dryer User’s Guide
Page 15 of 25 100510468 –REV C
7. Maintaining Your Quiet Dryer
In order to ensure that your P013464 Quiet Dryer continues to operate efficiently and
reliably, Altec AIR recommends performing the following maintenance procedures at the
specified Six-Month intervals.
It is also recommended that you print out the included Maintenance log sheet (section 12.
) and record all completed maintenance for historical tracking and reference purposes.
The log sheet includes a Section reference column which indicates the User’s Guide
section containing the information about the specific procedure. Please refer to these
sections for detailed procedural information.
NOTE: When operating at higher ambient temperatures, it is recommended that
maintenance be performed more frequently.
7.1 Safety & Warning Information
WARNING!
Extreme care should be exercised to avoid contact with live
electrical circuits. Many procedures performed during
installation, operation, testing, and maintenance of this Quiet Dryer
require the equipment to be running, creating a situation for
potential electrical shock. It is highly recommended that you
remove all jewelry before performing any procedures.
CAUTION!
SHUT DOWN IMMEDIATELY FOR REPAIRS if the Quiet
Dryer shows any evidence of excessive noise.

Altec AIR, LLC Quiet Dryer User’s Guide
Page 16 of 25 100510468 –REV C
7.2 Maintenance Log Sheet
MODEL: LOCATION NAME:
SERIAL NUMBER: ADDRESS:
DATE INSTALLED:
Maintenance Interval (Months)
Procedure
Section
6
12
18
24
30
Visually Inspect Quiet Dryer for Loose Wiring,
Tubing, or Hardware
-
Verify Consistent Timer Cycling
7.3
Replace Purge Muffler
7.4
Replace Filter Elements
(if 51365-R Filter Kit is installed)
7.5
Maintenance Performed by:
Date of Maintenance:
7.3 Verifying Consistent Timer Cycling
7.3.1 On the Solid-State Timer,
check to see if the AC1 and
AC3 LEDs are lighting back
and forth every 60 Seconds.
CAUTION!
Observe precautions for handling Electrostatic Sensitive Devices.

Altec AIR, LLC Quiet Dryer User’s Guide
Page 17 of 25 100510468 –REV C
7.4 Replacing the Purge Muffler
7.4.1 Remove the Purge Muffler
by unscrewing it Counter-
Clockwise.
7.4.2 Install the new Purge
Muffler by screwing it
Clockwise to the fitting.
7.5 Replacing the Filter Element
NOTE: This is general procedure and will vary slightly visually depending on
the Filter Element being replaced. This procedure covers the following:
- 5 Micron Particulate Prefilter
- 0.01 Micron Coalescing Prefilter
- 0.5 Micron Particulate Afterfilter
7.5.1 Remove the Filter Bowl.

Altec AIR, LLC Quiet Dryer User’s Guide
Page 18 of 25 100510468 –REV C
7.5.2 Remove the Filter Element
by unscrewing it Counter-
Clockwise.
7.5.3 Install the new Filter
Element by screwing it
Clockwise to the housing.
7.5.4 Replace the Filter Bowl.

Altec AIR, LLC Quiet Dryer User’s Guide
Page 19 of 25 100510468 –REV C
8. Replacement Parts & Accessories
8.1 Front of Dryer
Description
Part Number
Quantity
Recommended
Spare
Tower Switching
Valve
Included in Tower Switching Valve
Assembly - P013379
1
(1)
Purge Valve
Purge Muffler
P011884
1
Outlet Shuttle
P09717F262
1
Frame
P013463
1
Desiccant Tower
P010409P
2
Pilot Valve
P011883F11
1
(1)
Timer
P012927
1
(1)

Altec AIR, LLC Quiet Dryer User’s Guide
Page 20 of 25 100510468 –REV C
8.2 Back of Dryer
Description
Part Number
Quantity
Recommended
Spare
0.5 Micron
Particulate Filter
Included in Filter Kit w/ Regulator –
51365-R
1
Joiner Set
Included in Filter Kit w/ Regulator –
51365-R
2
5 Micron
Particulate Prefilter
Included in Filter Kit w/ Regulator –
51365-R
1
L-Bracket
Included in Filter Kit w/ Regulator –
51365-R
1
Regulator
w/ Gauge
Included in Filter Kit w/ Regulator –
51365-R
1
0.01 Micron
Coalescing Prefilter
Included in Filter Kit w/ Regulator –
51365-R
1
Table of contents
Other Altec AIR Dryer manuals