Altis INOVA M User manual

0
INOVA M MOTORIZED TREADMILL USER MANUAL

1
CONTENT----------------------------------------------------------------------------------------------------------------------1
I M P O R T A N T S A F E T Y P R E C A U T I O N S - - - - - - - - - - - - - - - - - - - - - - - - - - - - - - - - - - 2
A S S E M B L Y I N S T R U C T I O N S ---------------------------------------------3 - 5
F O L D I N G & U N F O L D I N G I N S T R U C T I O N S -----------------------------6
I N C L I N E I N S T R U C T I O N S - - - - - - - - - - - - - - - - - - - - - - - - - - - - - - - - - - - - - - - - - - - - - - - - - - - - 7
GROUNDING METHODS-----------------------------------------------------8
O P E R AT I O N G U I D E - - - - - - - - - - - - - - - - - - - - - - - - - - - - - - - - - - - - - - - - - - - - - - - - - - - - - - - 9 - 1 2
G E T T I N G S T A R T E D G U I D E ----------------------------------------- - - - - - - 1 3
S A F E T Y E X E R C I S E ----------------------------------------------------------1 4
W A R M - U P E X E R C I S E -------------------------------------------------------1 5
M A I N T E N A N C E I N S T R U C T I O N S - - - - - - - - - - - - - - - - - - - - - - - - - - - - - - - - - - - - - - - - 1 6
B E L T A D J U S T M E N T ---------------------------------------------------------17
E X P L O D E D D R A W I N G -----------------------------------------------------1 8
PA R T S L I S T- - - - - - - - - - - - - - - - - - - - - - - - - - - - - - - - - - - - - - - - - - - - - - - - - - - - - - - - - - - - - - - - 1 9 - 20
E R R O R C O D E A N D S I G N I F I C A N C E - - - - - - - - - - - - - - - - - - - - - - - - - - - - - - - - - - - 2 1
CONTENTS
PLEASE READ ALL INSTRUCTION IN THE OWNER'S MANUAL CAREFULLY
BEFORE ASSEMBLY AND USE THE TREADMILL.
AND KEEP IT FOR FUTURE REFERENCE.

2
WARNING
Before starting any exercise program, consult with your physician or health professional,especially
the person who is above 35 years old people or has some health problems before. We take no
responsibility for any troubles or hurts due to above reasons. Don't power on until you finish
assembly the treadmill and covering the protected top of motor.
ATTENTIONS
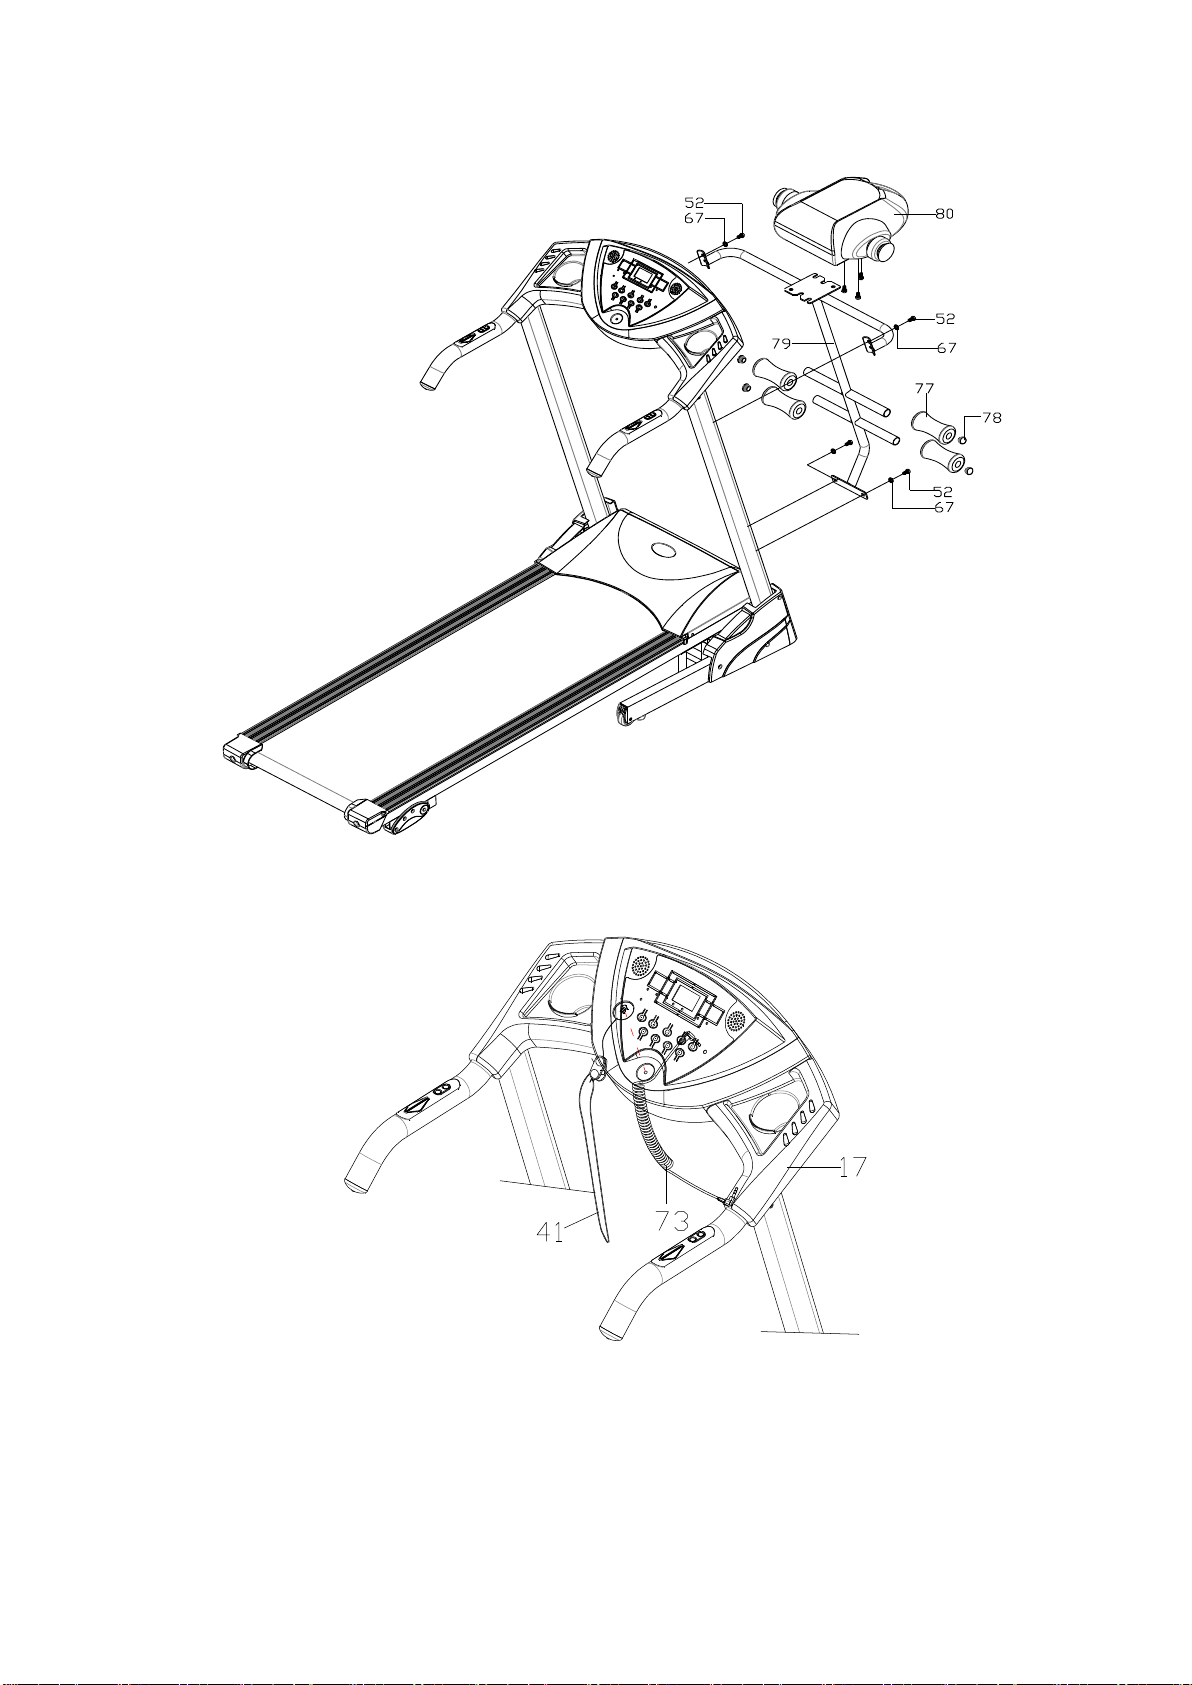
01. Do not plug anything into any parts of this equipment, or it may damage.
02.When using this treadmill, keep attaching the safety pull pin rope to your clothes or belt. If
the treadmill should suddenly increase in speed due to an electronics failure or the speed
inadvertently increased, the treadmill will come to a sudden stop when the pull pin is
disengaged from the console.
03.If you use the treadmill for the first time, you must hold the handrail until you feel
comfortable on the running belt.
04. Never start the treadmill while you are standing on the walking belt, and always stand on
the foot rails on the sides of the frame until the belt is moving.
05. Do not wear long, loose fitting clothing that could become caught in the treadmill. Always
wear running or aerobic shoes with rubber soles.
06. The treadmill is only used for adults, child use the treadmill must have adult on side.
07. Keep small children or pet away from the treadmill during operation.
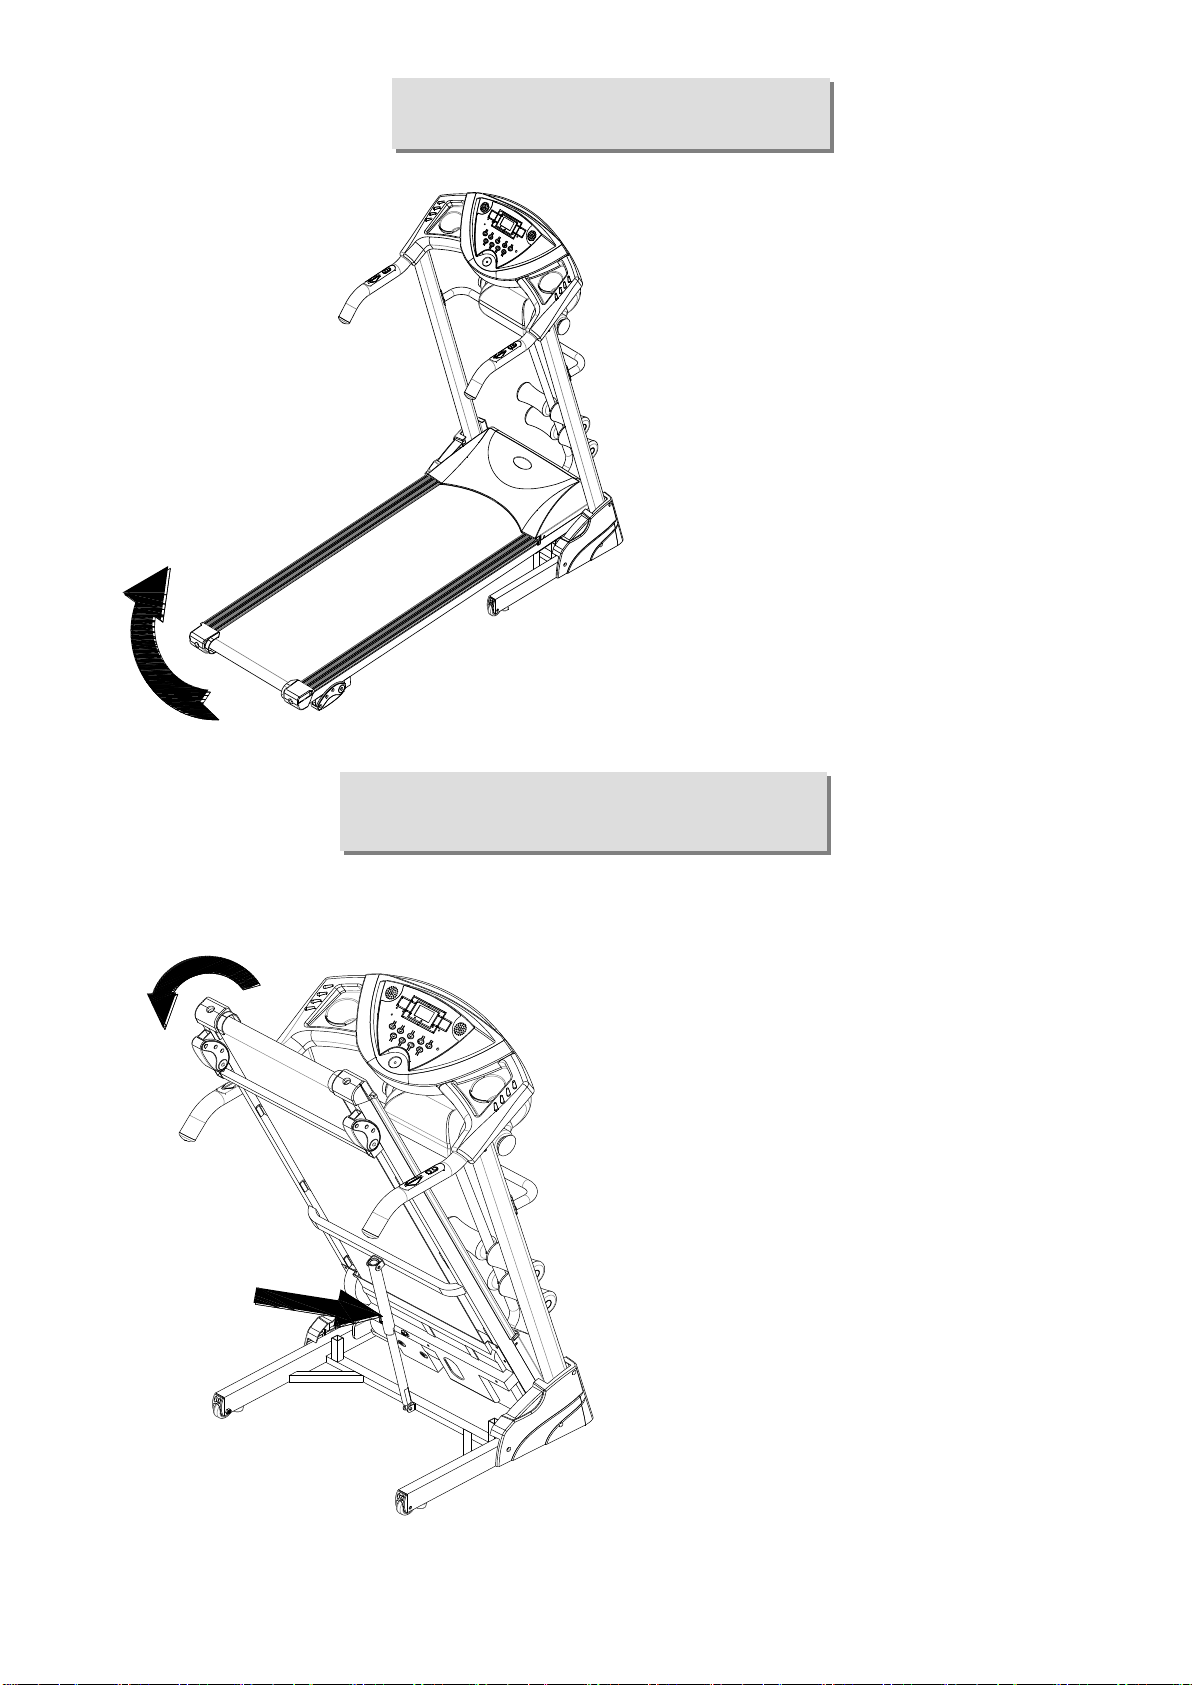
08. Position the treadmill on a clear, level surface. Do not place the treadmill on thick carpet as
it may interfere with proper ventilation.
09.When the treadmill is not being used, the power cord should be unplugged and the safety
pull pin removed. Note the power cord of motorized treadmill made by special equipment,
and if it is broken, please contact distributor quickly. The power cord of motorized treadmill
is specialized. If the power cord is damaged, please purchase it from distributor or contact
our company directly.
10. Do not do exercise in 40 minutes after meal.
IMPORTANT SAFETY PRECAUTIONS

3
WHEN YOU OPEN THE CARTON, YOU WILL FIND THE BELOW SPARE PARTS.
1
3L/R
17
41
52
67
68
69
70
73
74
75
76
77
79
80
81
SPARE PARTS LIST
NO.
DESCRIPTION
REMARK
QTY
NO.
DESCRIPTION
REMARK
QTY
1
MAIN FRAME
1
73
MP3 WIRE
1
3L/R
UPRIGHT
2
74
FRONT COVER
2
17
COMPUTER
1
75
FRONT COVER
PLUG
2
41
SAFETY KEY
1
76
BOLT
M4*15
4
52
BOLT
M8*15
14
77
SIT-UP FOAMS
4
67
WASHER
∮14.5*∮8.4
*t0.8
14
79
MASSAGER FRAME
1
68
ALLEN WRENCH
S5
1
80
MASSAGER
1
ASSEMBLY INSTRUCTIONS

4
69
SCREW DRIVER
1
81
TWISTER
1
70
ALLEN WRENCH
S6
1
FIXING TOOLS
5# ALLEN WRENCH 1 pc、6# ALLEN WRENCH 1 pc、SCREW DRIVER 1 pc
STEP 1:
Take out the UPRIGHT (3L/R) & COMPUTER (17); As the picture shown, connect
COMPUTER UP/MIDDLE/BOTTOM WIRE (36,37,38) well with COMPUTER (3), and fix
them up step by step;
ASSEMBLY STEPS

5
STEP 2: Fix the MASSAGER FRAME (79) & MASSAGER (80) to the MAIN FRAME (2);
STEP 3: Put on the SAFETY KEY (41) & MP3 WIRE (73).
ATTENTION
Must confirm complete assembly as the required above and lock all bolts.
Do the following operations after checking everything is ok.
Before you use the treadmill, please read the instructions carefully.

6
Lift up the machine and force to
pull up until you heard "click"
that made by safety casing stuck
the pneumatic cylinder.
Use foot to kick the safety sleeve
lightly and pull down the
machine at the same time as the
arrow direction. Then the
machine will fall down smoothly.
FOLDING INSTRUCTIONS
UNFOLDING INSTRUCTIONS

7
Adjust the incline by moving
the pin ,There are three
levels.
INCLINE INSTRUCTIONS

8
This product must be grounded. If it should malfunction or breakdown, grounding
provides a path of least resistance for electric current to reduce the risk of electric shock.
This product is equipped with a cord having an equipment-grounding conductor and a
grounding plug. The plug must be plugged into an appropriate outlet that is properly
installed and grounded in accordance with all local codes and ordinances.
DANGER –Improper connection of the equipment-grounding conductor can result in a risk
of electric shock. Check with a qualified electrician or serviceman if you are in doubt as to
whether the product is properly grounded. Do not modify the plug provided with the
product –if it will not fit the outlet, have a proper outlet installed by a qualified electrician.
This product is for use on a nominal 230 volt circuit and has a grounding plug that looks like
the plug illustrated in sketch A in following figure. Make that the product is connected to an
outlet having the same configuration as the plug. No adapter should be used with this
product.
GROUNDING METHODS

9
LCD WINDOW FUNCTION
1. "SPEED" WINDOW:
1.1 Display running speed ;
1.2 Display program number ;
1.3 Display 3 seconds countdown when the treadmill is starting ;
1.4 Display the "FAT" characters when in the mode of calorie;
2. "TIME" WINDOW:
Display running time.
3. "DIST." WINDOW:
3.1 Display running distance ;
3.2 Display category: "-1-" --- "-5-" when in the mode of calorie ;
4. "CAL." WINDOW:
4.1 Display heat and program movement level value ;
4.2 Display parameters in the mode of bodyfat testing: "sex"、"age"、"height" 、"weight"、
"body fat" ;
5. "PULSE" WINDOW:
Display heartbeat value.
OPERATION GUIDE

10
BUTTON FUNCTION
1. "PROGRAM" BUTTON:
Program select key. Choose order: manual mode -- P1 –P9 -- FAT cycle.
2. "MODE" BUTTON:
2.1 It is countdown select key when in standby condition. Choose order: manual
mode - time countdown - distance countdown - heat countdown cycle ;
2.2 It is calorie parameters select key when in the mode of calorie. Choose order: "sex"、
"age"、"height"、"weight".
3. "START" BUTTON:
Press this button to start.
4. "STOP" BUTTON:
Press this button to stop.
5. "SPEED + -" BUTTON:
Adjust speed when treadmill start. Press the button more than 2 seconds, and it will be up or
down continuously.
6. “SPEED SHORTCUT” BUTTON:
3,6,9 adjust the speed when treadmill running.
7. BUTTONS ON THE LEFT HANDLEBAR:
Start and stop key.
8. BUTTONS ON THE RIGHT HANDLEBAR:
Speed adjust key.

11
MAIN FUNCTION
Turn on the power, all window lighten 2 seconds, then enter standby condition.
1. QUICK START (MANUAL MODE)
Put on safety lock and press the start button. After 3 seconds, the treadmill will start at
the lowest speed. Click "SPEED + -", "3 6 9" or buttons on right handlebar to adjust
speed. Press the "STOP" button or take away the safety lock to stop.
2. COUNTDOWN MODE
Press the "MODE" button, choose :time countdown、distance countdown、heat countdown.
Windows display a default value and shine. Click "SPEED + -" button to adjust to the necessary
values. Press START button. After 3 seconds, the treadmill will start with the lowest speed. Click
"SPEED + -", "3 6 9" or buttons on right handlebar to adjust speed. When countdown to 0,the
treadmill will stop slowly.
3. BUILD-IN PROGRAM
Press program button to choose any one in P1---P9 and the time window shows default and
flickers. press speed button to adjust the time you need. Built-in program totally has 20 sections
and running time of every section is set time/20. Press start button, the treadmill will start
running after 3 seconds countdown. After one section exercise finish, it will go into next section
automatically and the speed will change to the speed of corresponding section. And you can
adjust the speed with “SPEED +,-“ when running. After all sections finish, the program will stop
and the treadmill slow down and stop. And you can also press stop button or take away safety
lock to stop the machine.
PULSE FUNCTION
When the treadmill is running, hold the handle pulse about 5 seconds, it will display pulse data. It has
heart-shaped graphics when testing pulse. This data is only for reference and can not be as medical data.
BODY TESTER(FAT)
In the standby condition , press PROGRAM button continuously to enter “FAT” body fat test.
When window displays “FAT”,Press MODE and choose order ("-1-" SEX, "-2-" AGE, "-3-" HEIGHT, "-4-"
WEIGHT). Press SPEED+, SPEED- to set. When all parameters are selected, press MODE button
again.The window will display "-5-" and "---". Then grasp the hand pulse, the window will display your
body fat index.

12
PARAMETER DISPLAY AND SETTING RANGE
BODY FAT INDEX COMPARING
SLEEP FUNCTION
When treadmill stops and no actions for more than 10 minutes, the system will shut down
the display and go into sleep status. Press any key to wake it up.
SAFETY LOCK FUNCTION
The window shows"---" when take away the safety lock and the treadmill will stop
quickly with "didi" alarm noise. And put the safety lock on, set program default.
RUNNING PARAMETER DISPLAY AND SETTING RANGE
Parameters category
Default
Range
Remark
SEX(-1-)
0(man)
0—1
0=man 1=woman
AGE(-2-)
25
10—99
HEIGHT(-3-)
170 CM
100—240 CM
WEIGHT(-4-)
70KG
20—160KG
Body fat index(BMI)
Obesity
<19
Thin
19--26
normal
26--30
Over weight
>30
Obesity
Display range
Default of
Mode
Default of
Program
Range
SPEED
0.8—12.0 KMH
--------
--------
--------
TIME
0:00—99:59
30:00
30:00
5:00---99:00
DISTANCE
0.00—99.9 KM
1.00KM
--------
0.5—99.5 KM
CALORIES
0—999 Kcl
50Kcl
--------
10—995 Kcl

13
PROGRAM EXERCISE CHAT
PREPARE
If you are around 35 years old, or have health problem, even this is your first time to do
fitness exercise, please consult doctor or professional before use it.
Before do exercise, please stand on the side to learn how to operate, such as start, stop and speed
adjustment. After that stand on the plastic deck of the treadmill board, catch hold of the handrail,
start by 1.6--3.2 km/h low speed, stand straight, look forward, one foot try to do few times, then
stand on the belt to do exercise. After adapting, you can adjust the speed to 3--5 km/h and keep
doing about 10 minutes, then stop.
TIME INTERVAL
MODE
SET TIME / 20 = EVERY GRADE TIME
1
2
3
4
5
6
7
8
9
1
0
1
1
1
2
1
3
1
4
1
5
1
6
1
7
1
8
1
9
2
0
P1
SPEED
2
3
3
4
5
3
4
5
5
3
4
5
4
4
4
2
3
3
5
3
P2
SPEED
2
4
4
5
6
4
6
6
6
4
5
6
4
4
4
2
2
5
4
2
P3
SPEED
2
4
4
6
6
4
7
7
7
4
7
7
4
4
4
2
4
5
3
2
P4
SPEED
3
5
5
6
7
7
5
7
7
8
8
5
9
5
5
6
6
4
4
3
P5
SPEED
2
4
4
5
6
7
7
5
6
7
8
8
5
4
3
3
6
5
4
2
P6
SPEED
2
4
4
4
5
6
8
8
6
7
8
8
6
4
4
2
5
4
3
2
P7
SPEED
2
3
3
3
4
5
3
4
5
3
4
5
3
3
3
6
6
5
3
3
P8
SPEED
2
3
3
6
7
7
4
6
7
4
6
7
4
4
4
2
3
4
4
2
P9
SPEED
2
4
4
7
7
4
7
8
4
8
9
9
4
4
4
5
6
3
3
2
GETTING STARTED GUIDE

14
EXERCISE
Please stand on the side to learn how to operate, such as speed and incline, until you know
it then can start do exercise. Walk 1 km by constant step need about 15-25 minutes, please record
it in fact. And walk 1km by 4.8 km/h need about 12 minutes. If you can do it easily by few times,
then can adjust the high speed and incline, and go on to do 30 minutes, you can take a good
exercise. Before do slow walk exercise,please remember it is for your health and can not irritable.
AMOUNT OF EXERCISE
SHORTCUT——The best way to save time is do 15-20 minutes exercise.
Warm up 2 minutes by 4.8 km/h, and adjust the speed to 5.3 km/h and 5.8 km/h, continue
do exercise by this two speeds. Then add 0.3 km/h per 2mins speed increase, until you feel
breathing quickened but not breathe hard. Keep this speed to do exercise, if feels uncomfortable,
please reduce 0.3 km/h. Leave 4 minutes to reduce speed at last. If you fell it is hard to strengthen
exercises by increase speed, then you can choose the way of increase incline slowly, it also can
strengthen exercise.
CONSUMPTION OF HEAT——This way can really consumption the heat.
Warm up 5 minutes by 4--4.8 km/h speed, then add 0.3 km/h per 2 minutes increasing speed,
you can do 45mins on the speed that you feel it is comfortable and challenge. In order to
strengthen do exercise. You can do 1 hour by this speed and add 0.3 km/h speed when you heard
some business advertisements, and return the speed back when go to next program, so at this
period, the heat will be consumed enough. At last keep 4 minutes to reduce the speed.
EXERCISE FREQUENCY
Target is 3--5 times per week, do 15-60mins each time. It is better to make a time schedule,
do not accord to your favor. You can get the strenuous exercise degree through adjusting speed
and incline. We'd suggest that do not set incline when start do exercise.

15
Please consult professional staff before do exercise. He can help recommendation exercise
rate/intension and time according to your age and health condition. When running, if you feel
chest tightness or chest pain, irregular Heartbeats, short of breath, dizziness or other unwell,
please stop immediately! And consult professional before you want continually to do exercise. If
you often use treadmill, you can choose normal walk speed or jog speed.
If you have no experience or can't make sure the best testing speed, you can reference below
standard:
Speed 1-3.0 km weak constitution people.
Speed 3.0-4.5 km sedentary or not often exercise people.
Speed 4.5-6.0 km walking quickly people.
Speed 6.0-7.5 km fast walk people.
Speed 7.5-9.0 km jogger.
Speed 9.0-12.0 km intermediate speed runner.
More than 12.0 km excellent runner.
ATTENTION : It is suitable for walker to choose less than or equal to 6 km speed.
It is suitable for runner to choose more than or equal to 8.0 km speed.
SAFETY EXERCISE

16
It is better to do some warm-up exercise. Warm the
muscle easy stretch, so use 5-10 minutes to warm-up.
Then stop and according below method to do stretch
exercise for five times, and each foot do 10 seconds or
more every time. After running, do those stretch
exercises one more time.
1. Reach Down Knees slightly bent and body s lowly
bent forward, back and shoulders relax, trying to
touch toes. Keep 10-15 seconds, and relax. Repeat 3
times (See picture l).
2. Hamstrings Stretches Sitting on a clean cushion,
put one leg straight, the other inward and close to
the inside of the straight leg. Try to touch your toes
by hand. Keeping 10-15 seconds, and relax. Repeat 3
times for each leg (See picture 2).
3. Crus and Feet Tendon Stretches Standing with
two hands on the wall, one leg behind. Keeping your
legs straight and the heel on the ground, tilt to the
wall or tree. Keep 10-15 seconds, and relax. Repeat
3 times for each leg (See picture 3).
4. Quadriceps Stretches Keeping your balance with
your left hand holding on the wall or table, then
stretch your right heel toward your buttocks slowly,
until you feel very tense in the front of your thigh.
Keep10-15 seconds, and relax. Repeat 3 times for
each leg (See picture 4).
5. Sartorius (Inner Muscles of the Thigh) Muscle
Stretches Sitting down with your soles opposite and
knees outward. Pull feet toward groin Keep 10-15
seconds, and relax. Repeat 3 times (See picture 5).
维护指南
WARM-UP EXERCISE

17
WARNING Please make sure pull out the treadmill's power plug before cleaning or
maintaining the product.
CLEANSING General cleaning or the unit will greatly prolong the treadmill's life. Keep
treadmill clean by dusting regularly. Be sure to clean the exposed part of the deck on
either side of the walking belt and also the side rails. This reduces the build up of foreign
material underneath the walking belt. Make sure the shoes are clean. The top of the belt
may be cleaned with a wet soapy cloth. Be careful to keep liquid away from inside the
motorized treadmill frame or from underneath the belt.
WARNING Always unplug the treadmill from the electrical outlet before removing the
motor cover. At least once a year remove the motor cover and vacuum under the motor
cover.
This treadmill's walking belt and deck are equipped with a pre-lubricated, low
maintenance deck system. The belt/ deck friction may play a major role in the function
and life of your treadmill, thus requiring periodic lubrication. We recommend a periodic
inspection of the deck. We recommend lubrication of the deck according to the following
timetable:
Light user (less than 3 hours/ week) once three weeks
Medium user (3-5 hours/ week) once two weeks
Heavy user (more than 5 hours/ week) every week
We suggest you buy lubricating oil from local distributors or contact our company directly.
Pay attention, any other maintains please ask professionals for help.
MAINTENANCE INSTRUCTION

18
Place treadmill on a level surface. Make treadmill
run at approximately 6-8 km/h, observe the
running belt deviate condition.
If the belt has drifted to the right, unplug the
safety lock and power switch, and turn the
right adjusting bolt 1/4 turn clockwise, then
insert the power switch and safety lock, make
the treadmill running, observe the running
belt deviate condition. Repeat above steps
until the running belt be placed in the middle.
See picture A
Once the treadmill belt swerving to the left,
unplug the safety lock, turn off the power,
then with the left adjusting bolt clockwise
rotation 1 / 4 laps, and turn on the safety lock
and power to make treadmill running,
checking the deviation of the treadmill belt.
Repeat the above steps until the belt
centered. See picture B
The treadmill belt will gradually relax after
above steps or after a period of time using,
unplug the safety lock, and turn off the power,
with the two adjusting bolt clockwise rotation
1 / 4 laps, and turn on the safety lock and
power to make treadmill running, then
standing on the belt to confirm the tightness.
Repeat the above steps until the belt
moderate tightness. See picture C
BELT ADJUSTMENT

19
EXPLODED DRAWING
This manual suits for next models
1
Table of contents
Other Altis Treadmill manuals
Popular Treadmill manuals by other brands

Hotel Fitness
Hotel Fitness TR9800-E user manual

STAR TRAC FITNESS
STAR TRAC FITNESS E-TR owner's manual

Christopeit Sport
Christopeit Sport CS 2000 Assembly and exercise instructions

Weslo
Weslo CADENCE C78 user manual

Casall
Casall 1.1T Assembly instructions and owner's manual

VIRTUFIT
VIRTUFIT TR-50i owner's manual