Altos BrainSphere R365 F4 User manual

User Guide
BrainSphere
R365 F4

System setup
System notes
Thank you for purchasing your Altos server. This user guide is intended as a reference for
experienced server technicians and helps detail many of the features available in Altos
servers. For more detailed information about any particular component or software
solution, you may consult the technical specifications or the user manuel for that
application.
Note: Before opening or removing any components
please contact your local certified Altos service
representative
Warning: Any parts or components damaged
during replacement by a non-certified technician
are not covered by the warranty. For details,
please consult the warranty guide from your system.

System component identification
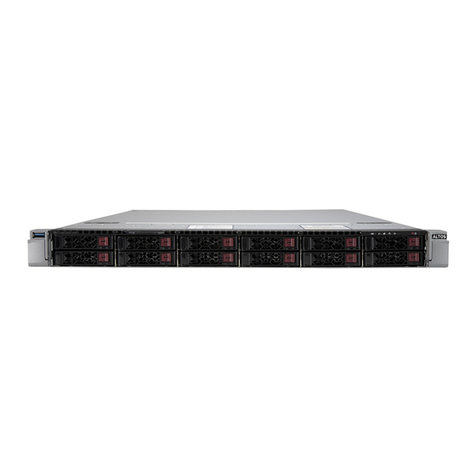
Altos BrainSphere R365 F4 system front panel configuration:
10x 2.5” Drive SKU
No.
Description
1. Front Panel LEDs and buttons
2. Front USB 3.0 ports
Orange HDD Latches Support NVMe
4x 3.5” Drive SKU
No.
Description
1. Front USB 3.0 ports
2. Front Panel LEDs and buttons
2
1
2

Altos BrainSphere R365 F4 system back panel feature identification:
No.
Description
1. VGA port
2. USB 3.0 ports
3. GbE LAN ports
4. Serial Port
5. 10/100/1000 Server management LAN port
2 3 45

System controls and indicators
Front panel controls
4x 3.5” Drive SKU
No.
Name
Color
Status
Description
Press the button server generates a NMI to the processor
1. NMI button if the multiple-bit ECC errors occur, which effectively halt
the server.
2. Reset Button Press the button to reset the system.
LAN 1/2
3/4 Active/Link
LEDs
Green
Solid On Link between system and network or no access.
Green
Blink Data trasmission or receiving is occuring
N/A
Off
No data transmission or receiving is occuring
5. HDD Status
LED
Green
On HDD locate
Blink HDD access
Amber
On HDD fault
Green/
Blink HDD rebuilding
Amber
N/A
Off
No HDD access or no HDD fault.
6. System
Status LED
Green Solid On System is operating normally.
Amber
Critical condition, may indicate:
Solid On System fan failure
System temperature
Non-critical condition, may indicate:
Redundant power module failure
Blink
Temperature and voltage issue
Chassis intrusion
N/A
System is not ready, may indicate:
POST error
Off
NMI error
Processor or terminator missing
7. ID Button
Press the button to activate system identification
8. Power button
with LED
Green On System is powered on
Green Blink System is in ACPI S1 state (sleep mode)
•System is not powered on or in ACPI S5 state
N/A
Off
(power off)
•System is in ACPI S4 state (hibernate mode)
NMI
RST
SYS
1 2 3 4 5 6
ID
7 8

10x 2.5” Drive SKU
No.
Name
Color
Status
Description
1. Reset Button Press the button to reset the system.
Press the button server generates a NMI to the processor
2. NMI button if the multiple-bit ECC errors occur, which effectively halt
the server.
3. Power button
with LED
Green On System is powered on
Green Blink System is in ACPI S1 state (sleep mode)
•System is not powered on or in ACPI S5 state
N/A
Off
(power off)
•System is in ACPI S4 state (hibernate mode)
4. ID Button Press the button to activate system identification
5. HDD Status
LED
Green
On HDD locate
Blink HDD access
Amber
On HDD fault
Green/
Blink HDD rebuilding
Amber
N/A
Off
No HDD access or no HDD fault.
6. System
Status LED
Green Solid On System is operating normally.
Amber
Critical condition, may indicate:
Solid On System fan failure
System temperature
Non-critical condition, may indicate:
Redundant power module failure
Blink
Temperature and voltage issue
Chassis intrusion
N/A
System is not ready, may indicate:
POST error
Off
NMI error
Processor or terminator missing
LAN 1/2
7/8. Active/Link
LEDs
Green
Solid On Link between system and network or no access.
Green
Blink Data transmission or receiving is occurring
N/A
Off
No data transmission or receiving is occurring
1
2
3
4
5 6
7 L1 L2 8

Rear System LAN LEDs
No.
Name
Color
Status
Description
1. 1GbE
Speed LED
Yellow On 1 Gbps data rate
Green On 100 Mbps data rate
N/A Off 10 Mbps data rate
1GbE
2. Link/
Activity
LED
Green
On Link between system and
network or no access
Blink
Data transmission or receiving is occurring
N/A
Off No data transmission or
receiving is occurring
Hard Disk Drive LEDs
2.5” Drive SKU
3.5” Drive SKU
RAID SKU
LED1
Locate
HDD
Fault
Rebuilding
HDD
Access
HDD Present
(No Access)
No RAID configuration
(via HBA, ICH)
Disk LED
(LED on
Back Panel)
Green
ON(*1)
OFF
Green
OFF
Amber
OFF
OFF
Amber
OFF
Removed HDD Slot
(LED on Back Panel)
Green
ON(*1)
OFF
Green
--
Amber
OFF
OFF
Amber
--
RAID configuration
(via HW RAID Card or
SW RAID Card)
Disk LED
Green
ON
OFF
Alternately
OFF
Amber
OFF
ON
(Low Speed: 2 Hz)
OFF
Removed HDD Slot
Green
ON(*1)
OFF
(*3)
--
Amber
OFF
ON
(*3)
--
LED 2
HDD Present
No HDD
Green
ON
OFF
NOTE:
*1: Depends on HBA/Utility Spec.
*2: Blink cycle depends on HDD's activity signal.
*3: If HDD is pulled out during rebuilding, the disk status of this HDD is regarded as faulty.
1 2 1 2
1 2
LED#1
LED#2(Reserved/No Function)
LED#1
LED#2(Reserved/No Function)

Setting up the system
Pre-installation requirements
Selecting a site
Before unpacking and installing the system, select a suitable site for the system for
maximum efficiency. Consider the following factors when choosing a site for the system:
Near a grounded power outlet.
Clean and dust-free
Stable surface free from vibration.
Well-ventilated and away from sources of heat.
Secluded from electromagnetic fields produced by electrical devices such as air
conditioners, radio and TV transmitters, etc.
Checking the package contents
Check the following items from the package:
System unit
Accessory box
If any of the above items is damaged or missing, contact your dealer immediately.
Save the boxes and packing materials for future use.

Turning on the system
After making sure that you have properly set up the system, applied power and connected
all the necessary peripherals, you can now power on the system. Follow the procedure
below.
Press the power button
The system starts up and displays a welcome message on the monitor. After that, a series
of power-on self-test (POST) messages appears. The POST messages indicate if the
system is running well or not.
Note: If the system does not turn on or boot after
pressing the power button, go to the next section
for the possible causes of the boot failure
Aside from the POST messages, you can determine if the system is in good condition by
checking if the following occurred.
The power status indicator on the front panel lights up blue.
The Num Lock, Caps Lock and Scroll Lock indicators on the keyboard light up.
Power-on problems
If the system fails to boot after you have applied power, check the following factors that
might have caused the boot failure.
The external power cord may be loosely connected.
Check the power cord connection from the power outlet to the power cord socket on
the rear panel. Make sure that the cord is properly connected to the power outlet and
to the power cord socket.
No power comes from the grounded power outlet. Have an electrician check your
power outlet.
Loose or improperly connected internal power cables.
Check the internal cable connections. If you are not confident to perform this step, ask
a qualified technician to assist you.
Warning! Make sure all power cords are
disconnected from the electrical outlet before
performing this task.
Note: If you have gone through the preceding
actions and the system still fails to boot, ask your
dealer or a qualified technician for assistance.

Turning off the system
There are two ways to turn off the server—via software or via hardware. The software
procedure below applies to a system running on a Windows OS. For other shutdown
procedures, refer to the related user documentation.
To turn off the system via software:
1. Press <Ctrl> + <Alt> + <Delete> on the attached keyboard or click Start on the
Windows taskbar.
2. Select Shut Down.
3. Select Shut Down from the drop-down menu, then click OK.
To turn off the system via hardware
If you cannot shut down the server via software, press the power button for at least four
seconds. Quickly pressing the button may put the server in a Suspend mode only.
Environmental Temperature Specifications
System inlet temperature
Operating
10°- 35°C
Non-operating
-40°- 60°C
Relative humidity
Operating
Non-operating
8 - 80 %
20 - 95 %

System troubleshooting
Resetting the system
Before going through in-depth troubleshooting, attempt first to reset the system using one
of the methods below.
Perform
Purpose
To do this
Soft boot
To clear the system memory and
reload the operating system.
Press <Ctrl> + <Alt> + <Del>
Cold boot
To clear the system memory, restart
POST, and reload the operating
system. This will halt power to all
peripherals.
Turn the system off and then on
again.

Initial system startup problems
Problems that occur at initial system startup are usually caused by an incorrect installation
or configuration. Hardware failure is a less possible cause. If the problem you are
experiencing is with a specific application.
Initial troubleshooting checklist
AC power is available at the wall outlet?
Is the power supply module properly installed?
Is the system power cord properly plugged into the power supply module socket? and
connected to a NEMA 5-15R outlet for 100-120 V or a NEMA6-15R outlet for 200-240
V
Are all peripheral cables correctly connected and secured?
Did you press the system power button to turn the server on (power on indicator
should be lit green)?
Are all device drivers properly installed?
Are hard disk drive(s) properly formatted and configured?
Are the BIOS configuration settings in the BIOS Setup Utility correct?
Is the operating system properly loaded?
Refer to the operating system documentation.
Are all hardware components compliant with the tested components
lists?
Are all internal cables correctly connected and secured?
Is the processor properly seated in its mainboard socket?
Are all standoffs in the proper location and not touching any components, causing a
potential short?
Are all add-in expansion cards fully seated in their mainboard slots?
Are all system jumpers correctly set?
Are all switch settings on add-in boards and peripheral devices correct?
To check these settings, refer to the manufacturer’s documentation that comes with
them. If applicable, ensure that there are no conflicts (e.g., two add-in boards sharing
the same interrupt).

Hardware diagnostic testing
This section provides a detailed approach to identifying a hardware problem and its cause.
Checking the boot-up status
Caution: Before disconnecting any peripheral cables
from the server, turn off the system and any
peripheral devices. Failure to do so can cause
permanent damage to the system and/or the
peripheral device.
1. Turn off the system and all external peripheral devices.
2. Disconnect all peripheral devices from the system, except for the keyboard and the
display monitor.
3. Make sure the system power cord is plugged into a properly grounded AC outlet and
in the power supply module cord socket.
4. Make sure the display monitor and keyboard are correctly connected to the system.
5. Turn on the display monitor.
6. Set the display brightness and contrast controls to at least two thirds of their maximum
range.
Refer the documentation that came with your display monitor.
7. If the operating system normally loads from the hard drive, make sure there is no
diskette in floppy drive and no disc in the optical drive.
8. If the power indicator is lit, attempt to boot from a disc.
9. Turn on the system.
Verifying the condition of the storage devices
As POST determines the system configuration, it tests for the presence of each mass
storage device installed in the system.As each device is checked, its activity indicator
should turn blue briefly. Check the activity indicators for the hard drive(s), DVD-ROM drive,
and any other 5.25" device you may have installed.
If any of these indicators fail to light up, refer to related problems listed in the Specific
problems and corrective actions section.

Specific problems and corrective actions
Listed below are specific problems that may arise during the use of your server and their
possible solutions
Confirming loading of the operating system
Once the system boots up, the operating system prompt appears on the screen. The
prompt varies according to the operating system. If the operating system prompt does not
appear.
Specific problems and corrective actions
Listed below are specific problems that may arise during the use of your server and their
possible solutions
Specific problems and corrective actions
Listed below are specific problems that may arise during the use of your server and their
possible solutions.
Power indicator does not light.
Do the following:
Make sure the power supply module is properly installed.
Make sure the power cord is connected correctly.
Make sure that the wall outlet has power. Test it by plugging in another device.
Make sure the power indicator on the front panel is lit up.
Remove all add-in cards and see if the system boots.
If reboot is successful, install the cards back in one at a time with a reboot between
each addition to determine if one of them is causing the problem.
Make sure that you have properly installed system compliant memory modules, and
that they are populated according to the system guidelines.
Make sure that you have installed system compliant processors, and that they are
populated according to the system guidelines.
HDD activity indicator does not light.
Do the following:
Make sure the drive is not disabled in the BIOS Setup Utility.
Make sure the drive is compatible
Make sure you have not exceeded the power budget for the server.

Check that relevant switches and jumpers on the hard drive and on the backplane
board are set correctly.
Optical drive activity indicator does not light
Do the following:
Make sure the SATA and power cables are properly connected.
Check that relevant switches and jumpers on the drive are set correctly.
Check that the drive is properly configured.
Optical drive tray cannot be ejected
Insert the tip of a paperclip into the small hole on the optical drive. Slowly pull the tray out
from the drive until the tray is fully extended.
Optical drive cannot read a disc
Do the following:
Make sure you are using the correct type of disc.
Make sure the disc is properly seated in the drive.
Make sure the disc is unscratched.
Make sure the drive’s cables are properly connected.
Newly installed memory modules are not detected.
Do the following:
Make sure the memory modules specifications comply with the system requirements.
Make sure the memory modules have been populated according to the system
guidelines.
Make sure the memory modules are properly installed on their mainboard slots.
Network activity indicators do not light.
Do the following:
Make sure the correct network drivers are loaded on the system.
Network might be idle.

Peripheral device connected to a USB port does not work.
Do the following:
Reduce the number of external devices connected to a USB hub.
Refer to the documentation that came with the device
There is problem with the software program.
Do the following:
Verify that the software is properly configured for the system.
Refer to the software installation and operation documentation for instructions on
setting up and using the software. Try a different version of the software to see if the
problem is with the copy you are using. If the other version runs correctly on the
system, contact your vendor about the defective software.
No characters appear on the display monitor.
Do the following:
Is the keyboard functioning? Test it by turning the Num Lock function on and off to
check if the Num Lock indicator lights up.
Is the display monitor plugged in and turned on? If you are using a switch box, is it
switched to the correct system?
Are the brightness and contrast controls on the video monitor properly adjusted?
Is the display monitor signal cable properly connected?
Does this display monitor work correctly if plugged into a different system?
Remove all add-in cards and see if the system boots.
If reboot is successful, install the cards back in one at a time with a reboot between
each addition to determine if one of them is causing the problem.
Make sure that you have properly installed system-compliant memory modules, and
that they are populated according to the system guidelines.
Make sure that you have installed system compliant processors, and that they are
populated according to the system guidelines.
If you are using an add-in video controller card, do the following:
1. Verify that the display monitor works using the onboard video controller.
2. Verify that the add-in video controller card is fully seated in its slot.

3. Reboot the system for the changes to take effect.
4. If there are still no characters on the screen after you reboot the system, reboot it
again.
Take note of the beep codes emitted during POST. This information may be required if
you seek technical assistance.
If POST does not emit any beep code and characters still do not appear, the display
monitor or the video controller may be defective. Contact your local Altos
representative or authorized dealer for technical assistance.
Note: If POST does not emit any beep code and characters still do not appear, the
display monitor or the video controller may be defective. Contact your local Altos
representative or authorized dealer for technical assistance.

Notices
Information for your safety and comfort
Safety instructions
Read these instructions carefully. Keep this document for future reference. Follow all
warnings and instructions marked on the product.
Turning the product off before cleaning
Unplug this product from the wall outlet before cleaning. Do not use liquid cleaners or
aerosol cleaners. Use a damp cloth for cleaning.
CAUTION for plug as disconnecting device
Observe the following guidelines when connecting and disconnecting power to the power
supply unit:
Install the power supply unit before connecting the power cord to the AC power outlet.
Unplug the power cord before removing the power supply unit from the computer.
If the system has multiple sources of power, disconnect power from the system by
unplugging all power cords from the power supplies.
CAUTION for accessibility
Be sure that the power outlet you plug the power cord into is easily accessible and located
as close to the equipment operator as possible. When you need to disconnect power to
the equipment, be sure to unplug the power cord from the electrical outlet.
Warnings
Do not use this product near water.
Do not place this product on an unstable cart, stand or table. If the product falls, it
could be seriously damaged.
Slots and openings are provided for ventilation to ensure reliable operation of the
product and to protect it from overheating. These openings must not be blocked or
covered. The openings should never be blocked by placing the product on a bed,
sofa, rug or other similar surface. This product should never be placed near or over a
radiator or heat register, or in a built-in installation unless proper ventilation is

provided.
Never push objects of any kind into this product through cabinet slots as they may
touch dangerous voltage points or short-out parts that could result in a fire or electric
shock. Never spill liquid of any kind onto or into the product.
To avoid damage of internal components and to prevent battery leakage, do not place
the product on a vibrating surface.
Never use it under sporting, exercising, or any vibrating environment which will
probably cause unexpected short current or damage rotor devices, HDD, Optical
drive, and even exposure risk from lithium battery pack.
This product is not suitable for use with visual display workplace devices according to
§2 of the German Ordinance for Work with Visual Display Units.
Using electrical power
This product should be operated from the type of power indicated on the marking
label. If you are not sure of the type of power available, consult your dealer or local
power company.
Do not allow anything to rest on the power cord. Do not locate this product where
people will walk on the cord.
If an extension cord is used with this product, make sure that the total ampere rating
of the equipment plugged into the extension cord does not exceed the extension cord
ampere rating. Also, make sure that the total rating of all products plugged into the
wall outlet does not exceed the fuse rating.
Do not overload a power outlet, strip or receptacle by plugging in too many devices.
The overall system load must not exceed 80% of the branch circuit rating. If power
strips are used, the load should not exceed 80% of the power strip's input rating.
This product's power supply is equipped with a three-wire grounded plug. The plug
only fits in a grounded power outlet. Make sure the power outlet is properly grounded
before inserting the power supply plug. Do not insert the plug into a non-grounded
power outlet. Contact your electrician for details.
Warning The grounding pin is a safety feature.
Using a power outlet that is not properly grounded
may result in electric shock and/or injury.
Note: The grounding pin also provides good
protection from unexpected noise produced by
other nearby electrical devices that may interfere
Table of contents
Other Altos Server manuals

Altos
Altos BrainSphere T350 F4 User manual

Altos
Altos BrainSphere R385 F4 User manual

Altos
Altos BrainSphere R685 F5 User manual

Altos
Altos R360 F5 SFF User manual

Altos
Altos BrainSphere R385 F5 User manual

Altos
Altos T110 F5 User manual

Altos
Altos BrainSphere P530 F4 User manual

Altos
Altos R380 F5 User manual

Altos
Altos BrainSphere R369 F4 User manual

Altos
Altos BrainSphere R580 F4 User manual