Altrason Humidry BRA Series User manual

®
Ceiling Mounted Desiccant Rotor
Multifunctional Dehumidifier
Please read through this user manual carefully before using the product. Keep
the manual in a secure place.
To assure your rights and interests, please ask the dealer to specify the
purchase date and dealer’s name on the warranty
Please follow the instructions as they appear in this manual and leave enough
room to allow safe repair and service in the future.
For Models:
BRA・BRB・BRC・BRF・BIF
For
Customer
Use Only
User
Manual

Safety Precautions
Please read this guide carefully prior to operation.
The following symbols are used to indicate the level of danger resulting from incorrect use.
・
・
・
・
・
Before servicing or cleaning unit, switch off the unit to
prevent electric shock or bodily injuries.
Wipe with damp cloth to clean the wall panel to avoid
damaging wall panel or causing malfunction.
Place the filter somewhere dark and dry after cleaning
for drying to avoid damaging, warping, or color
changing.
Please inspect the unit regularly to avoid personal
injuries due to unit malfunction.
Maintenance work must be done by qualified person(s).
Please contact your dealer, authorized repair service
professional, or the manufacturer to schedule your
maintenance work. Please refer to the last page for
service information.
・Use this unit only in the manner intended by the
manufacturer.
・
・
・
・
・
・
・
To ensure the unit is functioning properly, make sure
there is airflow into the room. Slightly open the door if
the room is airtight.
Stop unit operations when bath salt is used to prevent
powders from being sucked into the unit.
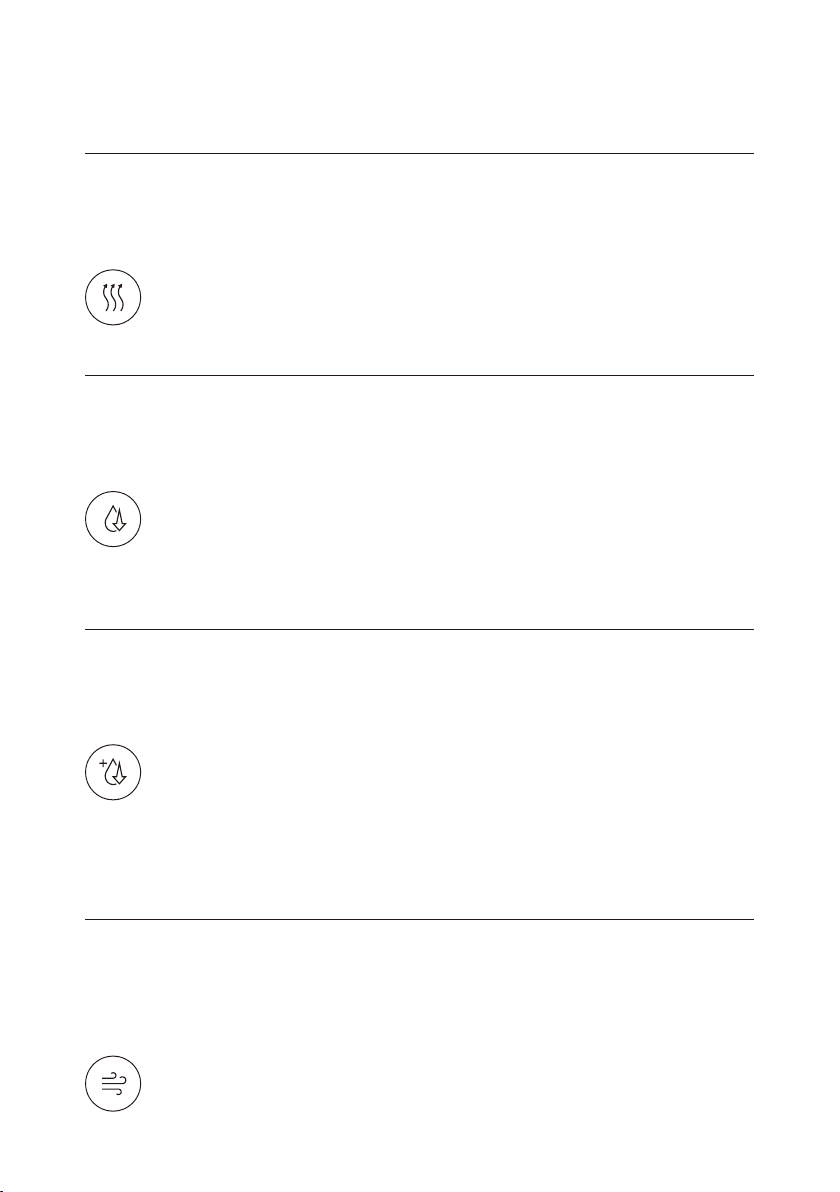
Room temperature may rise during unit operations
such as smart room heating, which may cause certain
items to deform.
Heating may be hindered as room temperature may be
affected by other environmental factors. These factors
may include location and size of the room, window size,
insulation and other conditions.
For children, elderly and individuals more susceptible
to heat-related illness, supervision is recommended or
that the unit be turned off to prevent accidents.
Please remove metal objects during smart room
heating, enhanced dehumidification and smart cloth
drying to avoid burns.
Do not hang clothes directly on the unit to avoid electric
shock, injuries or damaging the unit. Do not touch the
unit or hanging rod for clothes during cloth drying to
avoid burns.
Cleaning, Maintenance
Operations
Incorrect use may
result in death or serious injury.
WARNING Incorrect use may
result in injury or property damage.
CAUTION
Stop unit operations when the power plug or power cord is
damaged.
Do not pour water, mildew remover, basic cleaning solution,
thinner, or volatile chemicals directly on the unit or wall
panel, as this may cause malfunction, electric shock or
burn.
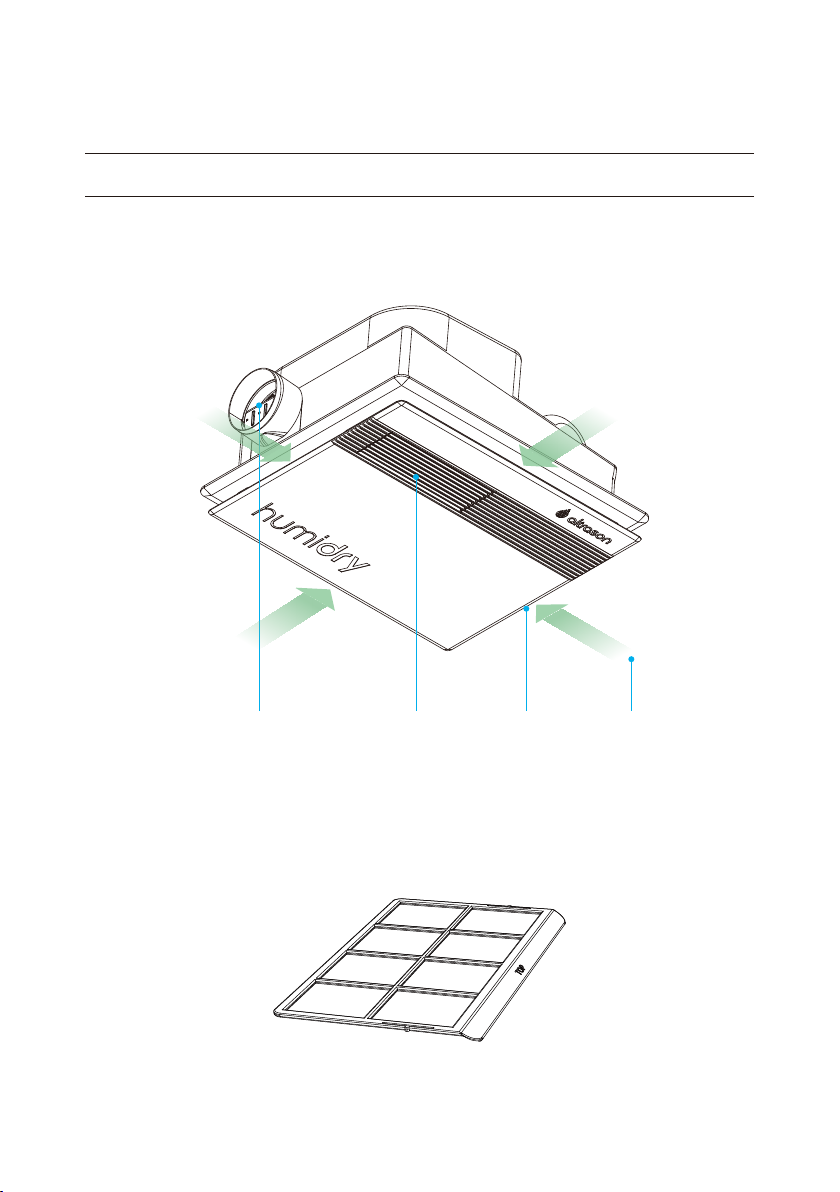
Please do not insert foreign objects into the supply and
return openings to prevent electric shock, fire, unit
malfunction or other bodily injuries.
Please do not place any dust cover or netting to prevent unit
malfunction or fire.
Do not use flammable aerosol near the unit, as this may
cause a fire.
When cleaning the unit, make sure safety precaution is
taken to prevent falling due to slippage. Do not stand at the
edge of bathtubs or stools. Make sure you are standing on
flat and stable surfaces.
Please do not touch the cover and supply grille as they will
remain hot during and immediately after unit operations to
avoid burning injuries.
In the event of a gas leak, please stop the operation of the
unit and open all doors and windows to prevent explosions
or fires.
Please do not operate the unit near flammable chemicals
and gasoline to avoid fires, combustions and injuries.
Terminate operations and switch off from the switchboard
when there is lightening to prevent malfunction. Switch
back when lightening has stopped.
This unit is not intended for use by persons with physical or
intellectual disability, persons who are inexperienced or
with a lack of knowledge (including children), unless under
the safe guidance or supervision of a guardian in charge.
Please keep this item safe and out of reach of children and
those without the ability to determine dangers.
Children should be supervised to ensure they do not play
with such electronics.
Consumers should use extra precaution and pay attention
when using this product.
During prolonged unit inactivity, switch off the unit at the
switchboard to prevent fire or electrical leakage.
・
・
・
・
・
・
・
・
・
・
・
・
・
・
・
Safety Instructions

HumiDry®
Component Descriptions
Air Damper Air Supply
Air Filter (Washable)
Insert
Air Filter
Here
Air Intake

Humidity Indicator:
Dry / Ideal / Moist / Humid
Timer Increase
Timer Decrease
Mode:
Timer / Auto / Always On
Dehumidification /
Clothes Drying Progress:
Will only display during Auto
Cool Air Dehumidification,
Enhanced Dehumidification
and Smart Clothes Drying.
Directional Key
COOL AIR
DEHUMIDIFICATION
Removing Moist Air…
Auto Humid
LED Indicator
Function
Current Status
Display
BRF Series
※BIF Series only has Cool Air Dehumidification, Preset Auto mode,
and does not include a touchscreen wall panel.
Air Circulation Power Off
Settings
Cool Air
Dehumidification
・Vent Air
・Indoor Air
HumiDry®Wall Panel ※For wall panel version
(Hold for 3 Sec)
BRA, BRB, BRC Series
Enhanced
Dehumidification
Cool Air
Dehumidification
Smart
Room Heating
Air Circulation Smart
Clothes Drying
Power Off
Settings
・Vent Air
・Indoor Air (Hold for 3 Sec)

SMART
DEHUMIDIFICATION
Cool Air
Enhanced
Removing Moist Air…
Auto
Humid
SMART
DEHUMIDIFICATION
Removing Moist Air…
Auto
Humid
Timer
Increase
Timer
Decrease
Directional
Key
Information
Filter
Reset
Power Off /
Settings
※BIF Series only has Cool Air Dehumidification,
Preset Auto mode, and does not include remote
control.
Smart
Room Heating
Smart
Clothes Drying
Cool Air
Dehumidification
Cool Air
Dehumidification
Enhanced
Dehumidification
Air
Recirculation
Air
Recirculation
Air
Ventilation
Air
Ventilation
HumiDry®Remote Control ※For remote control version
BRF SeriesBRA, BRB, BRC Series
Function
Current Status
Display
Aim the remote at the IR receiver and press the
button. A beeping sound indicates normal operation. If
there is no beeping sound, press again.
The remote will enter sleep mode after 15 seconds of
inactivity to save battery life. Pick up the remote to
wake up from sleep.
・
・
Keep batteries out of reach of children as they
can be choking hazards.
Remove the battery for extended periods of
non-usage.
Battery leaks may cause damages, rinse well if it
comes into contact with your skin, eye, or mouth,
and seek medical attention.
Remove used batteries immediately for recycle.
Do not recharge batteries.
Do not mix batteries of different brands or types.
-
-
-
-
-
-
WARNING
Humidity Indicator:
Dry / Ideal /
Moist / Humid
Mode:
Timer / Auto /
Always On
Dehumidification /
Clothes Drying Progress:
Will only display during Auto
Cool Air Dehumidification,
Enhanced Dehumidification
and Smart Clothes Drying.
(Hold for 3 Sec)
(Hold for 3 Sec)

Function/Controls
Press the “Smart Room Heating” button to start sending warm air
into the room.
Unit will stop at the end of the default running time of 1 hour.
Press the left or right button to change the run time. There are 5
preset selections of 1, 1.5, 2, 2.5, and 3 hours.
Pressing the Power Off button to stop unit operation.
Refer to page 2 for more information on operating Smart Room
Heating.
・
・
・
・
・
Smart
Room Heating
For BRA, BRB, BRC Series
After pressing the “Cool Air Dehumidification” button, the unit will
calculate the optimal humidity level based on the conditions indoors
and operate until the goal is reached. During dehumidification, the
room temperature will stay constant.
Default is set to auto, under which the unit will go into monitoring
once the target is reached. Dehumidification restarts automatically
when indoor conditions change.
Press the left or right button to change the run time. There are 5
preset selections of 1, 2, 4, 8, and 12 hours.
Pressing the Power Off button to stop unit operation.
・
・
・
・
Cool Air
Dehumidification
For BRA, BRB, BRC, BRF Series
After pressing the “Enhanced Dehumidification” button, the unit will
calculate the optimal humidity level based on the conditions indoors
and operate until the goal is reached. During dehumidification, the
room temperature will raise slightly.
Default is set to auto, under which the unit will go into monitoring
once the target is reached. Dehumidification restarts automatically
when indoor conditions change.
Press the left or right button to change the run time. There are 5
preset selections of 1, 2, 4, 8, and 12 hours.
Pressing the Power Off button to stop unit operation.
Refer to page 2 for more information on operating Enhanced
Dehumidification.
・
・
・
・
・
Enhanced
Dehumidification
For BRA, BRB, BRC Series
After pressing “Air Circulation” button, press the button again or use the
up/down buttons to switch to Ventilation. Stale, stuffy and humid air is
drawn outside the room via exhaust ducts to improve indoor air quality.
Default is set to run continuous (24 hours non-stop).
Press the left or right button to change the run time. There are 5 preset
selections of 1, 2, 4, 8, and 12 hours.
Pressing the Power Off button to stop unit operation.
Ensure that air can flow inside. Open the door slightly if you have to.
・
・
・
・
・
Air Circulation –
Vent Air or
Air Ventilation
For BRA, BRB, BRC, BRF Series

Resume
to Auto
Power Lost
Resume
Language
Setting Item Description
Yes/No. Default is set to “Yes”. Activate this to allow
resumption of the unit’s action prior to blackouts.
Humidity
Preference
Lower/Normal/Higher. Default is set to “Normal”.
Humidity Preference only applies to dehumidifica-
tion functions set to auto.
Yes/No. Default is set to “No”. Activating this will
allow for the last auto dehumidification function to
resume in the event of switching between
functions, e.g., switching to Air Circulation function
during Auto Cool Air Dehumidification when
“Resume to Auto” is set to “Yes” will revert the unit
back to Auto Cool Air Dehumidification once the Air
Circulation job is finished.
Wall
Panel
Remote
Control
After pressing “Air Circulation” button, press the button again or use
the up/down buttons to switch to Re-Circulation. Air circulates
continuously inside.
Default is set to run continuous (24 hours non-stop).
Press the left or right button to change the run time. There are 5 preset
selections of 1, 2, 4, 8, and 12 hours.
Pressing the Power Off button to stop unit operation.
・
・
・
・
Air Circulation – Indoor
Air or Air Recirculation
For BRA, BRB, BRC, BRF Series
After pressing the “Smart Clothes Drying” button, the unit will
calculate the optimal humidity level based on the conditions indoors
and commence clothes drying. Room temperature will rise during
clothes drying.
Default is set to auto, under which the unit will go into monitoring once
the target is reached.
Press the left or right button to change the run time. There are 5
preset selections of 1, 2, 4, 8, and 12 hours.
Pressing the Power Off button to stop unit operation.
It is advised that hand washed clothes are drained and spun for at
least 5 minutes before hanging to reduce the operation time of Smart
Clothes Drying.
Refer to page 2 for more information on operating Enhanced
Dehumidification.
・
・
・
・
・
・
Smart
Clothes Drying
For BRA, BRB, BRC Series
Unit stops current action and goes into Powered Off after pressing
this button.
To enter the Settings menu, hold Settings button for 3 seconds. Use
the directional buttons to select and configure the unit as you desire.
・
・
Power Off/ Settings
For BRA, BRB, BRC, BRF Series
Wall Panel Remote
Control
English/ Traditional Chinese/ Simplified Chinese/
Japanese/ Korean

PLEASE CLEAN
THE FILTER
Remind Me Later
Filter Cleaned
Retract and wash the
filter, reinsert it once
dried. Please aim the
remote at infrared
receiver while
resetting the filter.
PLEASE CLEAN
THE FILTER
Right button: Reset
Up/Down button: Select
Flashing LED displays
on the IR receiver.
Refer to “Cleaning the Filter” page for instructions on
how to clean the filter. After place the clean
filter back into the unit, press button for
3 seconds to reset the filter.
1 2
3
Press button and a reminder
appears on the screen.
By pressing the “Information” button during any function, the
remote will display current unit status and humidity indicator.
Progress bar will also appear if running in auto for “Cool Air
Dehumidification, Enhanced Dehumidification and Smart Clothes
Drying.
A flashing IR receiver indicates time for filter cleaning, press the
“Information” button and follow the on screen instructions. Flashing
will stop when the filter is placed back into the unit and reset.
・
・
・
When the screen displays “Please clean the filter” : Reminder
notice will disappear if the user chooses “Remind me later” .
The user will be prompted after additional 120 hours of usage.
Please refer to “Cleaning your filter” page for instructions on how to
clean your filter. Select “Filter cleaned” after placing the clean filter
back into the unit and confirm by selecting the right button.
・
・
Information
(Only for the Remote Control)
Wall Panel
A reminder will appear when it is time to clean the filter when the
“Information” button is pressed. Please refer to “Cleaning the filter” page
for instructions on how to clean the filter. After the clean filter is placed
back into the unit, press the “Reset” button for 3 seconds while aiming at
the IR receiver. The reminder screen will disappear and the flashing LED
stopped with a successful reset.
Remote Control
Filter Reset

StatusLight
Clean Filter Reminder
Only applicable when target is reached
and unit in auto
Only applies to remote control version Flashing LED
Smart Room Heating
Cool Air Dehumidification
Enhanced Dehumidification
Standby Monitoring
Smart Clothes Drying
Air Circulation
Pink
Light Blue
Orange
Light Green
Orange Yellow
Blue
Powered OffNone
IR Receiver
Location of
LED Indicator
BRA-220V BRB-220V BRC-110V BRF-110V
BRF-220V
BIF-110V
BIF-220V
0.004kW 0.004kW 0.004kW 0.004kW 0.004kW
7.2 KG 7.2 KG 7.2 KG 6.8 KG 6.8 KG
0.5kW 0.5kW 0.5kW 0.5kW 0.5kW
1.30kW 1.30kW 1.20kW _ _
1.70kW 1.70kW 1.50kW _ _
0.05kW 0.03kW 0.05kW 0.03kW _
Model Number
Frequency 50Hz/60Hz
Maximum Power Consumption
Standby
Monitoring
Cool Air
Dehumidification
Weight
Specification
LED will display different color depending on the
different functions.
LED Indicator is on the upper left of the wall
panel and on the IR receiver.
・
・
LED Indicator
Wall Panel Remote Control
Enhanced
Dehumidification
Smart
Clothes Drying
Smart
Room Heating
Air Ventilation
Air Recirculation

Please stop unit operations and contact qualified technicians when the issue cannot be fixed as
described in this section. Switching off the circuit breaker to ensure power is completely cut off.
※Read carefully the safety precautions on page 2
about cleaning the filter.
Possible CauseProblem Correction
Unit failed
to start
Unit not powered
Please check to make sure the breaker
and power lines are connected, power
cord plugged.
Vibration or
abnormal
noise
Unable to
control with
Wall Panel
Insufficient ceiling strength Make sure the unit is securely mounted
on suitable material in the ceiling.
Bad Wall Panel connection due to
loose wire
Unable to
control with
Remote Control
Insecure installation
PTC crackling sound
Secure the screws.
Change new batteries.
Make sure the battery direction is correct.
Controlling the Wall Panel with wet hands Please dry your hands.
Unplug the Wall Panel and plug it back in.
PTC heater will activate during Smart
Room Heating, Enhanced Dehumidification,
or Smart Clothes Drying, which may create
a sound due to heating and cooling of air
around the PTC. Not a malfunction.
Remote Control doesn’t have enough power
Batteries installed incorrectly
Unit and wall panel not connected
Make sure the LED indicator is displaying
normally and check the connection of the
cable to the Unit and the Wall Panel.
Cleaning the Filter
Troubleshooting
Make sure the power is shut off
before cleaning the filter.
WARNING
The unit will remind you when it is time to clean the filter.
Please clean the filter as soon as possible when the
reminder appears.
Use clean water to rinse the filter or a vacuum to clean the
filter. In the event of major stain, please use neutral cleaner
for cleaning and place back into the unit after drying. The
words “TOP” should face up when replacing the filter as it
has directionality.
・
・
Clean Filter Reminder:

Equipment name:
Ceiling Mounted Desiccant Rotor
Multifunctional Dehumidifier
Model:
BRA, BRB, BRC, BRF, BIF
Unit
PCB
Motors
Mechanical
Components
Restricted substances and its chemical symbols
Lead
(Pb)
Mercury
(Hg)
Cadmium
(Cd)
Hexavalent
chromium
(Cr+6)
Polybrominated
biphenyls
(PBB)
Polybrominated
diphenyl ethers
(PBDE)
Electrical
Components
Declaration of the Presence Condition of
the Restricted Substances Marking
Electrical
wires (Power
cord, other
electrical
wires)
“Exceeding 0.1 wt %” and “exceeding 0.01 wt %” indicate that the percentage content of the
restricted substance exceeds the reference percentage value of presence condition.
“○” indicates that the percentage content of the restricted substance does not exceed the
percentage of reference value of presence.
The “−” indicates that the restricted substance corresponds to the exemption.
Note 1:
Note 2:
Note 3:

ALTRASON INC.
6F., No.189, Lequn 2nd Rd.,
Zhongshan Dist., Taipei City 10462, Taiwan
Phone : +886-2-8502-3818
E-mail: sales@altrason.com
www.altrason.com
®
This manual suits for next models
11
Table of contents
Other Altrason Dehumidifier manuals
Popular Dehumidifier manuals by other brands

Mitsubishi Electric
Mitsubishi Electric MJ-101MWX-A1 instruction manual

SMC Networks
SMC Networks IDFA6E-20-A Operation manual

Roth-Kippe
Roth-Kippe SONORA 44 ECO Technical manual

Clean Air Optima
Clean Air Optima CA-703 user manual

EIPL
EIPL K100E owner's manual

Whirlpool
Whirlpool DS201NB operating instructions

ROWAN ELECTRIC APPLIANCE
ROWAN ELECTRIC APPLIANCE OL12D-D023B instruction manual

ElectrIQ
ElectrIQ ECD30 user manual

Professional Series
Professional Series PS78303 user manual

Trotec
Trotec TTK 400 Original instructions

Haier
Haier HDN455 - 45 Pint Capacity Dehumidifier user manual

Ideal Air
Ideal Air 180 PINT user manual