Alva GHP50 User manual

APPROVED FOR USE IN
SOUTH AFRICA
GHP50
WALL MOUNTED
PATIO HEATER
A division of Stingray Accessory Manufacturers (Pty) Ltd I PO Box 30014 Tokai 7966 I +27 21 442 1540
info@stingray.co.za I www.alva.co.za TOLL- FREE NUMBER: 086 100 ALVA (2582)
Manufactured for
and distributed by
• THIS IS A LOW PRESSURE APPLIANCE TO BE USED ONLY
WITH A 2.8kPa SANS 1237 APPROVED REGULATOR SANS 1156
HOSE (REGULATOR AND HOSE NOT SUPPLIED)
• FOR YOUR OWN SAFETY, PLEASE READ THIS MANUAL CARE-
FULLY AND ALWAYS OPERATE THIS PRODUCT
• ACCORDING TO THE INSTRUCTIONS IT IS ILLEGAL AND DAN-
GEROUS TO CHANGE OR MODIFY ANY PART OF THIS APPLI-
ANCE
• MUST BE INSTALLED BY A REGISTERED LPGSASA INSTALLER
/alvagas
/AlvaGas

IMPORTANT SAFETY INFORMATION
As with all appliances, misuse of this appliance or failure to fully
follow these instructions may cause re, injury or death.
Please read all the instructions before using your gas heater.
• The operator must understand all safety requirements as
detailed in this manual before using the unit.
• When this appliance is to be permanently installed the in-
stallation should only be carried out by a qualied gas tter
who is registered with LPGSASA and that such installations
should comply with the requirements of SANS 10087-1 or
SANS 827 as applicable.
• THIS UNIT MUST BE THOROUGHLY CHECKED BEFORE
USE.
• Ensure that all the gas ttings are correctly and rmly tted
before every use.
• DO NOT use this heater if you do not clearly understand
the instructions and/or how to operate the controls.
• Phone the Customer Care Line at 086 100 2582 (ALVA) or
email info@stingray.co.za for assistance.
• DO NOT use this heater in an enclosed area, which could
restrict airow as this is a ue-less heater (It does not have
a xed chimney). Always make sure there is enough fresh
air entering the room, by opening a door or window in the
same room.
• DO NOT operate this heater in a bedroom, caravan, boat or
any area less than 80 cubic meters(roughly 5 x 5 metres).
• DO NOT leave the heater unattended while in use.
• Ensure that the gas supply is turned OFF after use and
while the heater is unattended.
• DO NOT place objects on or against the heater.
• DO NOT attempt to use the heater as a stove.
• DO NOT use a naked ame to test for leaks. Follow the
Leak Testing procedure outlined under ‘LEAK TEST’.
• NEVER use this heater with a cylinder other than the size
recommended
• DO NOT touch the dress guard (front grill), as it gets very
hot, while in use or after it has been switched off and is
cooling.
Please read the
instructions carefully
before use.
Retain this manual
for future reference.
DO NOT mount
the heater near
ammable objects.
The heater should
always face the
centre of the room,
Always have a
clearance of at least
1000mm on the sides
400mm from the roof-
top, ±1000mm (1m)
in front of it.
Mount the heater
2000mm from the
oor.

• The dress guard provides protection.No part of the dress
guard should be removed or changed.
• DO NOT unscrew the regulator while the heater is on or if
the cylinder valve is open.
• DO NOT use a heater you suspect is faulty.
• When turning the heater off, rst pull on the ignition cord
to switch off heater, and then make sure to close the gas
cylinder valve.
• For safety reasons, only a qualied technician may execute
maintenance and repairs. The warranty for the heater will
be rendered void if the heater is serviced or repaired by
anyone other than an Alva appointed technician.
• The heater should be inspected once a year by a qualied
technician, to make sure the unit is safe and fault free.
• The operator is responsible for the safety of all third parties
while the heater is in use.

INDEX
WARRANTY
GENERAL INFORMATION
METHOD OF ASSEMBLY
HEATER SET UP
ASSEMBLY
LEAK TEST
FLASHBACK
USING YOUR HEATER
CHANGING YOUR CYLINDER
MAINTENANCE
FREQUENTLY ASKED QUESTIONS
SPECIFICATIONS
TROUBLESHOOTING GUIDE
FEATURES
AFTER SALES SERVICE
KEY
Important information
Cautions and
warnings.
Danger
Contact an approved
ALVA technician.
Do It Yourself
2
2
3
3
4-9
10
11
11
12
12
13
14
14
15
15

PLEASE RETAIN YOUR PROOF OF PURCHASE FOR
WARRANTY CLAIMS.
ALVA warrants this appliance to be free of defects in material and
quality for a period of 12 months from date of original purchase.
This warranty covers the intended use of this appliance – within
a domestic setting and not for commercial or industrial purposes.
Any damage caused by wilful abuse, tampering, modication or
unauthorized repair will not be warranted.
Please retain all packaging material, as items returned without
original packaging material may be subject to a withholding fee.
Where this appliance is found to be defective, damaged, broken,
or does not work correctly for the intended purpose, you must
return the appliance to the retailer from where it was purchased.
The warranty will only be effected with valid proof of purchase.
Failure to provide the proof of purchase will most likely result in
the repair or service required being chargeable.
If you have any questions while setting up or using this heater,
please visit www.alva.co.za or call 086 100 2582 (ALVA) or
e-mail info@stingray.co.za
Before using this heater, please read through this manual and
make sure you understand everything. If you are not sure, call
086 100 ALVA (2582) or visit www.alva.co.za for help. This heater
is a safe and efcient form of heating when used according to
these instructions.
Reading and understanding this manual should give you a good
indication of what to expect from your Alva heater.
If this product is not what you want or need, please help Alva and
the environment by not damaging or destroying any part of the
packaging, the manual or the Styrofoam inserts.
Always keep your proof of purchase. Keep these instructions for
future use. If you lose this copy, you can obtain a new copy from
your dealer or online at www.alva.co.za.
WARRANTY
GENERAL INFORMATION
Thank you for your
purchase of this
heater. Please read
these instructions
carefully before use
and keep them in a
safe place, for future
reference.
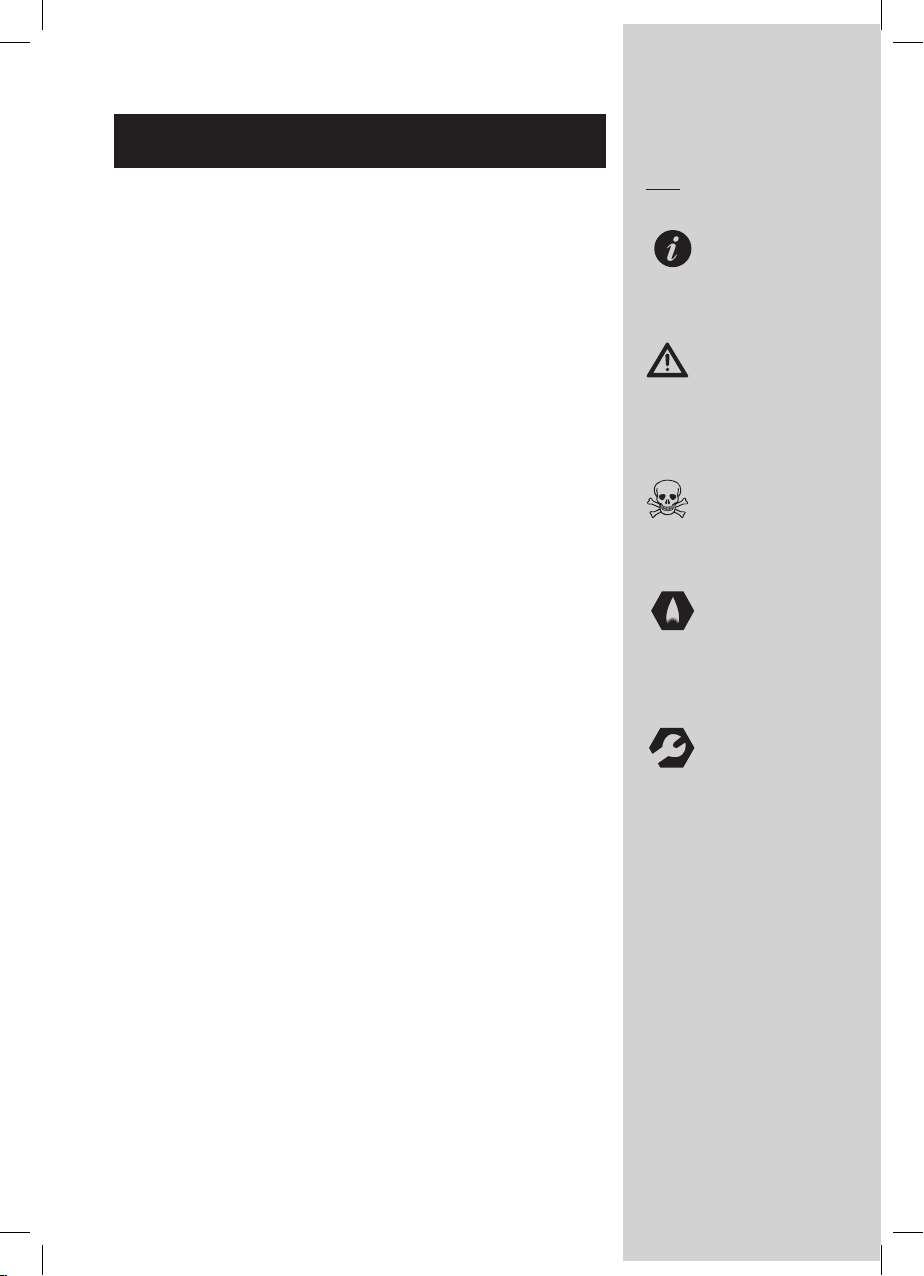
Not using appliances
according to the
instructions is
extremely dangerous
and can lead to
property damage,
injury or death.
2

3
WARNING:
This heater oper-
ates directly on an
industrial cylinder with
a 5/8" HORIZONTAL
exit valve, (ALVA 9kg
industrial size). It is
NOT to be used on a
domestic cylinder with
a 3/8" VERTICAL exit
valve.
METHOD OF ASSEMBLY
HEATER SETUP
9kg ALVA cylinder recommended
with a 5/8” BSP thread; horizontal
exit valve. The Bullnose Regulator
(not supplied with the heater)
tightens to the left hand side (anti-
clockwise) (gure A).
If you have bought a new gas
cylinder, the cylinder needs to be
purged (cleared out), before its rst use. If it is not purged of air,
the heater will not work properly. This should happen at the gas
lling station when you ll up the cylinder. Always check this with
your gas supplier.
1. Before removing this heater from the packaging, read this
manual in full and make sure that it is what you want/need.
2. Remove the heater from the packaging.
Fig.A
minimum mounting height from ground

4
7
6
5
1
4
3
Exploded View
Screws
4pcs M8x20 Screws & Nuts
Used for assembling front mounting bracket
to rear mounting bracket
3pcs 4.2x8 screws.
Used for assembling the Heat Shield to
Heater Body
1 Heat Shield 4 AAA Battery Compartment
2Heater Body 5 Gas Inlet Connector
3Front Panel 6 Front Mounting Bracket
7 Rear Mounting Bracket
2

Screws
6pcs M5x12 screws
Used for assembling the front
mounting bracket to Heater Body
6pcs ST4.8x30 screws & wall plugs
Used for rear mounting bracket to wall
ASSEMBLY (for licensed Gas Installer)
Step 1
Disassemble the upper xing plate from heater body
Orientation of
assembly
4pcs 4.2x8 screws
Upperxingplate
Heater body
5
Orientation
of assembly

6
Step 2
Assemble the front panel
Orientation
of assembly
Lower
Fixing plate
(2) The front panel should be inserted
intothetwoslotsofthelowerxing
plate. So it is held securely in place
(1) Slide the front panel into the heater
from top to bottom. Ensure that it is held
in place by the buckles on the left and
right sides of the heater. As seen below
Step 3
Reassemble the upper xing plate
(1)Insertthefrontpanelintothetwoslotsoftheupperxingplate.
(2)Use4.2x8screwstoassembletheupperxingplate.
Orientation
of assembly

Step 4
Assemble the heat shield using 3pcs 4.2x8 screws
Step 5
Assemble the front mounting bracket
Use 6pcs M5x12 screws to assemble the front mounting
bracket to the rear side of the Heater Body
Orientation of
Assembly
Screwed through heat
shield into the top of
the heater body
7
Orientation of
assembly
Heater body
Front mounting bracket

Step 7
Assemble the gas inlet connector to the Heater Body
Before assembling the gas inlet connector to the heater body, check
andmakesurethereisaatrubberwasherinthegasinletconnector.
Assemble the gas inlet
connecter to the heater.
Step 6
Assemble the rear mounting bracket to the wall
Use 6pcs ST4.8x30 screws & wall plugs to attach rear mounting
bracket to wall
Orientation of
assembly
Orientation of
assembly
Gas inlet with
atwasher
Flat rubber washer in
gas inlet connector
8

Additional Steps
9
Step 7
Assemble the Rear Mounting Bracket
Use 4pcs M8x20 Screws and 4pcs M8 nut to assemble the heater to the rear bracket.
Adjust the heater angle and tighten the screws.
Orientation of
Assembly
Rear mounting
Bracket
1. Connect the regulatorsold (sold separately and to be supplied by installer) to the cylin-
der and the hose to both (sold separately and to be supplied by installer) the regulator
and the appliance hose connector. Fasten with the hose clamps.
2. When attaching the regulator to the cylinder, check that the
rubber nose cone is in place, secure and in good condition, see Fig B.
3. Open the gas cylinder valve and do a leak test, see page 10.
4. DO NOT light the heater when performing this leak test.
5. After passing the leak test, insert a AAA battery into battery compartment for the auto
ignition to operate.
Gas inlet connector to
appliance

The leak test must be carried out in
a well-ventilated area, free from any
ames or other sources of ignition.
• With the cylinder connected to the
heater. Open the cylinder valve.
• Brush the connections (heater to cylin-
der) with a solution of equal parts soap
and water (make sure it’s foamy).
• A stream of bubbles forming
indicates a gas leak. (See Fig.F)
• If bubbles appear, turn the cylinder
valve OFF (clockwise) and disconnect
the heater from the gas cylinder.
• Tighten the connection and retry the
leak test.
• If you are unsure or if you cannot
tighten the connection, place the cyl-
inder outside in a cool, well-ventilated
area and contact Alva on 086 100
ALVA (2582).
• A leak between the heater and cylinder
can lead to a high pressure re, which
is very dangerous and can result in
extensive injury or even death.
10
APPLIANCE WARNING
This appliance is for outdoor use only, do not use in
bedroom / bathroom
WARNING
This is a ue less gas-red heater. It uses air (oxygen) from the room
in which it is installed. Provisions for adequate ventilation should be
provided. Refer to the appropriate section of the user manual.
WARNING
CARBON MONOXIDE POISONING CAN LEAD TO DEATH
Carbon monoxide poisoning: Early signs of carbon monoxide
poisoning resemble u symptoms, with headaches, dizziness or
nausea. If you have these symptoms, the heater may not be working
properly. Get fresh air at once! Have the heater serviced. Some people
are more affected by carbon monoxide than others. These include
pregnant women, people with heart or lung disease or anemia, those
under the inuence of alcohol, and those at high altitudes.
FOR YOUR SAFETY
IF YOU SMELL GAS
Turn off the gas
supply at the
bottle.
Extinguish all
DO NOT operate
any electrical
appliances.
Ventilate the
area.
Check for leaks
(see LEAK TEST)
If odour per-
sists, contact
your dealer or
local gas supplier
immediately.
http://www.
youtube.com
/watch?v=8L
pZ1B0m23Y
&feature=plcp
How to do
a leak test
Fig.F
Foamy
bubbles
indicate a
leak
Connection
in assembly
Connections to be leak tested
Regulator into cylinder
Hose to regulator
Hose to appliance
Hose to appliance
LEAK TEST
Fig.B
Gas inlet connector to
appliance

FLASHBACK (ames in the burner tube)
•
• If a ashback occurs (indicated by a roaring noise),
immediately close off the cylinder valve.
• Turn the heater OFF with the pull cord.
• Disconnect the regulator and allow the heater to cool.
• Check for blockages in the venturi ports. Clean with
compressed air, a small, soft brush or pipe cleaners.
• If the problem persists in reuse, have the heater checked by a
qualied technician.
USING YOUR HEATER
•
1. Turn the gas supply on by opening the cylinder valve.
IGNITING THE UNIT
2. Pull and hold down the ignition cord on the right and maintain
tension for approximatley. 10 seconds to ignite the ceramic
burner. Keep tension on the ignition cord for a further 15 sec-
onds to heat the thermocouple, then release the ignition cord.
3. Visually you should see a spark at the base of the centre
burner when holding down the ignition cord.
4. If the heater does not ignite the rst time, wait for about 30
seconds and repeat step 2 above. This may require more than
one attempt.
TURNING THE HEATER OFF
5. Pull down the off cord on the left by giving it a quick tug and re-
lease. Once the heater is turned off the burners will no longer be
glowing orange giving indication that the unit is off.
6. Close the cylinder valve.
11
Ignition Cord
Pull Down
Shut Off Cord
Pull Down
Ignition spark

MAINTENANCE
• Always make sure the
heater is OFF and cool,
with the cylinder valve
closed, before conduct-
ing any maintenance.
• Your heater should be
checked once a year
by a technician.
• If faults are suspected or
detected, stop using the
heater and contact ALVA.
• Clean the exterior of your
heater when required to
remove dust and prevent
lint build up.
• DO NOT use abrasive
products to clean the
heater; these may
damage the paint work.
• While in operation the
pilot ame should be
steady. If it ickers or is yel-
low the heater needs to be
serviced. (Fig. G)
If any part of the heater is
in need of replacing, use only original Alva parts. Using any
other spare parts is dangerous and will void the warranty.
When the heater is not going to be used for an extended
period of time, keep it covered or in its box, to prevent dust
from settling on the panels. When removing the heater from
storage, use a vacuum cleaner to vacuum the panels before
re-use.
CHANGING YOUR CYLINDER
Make sure your cylinder valve is closed (by turning it clockwise). Allow
the heater to cool completely before replacing the cylinder.
Replace the cylinder. ALWAYS check that the regulator sealing
washer (nose cone) is intact and in place before reattaching the
regulator to the gas cylinder. (Figure B, page 10)
Perform the leak test as detailed on page 10 every time you
replace the gas cylinder.
DO NOT attempt to remove the regulator while the heater is on or
if the cylinder valve is not closed.
Fig. M
Core
GOOD
BAD
Not enough air
BAD
Too much air
12
WARNING:
Never attempt to
remove the regulator
if the heater is on or
if the cylinder valve is
not properly closed.

If you are still unable
to correct the problem
with the information
in this guide , then
you need to contact
your nearest dealer or
manufacturer.
13
FREQUENTLY ASKED QUESTIONS
It is normal for dust to settle on the panel. When this
happens, the heater will not burn properly at rst, giving
the appearance of a blue ame running on the panel. This
might happen when you rst buy the unit or after you have
stored it. There is nothing wrong with the heater. Simply
burn the dust off the panels by letting the heater operate
for between 5 and 15 minutes. The panels should
eventually settle and burn red.
?
(refer to the
GHP50
A
10
Q: Why is there an odour when I use a gas heater?
A: All gas appliances give off an odour. This could be
harmful if inhaled for extended periods of time.
This “smell” is normal, and it does not mean that you
have a gas leak.
The smell of raw gas (just before you ignite the appliance)
differs from the smell coming from the heater when it is in
use.The odour is added to allow easy gas detection.

http://www.
youtube.com/
watch?v=Ya
vsYE8nzCw
&feature=plcp
How to test if
your cylinder
is overfilled
TROUBLE SHOOTING GUIDE
Should you experience
problems with this
gas heater, carry out
the necessary checks
as per the Trouble
Shooting Guide .
If you are still unable
to correct the problem
with the information
in this guide, then
you need to contact
your nearest dealer or
manufacturer.
14
No ignition spark Dead battery Replace with new
AAA battery
SPECIFICATIONS
ALVA GHP50
631 gr/h
1.6mm
8.8kW

15
FEATURES
AFTER SALES SERVICE
ignition string
MANUFACTURED FOR AND DISTRIBUTED BY ALVA,
a division of Stingray Accessory Manufacturers (Pty) Ltd
P.O. Box 30014
Tokai, 7966
Tel: 021 442 1540
E-mail: info@stingray.co.za
www.alva.co.za
/alvagas
www.facebook.com/AlvaGas
TOLL FREE NUMBER 086 100 ALVA (2582)
Table of contents
Other Alva Patio Heater manuals
Popular Patio Heater manuals by other brands

Firesense
Firesense LIP-10A-TGG owner's manual

Comfortaire
Comfortaire IRPH15SS Comfort Aire Installation & operation manual

Jetline
Jetline CALEA Manual instruction

BlueRhino
BlueRhino Endless Summer 233000 owner's manual

BlueRhino
BlueRhino Endless Summer 450000 Series owner's manual

Members Mark
Members Mark PG188H manual