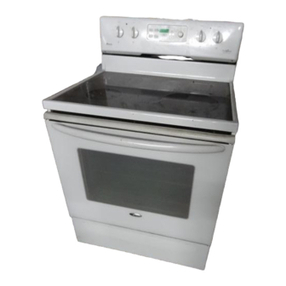
Amana EvenAir ARTC7511 Series User manual

Pararecibirunmanualenespañolgratis,envíeporcorreo
o por fax su nombre, dirección, y número de modelo a:
AmanaAppliances
ConsumerCommunications/SpanishManual
2800220thTrail
PO Box 8901
Amana,Iowa52204-0001
USA
Númerodefax1-319-522-8158
EvenAir™
Convection
Self-Cleaning
Electric Range
Owner's Manual
ARTC7511*
* Additionalalphanumericcharactersrepresenting
other models in series may follow each model
number.
Important
Save for local electrical inspector’s use.
Please Read Manual Before Operating
Range
Installer
Leavethismanualandotherliteraturewithconsumerfor
futureuse.
Customer
Keeptheseinstructionsfor future reference. If appliance
changesownership,besure this manual accompanies
range.

2
Contents
ModelIdentification ....................................................2
ImportantSafety Information
ALL APPLIANCES.................................................. 3
SURFACECOOKINGUNITS .................................. 4
GLASS/CERAMICCOOKING SURFACES ............. 4
OVENS................................................................... 4
SELF-CLEANINGOVENS ...................................... 4
VENTILATIONDUCTS............................................. 4
In Case ofFire ........................................................ 4
Precautions ............................................................ 4
Installation
Packing Material ..................................................... 5
RangeLocation ....................................................... 5
CabinetOpening ..................................................... 5
MinimumClearancestoCombustibleSurfaces ....... 5
IrregularCabinet andCountertopHeights ................ 6
LineVoltage Requirements ..................................... 6
PowerSupply Location ........................................... 6
PowerCordRequirements ...................................... 6
Range Terminal Block ............................................. 6
Installing3-Wire Power Cord ................................... 7
Installing4-Wire Power Cord ................................... 8
Converting3-Wire to 4-WirePowerCord ................. 9
Anti-tip BracketInstallation ..................................... 9
LevelRange ............................................................ 9
RemovalandReplacementof Range ....................... 9
Operation
ARTC7511Range Features ..................................... 10
Preparing toCook withSmoothtop Elements .......... 10
Cooking withSurface Elements .............................. 11
Cooking withDual Radiant Element ........................ 11
Cooking Utensils..................................................... 12
OvenCookingMethods ........................................... 13
Electronic OvenControl andOven Switches............ 14
Setting Clock .......................................................... 16
Setting Minute Timer............................................... 16
Prepare for Bake,Timed Bake, andDelayed Bake.. 16
Bakingor ConvectionBaking .................................. 18
TimedBaking or Timed Convection Baking.............. 18
DelayedBaking orDelayed ConvectionBaking ....... 19
Broiling orConvection Broiling ................................. 19
Dehydration ............................................................ 20
Preparefor Self-cleanand
DelayedSelf-clean Cycle ........................................ 21
Self-cleaning ........................................................... 21
DelayedSelf-clean Cycle ........................................ 21
CookingGuide
BakingGuide .......................................................... 22
Poultry RoastingGuide ........................................... 22
Beef and PorkRoasting Guide ................................ 23
BroilingGuide ......................................................... 23
ConvectionBaking Guide ........................................ 24
ConvectionBroilingGuide ....................................... 24
ConvectionPoultry Roasting Guide ......................... 25
ConvectionBeef and Pork Roasting Guide .............. 25
CareandCleaning
RemovingOvenDoor ............................................... 26
RemovingStorageDrawer ....................................... 26
ReplacingOvenLight .............................................. 26
Cleaning.................................................................. 27
CleaningSmoothtop Rangetop................................ 28
BeforeCalling forService............................................29
Warranty ....................................................................30
QuickReference Instructions .....................................32
Model Identification
Completeenclosedregistrationcardandpromptlyreturn.
If registration card is missing, call Consumer Affairs
Departmentat 1-800-843-0304 inside U.S.A.
319-622-5511outside U.S.A. When contacting Amana,
provideproduct information located onrating plate.Rating
plateislocatedon the oven frame. Record the following:
ModelNumber: ______________________________
ManufacturingNumber: ________________________
SerialorS/NNumber: _________________________
Dateof purchase:_____________________________
Dealer’sname and address: ____________________
__________________________________________
__________________________________________
Parts and Accessories
Purchasereplacement parts and additional accessories
(e.g.,refrigerator shelves, dryer racks,or cooktop
modules)overthe phone. Toorder accessories for your
Amanaproduct, call 1-800-843-0304 inside U.S.A.or
319-622-5511outside U.S.A.
Service
Keepa copy of sales receipt forfuture reference orin
case warranty service is required. Any questions or to
locatean authorized servicer,call1-800-NAT-LSVC
(1-800-628-5782)inside U.S.A.319-622-5511outside
U.S.A.Warranty service must beperformed by an
authorizedservicer. Amana, also recommends contacting
anauthorized servicer if service is required after warranty
expires.
Asure™ Extended Service Plan
Amanaofferslong-term service protection for this new
range. Asure™ Extended Service Plan is specially
designedtosupplementAmana’sstrong warranty.
Thisplancoversparts,labor,andtravelcharges.
Call1-800-528-2682forinformation.
3
IMPORTANT SAFETY INFORMATION
WARNING
!
To reduce the risk of the appliance tipping, it
must be secured by a properly installed anti-tip
bracket(s). To make sure bracket has been
installed properly, remove the storage drawer or
panel and look under the range with a flashlight.
Bracket(s) must be engaged in the rear corner of
the range.
• ALL RANGES CAN TIP
• INJURY TO PERSONS
COULDRESULT
• INSTALLANTI-TIP
BRACKET(S) PACKED
WITHRANGE
• SEEINSTALLATION
INSTRUCTIONS
WARNING
!
To avoid personal injury, do not sit, stand or lean on
ovendoor orovendrawer.
WARNING
!
To avoid risk of electrical shock, personal injury, or
death,make sure your rangehas beenproperly
groundedand always disconnect it frommain power
supplybefore servicing.
CAUTION
!
This appliance contains or produces a chemical or
chemicals which can cause death or serious illness
and which are known to the state of California to
causecancer, birth defectsor otherreproductive
harm. To reduce the risk from substances in the fuel
or from fuel combustion make sure this appliance is
installed,operated, and maintained accordingto the
instructions in this booklet.
CAUTION
!
DONOTTOUCHSURFACEUNITS OR AREASNEAR
UNITS—Surfaceunits may be hotthough theyare dark
in color. Areas near surface units may become hot
enough to cause burns. During and after use, do not
touch, or let clothing touch or other flammable
materials contact surface units or areas near surface
units until they have had enough time to cool. These
areasinclude the rangetop and backguard.
CAUTION
!
DONOT TOUCHHEATINGELEMENTSORINTERIOR
SURFACESOFOVEN—Oven heating elements may
be hot though they are dark in color. Interior surfaces of
an oven may become hot enough to cause burns.
During and after use, do not touch, or let clothing or
otherflammable materials touch heating elementsor
interiorsurfacesofovenuntil they have had enough
time to cool. Other range surfaces that may become
hotenoughto cause burns are the ovendoor and oven
ALL APPLIANCES
1. Proper installation. Be sure your appliance is
properlyinstalledand grounded by a qualified
technician.
2. NeverUse YourAppliance for Warmingor Heating
theRoom.
3. Do not leave children alone. Childrenshould notbe
aloneor unattended in the area wherethe appliance
is in use. They should never be allowed to sit or
stand on any part of the appliance.
4. Wearproperapparel. Loose fitting or hanging
garmentsshouldnever be worn while using
appliance.
5. UserServicing—Do notrepair or replaceany part of
theappliance unless specifically recommendedin
the manual. All other servicing should be referred to a
qualifiedtechnician.
6. Storagein oronappliance. Flammable materials
should not be stored in an oven or near surface units.
7. Do not use water on grease fires. Smother fire or
flame, or use dry chemical or foam-type extinguisher.
8. Use only dry potholders. Moist or damp potholders
on hot surfaces may result in burns from steam. Do
not let potholder touch elements. Do not use a towel
or other bulky cloth.

4
SURFACE COOKING UNITS
1. Useproper pansize. This applianceis equipped with
one or more surface units of different size. Select
utensilshavingflatbottomslargeenoughtocover the
surfaceunitheatingelement.Theuseofundersized
utensils will expose a portion of the heating element
to direct contact and may result in ignition of clothing.
Useofoversized utensils concentrates heat on
cookingsurfaceand can cause damage to range.
Properrelationship of utensil to burner improves
efficiency.
2. Neverleave surface unitsunattended.Boilovercauses
smoking and greasy spillovers that may ignite.
3. Glazed cooking utensils—Only certain types of glass,
ceramic,earthware,or other glazed utensils are
suitableforrangetopservice without breaking due to
suddenchange in temperature.
4. Utensilhandlesshouldbeturnedinward and not
extendoveradjacent surface units. Toreduce the risk
ofburns,ignitionofflammable materials, and spillage
due to unintentional contact with the utensil, the
handle of a utensil should be positioned so that it is
turnedinward,and does not extend over adjacent
surfaceunits.
5. Donotsoakremovable heating elements. Heating
elementsshouldneverbeimmersedinwater.
GLASS/CERAMIC COOKING SURFACES
1. Do not cook on broken cooktop. If cooktop should
break,cleaningsolutionsand spillovers may
penetrate the broken cooktop and create a risk of
electrical shock. Contact a qualified technician
immediately.
2. Clean cooktop with caution. If a wet sponge or cloth
is used to wipe spills on a hot cooking area, be
carefulto avoid a steam burn. Somecleaners can
producenoxious fumes if appliedto ahot surface.
OVENS
1. Usecare when opening door.Let hot air orsteam
escapebefore removingorreplacing food.
2. Donotheat unopened food containers. Build-up of
pressure may cause container to burst and result in
injury.
3. Keepoven vent ducts unobstructed.
4. Placement of oven racks. Always place oven racks in
desiredlocationwhile oven is cool. If rack isremoved
while oven is hot, do not let potholder contact hot
heatingelement in oven.
5. Protective liners. Do not use aluminum foil to line drip
bowlsorovenbottoms.Improperinstallationofthese
liners may result in a risk of electrical shock, or fire.
SELF-CLEANING OVENS
1. Do not clean door gasket. The door gasket is
essential for a good seal. Care should be taken not
torub, damage, or movethe gasket.
2. Donotuseovencleaners.Nocommercialoven
cleanerorovenlinerprotectivecoatingofanykind
should be used in or around any part of the liner.
3. Clean only parts listed in manual.
4. Beforeself-cleaning the oven,removebroiler pan,
ovenracks,and other utensils.
5. Removeall items from rangetop and backguard.
VENTILATION HOODS
1. Cleanventilation hoods frequently.Grease should not
beallowedto accumulate on hood or filter.
2. Whenflamingfoods,turnfanoff.Thefan,ifoperating,
mayspreadthe flame.
In Case of Fire
Fires can occur as a result of over cooking or excessive
grease. Though a fire is unlikely, if one occurs, proceed
as follows:
Surface Element Fire
1. Smotherthefire with a nonflammable lid or baking
soda, or use a Class ABC or BC extinguisher. Not
water. Not salt. Not flour.
2. As soon as it is safe to do so, turn the surface
controlsto
OFF
.Turn off power at main circuitbreaker
or fuse box.
Oven Fires
1. Ifyouseesmoke from your oven, do not open oven.
2. PressOVENCANCELtoturn oven off.
3. As an added precaution, turn off power at main circuit
breakerorfusebox.
4. Turnon vent to remove smoke.
5. Allowfood orgrease to burnitself out inoven.
6. Ifsmoke and fire persist, callfire department.
7. If there is any damage to components, call an
authorizedservicer beforeusingrange.
Precautions
• Donot cook food directlyon rangetopsurface, always
usecookware.
• Donotmix household cleaning products. Chemical
mixturesmayinteract with objectionable or even
hazardousresults.
• Do not put plastic items on warm cooking areas. They
may melt and stick.
• Do not slide rough metal objects across rangetop
surface. Scratching or metal marking can result.
• Donotleave fat heating unless you remainnearby. Fat
canigniteif overheated by spilling onto hotsurfaces.
• Do not allow pots to boil dry as this can cause damage
tocooking surface and pan.
• Do not use rangetop surface as a cutting board.
• Do not use range for storage or as a display counter.

5
Installation
Packing Material
Removeprotectivepacking materials from range. Tape
residue can be cleaned with a soft cloth and alcohol.
Range Location
Underwriter’sLaboratories, Inc. specifies range can be
installed flush against right and left base cabinets, and
rearvertical wall. Range canalso beinstalledflush
againstleft or right verticalwall extendingabove 36inch
standardcountertopheight.
Cabinet Opening
WARNING
!
To avoid riskof burnsor fireby reachingover elements,
cabinetstorage space located above range shouldbe
avoided.If cabinet storage is provided,install a range
hood that projects horizontally a minimum of 5 inches
beyond the cabinet bottom to reduce the risk.
CAUTION
!
Do not store items of interest to children in cabinets
abovearange or behind the backguard of arange.
Children climbing on the range to reach items could
beseriously injured.
Rangeshould extend approximately 2inches from
cabinetfront to oven door handle.Using dimensions,
preparecabinet opening.
A
C
B
D
E
A—301/8 to 30¼ inches
B—36 inches standard
C—35 inches standard
D—23 inches standard
E—25 inches standard
Standard Cabinet and Countertop Height
Minimum Clearances to Combustible
Surfaces
Usingdimensions,prepare cabinet opening.
• Minimum clearance to rear wall is 0 inches.
• Minimum clearance to a vertical right or left side wall is
0 inches.
• Minimumclearance to countertop/cabinet oneach side
is 0 inches.
• Minimumof 30 inches betweentop of cooking surface
andbottom of an unprotectedwood or metal cabinet.
• Minimumof 24 inches betweencooking surfaceand
protectedwoodormetal cabinet above range. Cabinet
bottom must be protected by at least ¼ inch thick
millboard with not less than No. 28 MSG sheet steel,
.015 inch thick stainless steel, .024 inch thick
aluminum, or .020 inch thick copper.
A
B
C
D
E
A—30 inches minimum
B—30 inches unprotected/24 inches protected minimum
C—13 inches maximum
D—25 inches maximum
E—36 inches maximum
Minimum Clearances to Combustible Surfaces

6
Power Cord Requirements
Power cord is not supplied with range. Power cord must
be U.L. Listed and meet NEC and Mobile Home
ManufacturersAssociation Standards. Cord mustbe
rated at a minimum 250V—40 AMP, equipped with a
plugconfiguration in accordance with NEMA.Conductors
must end with closed loop (ring) terminals at the range.
• Three-conductorcord plug NEMA10-50Pallowedfor
residential.
• Four-conductorcord plug NEMA 14-50P requiredfor
most mobile home installations but can be used for
residential.
NOTE: Onlyapower cord suitable for use with ranges may
be used. For installation in a mobile home, or area where
local codes do not permit grounding through the neutral
terminal, a 4-wire cord must be used.
Range Terminal Block
Connection block is located at bottom rear of range
behindrear cover panel. Remove rear coverscrew.
Directly below terminal block is a hole for a power supply
service cord. Power cord is not supplied with range.
Attach Power Cord
Irregular Cabinet and Countertop Heights
Countertops such as ceramic tile tops cause cabinet and
countertoptobehigherthan36inches. Follow instructions
belowwhen countertop is higher than36inches.
1. Raiseleveling legstomaximum height.
2. Measurefrom floorto rangetop.If measurement is
less than height of countertop, floor must be
shimmed.
3. Shim floor using a piece of plywood same size as
rangeopening.Secure plywood to floor. Plywood
must be as secure as original flooring.
4. Install anti-tip bracket and slide range into place.
Line Voltage Requirements
Linevoltagemustnot exceedratedvoltage.Seerating plate
attachedtorange for kilowatt rating. Line voltage lessthan
ratedvoltage will resultinslowheating. Wiring systemmust
conform to Underwriters Laboratories, Inc. standards and
National Electrical Code. Installation must conform to all
local, municipal and state building codes, and local utility
regulations. Range must be connected only to a supply
circuitasspecified on rating plate wiringdiagram of range.
Range requires 3 wires, 120/240 Volts, 60 Hertz A.C.
House wiring and fusing must comply with local wiring
codes. If no codes apply, wire according to National
Electrical Codes.
Power Supply Location
Shadedareashow range clearance for electrical
connection.
A
B
C
E
D
B
A—3 inches
B—7 inches
C—6 inches
D—301/8 inches minimum
E—241/16
Power Supply Location

7
Range has been grounded at the factory to the center
(nickel plated) terminal of the terminal block in
accordancewith the NationalElectrical Code(section
2560). When a separate ground is required by local code,
disconnect the grounding strap from the terminal block.
Groundframeby connecting a grounding wire torange
frameusingonly the grounding screwremoved from the
groundingstrap.
Power lead connect wire
with black or red insulation
and brass terminal
Power terminals
(240 V)
Ground
strap
Neutral terminal connect wire
with white insulation
Terminal Block
Terminal block is approved for copper wire connection
only, NOT aluminum wiring. If aluminum house wiring
is to be connected, the following procedure is suggested.
1. Connectlengthofcopperbuilding wire to range
terminal block with ring terminals.
2. Splicecopper wiresto aluminum wiringusing
connectorswhicharedesignedcertified by
Underwriter’sLaboratories and recognizedforjoining
coppertoaluminum.Follow the connector
manufacturer’srecommendedprocedure.
3. Wire used, location and enclosure of splices must
conform to local codes.
Installing 3-Wire Power Cord
Referto power cord instructions if available for additional
information.
1. Removerear wire coveronrearof range.
2. Place strain relief (winged clamp) in cord access hole
belowterminalblock.
• Strain relief is supplied with cord. Place wings
throughhole, entering from bottom.Screw holesin
clamp should be below mounting panel. Place cord
throughstrainrelief.
3. Attachneutral(center) or white wire tocenter terminal
on terminal block.
4. Attach power lead, red wire or black wire to left side
power terminal.
5. Attach power lead, red wire or black wire to the right
sidepower terminal.
6. Afterwires havebeen placed onterminals, attach
withhexnuts provided.
• Firmly tighten to ensure proper electrical
connection.
7. Place screw through strain relief and tighten.
8. Replacerear wire cover.
Wires from power cord
Wires from range
(Number of wires on each terminal can vary)
AA
B
A—Power lead terminal (Connect black or red insulated wire and
secure with brass nut.)
B—Neutral terminal (Connect insulated white insulated wire and
secure with brass nut.)
Installing 3-wire Power Cord

8
Installing 4-Wire Power Cord
WARNING
!
To avoid the risk ofsevereelectrical shock or death,
groundwiremust be attached to frame of range,using
groundscrewprovided.Groundwiremustnotcontact
anyotherterminal.
1. Removerear wire coveronbackofrange.
2. Place strain relief (winged clamp) in cord access hole
belowterminalblock.
• Strain relief is supplied with cord. Place wings
throughhole entering from bottom.
• Screwholes in clamp should bebelow mounting
panel.
3. Removegreengroundscrew(retain for use in step 8)
andunscrewbrassnutoncenterterminal.Remove
groundingstrap.
Green ground
screw
Center terminal
nut
Grounding
strap
Wires from range
(Number of wires on each terminal can vary)
Remove Green Ground Screw
4. Placecordthroughstrain relief.
5. Attach cord neutral (center) or white wire to center
terminal on terminal block. Secure with hex nuts
provided.See “Attach 4-wire Power Cord” illustration.
6. Attach power lead, red wire or black wire to left
terminal.Securewithhexnuts provided.
7. Attach power lead, red wire or black wire to right
terminal.Securewithhexnuts provided.
Wires from power cord
AA
B
Wires from range
(Number of wires on each terminal can vary)
A—Power lead terminal (Connect black or red insulated wire and
secure with brass nut.)
B—Neutral terminal (Connect insulated white insulated wire and
secure with brass nut.)
Attach 4-wire Power Cord
8. Positiongroundingstrap down and away from
terminalblock. Attach green orbare wireand
groundingstraptobackofrangeusinggreenground
screwpreviouslyremovedin step 3.
Wires from power cord
A
Wires from range
(Number of wires on each terminal can var
y
)
A—Ground screw (Connect green insulated wire and secure with
screw.)
Position Grounding Strap
9. Firmlytightenall connections to ensureproper
electricalconnection.
10. Placescrewthrough strain relief, tighten, and replace
rearwirecover.

9
Converting 3-Wire to 4-Wire Power Cord
1. Removerear wirecover.
2. Removebottomstrainreliefscrewandretainfor
furtheruse.
3. Removescrew/hexnuts from terminal block and
retainfor further use.
4. Removeall3-wireorcableleadsfromtheterminal
blockandproceedtoremovethepower cord from the
range by pulling in a downward motion so the cord is
removedfrom strainrelief.
5. To install the 4-wire cord, please follow step 3
throughstep9of
Installing4-WirePower Cord
section.
Anti-tip Bracket Installation
To reduce risk of range tipping, secure range with a
properlyinstalled anti-tip bracket.
1. Measure 31/2inches from back wall on right and left
side of cabinet cutout. Mark measurements on floor
and draw a straight line connecting marks.
2. Position anti-tip bracket.
• If range is installed beside cabinet(s), place anti-tip
bracket with back edge on line drawn on floor and
side of bracket against cabinet.
• If range is not installed beside cabinet(s), position
range where it will be installed. Draw a line along
sideof range on floor fromfront to back.Remove
range.Place anti-tip bracket withback edge over
line drawn 31/2inches from back wall and side of
bracketoverline drawn along side of range onfloor.
• Anti-tip bracket can be installed on either right or
left side.
or
3 1/2"
Anti-tipBracket Installation
3. Mark 2 hole locations in anti-tip bracket.
4. Drill 2 holes.
• If drilling into wood, use a 3/32-inch drill bit.
• If drilling into concrete, use a 3/16-inch masonry drill
bit and insert plastic anchors.
5. Secure bracket to floor using screws supplied.
6. Sliderangeinto position, remove range storage
draweror lower panel andconfirm anti-tipbracket is
engagedwith range leveling leg.
Level Range
CAUTION
!
To avoid damaging oven door, do not lift or move range
byoven door handle. Glasscan break.
Carefullylevelrangeusing legs provided. Range must be
levelto cook and bakeuniformly.
• Placealevel on top oven rack oron range topwhen
leveling.
• Levelinglegsmust extended ¼ inch toengage anti-tip
bracket.
Removal and Replacement of Range
1. Disconnectpowertorange.
2. Sliderange forward.
3. Unplugrangecord and place range aside.
4. Removeanti-tip bracket.
5. Install anti-tip bracket into new location using
instructionsprovidedwith bracket or see
Anti-tip
Bracket Installation
section in this manual.
6. To reinstall range, followinstructions in
Installation
section of this manual.

10
Operation
ARTC7511 Range Features
Shadedareascan become hot while cooking, baking, broiling, orself-cleaning.
A
B
AC
D
D
E
F
G
GG
H
J
K
A—Surface Element Control Knob
B—ElectronicRange Control
C—Dual Element Switch
D—SurfaceElement Indicator Lights
E—EvenAir™ Convection Fan Switch
Range Features
Preparing to Cook with Smoothtop
Elements
WARNING
!
To avoid risk of serious personal injury never cook on
abrokensmoothtopcookingsurface.Spilloversor
cleanerscan penetrate surface andcreate arisk of
electrical shock. If smoothtop cooking surface breaks,
discontinueuseandnotifyanauthorizedservicer
immediately.
F—Oven Light Switch
G—Surface Elements
H—Dual Size Surface Element
J—Oven Door Window
K—Storage Drawer
• Beforecooking on smoothtop, wipetopwith cleaner
conditioner.Conditioningsmoothtopbefore use makes
marks and stains easier to remove.
• Useheavy-gauge metal cookware not includingcast
iron.
• Bottom of cookware must be flat. Cookware that is
warped or slightly curved on the bottom heats slowly
andmay not boil water.Cookware with an aluminum
disk bottom makes excellent contact with cooking
surface. See
Utensils
section for more information.

11
Cooking with Dual Radiant Element
DualElement can be operatedusinginner element only
orboth elements.
To use inner element
1. Depress
ElementSize
switch downward. Dual
Element switch is located on right side of control
panel next surface element control knob.
LARGE
SMALL
ElementSize Switch
2. Push in and turn surface element control to desired
setting.
• Element will cycle on and off to maintain desired
heat setting.
OFF
LO HI
MED
Surface Element Control Knobs
3. When finished cooking turn control to
OFF
position.
To use both inner and outer element
1. Depress
Element Size
switch upward.
LARGE
SMALL
ElementSize Switch
2. Followsteps2-3above.
• Smoothtop cooking surface is not “scratch proof”.
Surface is highly scratch and impact resistant. With
recommendedcooking utensils and propercare, it will
continuelooking good through yearsof use.
• Donot use glass, glass-ceramic,or enamel-porcelain
cookware. Small imperfections on bottom of such
cookwarecan scratch smoothtop surface.
Cooking with Surface Elements
WARNING
!
To avoid risk of seriouspersonal injury, property
damage,orfire,donotleavesurfaceelements
unattendedwhile in operation. Grease and spillovers
can ignite causing a fire.
1. Push in and turn surface element control to desired
setting.
• Element will cycle on and off to maintain desired
heat setting.
• Rangeshas four indicator lights.After the surface
controlsareturned off, the appropriate surface
indicator light will continue to glow until the surface
elementshave cooled. The lengthof timeeachlight
remains on will vary. Do not expect the lights for
two different heating areas to go off at the same
timeeven if the elements wereturned off
simultaneously.
2. When finished cooking, turn control to
OFF
position.
OFF
LO HI
MED
Surface Element Control Knobs
Surface Element Settings
LO —Use to prepare food at less than boiling
temperaturesortosimmer.
MED—Useto maintain boiling of largeramounts offood,
lowtemperature frying and tomaintain correctpressure
ina pressure cooker.
HI—Useto bring food to boilingtemperatures. Whenfood
is boiling temperature setting should be reduced to LO
throughMED.

12
For best cooking results, use a pan with a flat bottom.
Determine if pan has a flat bottom.
1. Rotate a ruler along bottom of pan. If pan is not flat,
gapsbetween bottom of panand edgeof ruleroccur.
2. A small groove or mark on a pan does not effect
cookingtimes. However,if a panhas agap,formed
rings, or an uneven bottom, it does not cook
efficiently and in some cases may not boil liquid.
Flat Pan Bottom
citsiretcarahClairetaMlisnetUcitsiretcarahClairetaMlisnetU citsiretcarahClairetaMlisnetU citsiretcarahClairetaMlisnetUcitsiretcarahClairetaMlisnetU
epyTepyT epyT epyTepyTerutarepmeTerutarepmeT erutarepmeT erutarepmeTerutarepmeT esnopseR sesUsesU sesU sesUsesU
munimulAslooCdnastaeH ylkciuQ ,gniyrF ,gnisiarB gnitsaoR
norItsaCslooCdnastaeH ylwolS taeHwoL ,gnikooC gniyrF
reppoC deniLniT slooCdnastaeH ylkciuQ temruoG ,gnikooC eniW ,secuaS sehsiDggE
erawlemanEesaBnosdnepeD lateM taeHwoL gnikooC
cimareC )ssalG( slooCdnastaeH ylwolS taeHwoL gnikooC
sselniatS leetS taslooCdnastaeH etaRetaredoM ,spuoS ,secuaS ,selbategeV lareneG gnikooC
Cooking Utensils
• Use proper pan size. Do not use a pan that has a
bottom smaller than element. Do not use utensils that
overhangelement by more than 1inch.
More than
1 inch overhang
Correct Size
Utensil Size
• Use care when using glazed cooking utensils. Some
glass,earthenware, or other glazedutensils breakdue
tosudden temperature changes.Do notuse glazed
utensils on smoothtop ranges.
• Select utensils without broken or loose handles.
Handles should not be heavy enough to tilt pan.
• Do not use a wok with a ring stand. Use flat bottom
wok.
Woks

13
Oven Cooking Methods
Element and Fan Location
A—Upper Element (Broil)
B—Lower Element (Bake)
C—Convection Fan
Introduction
This Range provides standard Baking and Broiling,
as well as EvenAir™ Convection Baking and
Broiling. During EvenAir™ Convection Baking and
Broiling, the oven fan in the rear of the oven cavity
circulates air while the oven cooks. The circulating
air provides even browning and faster baking and
broiling times.
When the oven is set to standard mode, the
CONVECTION/STANDARD switch next to
electronic range control is pressed towards
“STANDARD” and does not glow. To set oven to
EvenAir™ Convection Cooking, press switch
towards “CONVECTION”. The switch glows and the
oven fan operates. When cooking is complete,
press switch towards “STANDARD” to turn fan
off.
Bake
Upper and lower elements operate during bake. Upper
element is only used to heat oven quickly and brown
top of food. Bake can be used to cook foods which are
normally baked. Oven must be preheated.
Broil
Upper element operates during broil. Broil can be used
to cook foods which are normally broiled. Preheating is
not required when using broil. All foods should be
turned at least once except fish, which does not need
to be turned.
EvenAir™Convection Bake
Upper element, lower element, and fan operate during
convection bake. Upper element is only used to heat
oven quickly and brown top of food. Convection bake
should be used for cooking casseroles and roasting
meats. Oven should be preheated for best results when
using convection bake. Pans do not need to be
staggered. Cooks approximately 25% quicker than
bake.
Convection Broil
Upper element and fan operate when using convection
broil. Convection broil can be used to cook foods that
are normally broiled. Oven does not require preheating
when using convection broil. Cooks approximately 25%
quicker than broil.
Dehydrate
Uses convection fan with oven at low temperature
(approx. 170ºF). Dehydration is an excellent way to
preserve fresh foods.
A
B
C

14
Electronic Oven Control and Oven Switches
TIMER
ON/OFF CLOCK STOP
TIME COOK
TIME
OVEN
CANCEL
CLEAN BROIL BAKE
O
N
CLEAN BROIL
LOCK
DELAY
OVEN ON
CLEAN
STOP
TIME BAKE
OVEN
LIGHT
CONVECTION
STANDARD
Electronic Oven Control
Pad Description
OVEN CANCEL Cancels any cooking or cleaning function except timer.
TIMER ON/OFF Use to time any kitchen function or cancel timer. Does not control bake, broil, or
clean function.
CLOCK Use to set time of day.
STOP TIME Use to set delayed bake and self-clean.
COOK TIME Use to set timed baking.
CLEAN Use to select self-clean cycle.
BROIL Use to select broil.
BAKE Use to select bake.
Use to set temperature or time.
Oven Signals
Timer signal When time elapses, timer beeps 3 times then approximately once every 6-8
seconds until TIMER ON/OFF pad is pressed.
Preheat signal After setting oven to bake and selecting a temperature, oven preheats. When
oven reaches set temperature, 1-second signal sounds.
End-of-Cycle signal When a timed cooking cycle is complete, three long signals sound. End of cycle
signal continues to sound until OVEN CANCEL pad is pushed.
If minute timer end of cycle signal is sounding, push TIMER ON/OFF pad.
Oven Switches
Oven Light Switch Oven light turns on when oven door is opened or when switch on control panel is
turned on.
Convection / Standard
Switch When pushed up towards “CONVECTION”, EvenAirConvection oven fan turns
on and switch glows. When cooking is complete, press switch towards
“STANDARD” to turn fan off. Do not use convection for Self-cleaning or
normal baking; push down towards “STANDARD”.
or

15
Display
Displays time-of-day, timer and timed or delayed bake
settings.
Displays temperature and cooking method for oven.
Display Glossary
TIME TIME displays while time-of-day, timed or delayed baking, or delayed self-cleaning is set.
BAKE BAKE displays while bake is set and used.
ON Displays when oven is heating.
DELAY Displays when delayed bake or clean self-cycle is set. Oven is not heating.
STOP Displays when setting the stop time for a delayed baking or self-clean cycle.
BROIL Displays when a broil is set and used.
CLEAN Displays when self-clean cycle is set and used.
LOCK LOCK flashes while oven door is locking and remains in display while door is locked. After
cycle is complete and oven has cooled to a safe temperature, LOCK no longer displays
and door can be opened.
Other Features
12-hour automatic
cancel This safety feature prevents oven from continuing to operate if it has been left on for
over 12 hours. If a cooking function continues longer than 12 hours without any options
on oven control being touched, this feature turns oven off. Any time an option is touched,
12-hour automatic cancel is reset.
Child lockout This safety feature is used to prevent children from accidentally programming oven by
disabling electronic oven control. Press and hold BAKE and COOK TIME for 5 seconds.
“OFF” displays where the temperature normally appears. To reactivate control, press and
hold BAKE and COOK TIME pads for 5 seconds on the upper oven control. Child lockout
must be reset after a power failure.
Service codes and
tones Electronic oven control is equipped with a self diagnostic system. Self diagnostic system
alerts you if there is a error or problem in the control. If electronic range control sounds a
series of short, rapid beeps for over 16 seconds and display shows a F-code, record the F-
code shown. Some F-codes can be cleared by touching OVEN CANCEL or disconnecting
power to the range. If the code continues to reoccur call an authorized servicer. Disconnect
electrical supply to range and contact an authorized servicer.
F1—Control malfunction
F2—High oven temperature
F3—Temperature sensor malfunction
F4—Temperature sensor malfunction
F7—Touch pad malfunction
F9—Door lock malfunction (Door unlocked)
FF—Door lock malfunction (Door locked)
O
N
CLEAN BROIL
LOCK
DELAY
OVEN ON
CLEAN
STOP
TIME BAKE
O
N
CLEAN BROIL
LOCK
DELAY
OVEN ON
CLEAN
STOP
TIME BAKE

16
Setting Clock
1. PressCLOCKpad.
• “TIME” displays.
2. Press or pad until correct time of day is
displayed.
3. Press OVEN CANCEL pad to set time.
• If OVEN CANCEL pad is not pressed,
approximately30seconds after last entry, “TIME”
disappears and time is set.
Setting Minute Timer
1. PressTIMERON/OFFpad.
• “TIMER”displays.
2. Press or pad until desired amount of time is
displayed.
• Timer can be set from 5 seconds to 9 hours and 50
minutes.
• Timer begins counting down automatically.
3. When time elapses timer beeps 3 times then
approximatelyonceevery6-8seconds.
• Press TIMER ON/OFF to cancel beep but remain in
timermode.
Canceling Minute Timer
PressandholdtheTIMER ON/OFF pad for approximately
3 seconds.
• When canceling minute timer do not press OVEN
CANCELpad.PressingOVENCANCELpad
cancelscooking function.
Prepare for Bake, Timed Bake, and Delayed
Bake
CAUTION
!
To reduce riskof foodpoisoning due to bacterial growth
and production of toxins, never hold meat, milk, fish or
eggsfor more than 2hours beforecooking.
Remove Items Stored in Oven
Removeanypans and other cooking utensils storedin
oven.
Remove Items Stored in Oven

17
OvenRacks
Rangeincludes 3 oven racks. TheEvenAir™convection
baking feature allows you to use all 3 racks
simultaneouslywhile providing even browningandfaster
bakingtimes.See “Convection Pan Placement” section.
Standard Oven Rack
Oven Rack Placement
Positionovenrackbefore turning oven on.
WARNING
!
To avoid damagingoven liner orcreating fire, donot line
ovenbottom or oven racks withfoil.
1. Pull rack forward to stop position.
2. Raise front edge of rack and pull until rack is out of
oven.
3. Place rack in new rack position.
• Curvededgeofrack must be toward rear of oven.
Oven Rack Placement
Bake Pan Placement
• Keeppans and baking sheets2 inches from ovenwalls.
• Stagger pans placed on different racks so one is not
directlyovertheother.
PanPlacement
Convection Pan Placement
Baking pans and cookie sheets should not touch side or
rearwalls of oven. Ifpans areplaced ondifferent racks,
theycan be placed directlyover eachother. Convection
cookingcirculates air around oven providing even
browningon all rack positions.When using convection,
oven can be loaded on all racks with excellent cooking
results.
ConvectionPan Placement

18
Timed Baking or Timed Convection Baking
Setovento cook for desired amount of time.Oven
automatically stops heating after time elapses.
1. Placefood in oven.
2. PressCOOKTIMEpad.
3. Press or pad until cooking time is displayed.
• Cook time can be set up to 11 hours and 55
minutes.
• 10 minutes minimum cooking time.
• Ifcooktime is entered and temperature notentered
“BAKE”and ---° flashes andsignals.
4. Press BAKE pad.
5. Press or pad until desired temperature is
displayed.
• Temperature begins at 350°Fand can be set from
170°F to 550°F in 5° increments.
• Temperature display increases in 5°Fincrements
startingat 100°F until reaching set temperature.
Someminorsmokingisnormal when using oven for
firsttime.When cook temperature is reached oven
signals.
• To view cooktime, press COOKTIME pad.
• When cooking time has elapsed, an end of cycle
signalsounds,ovenautomaticallyturns off and
display returns to time of day. Oven signal sounds 3
times, then once every 3 seconds for 5 minutes or
until OVEN CANCEL pad is pressed.
6. PressCONVECTION/STANDARDswitchtowards
CONVECTIONfor convection cooking. Switchglows
inconvection mode.
7. PressOVENCANCELpadwhenfinished.
• Removefood from ovenwhencookingtime has
elapsed.Foodleft in oven can overcook.
• PressCONVECTION/STANDARDswitch towards
STANDARDwhen baking is finished. Switch stops
glowing.
To Cancel Remaining Cooking Time
PressOVENCANCEL pad.
Baking or Convection Baking
Openovendoortoconfirmnothingisstored in oven cavity
andset racks to properheightbefore baking. For delicate
baking,preheat approximately 15–20 minutes before
placingfood inside oven.
1. Press BAKE pad.
• “BAKE”and“---°”display.
2. Press or pad until desired temperature is
displayed.
• Temperature begins at 350°Fand can be set from
170°Fto550°F in 5 degree increments.
• Temperature starts at 100°Fand increases in5°
incrementsuntilreaching set temperature. Some
minorsmokingisnormal when using oven for first
time.Whencooktemperature is reached oven
signalsoundsfor approximately 1 second.
3. PressCONVECTION/STANDARDswitchtowards
CONVECTIONfor convection cooking. Switchglows
inconvection mode.
4. PressOVENCANCELpadwhenfinished.
• Removefood from ovenwhencookingtime has
elapsed.Foodleft in oven can overcook.
• PressCONVECTION/STANDARD switchtowards
STANDARDwhen baking is finished. Switch stops
glowing.

19
Delayed Baking or Delayed Convection
Baking
Set oven to begin and end baking at later time. Range
control automatically calculates starting time.
1. Placefood in oven.
2. Press BAKE pad.
3. Press or pad until desired temperature is
displayed.
• Temperature begins at 350°Fand can be set from
170°F to 550°F in 5° increments.
4. PressSTOPTIMEpad.
• Current time of day appears in display.
5. Press or pad until desired stop time displays.
• Stop time can be set 11 hours 55 minutes ahead of
current time of day.
6. PressCOOKTIMEpad.
• To view cooktime later, press COOK TIME pad.
7. Press or pad until desired time cooking
displays.
• 10 minutes minimum cooking time.
• Electronic range control calculates start time.
When start time is reached “DELAY” no longer
displays and “O
N” displays.
• To view cook time, press COOK TIME pad.
• To view stoptime, pressSTOPTIME pad.
8. PressCONVECTION/STANDARDswitchtowards
CONVECTIONfor convection cooking. Switchglows
inconvection mode.
9. When cooking time has elapsed, end of cycle signal
sounds,ovenautomaticallyturns off and display
returns to time of day. Oven signal sounds 3 times,
then once every 3 seconds for 5 minutes or until
OVENCANCEL pad is pressed.
• PressCONVECTION/STANDARD switchtowards
STANDARDwhen baking is finished. Switch stops
glowing.
To Cancel Remaining Cooking Time
PressOVENCANCEL pad.
Broiling or Convection Broiling
Broiling system generates immediate, intense heat using
aspecial reflector. This reflector focusesheat directlyon
thefood;searinginnaturaljuicesandprovidingrestaurant
quality,charbroiledflavor.
WARNING
!
To avoid risk of fire, do not line the broiler grid with
foil.
• Foil may trap grease on top of grid close to burner
causing a fire.
• Neverleave ovenunattendedwhilebroiling.
Overcookingmay result in afire.
Broiling Tips
• Removeexcess fat from meat before broiling.Cut
edgesof meat to prevent curling.
• Place food on a cold ungreased broiling pan. If pan is
hot, food sticks.
• All food except fish should be turned at least one time.
Begin broiling with skin side down.
• Seasonmeat after it hasbrowned.
• Broilingdoesnotrequirepreheating.
• Begin cooking using suggested rack levels in
Broiling
Guide
section to test broiler results. If food is not brown
enough, cook on a higher rack position. If food is too
brown, cook on a lower rack position.
Broiling or Convection Broiling
1. Centerfoodonbroilinggridandpan,and place on
rackinoven.
• Ovendoor can be openedtofirst stop when
broiling.DuringConvectionBroiling,closeoven
door.
A
B
A—Broiler Grid
B—Broiler Pan
Broiler Pan and Grid

20
2. PressBROILpad.
• “BROIL”and “---” displays.
3. Press or to set from HI to settings 5 thru 1.
• Ovenbeginsto broil within 5 seconds. “BROIL”,“ O
N”
and “HI” or “5 thru 1” setting display.
Broiler Setting Use
HI Cookin
g
red meats
5 Cookin
g
pork
4 Cooking poultry
3 Cooking seafood
2 Cookin
g
fruits and ve
g
etables
1 Toastin
g
breads
4. PressCONVECTION/STANDARDswitchtowards
CONVECTIONfor convection cooking. Switchglows
inconvection mode.
5. PressOVENCANCELpadwhenfinished.
• Removefood from ovenwhencookingtime has
elapsed.Foodleft in oven can overcook.
• PressCONVECTION/STANDARD switchtowards
STANDARDwhen baking is finished. Switch stops
glowing.
Dehydration
Dehydrationisanexcellentway to preserve fresh foods.
The best way to become familiar with dehydration is using
fruits,vegetables,herbsand spices.
1. Place food on dehydration rack or cookie sheet in
middleofoven.
2. Open door to first stop position.
3. Press BAKE pad.
4. Press until 170° appears in display.
• Ovenisequipped with a 12 hour automaticcancel
feature.Ifdehydrationtime is longer than 12 hours,
control will need to be reset.
5. PressCONVECTION/STANDARDswitchtowards
CONVECTIONfor convection cooking. Switchglows
inconvection mode.
6. Whenfinished pressOVEN CANCELpad.
• PressCONVECTION/STANDARD switchtowards
STANDARDwhen baking is finished. Switch stops
glowing.
Dehydration Tips
Fruits
• Always start with fresh fruit.
• Cut fruit in equal pieces approximately 1/8” thick.
Thinnerpieces will dry quicker.
• Fruits need to be dipped into an antioxidant, a color-
keepingpreservative,ortwo parts water and one part
lemon juice. Treating fruit with an antioxidant will help it
retainvitamins,colorandflavor.
Vegetables
Mostvegetablesrequireblanchingtoinactivateenzymes.
Herbs and Spices
• Herbs and spices dry quickly.
• Checkevery30 minutes to avoid over drying.
• Whendrying herbs, leafclusters shouldbe separated
from stems.
Food Drying Time Results
Fruits
Apples 4–6 hours Leathery, Soft
Bananas 16–20 hours Leathery
Vegetables
Mushrooms
(No blanching) 3–4 hours Leathery, Soft
Carrots 3–7 hours Dry, Brittle
Herbs and Spices
Parsley 45–90 minutes Dry, Crumbly
Orange/
Lemon Peel 3–7 hours Hard, Tough
Table of contents
Other Amana Range manuals

Amana
Amana ACR4503SFW4 User manual

Amana
Amana W10531343B User manual

Amana
Amana AER5830VAW User manual

Amana
Amana AGR3311WD User manual

Amana
Amana AES1350BAW User manual

Amana
Amana AER5523XAW1 User manual

Amana
Amana ACF422GAB User manual

Amana
Amana ARG7202 Manual

Amana
Amana cards801 User manual

Amana
Amana ZRT6510 User manual

Amana
Amana AGDS901 User manual

Amana
Amana ARGS7650 Series User manual

Amana
Amana EASY TOUCH CONTROL Easy Touch Control 800 User manual

Amana
Amana AGG222VDW User manual

Amana
Amana AGS730 User manual

Amana
Amana AGR6603SFW1 User manual

Amana
Amana AGR6603SFS User manual

Amana
Amana AES5730BA User instructions

Amana
Amana AER5630BAS User manual

Amana
Amana STANDARD CLEANING GAS RANGE User manual