5
OVENS
1. Use Care W en Opening
DoorLet ot air or steam
escape before removing or
replacing food.
2. Do Not Heat Unopened Food
ContainersBuild-up of
pressure may cause container to burst and
result in injury.
3. Keep Oven Vent Ducts Unobstructed.
4. Placement of Oven RacksAlways place oven
racks in desired location w ile oven is cool. If rack
is removed w ile oven is ot, do not let pot older
contact ot eating element in oven.
5. Protective LinersDo not use aluminum foil to line
drip bowls, oven racks or oven bottoms. Improper
installation of t ese liners may result in a risk of
electrical s ock, or fire.
SELF-CLEANING OVENS
1. Do Not Clean Door GasketT e door gasket is
essential for a good seal. Care s ould be taken
not to rub, damage, or move t e gasket.
2. Do Not Use Oven CleanersNo commercial oven
cleaner or oven liner protective coating of any kind
s ould be used in or around any part of t e liner.
3. Clean Only Parts Listed in Manual.
4. Before Self-Cleaning t e OvenRemove broiler pan,
oven racks, and ot er utensils.
5. Remove All Items From Rangetop and Backguard.
VENTILATION HOODS
1. Clean Ventilating Hoods FrequentlyGrease s ould
not be allowed to accumulate on ood or filter.
2. W en flaming foods under t e ood, turn t e fan on.
In Case of Fire
Fires can occur as a result of over cooking
or excessive grease. T oug a fire is
unlikely, if one occurs, proceed as follows:
Surfa e Burner Fire
1. Smot er t e fire wit a nonflammable lid or baking
soda, or use a Class ABC or BC extinguis er.
Not water. Not salt. Not flour.
2. As soon as it is safe to do so, turn t e surface
controls to OFF. Turn off power at main circuit
breaker or fuse box. Turn off gas supply.
Oven Fires
1. If you see smoke from your oven, do not open
oven door.
2. Turn off oven.
3. As an added precaution, turn off power at main
circuit breaker or fuse box. Turn off gas supply.
4. Turn on vent to remove smoke.
5. Allow food or grease to burn itself out in oven.
6. If smoke and fire persist, call fire department.
7. If t ere is any damage to components, call an
aut orized servicer before using range.
IMPORTANT SAFETY INFORMATION (cont'd)
SAVE THESE INSTRU TIONS
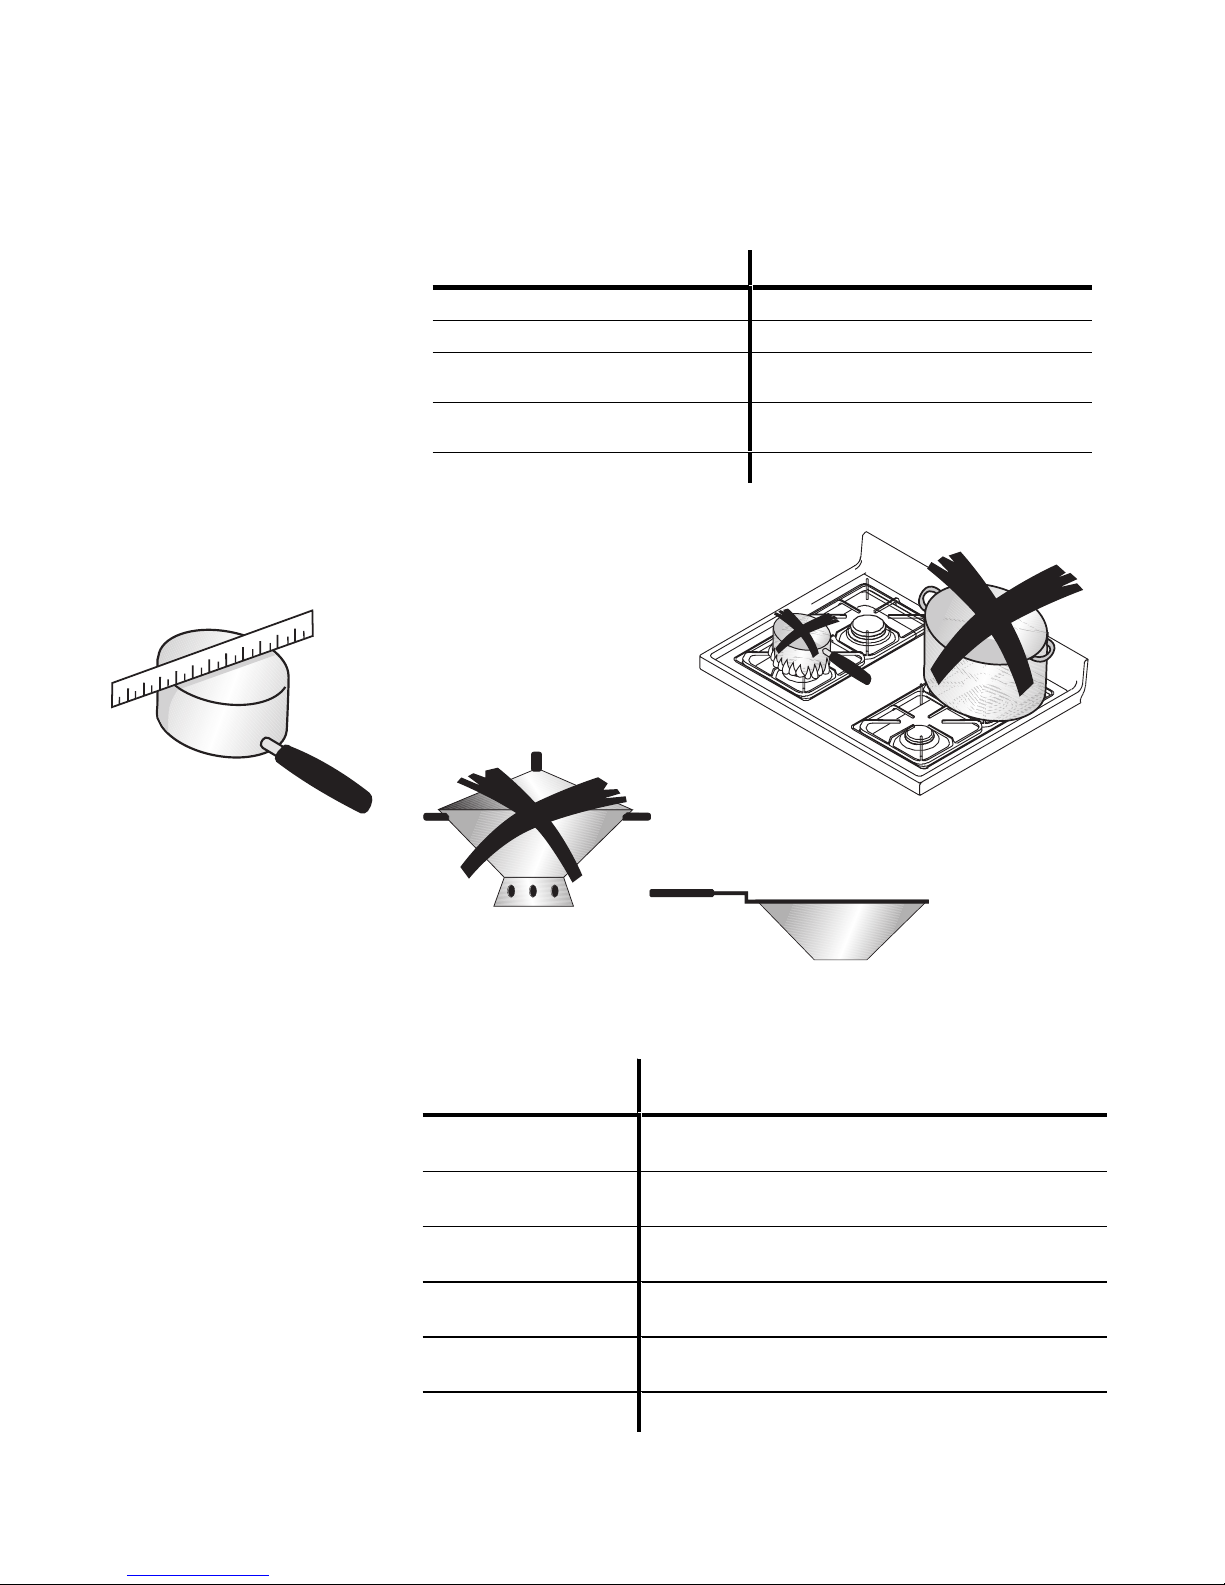
!Precautions
Do not cook food directly on
rangetop surface, always use
cookware.
Do not mix ouse old cleaning products. C emical
mixtures may interact wit objectionable or even
azardous results.
Do not put plastic items on warm cooking areas.
T ey may melt and stick.
Oven door contains a glass window. W ile t e
window is built to be sturdy and strong, it is still glass
and needs to be treated wit care.
Do not lift or move range by grasping oven door
andle. T is can result in window glass breaking or
s attering.
Do not slide roug metal objects across rangetop
surface. Scratc ing or metal marking can result.
Do not leave fat eating unless you remain nearby.
Fat can ignite if over eated by spilling onto ot
surfaces.
Do not allow pots to boil dry as t is can cause
damage to cooking surface and pan.
Do not use rangetop surface as a cutting board.
Do not use range for storage or as a display counter.
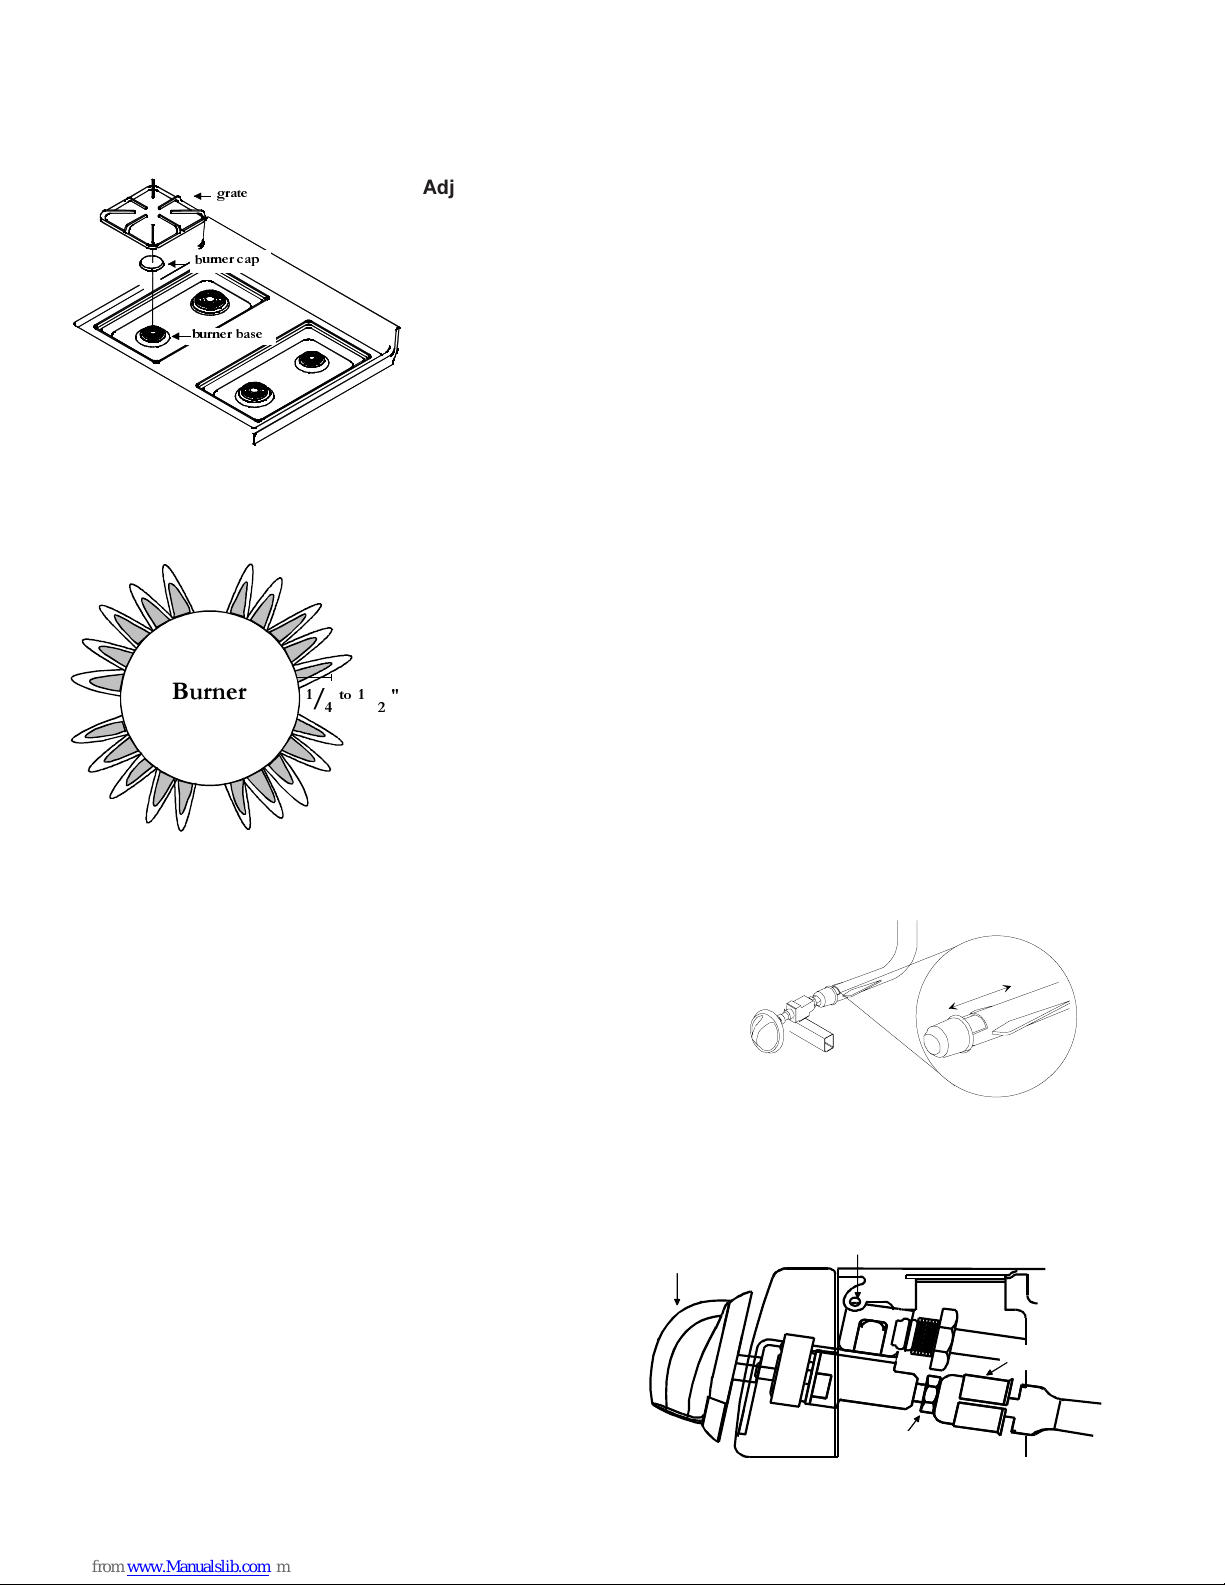
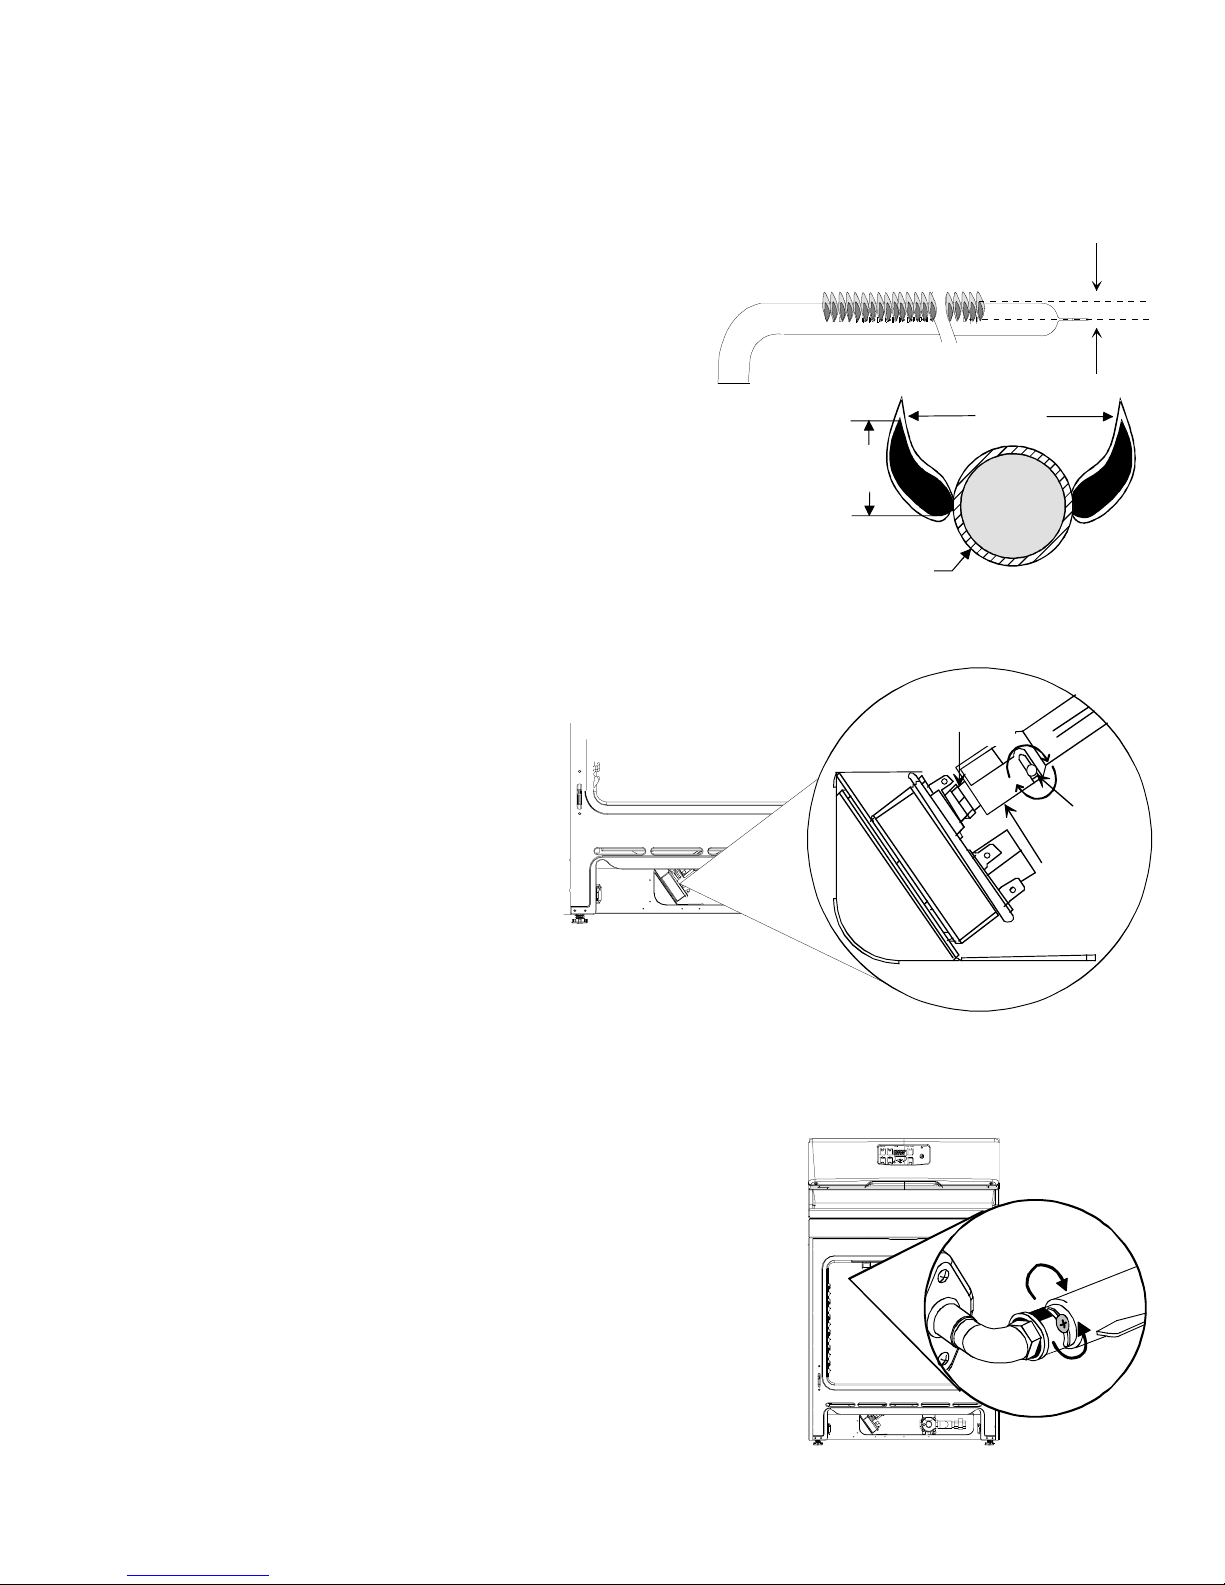
DELA ED IGNITION
Surface burners
Burner s ould ignite wit in 4 seconds. If burner does not
ignite wit in 4 seconds, turn control knob to OFF and
follow directions for installing burner caps in Adjusting
Surface Burners. Try again. If burner still does not ignite
wit in 4 seconds, contact an aut orized servicer.
Bake and broil burner flame
Allow no more t an 40-60 seconds before burner ignites
and eat is felt. To c eck for eat, open oven door to first
stop and place and over oven door opening. If eat is
not felt, press CANCEL to turn oven off. If burner
repeatedly fails to ignite, contact an aut orized servicer.