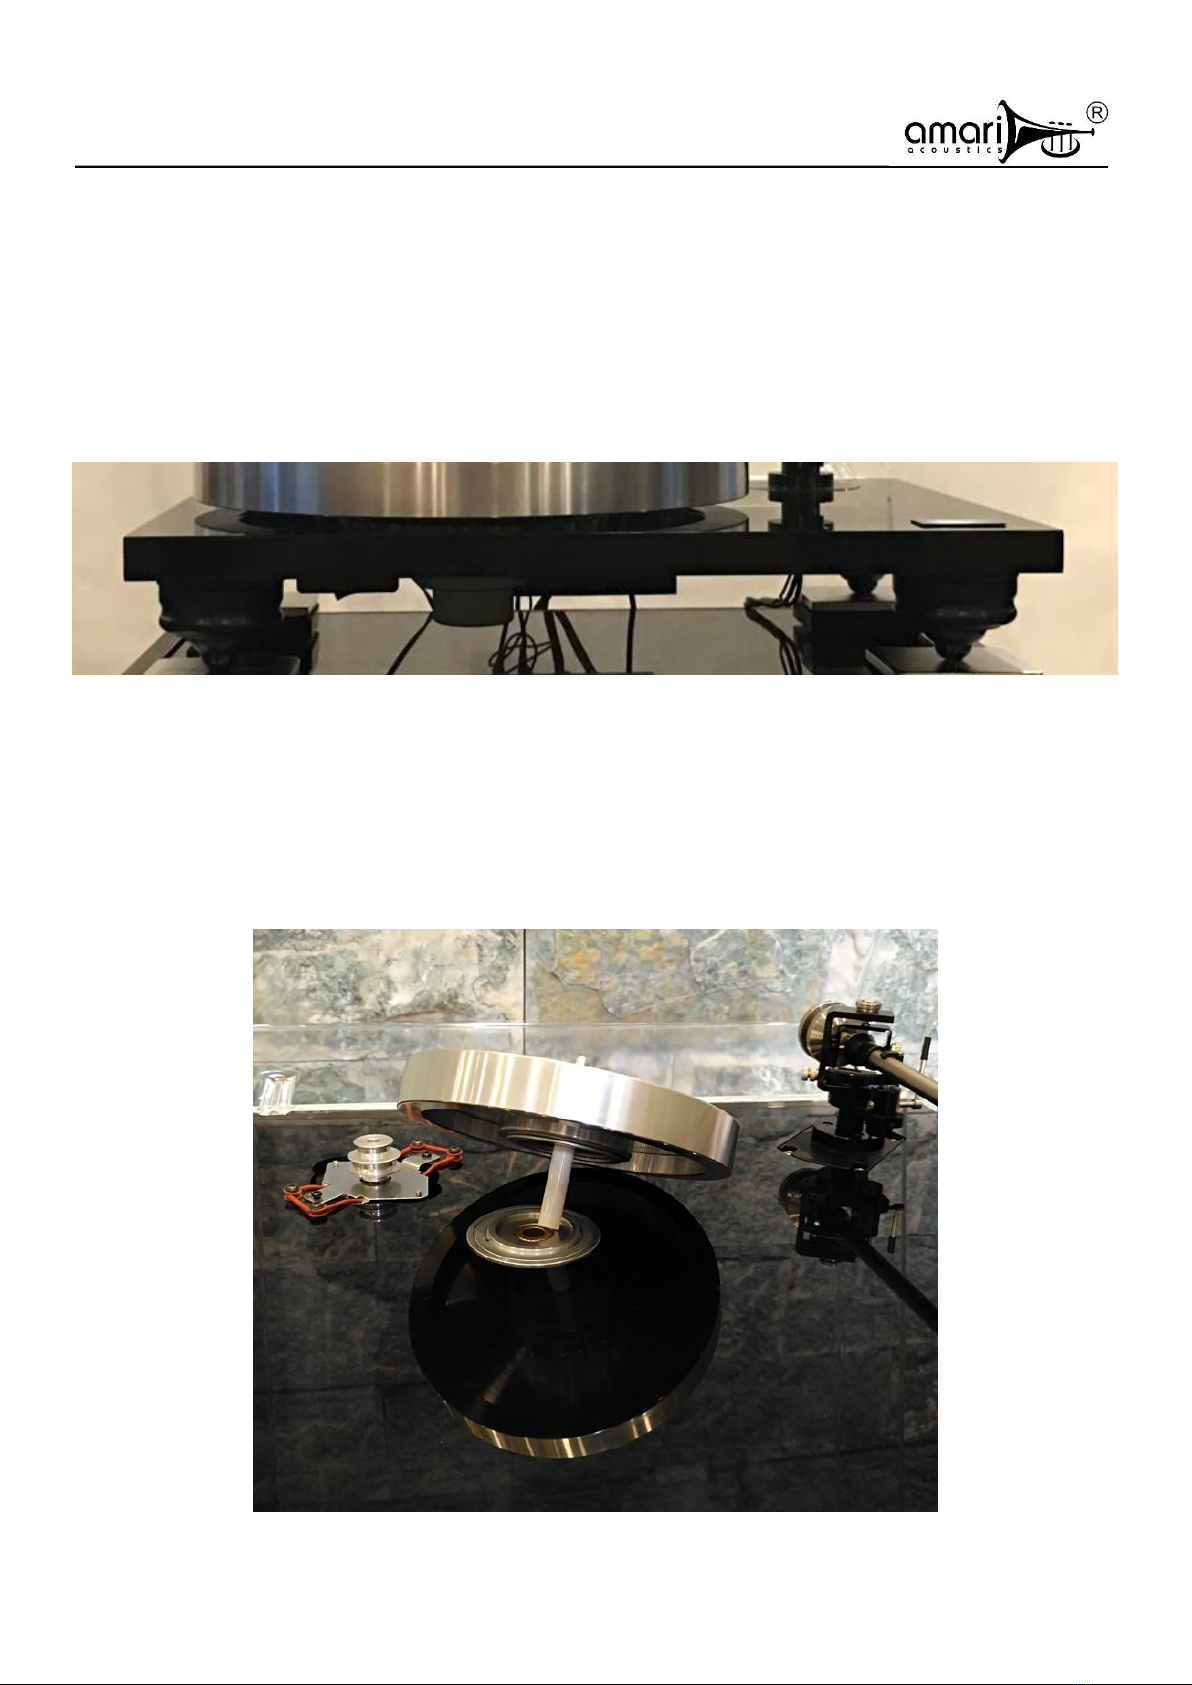
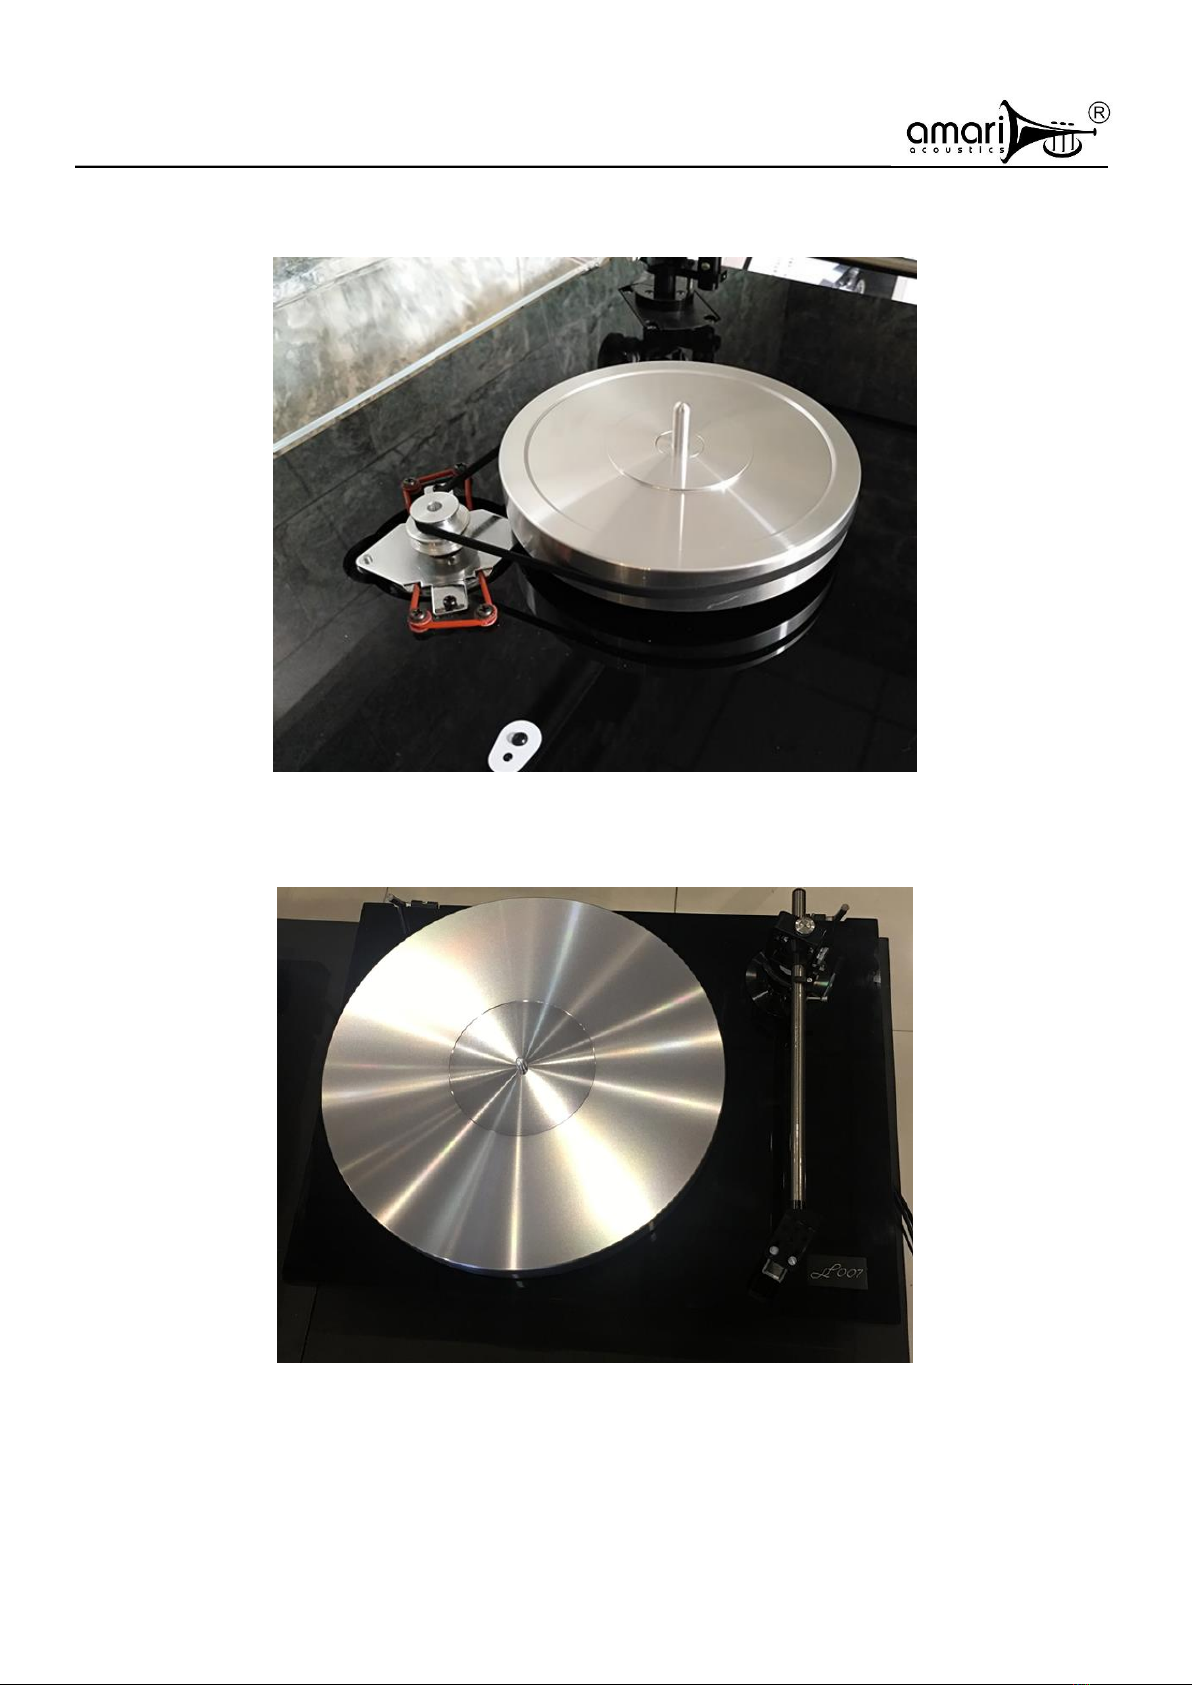
LP-007s Record Player
Adjustment and playback
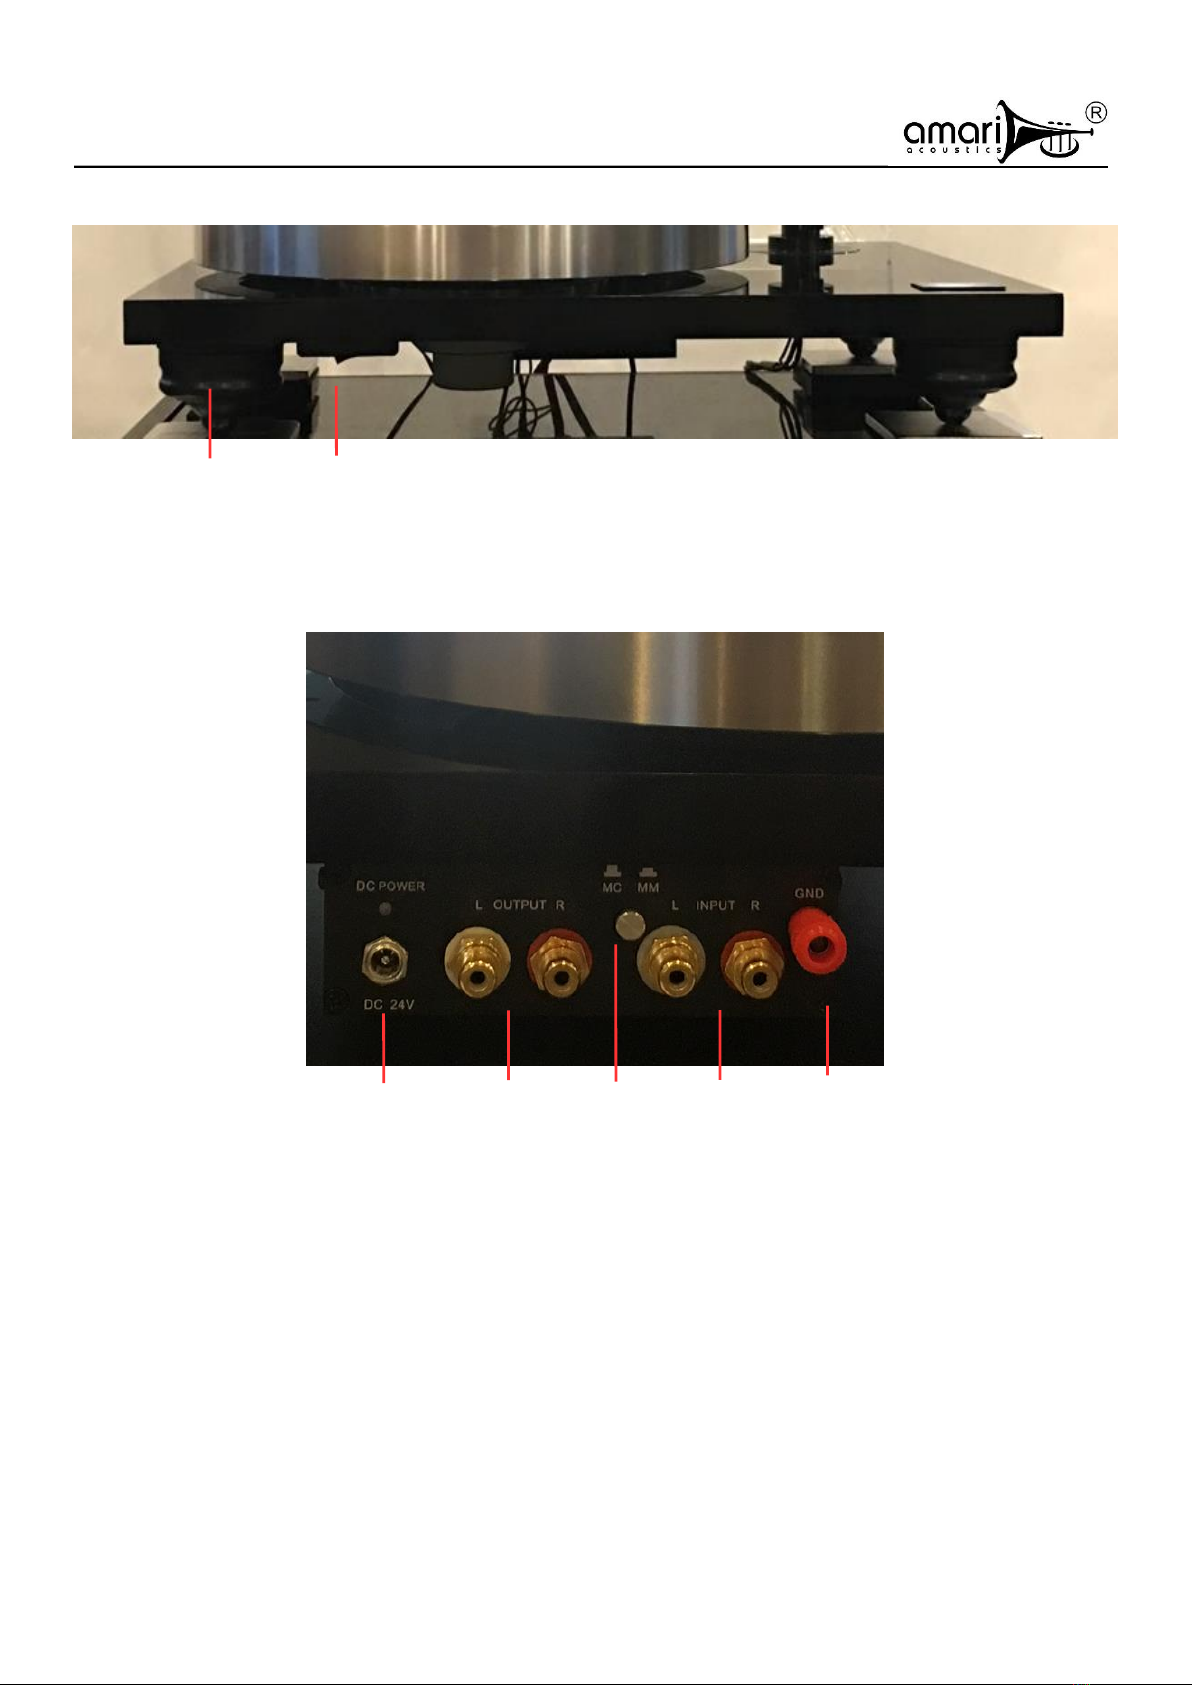
1. Connect the turntable motor power supply (AC12V) and the phono amplifier power supply
(DC24 V). Connect the audio output of the tonearm to the input of the phono amplifier. The pickup
selector switch to the MM type (for standard AT-95E cartridge), and the output of the phono
amplifier to the inputs of pre-amplifier or integrated amplifier. During connection, please ensure all
amplifier are power off. Turn the motor switch on and check if the motor and platter is rotating
properly, then switch off.
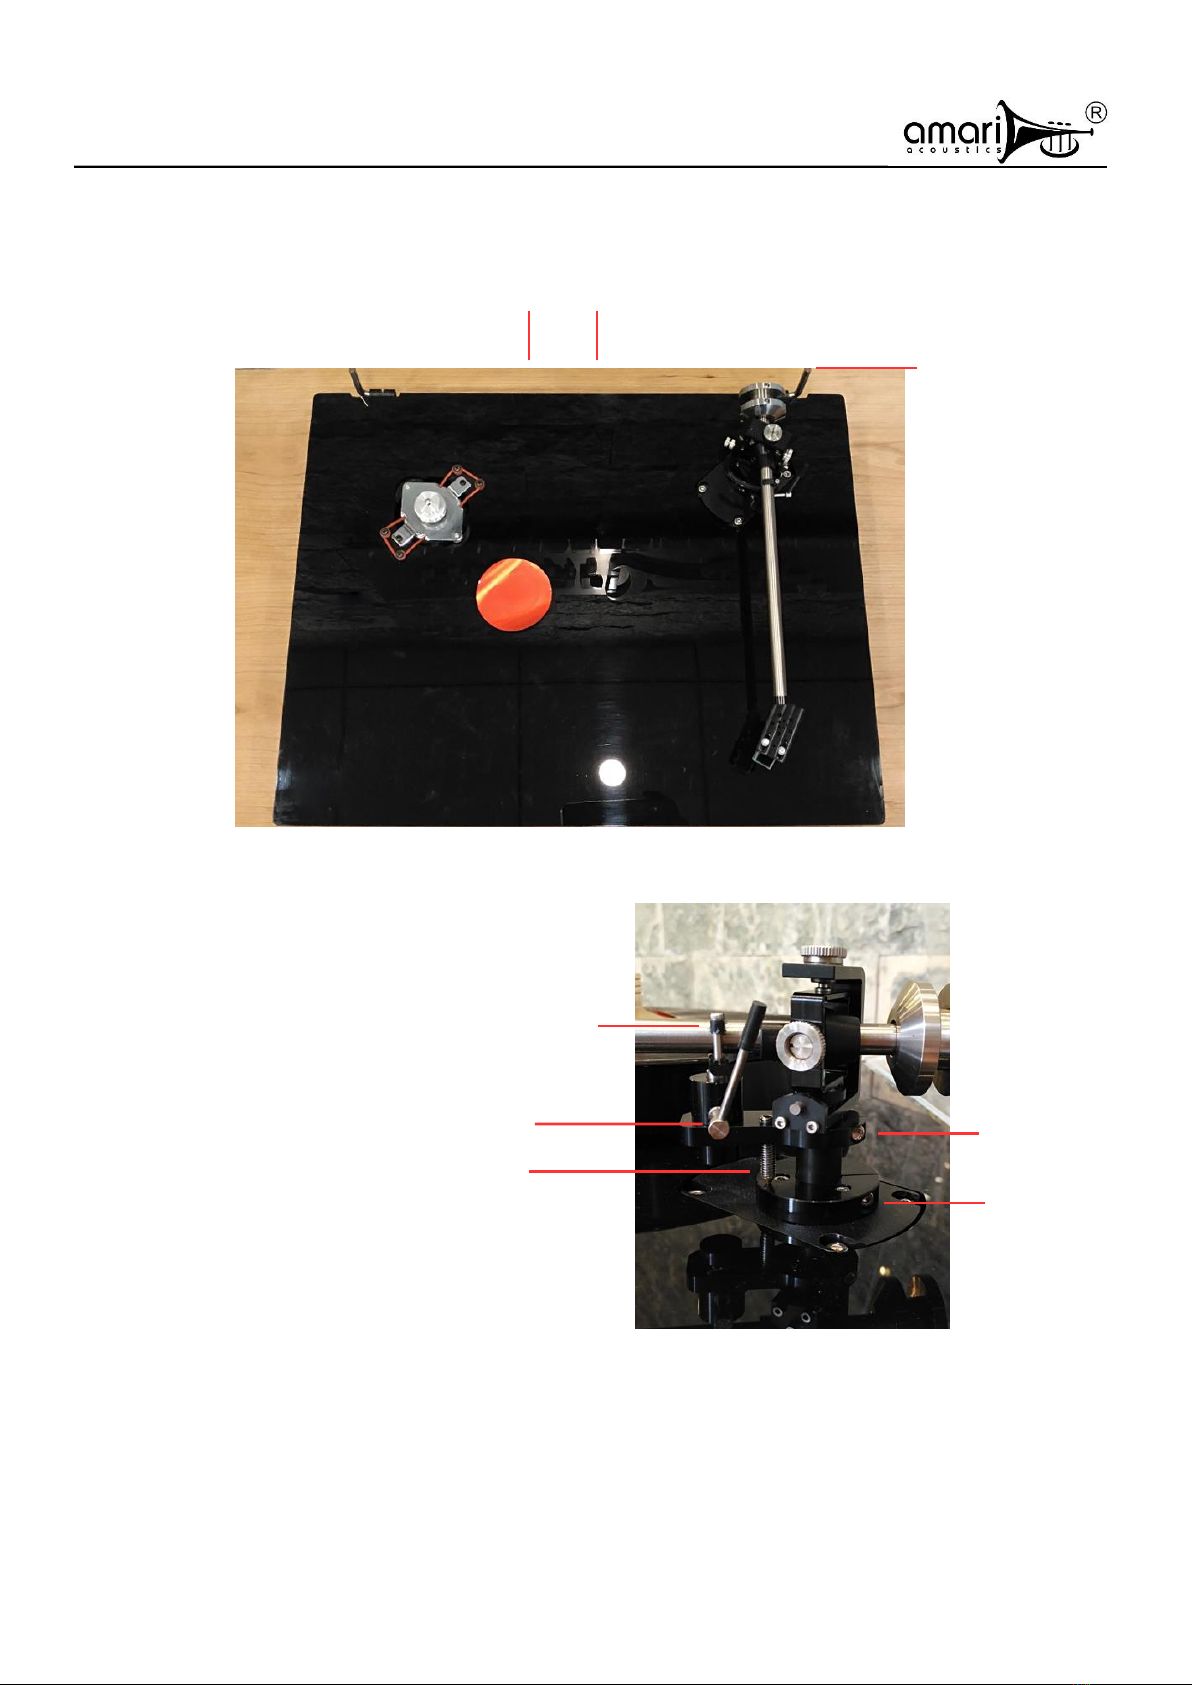
2a. VTA adjustment: put the stylus on a stationary platter, and adjust the VTA adjustment screw
until the tonearm is parallel with the platter.
b. Stylus tracking force adjustment: put the stylus tracking force gauge on the stationary
turntable, adjust the front and rear position of the counterweight, so that the reading meets the
tracking force specification of the cartridge. 2.0g is recommended for standard AT-95E
cartridge.
c. Adjust Zenith angle: with Amari's unique protractor disc, the stylus should be in line with the
lines on the disc when the tip of the stylus is resting on the null points. Loosen the cartridge
mounting screws, adjust the position of the cartridge and then tightening the mounting screws.
Do not over-tighten the mounting screws as this may damage the phono cartridge.
3. When the above adjustment is completed, put on the record, turn on the power of the turntable,
lift the arm lift lever, move the pickup to the place where you want to start playing, slowly lower the
lifter by about 20°, so that the tonearm follows the bracket and slowly lowers the stylus onto the
record. At this point, you can concentrate on the music that Amari brings to you.