SP-6N Dec 2021
4Amate Audio
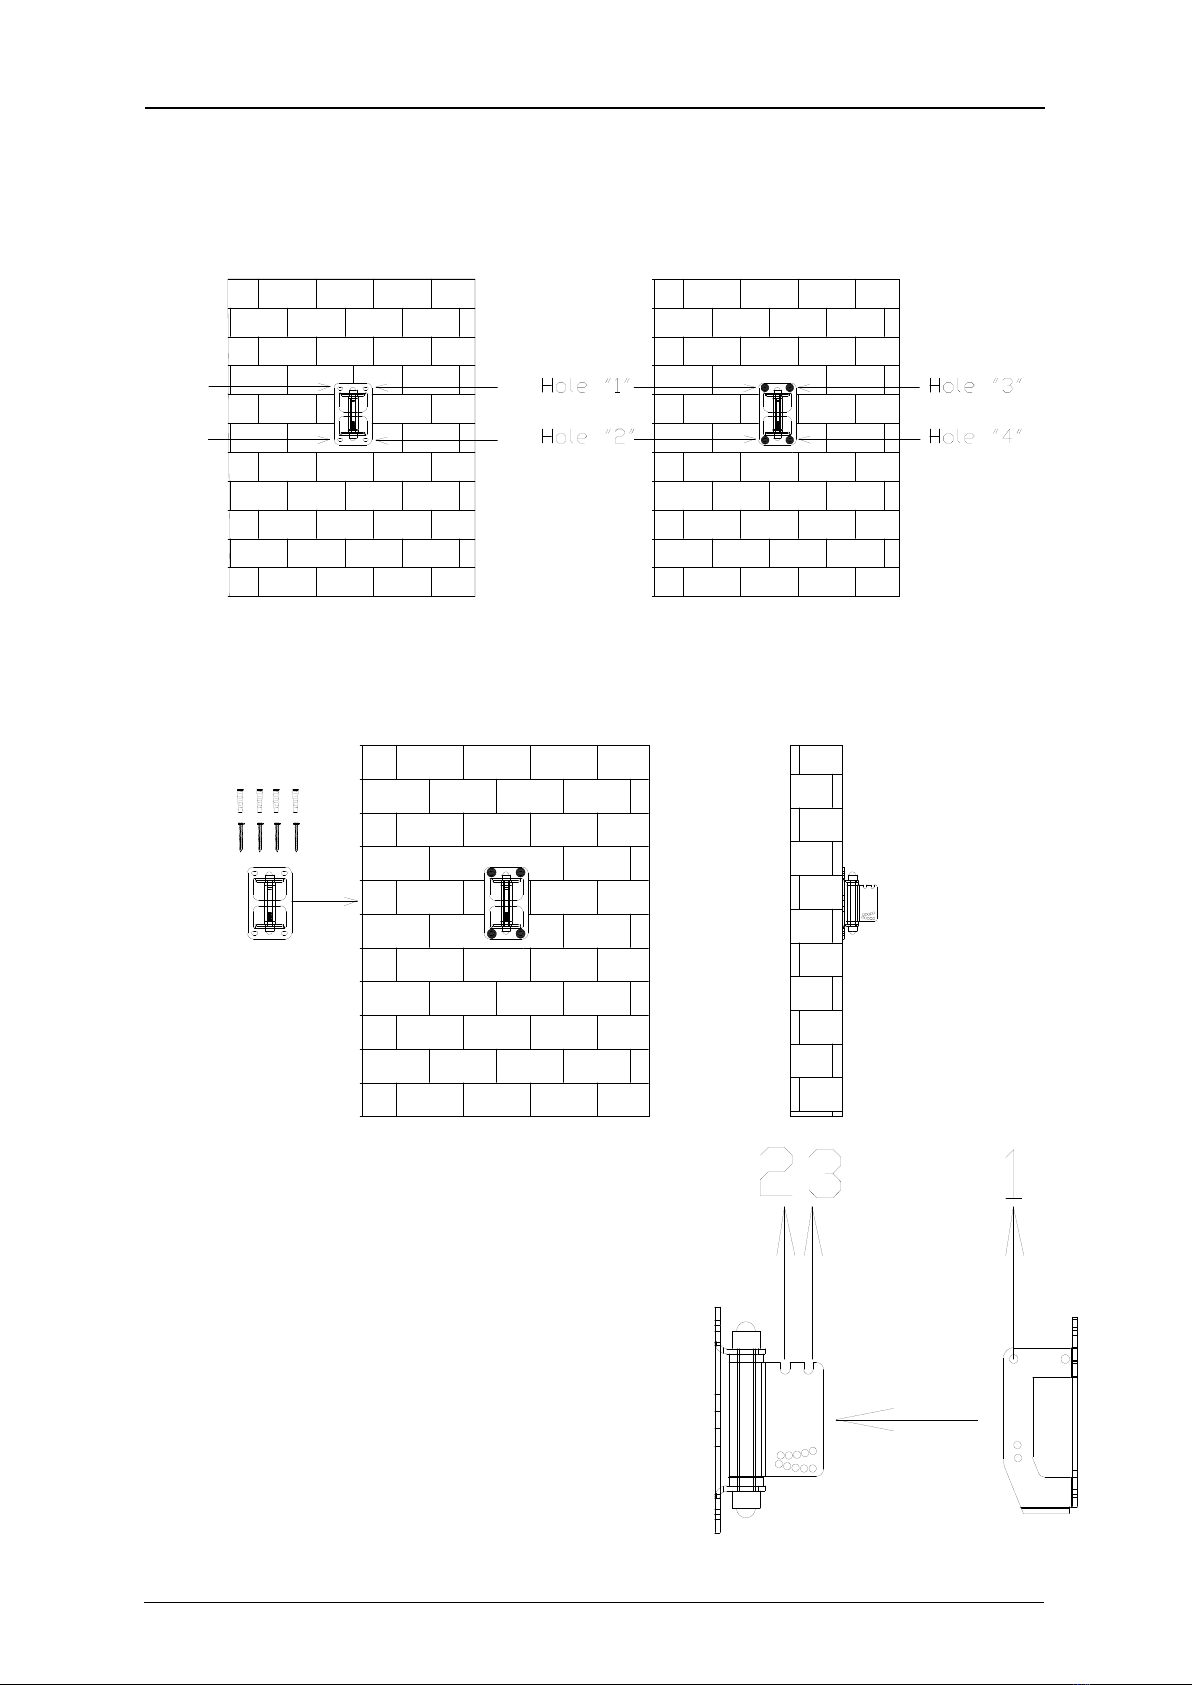
Place the SP-6N bracket (part “A”) in front of the mounting surface, so you can
mark the locations of the four mounting holes.
~ Sitúe la parte “A” del soporte SP-6N cerca de la pared donde vaya a colgar la caja
y marque la localización de los cuatro puntos de soporte.
Drill some corresponding pilot holes on the wall and fix the bracket using the wall
plugs and the four DIN7505B 4x25 screws that you will find in the kit.
~ Realice los taladros en la pared y cuelgue el soporte con tornillería adecuada y
de alta resistencia (tacos y tornillos DIN7505B 4x25 suministrados en el “kit”).
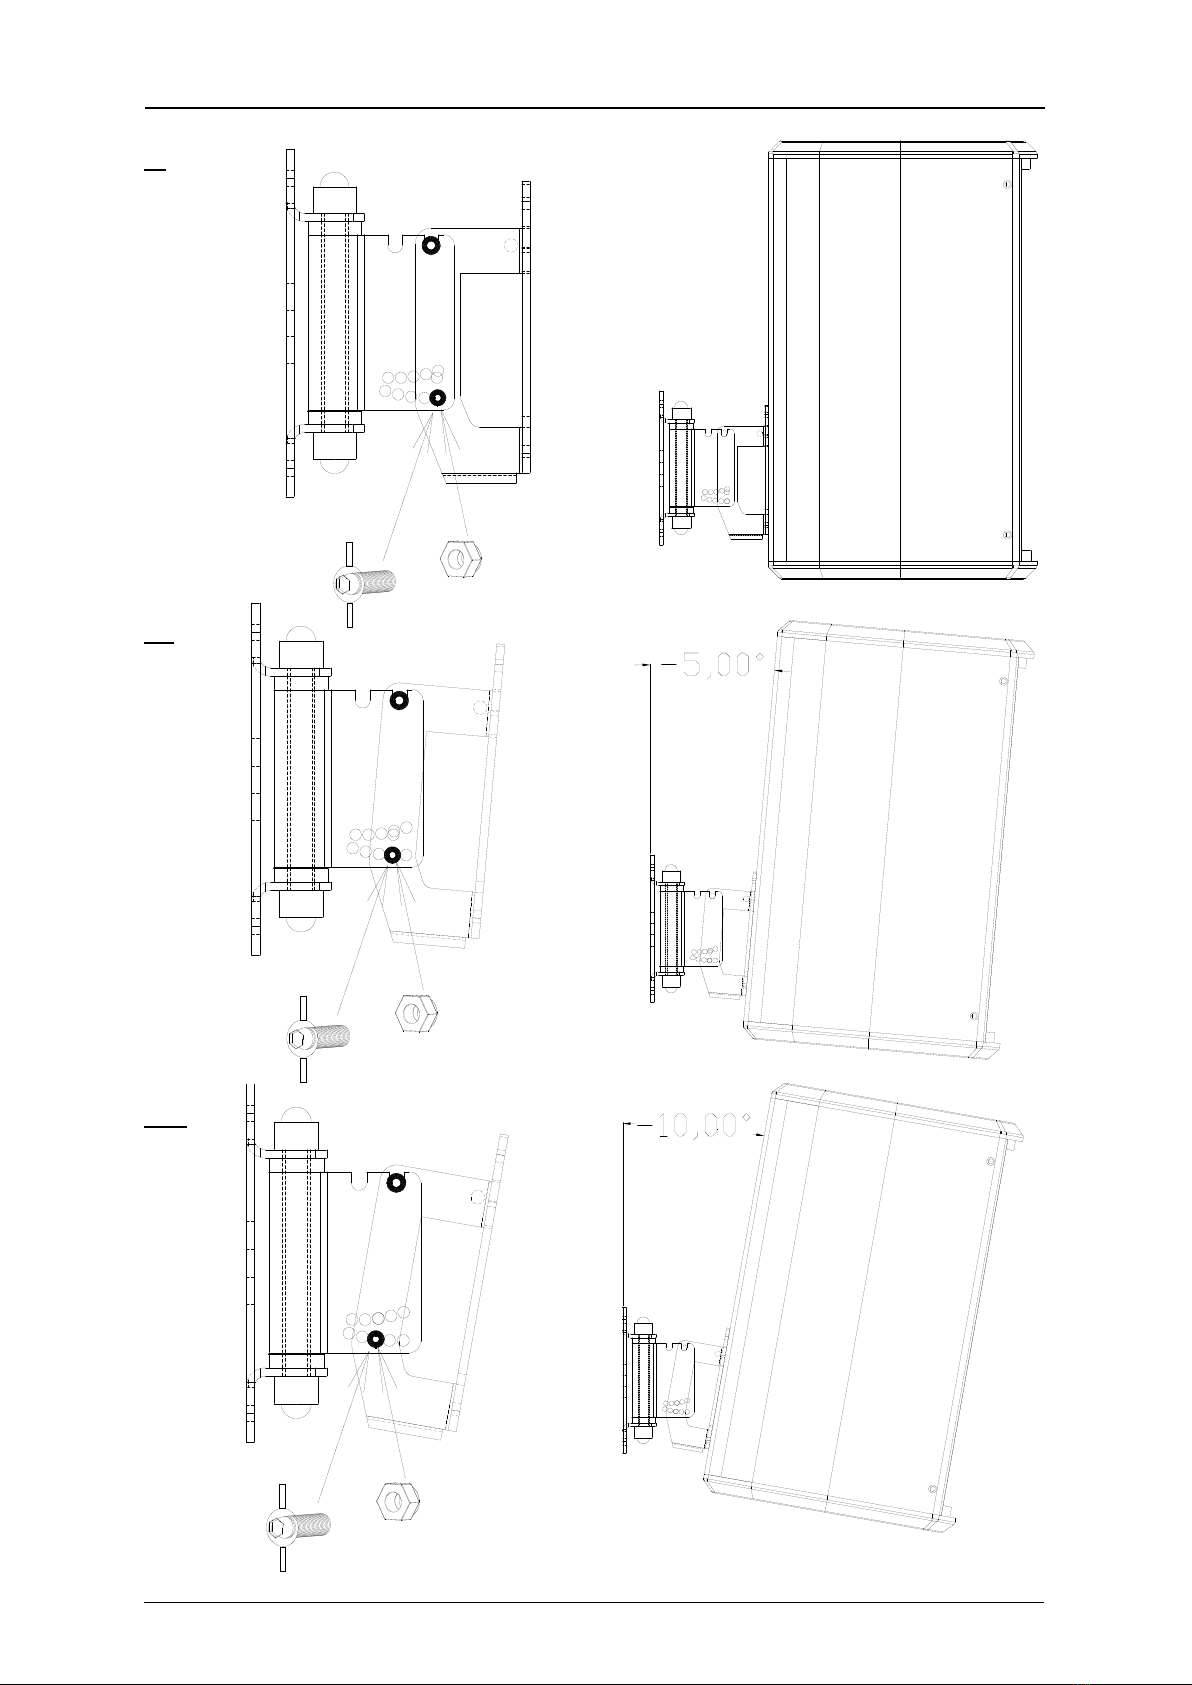
Join the two parts of the bracket (A & B),
placing the point “1” to “2” or “3” position
(depending on the desired angle of inclination).
~ Una las dos partes del soporte (A y B),
colocando el punto “1” en la posición “2” o “3”
(dependiendo del ángulo de inclinación
deseado).