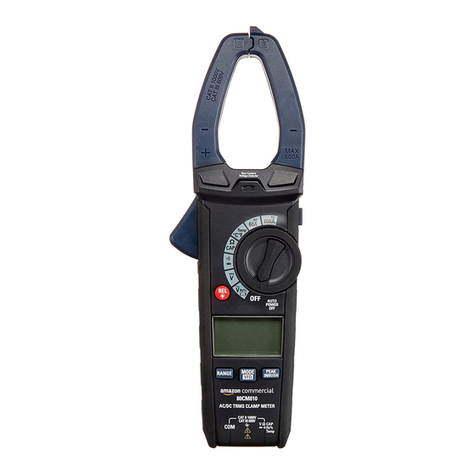
AMAZON COMMERCIAL B07VX43ZKN User manual

1000A AC Clamp Meter, True RMS, NCV, Flashlight, 4000 Count
Pinza Amperimétrica CA de 1000A, True RMS, NCV, Linterna,
4000Cuentas
Pince Ampèremétrique AC 1000A, à Valeur Efficace Vraie,
Détection de Tensions sans Contact (NCV), Lampe-Torche,
Écran (4000Comptes)
B07VX43ZKN

English . . . . . . . . . . . . . . . . . . . . . . . 3
Español . . . . . . . . . . . . . . . . . . . . . 33
Français . . . . . . . . . . . . . . . . . . . . . 66

3
EN
IMPORTANT
SAFEGUARDS
Read these instructions carefully and
retain them for future use. If this product
is passed to a third party, then these
instructions must be included.
When using electrical appliances, basic safety
precautions should always be followed to reduce
the risk of fire, electric shock, and/or injury to
persons including the following:
WARNING Risk of electric shock! Improper
use of this product can cause damage, shock,
injury or death.
WARNING Risk of electric shock! The
safety features of this product may not protect
the user if not used in accordance with this user
manual.
WARNING Risk of electric shock! Use
special care when making measurements, if the
voltages are greater than 25V~ RMS or 35V .
These voltages are considered a shock hazard.
CAUTION Risk of injury! The probe tips are
sharp for accuracy. Be careful when handling and
reattach the probe tip shrouds after use.

4
EN
CAUTION Risk of damage! The clamps
are breakable. Avoid dropping the product else,
measurements in ampere become unreliable.
• For indoor use. This product is protected
to CAT IV 600V and CAT lll 1000V, Pollution
Degree 2.
• This product must be used by trained users
only.
• Do not exceed the maximum allowable input
range of any measurement mode.
Mode Maximum Input
A~1000A ~
V~1000V ~
Resistance,
Capacitance,
Frequency, Diode
Test, Temperature.
1000V ~
• Do not measure current on a CAT II circuitry
whose voltage exceeds 1000 V.
• Do not measure current on a CAT III circuitry
whose voltage exceeds 1000 V.
• Do not measure current on a CAT IV circuitry
whose voltage exceeds 600 V.
• When measuring volts, do not switch to
current/resistance modes.

5
EN
• Set the function switch to the appropriate
position before measuring.
• Set the function switch (L) to the OFF position
when not in use.
• When changing ranges always disconnect the
connector leads from the circuit under test.
• Inspect the condition of the test leads and the
product itself for any damage before operation.
Repair or replace any damage before use.
• Always discharge capacitors and remove
power from the device under test before
performing diode, resistance or continuity tests.
• Voltage checks on electrical outlets can
be difficult and misleading because of the
uncertainty of connection to the recessed
electrical contacts. Do not use this product
for checking socket outlets. Use special
equipment for checking socket outlets.
• Do not use, if the product appears to be
damaged or if it is not working properly. If in
doubt, replace the product.
• Comply with all applicable safety codes. Use
approved personal protective equipment when
working near live circuits − especially with
regard to the possibility of arc flash hazards.

6
EN
• Do not attempt repairs. There are no user
serviceable parts.
• The light source in this product is not
replaceable.
• Do not look directly into the light source.
• The probe tips are sharp for accuracy. Be
careful when handling.
• Always remove the connector leads before
replacing the battery.
Battery Warnings
• Always insert batteries correctly with regards to
polarity (+ and –) marked on the battery and the
product.
• Do not mix old and new batteries or batteries of
different types or brands.
• Exhausted batteries should be immediately
removed from product and properly disposed.
• Keep batteries out of the reach of children.
• Do not dispose of batteries in fire.

7
EN
• Remove batteries from product if it is not to be
used for an extended period of time.
• If the battery leaks avoid contact with skin and
eyes. Rinse affected areas immediately with
plenty of clean water, then consult a doctor.
Explanation of Symbols
WARNING The signal word that indicates
a hazard with a medium level of
risk which, if not avoided, could
result in death or serious injury.
NOTICE Indicates a practical tip, advice
or practice not related to
personal injury.
CAUTION The signal word that indicates
a hazard that if not prevented
could result in minor or
moderate injury.
This symbol, adjacent to another
symbol or terminal, indicates the user
must refer to the manual for further
information.
This symbol, adjacent to a terminal,
indicates that, under normal use,
hazardous voltages may be present.

8
EN
Application around and removal from
uninsulated hazardous live conductors
is permitted.
Product is protected by double
insulation or reinforced insulation.
Alternating current (AC).
Direct current (DC).
Earth (ground) terminal/potential.
1000A Current measurement up to 1000 A.
CAT II
1000V
Product is designed to protect the user
during measurements performed on
circuits directly connected to the low
voltage installation (up to 1000 V).
CAT III
1000V
Product is designed to protect the user
during measurements performed in the
building installation (up to 1000 V).
CAT IV
600V
Product is designed to protect the user
during measurements performed at the
source of low-voltage installation
(up to 600 V).

9
EN
Intended Use
• This product is intended to perform electrical
measurements on CAT III locations (3-phase
and single phase distribution) and CAT IV
locations (3-phase and single phase primary
overcurrent protection devices).
• This product covers indoor CAT II (single-phase
household appliances and tools).
• This product is for indoor use only.
• This product may be used only under the
conditions and for the purposes for which it
was designed.
• No liability will be accepted for damages
resulting from improper use or non-compliance
with these instructions.
Before First Use
• Check the product for transport damages.
• Remove all the packing materials.
DANGER Risk of suffocation! Keep any
packaging materials away from children – these
materials are a potential source of danger, e.g.
suffocation.

10
EN
Product Description
A
B
C
D
E
F
G
H
I
M
L
K
J
N
O
PQ
R S

11
EN
ANon-contact
voltage detector
KMAX/MIN button
BCurrent clamp LFunction switch
CNon-contact
voltage indicator
MHOLD/ button
DClamp trigger NFlashlight
EREL/ button OBattery
compartment
FDisplay PTest probes with
connector leads
GRANGE button QProbe tip shrouds
HMODE button RThermocouple
probe
ICOM input terminal STemperature probe
adapter with caps
JV, Ω, , , CAP, TEMP input terminal

12
EN
3
2
1
12
13
4 5 6 7 8 9 10 11
1AC Alternating
current/voltage
8Continuity
2Minus sign 9MAX/MIN voltage
peaks
3DC Direct
current/voltage
10 REL Relative
4H Display hold 11 Low battery
5Auto power off 12 Unit of
measurement
6AUTO Automatic
range setting
13 Display reading
7Diode test

13
EN
Function switch
Position Function / Measurement
AC current up to 1000 A
AC current up to 400 A
Temperature
Diode test / capacitance
Resistance / continuity
DC voltage
AC voltage, Frequency, duty ratio
OFF

14
EN
Changing Batteries
WARNING Risk of electric shock!
Disconnect the product from any circuit, remove
the test leads (P) from the input terminals (I)/(J),
andturn OFF the product before opening the case.
Do not operate the product with an open case.
NOTICE Replace the batteries when the low
battery indicator (11) is shown on the display.
• Turn the lock of the battery compartment
cover(O) by 180° in an anti-clockwise direction.
• Open the battery compartment.
• Replace 3 x 1.5V AAA (R03) batteries.
• Close the battery compartment and turn the
lock by 180° in a clockwise direction.
Operation
Switching the product on/off
• To switch the product on, set the function
switch (L) to the desired measurement mode.
• To switch the product off, set the function
switch (L) to the OFF position.

15
EN
Automatic power OFF
• In order to conserve battery life, the product
automatically shuts off after it has been idle for
30 minutes.
• To turn the meter on again, turn the function
switch (L) to the OFF position and then to the
desired measurement mode.
• When “automatic power off” is enabled,
the indicator (5) is shown on the display.
• To deactivate “automatic power off”, press and
hold the MODE button (H) while switching the
product on. The indicator (5) goes off.
Switching the flashlight on/off
• When switched on, press and hold the
H/ button (M) for 2seconds to switch the
flashlight (N) on/off.
Switching the display backlight on/off
• Press and hold the REL/ button (E) for
2seconds to switch the display backlight
on/off.
Display hold
• To freeze the display reading, press the
HOLD/ button (M). The Hindicator (4) is
shown on the display.

16
EN
• Press the HOLD/ button (M) again to return to
normal operation.
Changing the measurement range
By default, the measurement range is set
automatically and the AUTO indicator (6) is
shown on the display. It is possible to set the
measurement range manually (not in every
measurement mode).
• Press the RANGE button (G) to activate the
manual mode and to disable the automatic
range setting. The AUTO indicator (6) goes off.
• By every press on the RANGE button (G) the
relevant decimal place changes its position.
• If a reading is higher than the measurement
range, OL is shown on the display (F).
• Press and hold the RANGE button (G) for
more than 1second to exit manual mode and
restore automatic range setting. The AUTO
indicator(6) is shown on the display.
Zero the display
• Press the REL/ button (E) to zero the
measured value (13). The REL indicator (10) is
shown on the display.

17
EN
• Press the REL/ button (E) again to show the
absolute measurement. The REL indicator (10)
goes off.
Clamp measurement
NOTICE Disconnect the test leads (P) from
the product before making clamp measurements.
• Set the function switch (L) to the 400A or
1000A position. If the approx. range of the
measurement is not known, select the highest
range. Then move to the lower ranges if
necessary.
• Press the trigger (D) to open the jaw. Fully
enclose only one conductor. For best results,
center the conductor in the jaw.

18
EN
• The stabilized value on the display (F) is read as
the actual reading.
• Press the MODE button (H) to change the
measurement mode. The set measurement
mode in indicated by the following symbols:
Symbol Measurement mode
Alternating current
Hz Frequency
%Duty cycle
CAUTION Risk of short circuit! Use the
test probe shrouds (Q) to avoid accidental short
circuiting if the components or test points are too
near each other.
AC voltage measurement
• Insert the black connector lead (P) into the
negative COM (black) terminal (I) and the red
connector lead(P) into the positive V(red)
terminal (J).
• Set the function switch (L) to the position.
• Connect the test probes (P) in parallel to the
circuit under test.
• The stabilized value on the display (F) is read as
the actual reading.

19
EN
Measuring AC voltage peaks
• In AC voltage measurement mode, press
the MAX/MIN button (K) to switch between
the maximum (MAX) and minimum (MIN)
measured value. The MAX/MIN indicator (9) is
shown on the display (F).
• Press the MAX/MIN button for 2seconds to
return to normal operation. The MAX /MIN
indicator goes off.
DC voltage measurement
• Insert the black connector lead (P) into the
negative COM (black) terminal (I) and the red
connector lead(P) into the positive V (red)
terminal (J).
• Set the function switch (L) to the position.
• Connect the test probes (P) in parallel to the
component or circuit being measured.
• The stabilized value on the display (F) is read as
the actual reading.
Resistance measurement
• Insert the black connector lead (P) into the
negative COM (black) terminal (I) and the red
connector lead(P) into the positive V(red)
terminal (J).

20
EN
• Set the function switch (L) to the Ω/position.
• Connect the test probes (P) across the circuit
or component being measured. It is best to
disconnect one side of the device being tested
so the rest of the circuit does not interfere with
the resistance reading.
• If OL appears on the display (F), no current flow
can be measured because the circuit is open or
the resistance is too high to measure.
• The stabilized value on the display (F) is read as
the actual reading.
Capacitance measurement
NOTICE To avoid electric shock or
measurement errors, discharge the capacitor
under test before measuring.
• Insert the black connector lead (P) into the
negative COM (black) terminal (I) and the red
connector lead(P) into the positive V(red)
terminal (J).
• Set the function switch (L) to the /CAP
position.
• Press the MODE button (H) to shift to
measuring the capacitance F(Farad).
• Connect the test probes (P) to the capacitor
being measured.
Table of contents
Other AMAZON COMMERCIAL Measuring Instrument manuals
Popular Measuring Instrument manuals by other brands

Hanna Instruments
Hanna Instruments HI96785 user manual

HOKUYO AUTOMATIC
HOKUYO AUTOMATIC UST-05LN user manual

Landis & Gyr
Landis & Gyr Cashpower Gemini HMI user guide

Elcometer
Elcometer CG30 operating instructions

Phoenix Contact
Phoenix Contact TESTFOX CC operating manual

Spirent
Spirent NOMAD UX Operation guide

METREL
METREL EurotestCOMBO MI 3125 instruction manual

Omron
Omron Z500 Series Product information

Rion
Rion NA-28 instruction manual

Agilent Technologies
Agilent Technologies NFA Series Performance Verification and Calibration Guide

Cloudray
Cloudray CR30C Operator's manual

Axometrics
Axometrics AXOSTEP-APM-65 installation manual