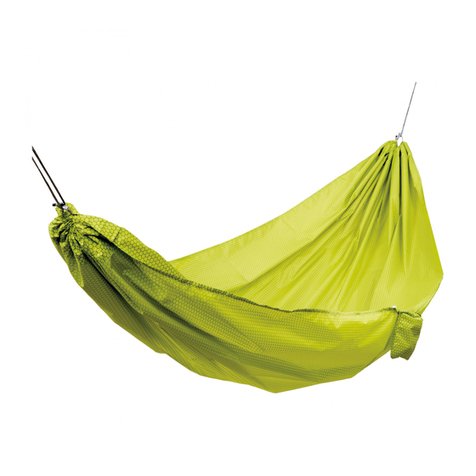
AMAZONAS Madera Manual

1
Aufbauanleitung
Set-up instructions
Indication de montage
AMAZONAS GmbH • Am Kirchenhölzl 15
82166 Gräfelfing, Germany
2 x
2 x
Madera
120914_Madera_instruction_DIN A5 14.09.12 15:18 Seite 1
AMAZONAS

1. Die beiden gelochten Holzstäbe werden am oberen Ende mit der mitgelieferten
Ringschraube so verbunden, dass die Abschrägungen an den unteren Enden nach
innen zeigen.
2. Diese schrägen Enden werden in die Metallzylinder der beiden anderen
Holzstäbe gesteckt. Die formschlüssige Verbindung im Inneren des Zylinders hält
ohne Verschraubungen, da sich die abgeschrägten Flächen der Stäbe aneinander
pressen!
Die Spitzen der Stäbe sollten jetzt nach innen zeigen! Stecken Sie die Spitzen
auseinander gespreizt in einem Abstand von etwa 120 cm in den Boden.
3. Schlagen Sie den Erdnagel leicht schräg gegen die vorgesehene Zugrichtung der
Hängematte in den Boden, am besten mit Hilfe eines Gummihammers. Der
Erdnagel muss bis zur Biegung im Untergrund stecken. Sollten Steine dies
verhindern, bitte an einer anderen Stelle noch einmal versuchen!
Achtung! Eine stabile Verankerung mit dem Erdnagel ist nicht möglich in Sand
oder extrem lockerem Boden. Auch anhaltender Regen kann die Stabilität des
Untergrunds beeinträchtigen (vgl. Erdrutsche im Gebirge). Im durchweichten
Boden ist ein fester Halt deshalb nicht mehr gewährleistet.
4. Das längenverstellbare Seil oberhalb der Ringschraube um die Spitze der
Holzstäbe legen und mit dem Erdnagel verbinden. Die Holzstäbe dabei unbe-
dingt auf etwa 60° in Richtung zum Erdnagel hin neigen! Statt mit dem Erdnagel
kann das Seil auch im unteren Bereich stabiler Stämme von Sträuchern oder klei-
neren Bäumen befestigt werden.
Bitte testen Sie die Hängematte vor der ersten Benutzung durch vorsichtige
Gewichtsbelastung, um festzustellen, ob der Erdnagel und alle Verbindungen
richtig installiert sind!
Öffnen Sie keine Sicherheitsknoten an dem mitgelieferten Seil!
2
120 cm
60°
Aufbauanleitung Madera
120914_Madera_instruction_DIN A5 14.09.12 15:18 Seite 2
AMAZONAS

3
1. Join the two wooden bars by inserting the supplied ring bolt through the bore
holes at the upper ends. Tighten the ring bolt with the supplied nut. The bars
must be screwed together in such a way that the oblique surfaces at their lower
ends point inwards.
2. Insert these oblique ends into the metal cylinders of the other two wooden bars.
The self-locking form-fit joint inside the cylinder ensures a reliable connection
without screws by pressing the oblique surfaces of the bars together!
The tips of the bars should now point inwards! Spread out the bars until the
tips are about 120 cm apart and stick the tips into the ground.
3. With a rubber mallet or other suitable tool, drive the ground bolt into
the ground in such a way that it is slightly inclined against the intended direction
of tension from the hammock.The bolt must be inserted into the ground all the
way up to the curve. If rocks in the ground prevent this, please retry at a
different spot!
Caution!The ground bolt does not provide firm anchorage in sand or extremely
loose soil. Continuous rain may also impair the stability of the ground (cf. landslides
in mountain regions). In the case of soggy ground conditions, secure fastening
thus can no longer be ensured.
4. Run the rope, which is adjustable in length, around the upper ends of the
wooden bars above the ring bolt and fasten it to the ground bolt. It is essential
to ensure that the wooden bars are inclined towards the ground bolt at an
approx. 60° angle! Instead of using the ground bolt, you can also tie the rope
around the trunk bottom of a sturdy bush or small tree.
Please test the hammock before first use by carefully putting weight on
it in order to check whether the ground bolt and all connections are
properly installed!
Do not open any safety knots in the supplied rope!
120 cm
60°
Madera set-up instructions
120914_Madera_instruction_DIN A5 14.09.12 15:18 Seite 3
AMAZONAS

4
1. Les deux barres en bois perforées sont liées entre elles à leur extrémité
supérieure avec l’anneau de levage prévu à cet effet. Les faces inclinées des pieds
doivent être orientées vers l’intérieur.
2. Les deux pieds biseautés sont insérés dans les cylindres métalliques des deux
autres barres en bois. Les dispositifs de verrouillage par prise directe à l’intérieur
des cylindres ne requièrent aucune vis ni attache car les surfaces se soutiennent
l’une l’autre sous l’effet d’une pression réciproque !
Les tranchants des barres doivent maintenant être orientés vers l’intérieur !
Ecartez les barres l’une de l’autre et plantez les côtés tranchants dans le sol à
environ 120 cm de distance.
3. Si possible au moyen d’un maillet en caoutchouc, enfoncez la sardine dans le sol
en l’inclinant légèrement à l’opposé du sens de traction prévu pour le hamac. La
sardine doit être enfoncée dans le sol jusqu’à la courbure. Si la présence de pierres
ne vous permet pas de l’enfoncer suffisamment, réessayez à un autre endroit !
Attention ! Il est impossible de procéder à un ancrage stable avec la sardine
dans le sable ou dans un sol extrêmement meuble. Une pluie persistante peut
également altérer la stabilité du sol (comme pour les glissements de terrain en
montagne). La stabilité de l’installation n’est donc plus garantie dans les sols
détrempés.
4. Faites passer le câble réglable au-dessus de l’anneau de levage autour du sommet
des barres en bois et reliez-le avec la sardine. Les barres en bois doivent
impérativement être inclinées à environ 60° par rapport à la sardine ! Au lieu de
la sardine, le câble peut également être maintenu par la base du tronc d’arbustes
ou de buissons suffisamment solides.
Avant le premier usage, testez le hamac en le soumettant à un poids
adéquat afin de vous assurer que la sardine et tous les points de liaison sont
correctement installés !
Ne déliez aucun nœud de sécurité sur le câble de réglage !
120 cm
60°
Indication de montage Madera
120914_Madera_instruction_DIN A5 14.09.12 15:18 Seite 4
AMAZONAS
Table of contents
Languages:
Other AMAZONAS Hammock manuals