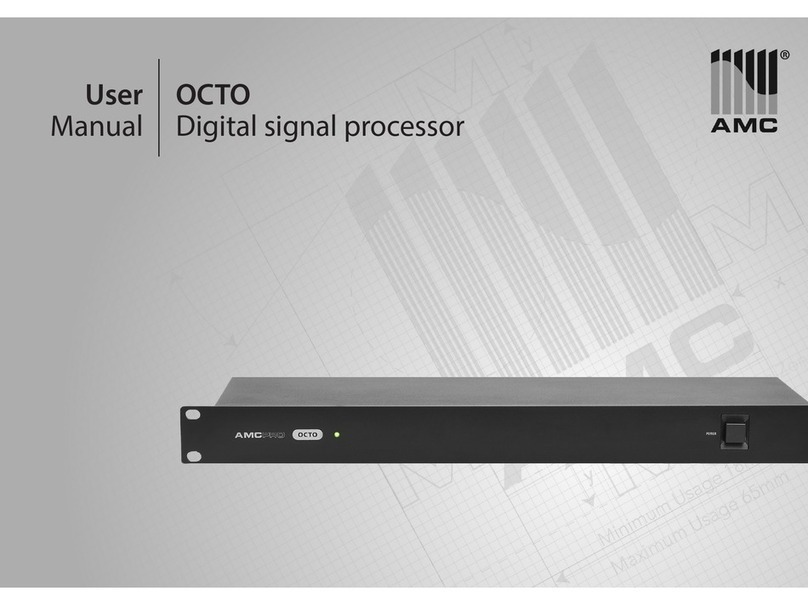
AMC DSP 88 User manual


IMPORTANT SAFETY INSTRUCTIONS
When using this electronic device, asic
precautions should always e taken,
including the following:
1. Read all instructions before using the product.
2. Do not use this product near water (e.g., near a bathtub, washbowl, kitchen sink, in a wet basement or
near a swimming pool etc).
3. Use this device when you are sure that digital signal processor has a stable base and it is fixed securely.
4. his product, in combination with loudspeakers and amplifier may be capable of producing sound levels
that could cause permanent hearing loss. Do not operate for a long period of time at a high volume level or
at a level that is uncomfortable. If you experience any hearing loss or ringing in the ears, you should consult
with otorhinolaryngologists. he product should be positioned so that proper ventilation is maintained.
5. he product should be located away from heat sources such as radiators, heat vents, or other devices
(including amplifiers) that produce heat.
6. he product should be connected to a power supply that is described in the operating instructions or
are marked on the product. Replace the fuse only with one of the specified type, size and correct rating.
7. he power supply cord should be undamaged and never share an outlet or extension cord with other
devices so that the outlet or extension cord's power rating is exceeded. Never leave device plugged into the
outlet when it is not being used for a long period of time.
8. Care should be taken so that objects do not fall into, and liquids would not be spilled through, the
enclosure's openings.
9. he product should be serviced by qualified service personnel if:
• he power supply cord or the plug has been damaged.
• Objects have fallen into or liquid has been spilled on the product.
• he product has been exposed to rain.
• he product has been dropped or the enclosure damaged.
10. here are some areas with high voltage inside, to reduce the risk of electric shock do not remove cover of the
device. he cover should be removed by the qualified personnel only.
No user servicea le parts inside.

CON EN S:
Before you start
Introductions 4
Features 4
Operation
Front panel 5
Rear panel 5
Function description 6
Powering up the device 7
Operating the channel menus 8
Operating the system menus 13
Quick Reference 18
PC Control Software 19
Firmware upgrade 23
Specifications
General specifications 24

Introduction
he DSP 88 is a digital loudspeaker management system designed for the touring or fixed sound installation
markets. he absolute latest in available technology is utilized with 40-bit floating point processors and high
performance 24-bit Analog Converters. he high-bit DSP prevents noise and distortion induced by
truncation errors of the commonly used 24-bit fixed-point devices. A complete set of parameters include I/O
levels, delay, polarity, 8 bands of EQ per channel, 31 bands of GEQ per input, multiple crossover selections
and full function limiters. Precise frequency control is achieved with its 1 Hz resolution. Inputs and outputs
can be routed in multiple configurations to meet any requirement. he DSP 88 can be controlled or
configured in real time on the front panel or with the intuitive AMC DSP Software Control accessed via the
RS-232, USB or Ethernet interface. Software upgrade for CPU and DSP via PC keeps the device current with
newly developed algorithms and functions once available. Multiple setup storage and system security
complete this professional package.
Features
• Up to 8 inputs and 8 outputs with flexible routing.
• 40-bit floating point DSP.
• 96 kHz sampling rate.
• High performance 24-bit A/D converters.
• 1 Hz frequency resolution.
• 8 equalizers for each input and output.
• 31 bands GEQ for each input.
• Multiple crossover types with full function limiters.
• Precise level, polarity and delay.
• CPU and DSP upgrade via PC.
• Individual channel buttons with linking capability.
• 2-Line x 16 character backlit LCD display.
• Full 5-segment LED’s on every Input and output.
• Storage of up to 30 preset setups.
• Security lock.
• Ethernet, USB and RS232 Interface for PC control and configuration.
• Mic preamps + phantom Power for each input.

Front Panel
1. USB connector
2. RS232 connector
3. Mute (channel button)
4. Audio signal meter
5. Channel menu LED
6. LCD display
7. Menu buttons
8. Rotary selector
Rear Panel
1. Power connector with power switch and AC
fuse ( 2,5AL 250V)
2. Ethernet connector
3. Balanced universal Phoenix outputs
4. Balanced universal Phoenix inputs

Functions description
USB
his is a standard ype B USB connector. Device driver from the provided software CD must be installed
prior to usage.
RS232
his is a standard female DB \9 socket. A straight through cable is required for PC connection.
Mute (Channel Menu) Buttons
his button is for mute or un-mute input and output channel. When an input channel is muted, a red LED
comes on for indication. When the <<Menu or Menu>> key is held down, the Mute Buttons selects the
corresponding channel for the LCD menu display and is acknowledged by a green LED below the button.
he last modified menu will be displayed on the LCD. Multiple channels can be linked or unlinked by
pushing the desired channels. his eases programming for same parameters across multiple channels.
Multiple Inputs can be linked together and multiple outputs can be linked together. Inputs and Outputs are
linked separately.
Channel Menu LED
Menu LED indicates the activated channels for data modification.
Peak Level LED
Peak LED indicates the current peak level of the Signal: Signal, -12dB, -6dB, -3dB, Over/Limit. he Input Limit
LED references to the device's maximum headroom. he Output Limit LED references to the threshold of
the output limiter.
LCD
Display shows all the necessary information to control the unit.
Menu Buttons
here are 6 menu keys:
<<Menu
Go to previous menu screen. Holding this button down while pressing Mute key you go to the specify
channel menu.
Menu>>
Go to next menu screen. Holding this button down while pressing Mute key you go to the specify channel
menu.
<<Cursor
Go to previous cursor in the menu screen.
Cursor>>
Go to next cursor in the menu screen.
Enter/Sys
Enter/Sys is used only in the System Menu to proceed with selected actions. Sys enters the System Menu
from the main menu.
Exit
Exit to the Main Menu.
Rotary Thum Wheel
Rotary thumb wheel changes parameter data values. he wheel has travel velocity sensing which ease large
incremental data modifications. For modifying delay and frequency (1 Hz resolution), pressing the Enter/Sys
key simultaneously will increment/decrement the data value by 100 times.

Main Power
Connects via a standard IEC socket. A compatible power cord is supplied with the unit.
Main Fuse
2.5A-250V. Slow blow type.
Power switch
Controls power On/Off.
Ethernet
his is RJ45 connector for Ethernet control. he device should be connected to a router/switch/hub via a
straight through CA -5 cable.
Analog Inputs and Outputs
Separate phoenix connectors are provided for each audio input and output. he device's output stage
employs the balanced impedance topology.
Powering up the device
After powering up the unit, the following initialization screen is displayed on the LCD
he initialization process takes several seconds and during that period the unit boots and displays the
device model and firmware version. After the initialization process is finished the XP displays its main screen:
he screen shows the current program number and program name assigned to the unit. If the program
number ends with *, it means that no program is assigned, the last data before previous power down is
recalled instead.

Operating the channel menus
Please hold the Menu >> button and then, press the mute button of the input or output channels if you
want to activate the channel menu.
Channel Linking – while holding down the <<Menu or Menu>>, more than 1 channel from the same group
(Input or Output group) can be selected to link the channels together. he green LEDs below the Mute
buttons are lit for the linked channels. Any modification of the data for the selected channel will be applied
to the linked channels as well. o cancel the linking, simply deselect the desired channel while the <<Menu
or Menu>> key is still pressed, or just press the Exit key to deselect all channels.
Input microphone gain
he level (or gain) ranges from 0dB to +45dB in 3dB steps. his level will only have an affect on the input
channel when MIC Input is selected from the System Menu.
Input / output signal
LEVEL: he level (or gain) ranges from -40.00dB to +15.00dB in 0.25dB steps.
POL: he polarity (or phase) can be normal (+) or inverted (-).
DELAY: he maximum delay permitted is 650ms, in steps of approximately 10us. It can be displayed in ms,
ft or m. he time unit of the delay is set in the system menu.

Input / output equalizer
EQ#: Each input channel has 8 bands of equalization. his control selects one of the 8 available bands.
BYPASS: his control will un-bypass (Off) or bypass (On) the currently selected band.
TYPE: he 5 types of EQ that can be used are: parametric (PEQ), low shelf (LOSHF), high shelf (HI-SHF), 1st
degree all-pass (AP-1), and 2nd degree all pass (AP-2).
FREQ: he EQ center frequency ranges from 20Hz to 30kHz in either 1Hz steps or 1/36 octave steps. he
frequency steps can be selected in the system menu.
BW: he EQ bandwidth ranges from 0.02 to 3.61 octaves in steps of 0.01 octave. he equivalent Q value
automatically shows besides the octave value. For 1st degree all-pass (AP-1) filter, the bandwidth
sets the phase shift at the centre frequency. his phase shift is gradually changed from 180degrees
above the centre frequency to the specified value.
LEVEL: he EQ level (or gain) ranges from -30.00dB to +15.00dB in 0.25dB steps.

Input graphic equalizer
GEQ#: he graphic equalizer has 31 bands of equalization from 20Hz to 20kHz. his control selects one of
the 31 available bands. he frequency corresponding to each band is also shown.
LEVEL: he GEQ level (or gain) ranges from -30.00dB to +15.00dB in 0.25dB steps.
BYPASS: his control un-bypass (Off) or bypass (On) the entire GEQ for this channel.
Input / output crossover
TYPL: he 3 available filter types for the low frequency crossover point (high pass) are: Butterworth,
Linkwitz Riley or Bessel.
FRQL: he filter cuts-off frequency for the low frequency crossover point (high pass) ranges from 20 to
30kHz in either 1Hz steps or 1/36 octave steps. he frequency steps can be selected in the
System’s Menu.
SLPL: he filter slope for low frequency crossover point (high pass) ranges from 6to 48dB/octave. he
available slopes are 12, 24, 36 or 48 dB/octave.

TYPH: he 3 available filter types for the high frequency crossover point (low pass) are: Butterworth,
Linkwitz Riley or Bessel.
FRQH: he filter cut-off frequency for the high frequency crossover point (low pass) ranges from 20 to
30kHz in either 1Hz steps or 1/36 octave steps. he frequency steps can be selected in the system
menu.
SLPH: he filter slope for high frequency crossover point (low pass) ranges from 6 to 48dB/octave. If the
selected filter type is Linkwitz Riley, the available slopes are 12, 24, 36 or 48 dB/octave.

Input compressor
THRESH: he compressor threshold ranges from -20 to +20dBu in 0.5dB steps.
ATTACK: he compressor attack’s time ranges from 0.3 to 1ms in 0.1ms steps, then ranges from 1 to 100ms
in 1ms steps.
RELEASE: he compressor release’s time can be set at 2X, 4X, 8X, 16X or 32X the attack time.
RATIO: he compressor ratio is the slope in which the signal is compressed. It ranges from 1:1 to 1:40.
Input / output channel name
NAME: A 6 characters name can be assigned to each channel.
Output Limiter
THRESH: he limiter threshold ranges from -20 to +20dBu in 0.5dB steps.

ATTACK: he limiter attack time ranges from 0.3 to 1ms in 0.1ms steps, then ranges from 1 to 100ms in 1ms
steps.
RELEASE: he limiter release time can be set at 2X, 4X, 8X, 16X or 32X the attack time.
Output Source
IN1 – 8: his sets the input channel source for the current output channel. It can be used to mix the input
source (in dB) or disable it (Off). If more than one input sources are enabled, they are added
together as the source for the current output channel.
Operating the system menus
he system menus allow the user to control and change parameters that are related to the system behavior
and general operation. It can be accessed by pressing the Sys key in the main menu (when no input /
output or system menu is activated). All system menus require pressing the enter key to confirm and save
the settings.
Preset recall
P1: he DSP 88 has a built in non-volatile memory that can store up to 30 different preset setups. his
control selects which program to recall from the non-volatile memory. he program name is
displayed to the right of the program no.

Preset store
P:1 he DSP 88 has a built in non-volatile memory that can store up to 30 different preset setups. A
program can be stored using this menu. he old program with the same program number will be
replaced. Once the program is stored in the flash memory, it can be recalled at a later time, even
after power down. his control selects which preset location in the non-volatile memory to be
saved.
NAM: A descriptive name of up to 12 characters can be assigned to each program.
MIC settings
IN1: he user can choose between Line input or MIC input. For MIC input, the input will receive a 30dB
gain. Each input channel can be selected individually.
Phantom power
he optional microphone preamp also comes with 48 V phantom power, which can also be enabled or
disabled per channel in this menu.
Copy channels
Copy channels from the source to the target. When the source and targets are both Inputs and outputs, all
audio parameters will be copied. When one of the source or the target is an input while the other is an
output, only the level, polarity, delay, EQ, crossover, and channel name are copied.

SOURCE: his is the channel to be copied from.
TARGET: his is the channel to be copied to.
General Settings
FREQ MODE: his changes the frequency control mode for EQ and crossover filters. It can be 36
steps/octave or All Frequencies (1 Hz resolution).
DELAY UNIT: his sets the time unit for input and output delay to ms, ft, or m.
Ethernet settings
he network settings are separated into 3 menus.
Eth IP An unique IP address should be assigned to each unit in the network.
Eth GW he gateway address of the network. Usually, this should be the IP address of your
router/switch/hub address.

Eth SM he set of the subnet mask used by your network.
Communication settings
Please note: User must power cycle (reset) the unit for this settings to take effect.
DEVICE ID: his control assigns a device ID from 1 to 16 to the unit. his ID is only useful when a network of
more than 1 unit is used in conjunction with 1 or more DSP 88.
BAUD RATE: It sets the baud rate of the serial communication. AMC DSP Software Control uses a baud rate
of 115200, it should be left unchanged for most users.
NETWORK ID: his control assigns a network ID from 0 to 60000 to the unit. his ID is used for future
network expansion only, please leave it at 0.
Security lock and unlock
he password is 4 characters in length. he factory default of a new unit does not require a password. he
device can be protected for unauthorized parameter and /or system abuse. he security settings can be
controlled and stored in the device with the AMC DSP Software Control only. When the correct password is
entered in the device all the locks are disabled. After reentering the password or power cycling the device,
the locks are automatically enabled again.

Factory settings
CURRENT: his resets all the current parameters back to factory default settings only, while stored presets
and system settings stay untouched.
ISO settings (noise gate)
his internal system optimizer (gate) reduces ground floor noise if no signal is present.
If unwanted noise gate effects are audible on low sound levels it can be switched to bypass mode.
INFO
his menu contains 3 info screens:
he first screen displays the device’s name.
he second screen displays the Firmware version.

he third and last screen display the security code. When no password is set the factory default code is
11110000. When another combination of characters is displayed a password is set in the device and certain
functions are disabled for the user to modify.
Quick reference

PC control software
he DSP 88 is shipped with a special PC Graphic User Interface (GUI) application - AMC DSP Software
Control. AMC DSP Software Control gives the user an option to control the unit from a remote PC. he GUI
application makes it much easier to control and monitor the device, allowing the user to get the whole
picture on one screen. Programs can be stored to PC’s hard drive, thus expanding the storage to become
virtually limitless. AMC DSP Software Control can be connected to the DSP 88 via RS232, USB or Ethernet.
USB requires the installation of additional driver. he user is given an option to install it during the
installation of AMC DSP Software Control, and if the user did not install it at that time, they may choose to do
so by running the USB driver installer from the provided software.
AMC DSP Software Control is compatible with Microsoft XP, Vista and Microsoft Windows 7. he software
will also work if using Boot camp on a Mac.
Please note: Do not connect your DSP 88 processor with the computer before installing the software.
Ethernet configuration
hree of the PC’s parameters need to be determined to connect successfully to the unit:
• IP address
• Gateway
• Subnet mask
Determine these parameters by selecting “Start” and then “AMC DSP Software Control” from the main menu.

In AMC DSP Software Control window goes to “Setup” then “Port Connection”. And click on “Command
Prompt” in window below.
A DOS prompt window will appear. ype “ipconfig” when ready and press enter. his brings up all the
information required to setup the Ethernet connection.
Return to the main page of the AMC DSP Software Control and click “Device 1 (online)”. he main window
for that specific device appears.
Table of contents
Other AMC Computer Hardware manuals
Popular Computer Hardware manuals by other brands

Freescale Semiconductor
Freescale Semiconductor TWR-K64F120M quick start guide

EKF
EKF SC4-CONCERTO user guide

IEI Technology
IEI Technology HPE-5S3 Quick installation guide

Allied Telesis
Allied Telesis AT-2500TX Quick install guide

Pioneer
Pioneer BDR-XD08EMB-S owner's manual

Rosewill
Rosewill RCX-Z775-LX user manual

Telit Wireless Solutions
Telit Wireless Solutions SE868SY-D Hardware Design Guide

powersoft
powersoft Duecanali Series user guide

Creative
Creative EF0960 Safety & Regulatory Guide

Infineon
Infineon CYSBSYSKIT-DEV-01 quick start guide

Exsys
Exsys EX-12011 manual

Intel
Intel NUC 13 Extreme Kit NUC13RNGi9 user guide