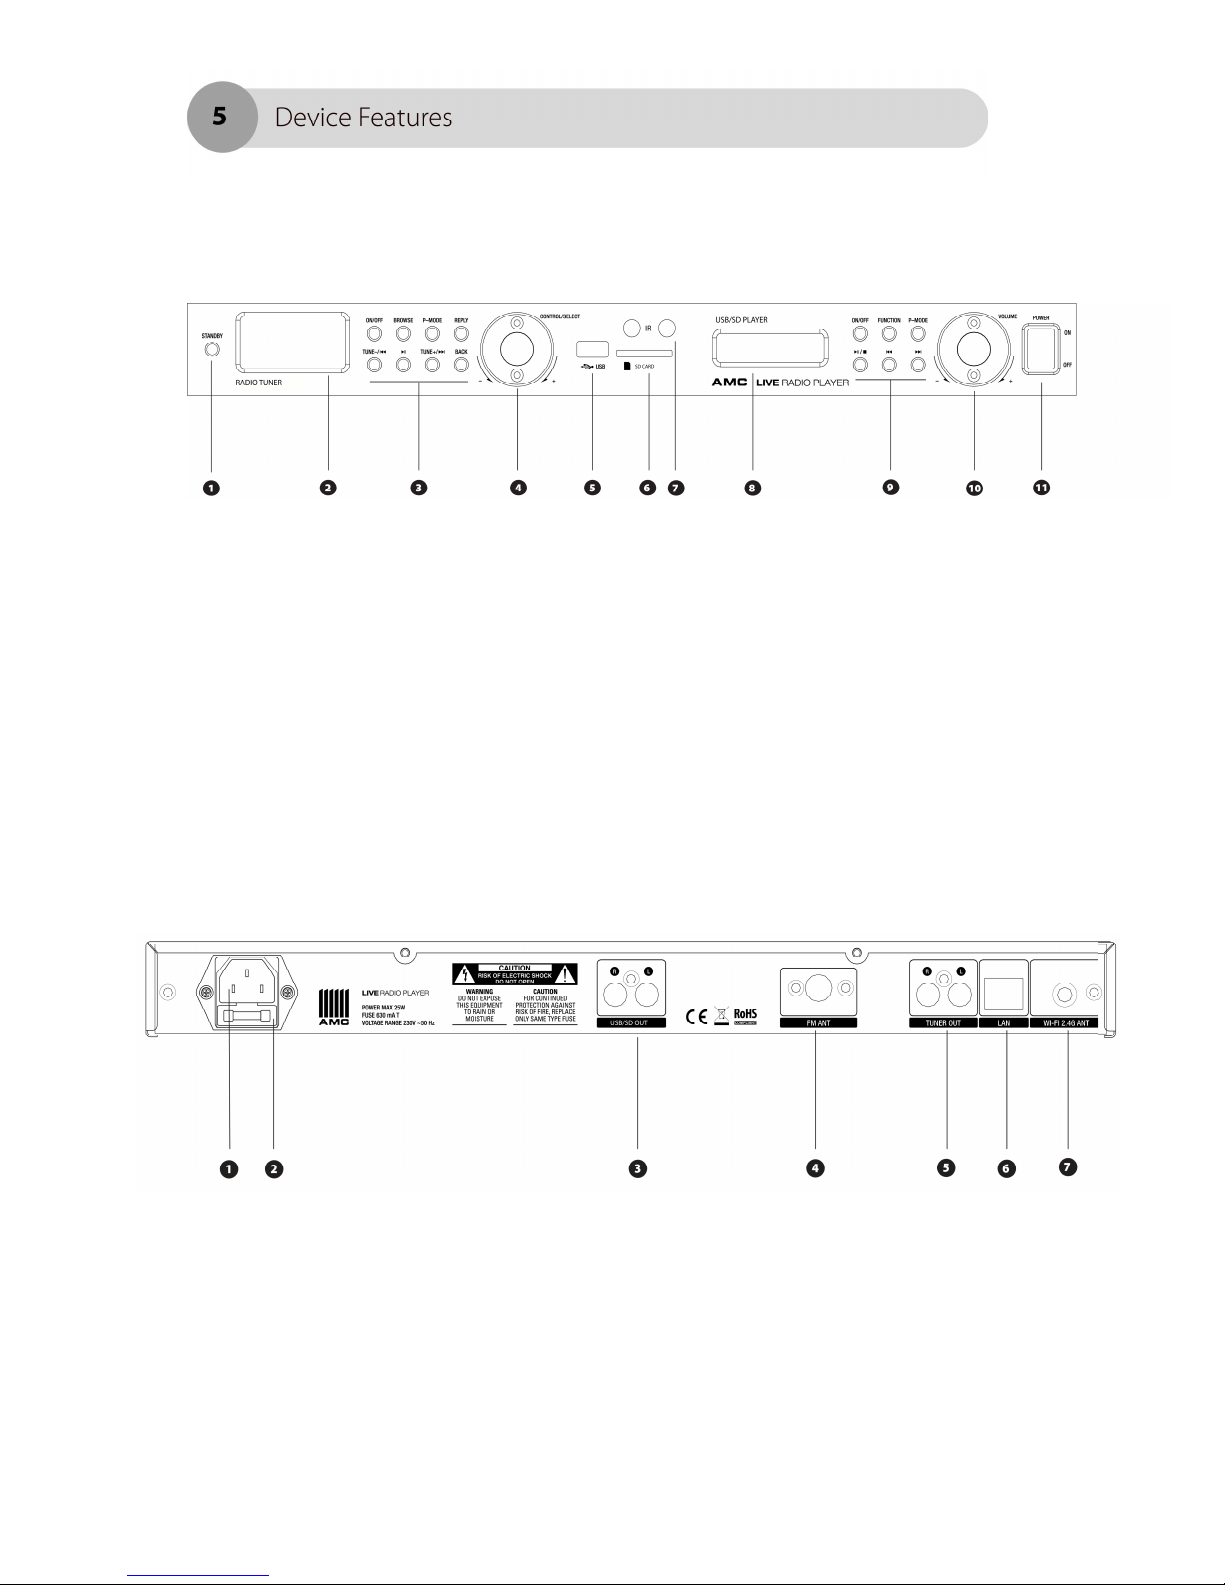
USB/SD FUNCTIONS KEY
•ON/Off - urns on and off USB/SD sec ion on he device.
•Func ion – music source selec ion. Change music source be ween USB and SD.
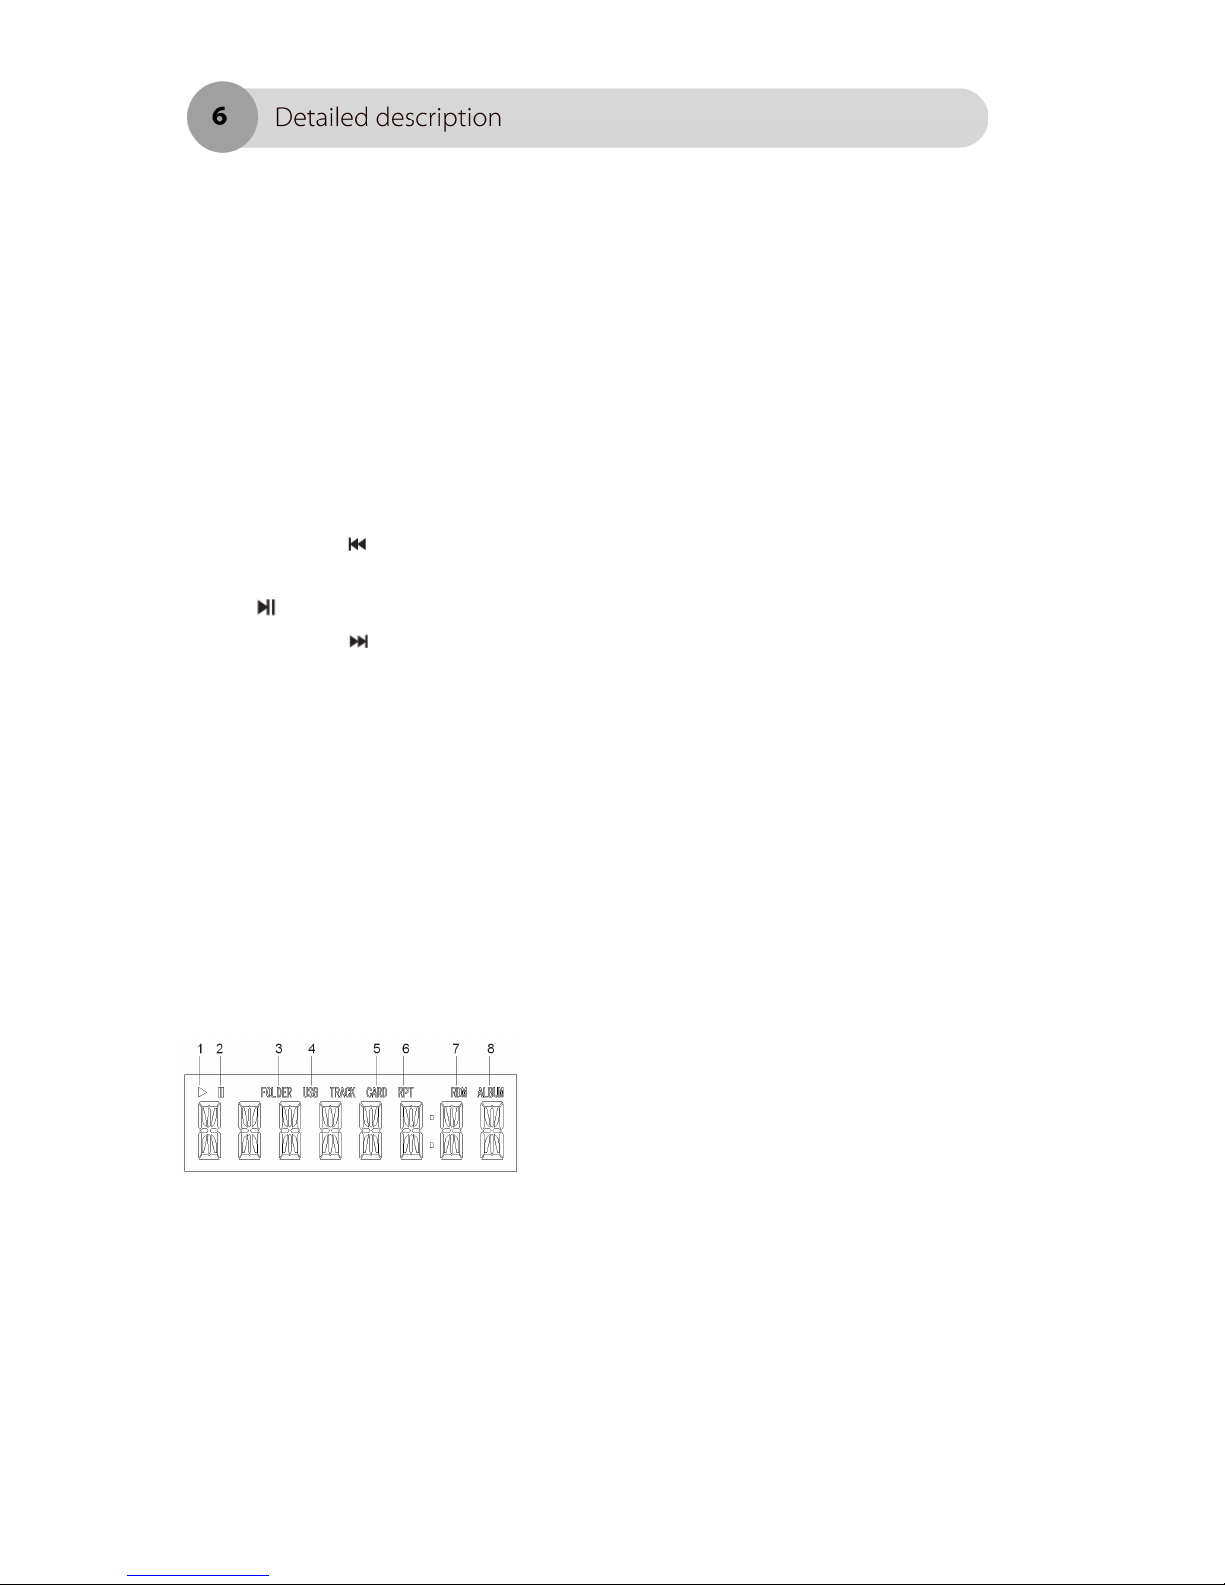
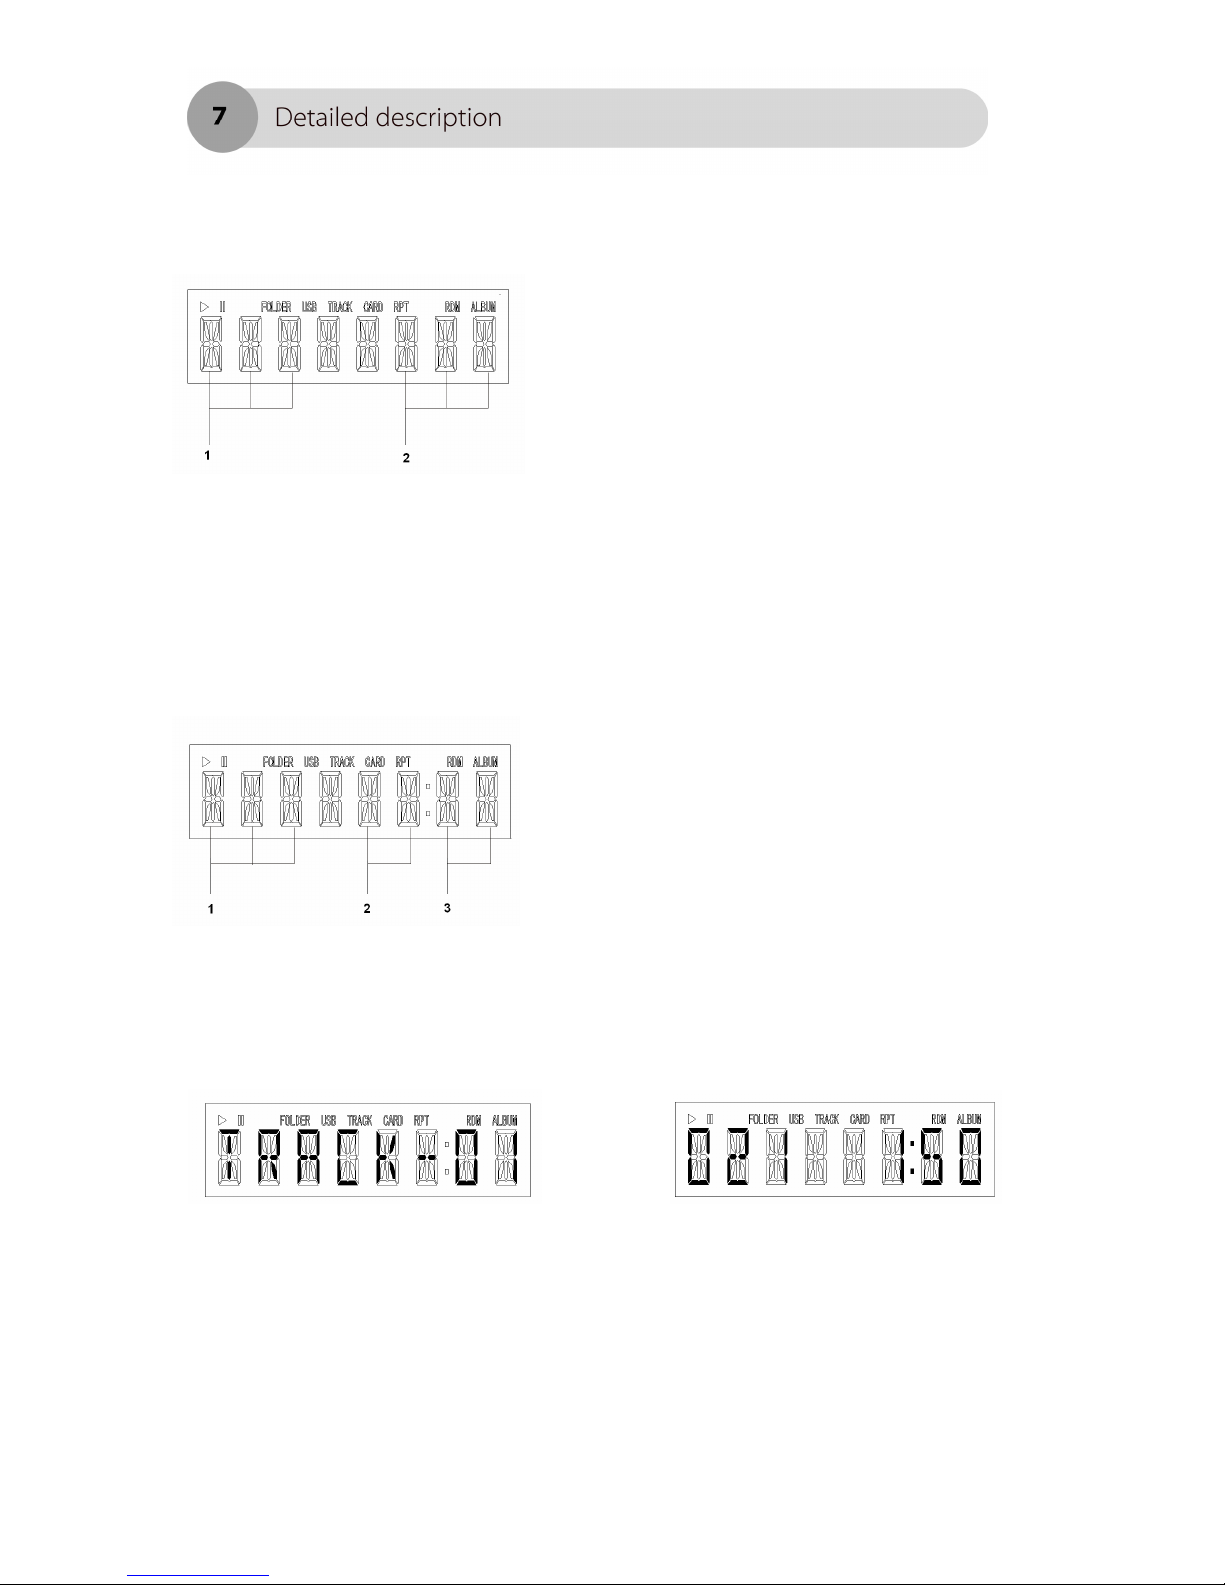
•P mode – change playing mode: repea one → repea folder → random→
normal.
• ■ - Play/pause/s op bu on.
• - backward playing ack by pressing
• - forward playing rack by pressing
•Volume - when he uni is in playing mode, urn he clockwise or
coun erclockwise if you wan o increase or decrease volume level
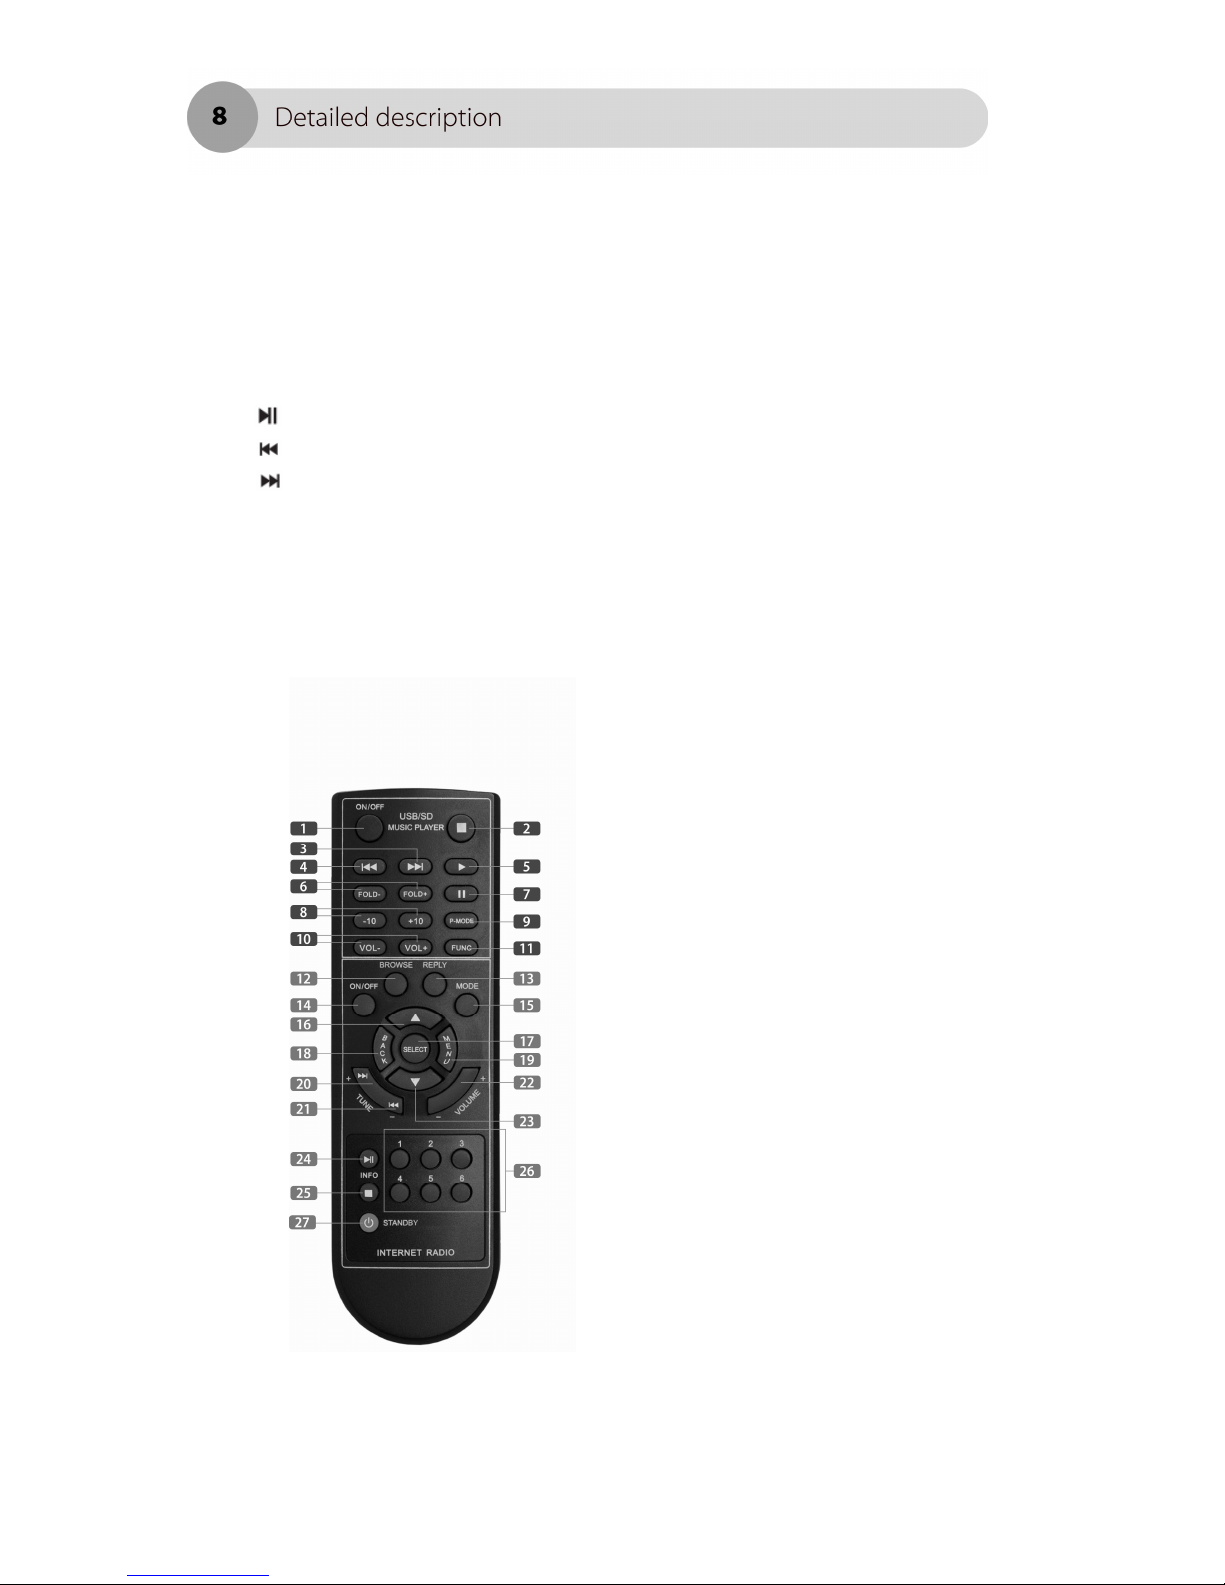
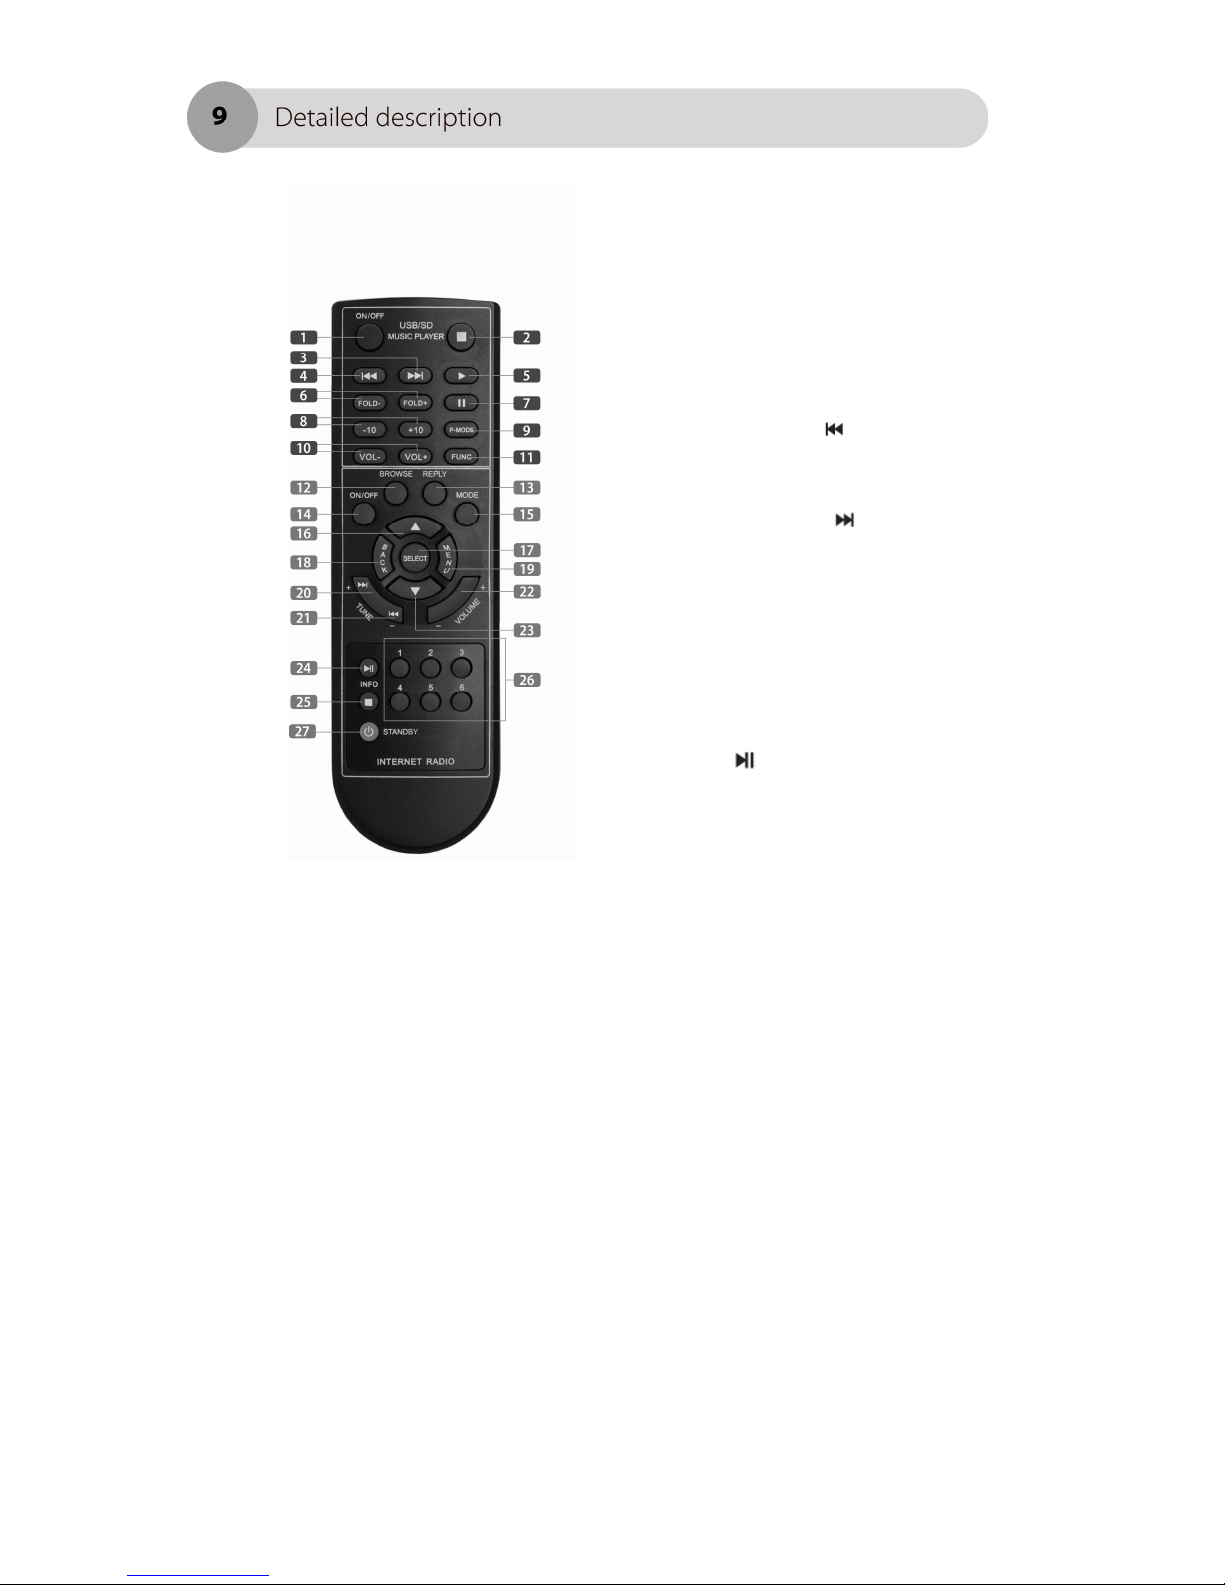
Remote control
1. ON/Off - urns on and off USB/SD
sec ion on he device.
2. S op playing USB/SD rack
3. Backward USB/SD playing
4. Forward USB/SD playing ack
5. Play bu on for USB/SD player.
6. Change he playing folder.
7. Pause played rack form USB/SD
player
8. Skips 10 rack o backward or forward
9. Change playing mode on he USB/SD
player : repea one → repea folder →
random→ normal.
10. Volume key for USB/SD player
11. Func ion – music source selec ion.
Change music source be ween USB and
SD.
12. BROWSE – browse he rack info in
he playlis (ac ive in media mode only)
13. Replay – his key for fu ure upgrade
func ion, communica e wi h in erne
server.
14. Radio uner on/off swi ch
15. Mode – change music source
be ween in erne radio → FM radio →
Media player