Amco Houseworks PEEL AWAY User manual

PEEL AWAY™PEELER
Instruction Manual
Quick Set-up ........................................................................................................... 2
How to Peel, Core, and Slice ................................................................................... 3
How to Slice & Core - No Peeling ............................................................................ 3
How to Peel Only...................................................................................................... 4
Tips & Tricks ............................................................................................................ 5
Cleaning your Peeler................................................................................................ 5
Recipes ................................................................................................................... 6
Warranty ................................................................................................................ 10
SAVE THIS INSTRUCTION MANUAL FOR FUTURE REFERENCE

English - 2
QUICK SET-UP
Before using, wash all parts of the peeler with warm, soapy water. Rinse and dry
thoroughly.
CAUTION: Blades are sharp, handle carefully. This product should not be used by
children.
The Peel Away™ Peeler has multiple functions and a variety of adjustable settings to
allow for optimal performance for your needs.
1. 1a) Assemble the Handle (A) by threading onto the end
of the Shaft (N).
1b) Attach the Fork (M) onto the opposite end of the
Shaft (N).
Tip: By holding down the Shaft Lever (B) you can easily
move the Shaft (N) back and forth.
2. Turn the Thumb Screw (I) at the base of the
Coring/Slicing Blade (L) to loosen the blade. Tighten
when the fork is centered.
3. Adjust the Peeling Blade (K) so it extends slightly
past the Peeling Arm (G).
4. Secure peeler to the work surface.
Vacuum Lever model: Lock Peel Away™ Peeler
to a flat work surface by moving the Vacuum
Lever (D). (see image)
Clamp model: Lock Peel Away™ Peeler to a
flat work surface by tightening the clamp with
your fingers only. (see image)
Caution: Using hand tools, such as pliers,
may damage your peeler and will void the
warranty.
Handle &
Handle Knob (A)
Shaft Lever
Spring (O)
Shaft (N)
Shaft Lever (B)
Suction Base (C)
Vacuum Lever (D)
Fork (M)
Coring/Slicing
Blade (L)
Peeling
Blade (K)
Peeling Arm
Lock Lever (J)
Peeling Blade
Thumb Screw (E)
Coring/Slicing
Blade Thumb
Screw (I)
Peeling Arm
Adjustment Screw (H)
Peeling Arm (G)
Tension
Spring (F)

English - 3
Now you’re ready to peel, core, and slice!
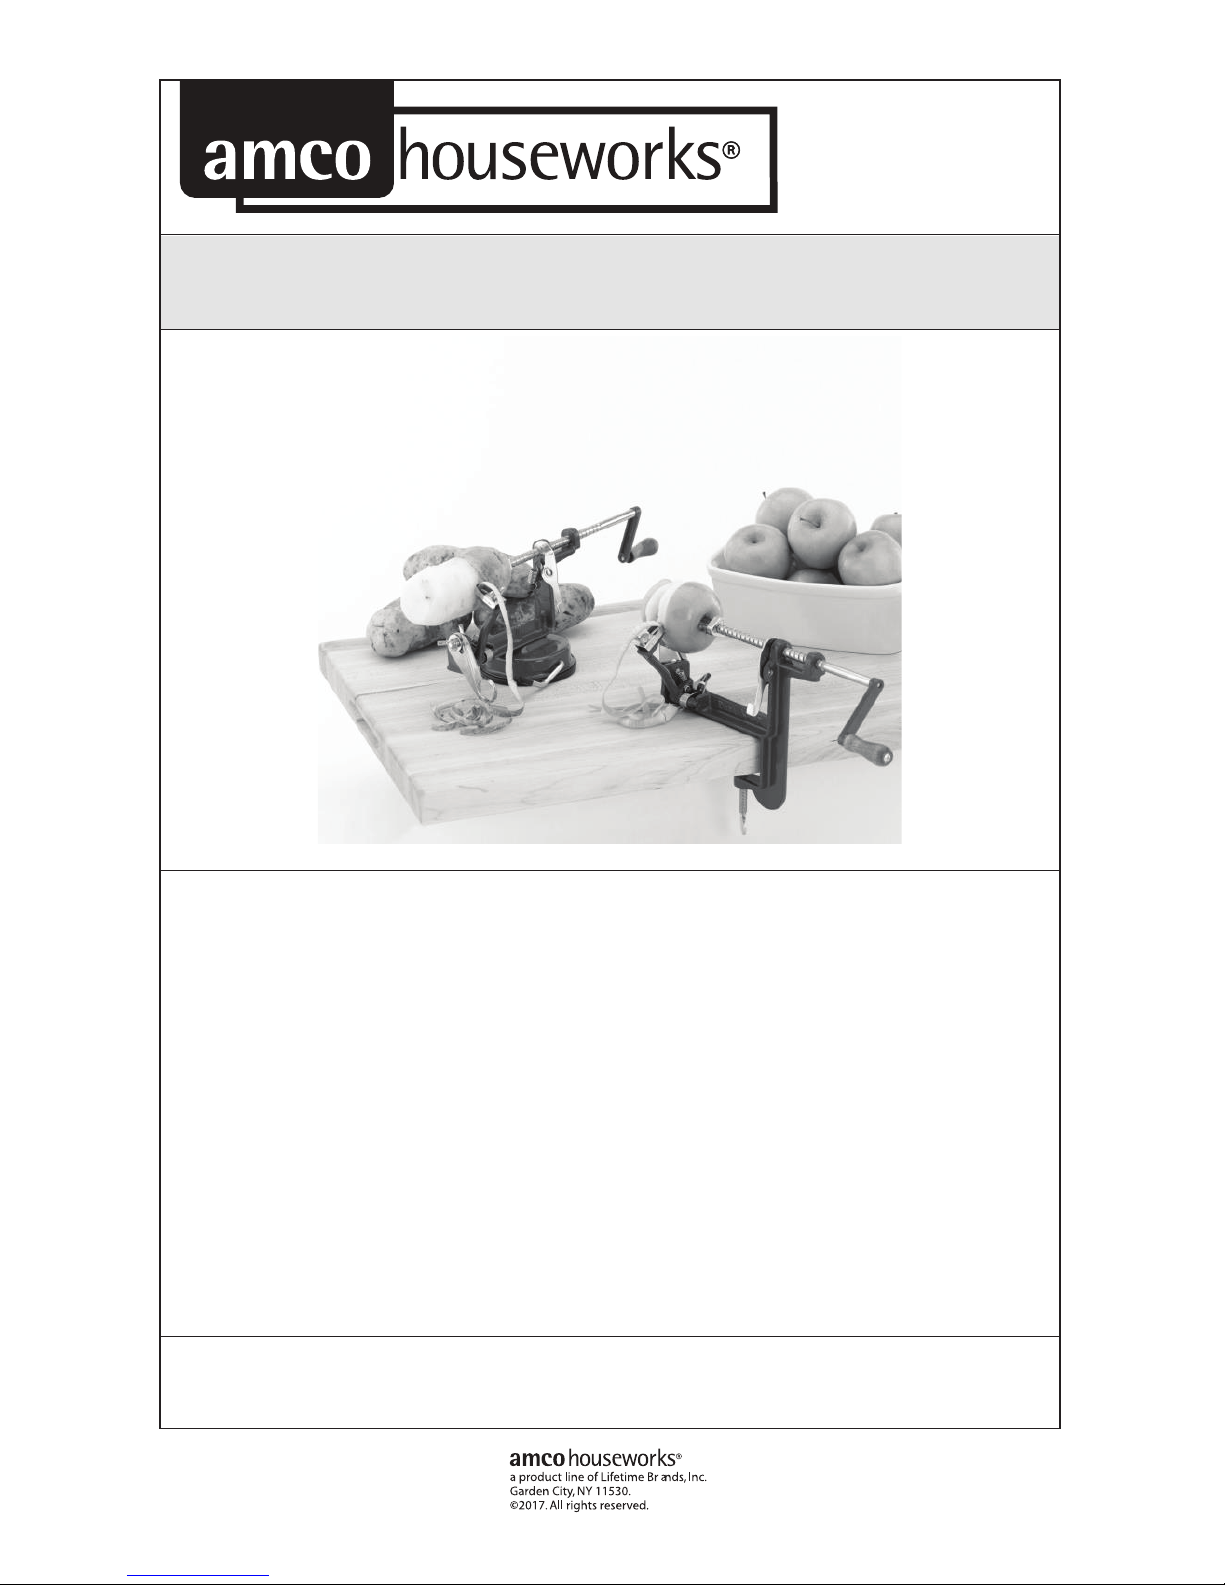
The Peel Away™ Peeler will save you time and effort when making apple sauce,
apple pies, shoestring potatoes, and scores of other apple and potato dishes!
This product is designed to save time by performing several tasks at once!
1.Peel, Core, and Slice
2.Slice and Core –No Peeling
3.Peel Only
HOW TO PEEL,CORE,AND SLICE
This feature is perfect for creating perfect slices for pies, chunky-style apple sauces,
dehydrating, or other snacks!
Now that you have done the initial set-up, you are ready to go!
Tips:
Select only firm produce; this product works best with firm produce.
Depending on the size of produce being peeled, you may
need to adjust the Peeling Arm Adjustment Screw (H).
Turning the Peeling Arm Adjustment Screw moves the
arm in and out. This feature allows you to move the
peeling blade in and out to accommodate a variety of
produce sizes and make thin or thick peels.
Instructions:
1. Pull back the Shaft (N) by holding down the Shaft Lever (B) and pulling the Shaft
back.
2. Firmly place the produce on the Fork (M) (stem first). Make sure it is centered on
the Fork.
3. Turn the Handle to start peeling, slicing, and coring.
4. When done, remove the outer slices and then firmly grasp the core and remove
from the Fork.
HOW TO SLICE &CORE -NO PEELING
This function is ideal for when you want to leave the peel on for flavor, texture, or color!
Now that you have done the initial set-up, you are ready to go!
Tips:
Select only firm produce; this product works best with firm produce.
Depending on the size of produce being peeled, you may
need to adjust the Peeling Arm Adjustment Screw (H).
Turning the Peeling Arm Adjustment Screw moves the arm
in and out. This feature allows you to move the peeling
blade in and out to accommodate a variety of produce
sizes and make thin or thick peels.
Instructions:
1. Pull back the Peeling Arm (G) and flip the Peeling Arm
Lever (J) up until it locks to the base body.
This feature will lock the peeling arm back, allowing for
coring and slicing while keeping the peel.
2. Pull back the Shaft (N) by holding down the Shaft Lever
(B) and pulling the Shaft back.
3. Firmly place the produce on the Fork (M) (stem first). Make
sure it is centered on the Fork.
4. Turn the Handle to start peeling, slicing, and coring.
5. When done, remove the outer slices and then firmly grasp the core and remove
from the Fork.
H
J
H

English - 4
HOW TO PEEL
Use this feature to quickly peel potatoes or apples.
Now that you have done the initial set-up, you are ready to go!
Tips:
Select only firm produce; this product works best with firm produce.
Depending on the size of produce being peeled, you may
need to adjust the Peeling Arm Adjustment Screw (H).
Turning the Peeling Arm Adjustment Screw moves the arm
in and out. This feature allows you to move the peeling
blade in and out to accommodate a variety of produce sizes
and make thin or thick peels.
Instructions:
1. Loosen the Coring/Slicing Blade Thumb Screw (I)
at the end of the peeler.
2. The Coring Slicing Blade (L) will swing down, (see
image) allowing the food to be peeled without
slicing and coring.
3. Pull back the Shaft (N) by holding down the Shaft
Lever (B) and pulling the Shaft back.
4. Firmly place the produce on the Fork (M) (stem
first). Make sure it is centered on the Fork.
5. Turn the Handle to start peeling, slicing, and coring.
6. When done, remove the peeled produce from the Fork.
Tip: Shoestring Potatoes
1. Loosen the Coring/Slicing Blade Thumb Screw (I) at the end of the peeler. Swing
the Coring/Slicing Blade (L) out of the way and tighten the Thumb Screw.
2. Adjust the Peeling Blade (K) as far toward the shaft as possible so that it cuts
deep into the potato.
3. Turn the Handle and peel the potato.
4. When the potato has been completely peeled, pull the Peeling Arm (G) back and
swing the Peeling Arm Locking Lever (J) down to lock (the peeling blade should
not touch the potato). Next, press and hold the Shaft Lever (B) and pull back the
Shaft (N) to the right. Release the shaft lever, unlock the peeling arm so the
blade is in contact with the potato, and turn the Shaft clockwise for a second
pass. Repeat until the Peeling Blade no longer cuts the potato.
I
H

English - 5
TIPS &TRICKS
To make the spiral into individual rings, use a knife to cut through one side of the
cored and sliced produce.
Apples and potatoes that are firm, symmetrical, and blemish-free work the best.
For best results use only small to medium sized apples and potatoes. Very large
produce may have undesirable results.
Avoid using soft produce. Soft produce will not peel well and will not stay in place
on the fork.
Troubleshooting
Problem
Cause
Solution
Will not peel.
Peeling Blade (K) not
correctly aligned.
Adjust the Peeling Blade.
Stops peeling.
Peeling Blade (K) needs
cleaning.
Rinse the Peeling Blade, remove
any peel that is stuck.
Too much of the produce
being peeled is removed
with the peel.
Peeling Blade (K) is set too
deep.
Adjust the Peeling Blade.
Produce breaks apart
before completely sliced.
Produce is too soft.
Use only firm, fresh produce.
Part of the core is sliced
with the apple.
Apple is not centered on
Fork (M).
Use symmetrical apples and be
sure they are centered on the
Fork.
Won't core.
Coring/Slicing Blade (L) not
correctly aligned.
Align the Coring/Slicing Blade.
Check that Fork will pass cleanly
through before putting produce
on the Fork.
Produce won't slice.
Coring/Slicing Blade (L) is
on backwards.
Check the diagram and make
sure the blade is facing the right
direction.
CLEANING YOUR PEEL AWAY™
Pieces are removable for cleaning
Hand-wash only in warm, soapy water. Rinse and dry thoroughly.
A drop of vegetable oil on moving parts will ensure smooth operation for your
next use.

English - 6
RECIPES
Easy Apple Pie
Crust
2 cups Sifted flour
1½ tsp. Salt ½ cup + 2 tbsp. Vegetable oil
¼ cup + 2 tbsp. Cold milk
Mix together the sifted flour and salt. Combine in a measuring cup the vegetable oil
and cold milk. Pour the liquid mixture into the flour and stir lightly until mixed.
Makes enough dough for 2 pastry shells.
Filling
6 cups Sliced apples
1 tbsp. Butter
1½ tbsp. Cornstarch
¾ cup Sugar
1 tsp. Ground cinnamon
Spread one of the pastry shells in the bottom of a pie pan. Heap the apples into the
pastry shell. They should be well above the edge of the pie pan. Combine the
cornstarch, sugar, and cinnamon in a small bowl. Take 1 tbsp. of this mixture and set
aside. Sprinkle the remaining mixture over the apples. Dot the top with the butter.
Cover with the remaining pastry shell and seal the edges. Sprinkle the top pastry
shell with the remaining cinnamon. Cut small ventilation holes in the crust. Bake at
375°F (190°C) for 35 minutes. Lower heat to 325°F (163°C) and bake for another 25
minutes.
Whole Wheat Apple Bread
2 cups Oil
2 cups Sugar
3 Eggs, well beaten
3 cups Whole wheat flour
1 tsp. Salt
1 tsp. Baking soda
2 cups Chopped apples
1 cup Pecans or black walnuts
2 tsp. Vanilla
Combine oil, sugar, and eggs and set aside. Combine flour, salt, and baking soda.
Add these ingredients to the oil mixture and mix well. Add apples, nuts, and vanilla.
Pour into 2 greased 9 x 5 inch bread pans. Bake at 350°F (177°C) for 1½ hours.
Easy Apple Pancakes
Simply mix apples slices into a pancake batter. Or, prepare a pancake topping by
warming a generous amount of apple slices in a sauce pan with brown sugar and
butter.
Baked Squash and Apple Casserole
1 Small butternut squash (2lbs. or less)
¼ cup Cold margarine
1 tbsp. Flour
2 Apples (peeled, cored, and sliced)
½ cup Brown sugar
1 tsp. Salt
¼ tsp. Cinnamon
¼ tsp. Nutmeg
Pare, seed, and cut the squash into small slices. Place the squash and apple slices
in an oblong 7 x 11 inch baking dish. Blend the rest of the ingredients together until
crumbly. Sprinkle over the squash and apples. Cover and bake at 350°F (177°C)
for 45 to 50 minutes.

English - 7
Pull Apart Apple Rings
½ cup Apple jelly
¼ cup Chopped nuts
½ cup Brown sugar
2 - 10 oz. Cans of refrigerated
biscuits
¼ tsp. Cinnamon
¼ cup Butter, melted
1 Large apple (peeled, cored, and
sliced)
Grease a 12 cup fluted tube pan. Spoon jelly over the bottom and sprinkle with nuts.
In a small bowl, mix the sugar and cinnamon together. Cut the apple rings into
thirds. Separate the dough into 20 pieces. Wrap 1 biscuit around each apple slice
third. Pinch the edges to seal and completely cover each apple slice. Dip in butter
and roll in the sugar mix. Stand biscuits on end in the pan. Drizzle with the
remaining butter and sugar mixture. Bake at 350°F (177°C) for 30 to 40 minutes or
until golden brown. Cool upright in pan for 8 minutes. Invert on a plate. Spoon
additional topping over the apple ring. Serve warm. Serves 10.
Creamy Apple Squares
1 pkg. Yellow cake mix
½ cup Soft margarine
¼ cup Brown sugar
½ tsp. Cinnamon
2 Apples (peeled, cored, and sliced)
1 cup Sour cream
1 Egg
Combine the cake mix and margarine. Mix until crumbly. Set aside ⅔ cup for the
topping. Add brown sugar and cinnamon to the reserved topping. Mix well and set
aside. Press the remaining mixture into the bottom of an ungreased 9 x 13 inch pan.
Arrange the apple slices in the pan. Blend the sour cream and egg together.
Spread evenly over the apples. Sprinkle the reserved topping over this. Bake at
350°F (177°C) for 25 to 30 minutes. Serve warm.
Apple Crisp
5-6 Apples, (peeled, cored, and
sliced)
¾ cup Unsweetened apple juice
concentrate, thawed
2 tbsp. Flour
½ cup Rolled oats
¼ cup All purpose flour
½ cup Brown Sugar
¼ tsp. Cinnamon
¼ tsp. Nutmeg
¼ cup Margarine or butter
¼ cup Chopped nuts (optional)
Filling: In a 9 x 13 inch baking dish, stir together the apples, apple juice
concentrate, and 2 tbsp. flour.
Topping: In a bowl, mix together the remaining ingredients. Sprinkle the topping
over the filling mixture. Bake at 375°F (190°C) for 35 to 40 minutes. Serve warm
with ice cream or whipped cream.

English - 8
Country Style Hash Browns
4 Medium potatoes, shoestring cut
½ cup Chopped onion
¼ cup Chopped green peppers
1 tbsp. Fresh snipped parsley (or ½
tsp. dried parsley)
⅛ tsp. Onion salt
⅛ tsp. Garlic salt
1 tbsp. Olive or canola oil
Pepper to taste
Microwave the potato strings for 2 minutes or bake at 400°F (204°C) for 15 minutes.
In a frying pan, heat the oil and brown the onions. Add potatoes and all other
ingredients, except parsley. Cook over medium heat, stirring occasionally until the
potatoes are crispy on the outside. Add parsley just before serving.
Deep Fried Shoestring Potatoes
Vegetable Oil for Deep Frying
2 - 3 Large potatoes, shoestring cut (about 2 pounds)
Salt, Seasonings, or Herbs
Cut potatoes into shoestrings and soak in a bowl of room temperature water. Spin
them as dry as possible in a salad spinner. Spread them on towels and blot.
Potatoes should be dry so they don’t spatter in the hot oil.
Heat about 2 inches of oil in a large, heavy bottomed pot over medium heat until the
deep fry thermometer reads 365°F (185°C).
Increase the heat to medium-high. Working in batches, carefully add the potatoes to
the oil and fry until brown and crispy (about 4 minutes). Scoop the fries from the oil
with a slotted spoon and drain in a pan lined with paper towels. Repeat with the
remaining potatoes, making sure the oil returns to 365°F (185°C) before each batch.
Season with salt, seasonings or herbs of your choice.
Oven Baked Shoestring Potatoes
2 Large potatoes, shoestring cut (about 1 ½ pounds)
3 tbsp. Olive oil, plus more for baking sheets
Coarse salt and freshly ground pepper
Peel and cut the potatoes into shoestrings. (You can do this up to four hours ahead.
To prevent discoloration, place cut potatoes in a bowl of cold water in the refrigerator
until ready to use, and gently pat dry with paper towels.)
Preheat oven to 425°F (218°C). Lightly coat two baking sheets with oil. Toss
together potatoes, 3 tablespoons of oil and 1 teaspoon of salt. Dividing evenly
among prepared baking sheets, arrange potatoes in a single layer.
Bake, turning potatoes a few times and rotating sheets halfway through, until crisp
and golden brown, about 18 to 20 minutes. Transfer potatoes to a large piece of
parchment paper or paper towels and let cool for 5 minutes. Season with salt and
pepper and serve.

English - 9
Cheesy Shoestring Casserole
2 Large potatoes, shoestring cut
1 - 16 oz. pkg. Sour cream
1 - 8 oz. can Chicken soup
1 - 8 oz. pkg. Cream cheese, softened
1 - 1⅞ oz. pkg. Dry ranch dressing mix
½ cup Chicken broth or ½ cup water
2 cups Shredded cheddar cheese
10 slices Bacon, cooked and crumbled
Preheat oven to 375°F (191°C) and grease a 9 x 13 inch pan. Spread half of
potatoes to cover bottom of dish.
In a bowl, combine sour cream, chicken soup, cream cheese, dressing mix, broth (or
water) and salt. Spread half of mixture over potatoes and top with 1 cup of shredded
cheese. Repeat the layers.
Cover and bake for 1 hour. Uncover and sprinkle with bacon. Continue baking for 15
minutes.
Cheeseburger and Fries Casserole
1 ½ lbs. Lean ground beef
1 med. Green sweet pepper, chopped
½ cup Chopped onion
3 cloves Garlic, minced
1 - 14 oz. can Diced tomatoes, undrained
1 - 6 oz. can Tomato sauce
1 - 10 ¾ oz. can Condensed cheddar
cheese soup
½ cup Light sour cream
4 cups Shoestring cut potatoes
1 tsp. Seasoned salt (optional)
Assorted toppings (ketchup, pickle
slices, yellow mustard, and/or chopped
fresh tomato)
Preheat oven to 350°F (177°C). In a 12 inch skillet, cook ground beef, sweet pepper,
onion and garlic over medium heat until meat is brown and vegetables are tender.
Drain fat. Stir undrained tomatoes and tomato paste into beef mixture. Bring to a boil.
Reduce heat and simmer uncovered for 5 minutes.
Spoon mixture into the bottom of an ungreased 2 quart baking dish. In a medium
bowl, stir together soup and sour cream. Spread over meat mixture in baking dish.
Sprinkle potatoes over top of soup mixture. If desired, sprinkle with seasoned salt.
Bake uncovered for 40-45 minutes or until heated through and potatoes are golden.
If desired, serve with assorted toppings.

PRODUCT WARRANTY
5-YEAR LIMITED WARRANTY
This fine product is warranted to be free from defects in material and
workmanship for a period of 5 years from date of purchase. Any piece
found to be defective under normal use and care will be repaired or
replaced at no charge with the same item or an item of equal or better value.
Customers would only be responsible for standard shipping and handling fees.
Customers may call (800) 252-3390 to obtain applicable shipping and handling
fees. Individual pieces should be returned postage paid by customers to:
Amco Houseworks® Products,
C/O Lifetime Brands, Inc.,
12 Applegate Drive
Robbinsville, NJ 08691
You may have other rights, which vary from state to state.
Residents of the state of California please call (800) 252-3390
for further instructions.
Table of contents