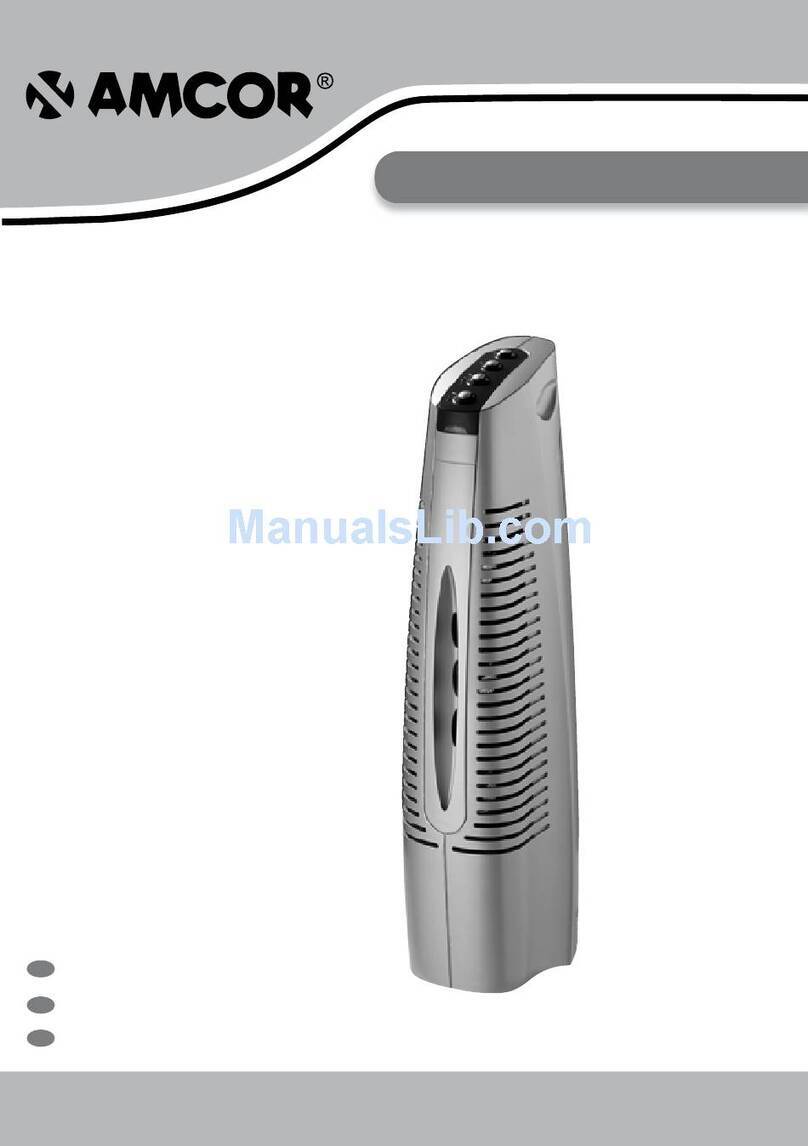
Amcor PLDA 19E User manual

PLDA 19E 19EH 25E 25EH
HOME TREATMENT CENTRE
www.amcorgroup.com
DBedienungsanleitung
家庭空氣處理器
家庭空气处理器
LUFTREINIGER
GB Instruction Manual
TC 說明書
SC 用户手册

GB
2
THANK YOU !
• Never operate this appliance if it is damaged or if it has a damaged cord or plug.
• Do not lead the cord over sharp edges.
• A damaged supply cord should be replaced by the manufacturer, its service agent
or a qualied person in order to avoid a hazard.
• Any service other than regular cleaning or replacing the carbon lter should be
performed by an authorized service representative. Failure to do so could result in
a loss of warranty.
The rst time that you use the unit please ensure that it has been standing for
2 hours in an upright position before it is switched on.
IMPORTANT: The unit is not to be used in temperatures under 5 °C.
Thank you for choosing this innovative amcor product. We suggest that you keep
this manual in a safe place for future reference. It describes the many benets and
advanced features this unique product has to offer. Before you use it, you should
carefully read these instructions to maximise this product’s performance.
For over 50 years amcor has specialised in complete indoor environmental control,
manufacturing and marketing dehumidiers, portable air conditioners, coolers, air
puriers, ionisers and aromatherapy scent diffusers. These world class products
incorporate the latest technological developments.
IMPORTANT SAFETY INSTRUCTIONS
Before any installation, use and maintenance operation, read the safety instructions
in this manual carefully.
Remove all packaging materials from the unit, keep it away from babies and small
children to avoid the danger of suffocation.
Before inserting the plug make sure that the voltage is within the range indicated on
the rating label on the unit.
The dehumidier is intended exclusively for the use for which it was created. Amcor
is not responsible for any damage caused by improper use.
The dehumidier is safe, however as with other electrical appliances, use it with
care.
WARNING

GB
IMPORTANT!
• The unit is designed for indoor operation.
• Rating: This unit must be connected to a 220-240 V / 50 Hz earthed outlet.
• The installation must be in accordance with regulations of the country where the
unit is used.
If you are in any doubt about the electrical installation, have it checked and if
necessary modied by a qualied electrician.
• Unplug when not in use. Do not unplug by pulling the cord.
• Do not operate this product with wet hands.
• Keep out of the reach of children.
• Do not clean the unit by spraying it or immersing it in water.
• Disconnect it from the mains before cleaning the unit or any of its components.
• Always unplug before changing the carbon lter.
• Do not connect the unit to an electrical outlet using an extension cord. If an
outlet is not available, one should be installed by a licensed electrician.
• Keep at least 20cm distance from the wind outlet to the combustible surfaces,
when the heater is on.
Do not use your PLDA under the following conditions:
Close to a heat
source
Inside unit exposed
to the weather
outdoors
In a permanent
very humid
environment
If the power cable
wires are frayed
or cut
When small
children may be
left unattended
If an extension
cord is needed to
reach an outlet
Where the power
cable may be
damaged
On a slope or
uneven surface
Where it may
be damaged by
chemicals
Where there is a
risk of interference
by foreign objects
This product is
not made for DIY
repair
If there is a risk of
liquid falling on
the unit
Fan
Motor
Proximity
switch
Water tank
Micro switch
Condenser
(warmed coil)
Evaporator
(cold refrigerated coil)
Buoy
Compressor
Door switch
Proximity
switch
Water tank
Moist
air
Moist ai
r
Warmer dry air
a
b
c
d
e
f

GB
HOW IT WORKS
Your Amcor PLDA draws air through a multi stage high efciency washable lter
onto a refrigerated cold coil. As the air in the room passes over the cold surface,
moisture condenses and collects into a removable water tank. The drier, slightly
warmer air is then expelled through the air outlet located behind the control panel
of the unit into the room.
When the water tank is full, a micro-switch automatically stops the unit and an
indicator light signals the need to empty the tank.
If preferred a continuous drainage hose connected into the back of the unit can be
used to drain the water.
The dehumidier ghts condensation, mould and dampness throughout the house.
It protects your furniture, precious possessions and decor from the damaging
effects of excessive moisture.
The combination of air purier and dehumidier may aid in relieving some medical
conditions such as arthritis and allergies linked to high humidity and airborne
allergens by removing excess moisture, dust, smoke, animal dander, mould spores
and pollen to create a less irritating living environment for your enjoyment.
The air is cleaned both when the dehumidier is operating and also independently
of the dehumidier when the air purier mode is selected.
Your PLDA is also great for drying the laundry! But please do not put the clothes on
the unit directly.
Close to a heat
source
Inside unit exposed
to the weather
outdoors
In a permanent
very humid
environment
If the power cable
wires are frayed
or cut
When small
children may be
left unattended
If an extension
cord is needed to
reach an outlet
Where the power
cable may be
damaged
On a slope or
uneven surface
Where it may
be damaged by
chemicals
Where there is a
risk of interference
by foreign objects
This product is
not made for DIY
repair
If there is a risk of
liquid falling on
the unit
Fan
Motor
Proximity
switch
Water tank
Micro switch
Condenser
(warmed coil)
Evaporator
(cold refrigerated coil)
Buoy
Compressor
Door switch
Proximity
switch
Water tank
Moist
air
Moist ai
r
Warmer dry air
a
b
c
d
e
f

GB
5
HOW IT WORKS
PARTS
PLACEMENT
a. Carbon lter
b. Scent emitter
c. Adapter for d.
d. Spot dehumidication hose
e. 3M™ High Air Flow lter
(optional)
Your Amcor PLDA will begin to protect your home from the harmful effects of exces-
sive moisture as soon as it is turned on.
Excess moisture travels throughout your home, in the same way that cooking smells
spread to every room in the house. For this reason, the dehumidier should be
positioned in a central and clear location so that it can draw this moist air towards
it from all over the home. A warm hallway or landing is an excellent position for your
dehumidier. If possible, leave interior doors ajar to allow air circulation.
Alternatively, if you have a serious problem in one area you can begin by positioning
the dehumidier there and later moving it to a more central point.
For the most effective use, run your dehumidier with external doors and windows
kept closed when the dehumidier is operating.
Please note the unit should not be placed directly against a radiator or other heat
source.
When positioning your AMCOR PLDA, ensure that it is placed securely on a
level surface clear of any obstacle that may limit the air movement.
Your AMCOR PLDA is tted with 4 wheels for easy movement.
Before you move the unit, switch it off and empty the water tank.
a
b
c
d
e

GB
AIR PURIFYING
Your PLDA is tted with a high denition multi-stage air purication system.
Stage one
A preliminary washable dust lter. The lter absorbs irritating odours such as that
from mould, stale cigar smoke, or vehicle fumes so they are not recirculated into
the cleaner air.
Stage two
An activated carbon odour absorbent lter.
Stage three (optional)
An optional 3M™ High Air Flow lter or a TiO2 lter for purifying the air from
bacteria.
Remember
You can use the air purier function even when dehumidication is not needed.
Simply press the UV push button and set the humidity level to 80%.
For details on cleaning the lter see the section of maintenance.
5678
10
12
9
1
2
3
4
11
13

GB
AIR PURIFYING CONTROLS
1. Humidity set mode.
2. High fan speed.
3. Low fan speed.
4. Dehumidication – compressor runs.
5. Timer set is on.
6. Setting the timer ON.
7. Setting the timer OFF.
8. Real time indication and timer setting(s).
9. Indication of room relative humidity and temperature.
In all units – it also indicates the timer setting status as follows:
– setting the rst timer – Setting the second timer
– the rst timer ( )is conrmed – the second timer ( )is conrmed.
10. Ultra violet light is on (where available).
11. Heating function is ON. (for PLDA 19EH & 25EH)
12. Water tank full.
13. Dual colour led indication.
1. When the unit is switched ON the led colour is BLUE.
2. When the water tank is full the led colour turns RED.
..
..
..
..
..
..
5678
10
12
9
1
2
3
4
11
13

GB
Setting the time
..
The real time is shown on the clock, the 4 digits at the bottom of the LCD.
The moment the unit is connected to the electricity, the default time 12:00 is shown.
Push the SET BUTTON for 2 seconds, the 2 left digits will blink, adjust the hour by
pressing the
..
or
..
button repeatedly.
To set the minutes push the SET BUTTON again for 2 seconds. The 2 right digits
blink. Press the
..
or
..
button repeatedly to adjust the minutes.
Push the SET BUTTON again and the real time is set.
Switching the unit ON and OFF
Push the
..
BUTTON to operate the dehumidier. Pushing the button again will
switch the unit off.
Setting the humidity level
..
CONT = Continuous dehumidication, the unit is dehumidifying disregarding the
relative humidity in the room.
50% maintains the relative humidity around 50%, ideal for personal comfort and dry
storage.
60% maintains the relative humidity around 60% for personal comfort.
70% maintains the relative humidity around 70% in the room.
80% maintains the relative humidity around 80% in most cases the compressor will
be OFF.
To set the desired relative humidity level press the
..
or
..
button repeatedly.
Setting the fan speed.
Push the SPEED BUTTON to change the fan speed, the chosen speed will be
indicated on the LCD,
..
for the high speed and
..
for the low speed.
Setting the Timer
..
The timer switches the unit on and off automatically.
Make sure that the clock is set to the real time so that the timer can operate the unit
accurately.
When the unit runs (is ON)
Push the TIMER BUTTON, the 2 left digits will blink; adjust the desired hour when
the unit will switch OFF by repeatedly pressing the
..
or
..
button. Push the TIMER
BUTTON again, the 2 right digits will blink; adjust the minutes by repeatedly press-
ing the
..
or
..
button. (The minutes can be set insteps of 5 minutes, 5, 10, 15 up to
55). Press SET BUTTON to conrm the desired timer and
..
will be displayed.
If an ON setting is desired after the OFF, repeat the above procedure. (
..
will
be displayed accordingly)
To activate the timer settings push the SET BUTTON one more timer.
GB
9
When the unit is OFF.
Follow the same procedure as above for the ON and if required continue to the OFF
setting.
Cancelling the timer
In order to cancel the timer setting(s), push the TIMER BUTTON.
Blue light in the UV light range
..
Normally the blue UV light will be ON whenever the unit is connected to the
electricity. In order to turn the blue UV light off, push the UV BUTTON, the UV light
will go OFF and the UV icon on the LCD will disappear.
Pushing the UV BUTTON again will light the UV light.
When the front door opens, a micro switch cuts off the electricity.
Heater
..
( for PLDA 19EH & 25EH)
The heating function may run together with the compressor or alone. The heater will
run only when the room temperature is below 25 °C.
To operate the heating function, press the TEMP&HEAT BUTTON.
Room relative humidity
..
Normally the 2 digits indicate the relative humidity % in the room.
If the relative humidity is lower then 35% the 2 digit icon indicate
..
If the relative humidity is higher then 95% the 2 digit icon indicate
..
Room temperature
Push the TEMP&HEAT BUTTON for 2 seconds and the LCD will indicate the room
temperature.
SCENT EMITTER
The unit is supplied with a scent emitter to fragrance
the air.
• take out the scent capsule from its bag.
• take the scent emitter cover off by turning it and
pulling it out.
• x the capsule into its airy seat in the back of the
unit.
• return the cover to its place.

GB
10
MAINTENANCE
Always unplug the unit from the mains before carrying out any maintenance or clean-
ing the unit.
Cleaning the body
Use only a soft cloth to wipe the unit clean.
Do not use volatile chemicals, petrol, detergents, chemically treated cloths or other
harmful cleansing solutions. These could all possibly damage the cabinet.
Cleaning the washable air lter
This dehumidier is equipped with a washable lter. This will capture most airborne
pollutants like dust, smoke, animal dander, mould spores and pollen to create a less
irritating living environment.
It is advisable to check the lter on a regular basis (at least monthly and after stor-
age) and clean as necessary:
• Extract the lter holder
• Use a vacuum cleaner or tap the lter lightly.
If the lter is particularly dirty, use luke-warm water with a small amount of medium
strength detergent and rinse thoroughly under the cold water tap.
Make sure the lter is completely dry before replacing.
Do not expose the lter to sunlight or other sources of direct heat as this may cause
the lter and frame to warp.
Cleaning and replacing the carbon lter.
The carbon lter can be cleaned with a vacuum cleaner, never rinse it with water. We
suggest to replace the carbon lter every 6 months.
Optional lters
3M™ High Air Flow lter
PCO – Photo Catalytic Oxidation (optional)
TiO2 lter is included in the multi air lter.
STORAGE
If the dehumidier is not used for long periods of time, follow these steps:
• disconnect the unit and wrap the power cable.
• if used, empty the water container, remove the scent emitter .
• clean the unit and lter, pack it in its original packaging or cover to protect against
dust.
• store the unit in an upright position in a cool, dry place away from access by chil-
dren.

GB
11
..
..
MAINTENANCE
STORAGE
EMPTYING THE WATER TANK
When the water tank is full, the unit will switch off and beep 10 times, the blue led
on the control panel will become red and the icon on the LCD will come on.
At this time please empty the water tank as
follows:
• Open the front door.
• Pull the water tank partly out by the recession at
the bottom of the tank.
• Raise the handle, carry the tank to the drain
point and empty the water by the small triangle
opening in the cover of the tank.
• Once emptied, gently push the tank back into its
place checking that the icon goes out and
the red led turns back to be blue.
To clean the water tank follow these steps:
• turn the handle to the position where the notch on
the handle’s hinge matches the slot in the water
tank.
• pull the handle out of its place in the water tank
and take the handle off.
• take off the cover.
• clean the water tank.
• put back the cover.
• return the handle to its place.

GB
12
CONTINUOUS DRAINAGE (OPTIONAL)
For the continuous drainage please refer to the
following instructions and pictures :
1. Cut out the hole for the drainage tube on the
back of the unit. There are 4 tiny strips holding
the cover in the hole, just cut them and the
cover will come out.
2. Push the drain tube through the hole in the
back of the unit and x it on to the plastic
drain tube.
3. The water tank have to remain in place also in
the continuous drainage.
4. Make sure that the drain tube will have a
continuous downward slop all the way to the
drain point.
5. Do not insert the edge of the drain tube below
the water level.
SPOT DEHUMIDIFICATION
Normal dehumidication
Before you start the unit, open the air outlet
grill located behind the control panel to direct
the dehumidied dry air run up according to
your wish.
Spot dehumidication
Your dehumidier has got a unique feature. Be-
sides dehumidifying the air in the room it can
at the same time dehumidify humid spots like
closets, shoes, dresses etc. by a exible hose
connected to the rear panel:
• take off the cover of the scent emitter
• take out the scent capsule
• screw the exible hose into its adapter
• connect the adapter to the opening in the
rear panel
• close the air outlet panel on the top of the
unit
• run the unit.

GB
1
CONTINUOUS DRAINAGE (OPTIONAL)
Never try to repair or dismantle the unit yourself. Before calling for assistance please check the points
below.
The unit doesn’t run. Is the machine plugged in?
Is the mains power supply on?
Is the water tank full indicator on? (If so, the water tank is full or it isn’t
positioned properly).
The unit seems to
extract little water. Are too many windows or doors open?
Is there something in the room producing lots of heat?
Is the room cold – the colder the air the less moisture the unit will extract.
Is the lter dirty?
Is the room humidity already quite low?
The unit seems to do
nothing. Is the lter dirty?
Is the air intake or outlet blocked?
Is the room humidity already quite low?
Is the room temperature below 5 °C? The fan may run without the
compressor.
Too noisy. Is the machine positioned unevenly so as to create vibration?
Is the oor underneath the unit uneven or loose tting?
Is there any foreign body interfering with the unit?
The unit’s fan doesn’t
seem to be revolving. Is the lter blocked?
Is there any foreign body interfering with the unit?
The continuous
drainage is not working. Does the hose have a downward slope throughout its entire length?
Is there a kink or sharp bend in the hose?
Model PLDA 19E PLDA 19EH PLDA 25E PLDA 25EH
Mains 220 - 240 V / 50 Hz
Power consumption
(at 32 °C, RH 90 %) W 300 390
Heater (PTC type at 20˚C) W - 470 - 470
Moisture removal
(at 32 °C, RH 90 %) L/24h 19 25
Refrigerant R-134A
Refrigerant load g 155 200
Working temperature °C 5 - 35
Dimensions (W x D x H) cm 42 x 24 x 60
Net weight kg 14.5 15
Due to our continuous R+D program, specications may change without prior notice.
For current specications please refer to the rating label on your machine.
TROUBLE SHOOTING
TECHNISCHE DATEN

TC
1
謝謝
重要安全說明
警 告
•如果本產品的插頭或電源線有損壞,則不要對其進行操作。
•電源線經過的地方不得出現尖銳的物體。
•為了避免危險,如果出現電源線損壞,則須要請生產廠家、維修代理商或專
業人員進行替換。
•除了定期清洗以及替換過濾綱,其他的任何維修工作都要由授權的代理來進
行。否則,出現任何損壞,Amcor不負責保修。
首次使用本產品時,在開機之前請將其豎放兩小時。
注意:本產品不可在低於5攝氏度的環境下使用。
感謝您購買本創新的AMCOR PLDA。建議您妥善保存本說明書,以備將來參考
之用。本說明書中介紹了這一獨特產品的許多優點及特別功能。在使用本產品
之前,請仔細閱讀本說明書,以確保本產品發揮其最佳功能。
在過往的50多年裹,AMCOR致力發展專業的、全面的的室內環境控制技術,生
產與銷售抽濕機、移動式冷氣機、冷風機、空氣淨化機、離子產器以及有芳香
療法的香芬機。結合了最先進的技術發展,提供世界級水平的產品。
在進行安裝、使用和維修操作之前,請仔細閱讀本說明書中的安全說明。
去除產品的包裝材料,切勿讓嬰兒和小孩觸及,避免發生窒息意外。
插入插頭之前,確保電壓在產品標籤上所標示的範圍內。
本PLDA僅可用於其指定用途。任何不當使用引致的損壞,Amcor不負任何責
任。
本PLDA是非常安全的,但是和其他電器一樣,需要小心使用。

TC
15
重要提示
•本產品專門為室內使用設計。
•電源:本產品必須連接到220V-240V/50Hz的接地插座上面。
•其安裝必須符合其所使用國家的相關規定。
對於本產品的電氣安裝,如果您存在任何疑問,則需檢查清楚。如必要,請
專業人員進行修改。
•在不使用本產品的時候要將其從電源上拔下。不要拉扯電源線來拔下插頭。
•濕手時請勿操作本產品。
•確保孩子不能接觸到本產品。
•不要用水對本產品進行清洗或是把它浸入到水中。
•在對本產品或者其任何零件進行清洗之前,要先切斷電源。
•在更換濾綱之前,要先切斷電源。
•不得使用延伸線將本產品連接到插座上面。如果沒有適合的插座,則要請專
業人員安裝一個。
•在加熱器打開的時候,風口與可燃表面之間至少要保持20釐米的距離。
切勿在下列情況下使用本PLDA:

TC
1
工作原理
您的AMCOR PLDA通過多級高效可洗過濾綱將空氣抽到冷卻器上面。當室內的
空氣通過冷的表面的時候,濕氣會凝結並收集到可移動水箱當中。之後,更加
乾燥且有一點溫暖的空氣通過位於產品控制面板後面的出風口排出到房間內。
當水箱裡的水滿時,微開關會自動停止產品運作,指示燈會提醒清空水箱。
如需要,可以將連續排水管連接到產品的後面,進行持續排水。本抽濕機抗室
內結露、黴變以及潮濕。它可以用來保護您的傢俱、貴重物品以及裝修,使其
免受過度潮濕的侵擾。
通過空氣清潔器與抽濕器的結合,可以去除過多的濕氣、塵土、煙霧、動物皮
屑、黴菌孢子以及花粉,創造宜人的居住環境,從而減輕與高濕度以及空氣傳
播過敏原相關的病症。
在空氣清潔器模式單獨開啟或與抽濕功能同時開啟時,空氣都可以得到清潔。
您的PLDA產品也甚至可以用於乾燥衣物!但是不要把衣物直接放到產品上 。
微開關
凝結器
(加熱器)
浮標
前門開關
水箱
接近開關
潮濕
空氣
壓縮機
水箱
接近開關
電機
風扇
微熱的乾燥
空氣
潮濕
空氣
蒸發器
(冷卻器)

TC
1
工作原理
部件
放置
a. 活性碳過濾綱
b. 芳香囊
c. 除濕管連接器
d. 定點除濕管
e. 3M™ High Air Flow 過濾綱
(可選擇)
只要一打開,您的Amcor PLDA就會開始對您的家居環境進行保護,防止出
現有害效應以及過度的潮濕。
過度的濕氣在家中蔓延,就象烹飪的氣味在房子的每個房間裡蔓延一
樣。因此,應當把本抽濕機放置於中間的一個清潔位置,這樣,它就可以將房
子裡的所有濕氣都吸取。溫暖的走廊以及樓梯平臺是放置抽濕機的理想位置。
如果可能,要把裡面的門打開,這樣便於空氣流通。
如果某一個區域嚴重潮濕,您可以把抽濕機直接放置於這區域之後,再把它移
動到中心點去。
為了發揮更大效用,在PLDA工作的時候,要確保外部的門窗都關閉。
請注意,本產品不可直接放置於加熱中或其他的熱源處。
在固定您的Amcor PLDA的時候,請確保其平穩地放置于水平表面上,上面
不得有阻礙空氣流動的障礙物。
為了方便移動,您的Amcor PLDA上面安裝有四個輪子。
在移動本產品之前,要先將其關閉,並清空水箱。
a
b
c
d
e

TC
1
空氣清潔
PLDA上裝有一個高效能空氣清潔系統。
第一級
這是一個初步的可洗灰塵過濾綱。本過濾綱可以吸收令人不快的怪味比如:黴
氣、香煙煙氣或是汽車的癈氣,這樣可以迴環為清潔的空氣。
第二級
這是一個活性碳過濾綱 , 吸收異味。
第三級(可選)
這是一個可選的3M™ High Air Flow 過濾綱或TiO2過濾綱,用於清除空氣中的細
菌。
記住
即使在不需要抽濕的情況下,您仍然可以使用空氣清潔功能。只要按一下UV按
鈕,就可以將相對濕度設置為80%。
有關清潔過濾綱更多詳細資訊,請參考清潔及保養一節。
5678
10
12
9
1
2
3
4
11
13

TC
19
空氣清潔 控制
1. 濕度設定。
2. 高風速。
3. 低風速。
4. 除濕-壓縮機運行中。
5. 計時器已設定。
6. 設定開機計時器。
7. 設定關機計時器。
8. 即時時間顯示與計時器設定。
9. 室內相對溫度與濕度顯示。
在所有的產品當中-如果要確認或是取消計時器,則按設定按鈕-按照以
下資訊來標示狀態:
設定第一個計時器 設定第二個計時器
確定第一個計時器( ) 確定第二個計時器( )
10. 紫外線燈打開。(如有此功能)
11. 加熱功能打開。(只用於PLDA 19EH與25EH)
12. 水箱滿。
13. 雙色LED顯示
1)當產品運作的時候,LED顯示為藍色。
2)當水箱滿的時候,LED顏色變為紅色。
5678
10
12
9
1
2
3
4
11
13
..
..
..
..
..
..

TC
20
設定時間
..
實際的時間顯示在LCD的底部四位數位
..
。
一旦產品連接到電源上面,預設時間12:00顯示在上面。
按住設定鍵(SET)兩秒鐘,左邊的兩位數閃爍,通過
..
或
..
鍵來調節小時。
如果要設定分鐘,則再次按下設定鍵(SET)兩秒鐘。右邊的兩位數會閃爍。使用
..
或
..
鍵來調節分鐘。
再次按下設定鍵(SET),確定設定的實際時間。
開動及關閉產品
按下電源鍵
..
啟動抽濕器。再次按下這一鍵,則將產品關閉。
設定相對濕度水準:
..
CONT: 持續抽濕,產品持續進行抽濕,而不管房間內的相對濕度有多高。
50%: 將相對濕度維持在50%左右的水準,適用于人體舒適度與乾燥儲存。
60%: 將相對濕度維持在60%左右的水準,適用于人體舒適度。
70%: 將室內的相對濕度維持在70%左右的水準。
80%: 將相對濕度保持在80%左右的水準,在大多數情況下,壓縮機關閉。
如果要設定某一相對濕度,請按
..
或
..
鍵選擇。
設定風扇速度
按下速度鍵(SPEED)來更改風扇的速度,所選擇的速度會顯示在LCD上面,
..
表示高速,
..
表示低速。
設定計時器
..
計時器自動打開或關閉產品。
確保時鐘的時間與實際時間一致,這樣,計時器就可以準確的操作。
當產品運作時
按下計時器鍵(TIMER),左邊的兩位數會閃爍,反覆地按
..
或
..
鍵,選
擇產品需要關閉的時間的小時,再按計時器鍵,右邊的兩位數會閃爍,反覆地
按
..
或
..
鍵,選擇需要關閉的時間的分鐘,(分鐘可以設定為步長為5分鐘、
5、10、15,直至55)按下設置鍵(SET)確定計時器 。 (
..
會顯示)
如果在自動關機後, 要自動開動產品,則重複以上的步驟。(
..
會顯示)
如果要啟動計時器設定,則再按下設定鍵(SET)。
This manual suits for next models
3
Table of contents
Languages:
Other Amcor Air Cleaner manuals

Amcor
Amcor AM-90 User manual

Amcor
Amcor AM-45 User manual

Amcor
Amcor AIR PROCESSOR 2000 User manual

Amcor
Amcor AM-45 User manual

Amcor
Amcor UltrClean AM-70 Ficus User manual

Amcor
Amcor AM-90 User manual

Amcor
Amcor AM-90 User manual

Amcor
Amcor HEPA TOWER plus User manual

Amcor
Amcor AM-15 User manual

Amcor
Amcor AM-60 User manual