Ameeca Headset User manual

Manual
listening for learning...

Base unit
Headset
Remote console
1
2
3
4

Quick SetUp
Simply take your StoryPhones out of the box
and press the play button for 2 seconds! Your
StoryPhones are ready to play.
Now, set up your system...
(more details on pages 3 & 4)
Install the software by inserting the CD
into the CD drive of your PC and the
software will run. For more information
please see page 3.
Plug the Base Unit into the mains power
supply using the power supply unit.
Connect the Base Unit to the PC with the
USB cable.
Put the Headsets and Remote Console into
the Base Unit one at a time and wait for
each one to appear in Bookshelf before
adding the next player. (It may take a short
time for each player to appear as software
drivers are installed).
Your system is ready to use.
1
2
3
4

Contents
Welcome to StoryPhones
Important Safety Information
Installing the Bookshelf Software
Setting up Your StoryPhones System
Using the StoryPhones System
How to use the Headsets
How to use the Remote Console
The StoryPhones Bookshelf Software
Taking Care of Your StoryPhones System
1
2
3
4
5
5
6
8
20

Hello and welcome
to your StoryPhones
Audio System.
I developed the concept of StoryPhones during my
time as an Early Years Foundation Stage teacher.
As a teacher, I understood the importance of nurturing
children’s listening and communication skills and I felt
that there was a need to modernise the way children
accessed audio resources in order to develop these
skills. StoryPhones will give your children a versatile,
accessible way of listening to stories, music, songs and
games wherever they want. The recording facility will
allow children to record their own stories and ideas.
The system will give you ease of access to audio
resources when planning children’s learning.
We hope that you enjoy using your StoryPhones
system.
Eleanor Johnson, creator of StoryPhones
1

Important Safety Information
Please read these instructions thoroughly
before use.
Do not attempt any repair or remove any covers except for
battery replacement. Ameeca will not be held responsible for
any damage caused by unauthorised repairs.
The StoryPhones system is only to be used as an audio
teaching aid and entertainment system, Ameeca will not be
held responsible for any misuse. StoryPhones is not a toy.
StoryPhones should not be taken outside when it is raining.
StoryPhones should not be immersed in water.
For health and safety reasons, children should not wear a
Headset whilst riding a bike, climbing or running around.
Should your system need cleaning use a slightly damp cloth
to wipe the plastic surfaces.
StoryPhones uses the type of rechargeable batteries used in
mobile phones and many other appliances. It is important
that the batteries are replaced only with the same type.
Caution. Danger of explosion if the battery is incorrectly
replaced. Contact Ameeca for replacement batteries.
The battery must not be exposed to excessive heat such
as direct sunlight, fire etc.
Only use the plug-in power supply that comes with the
StoryPhones. Consult Ameeca for a replacement if required.
The equipment must be connected to a mains socket outlet
with a protective earth connection and the mains plug must
be readily accessible.
The equipment and its component parts must be disposed of
in accordance with local and national environmental
regulations in place.
2

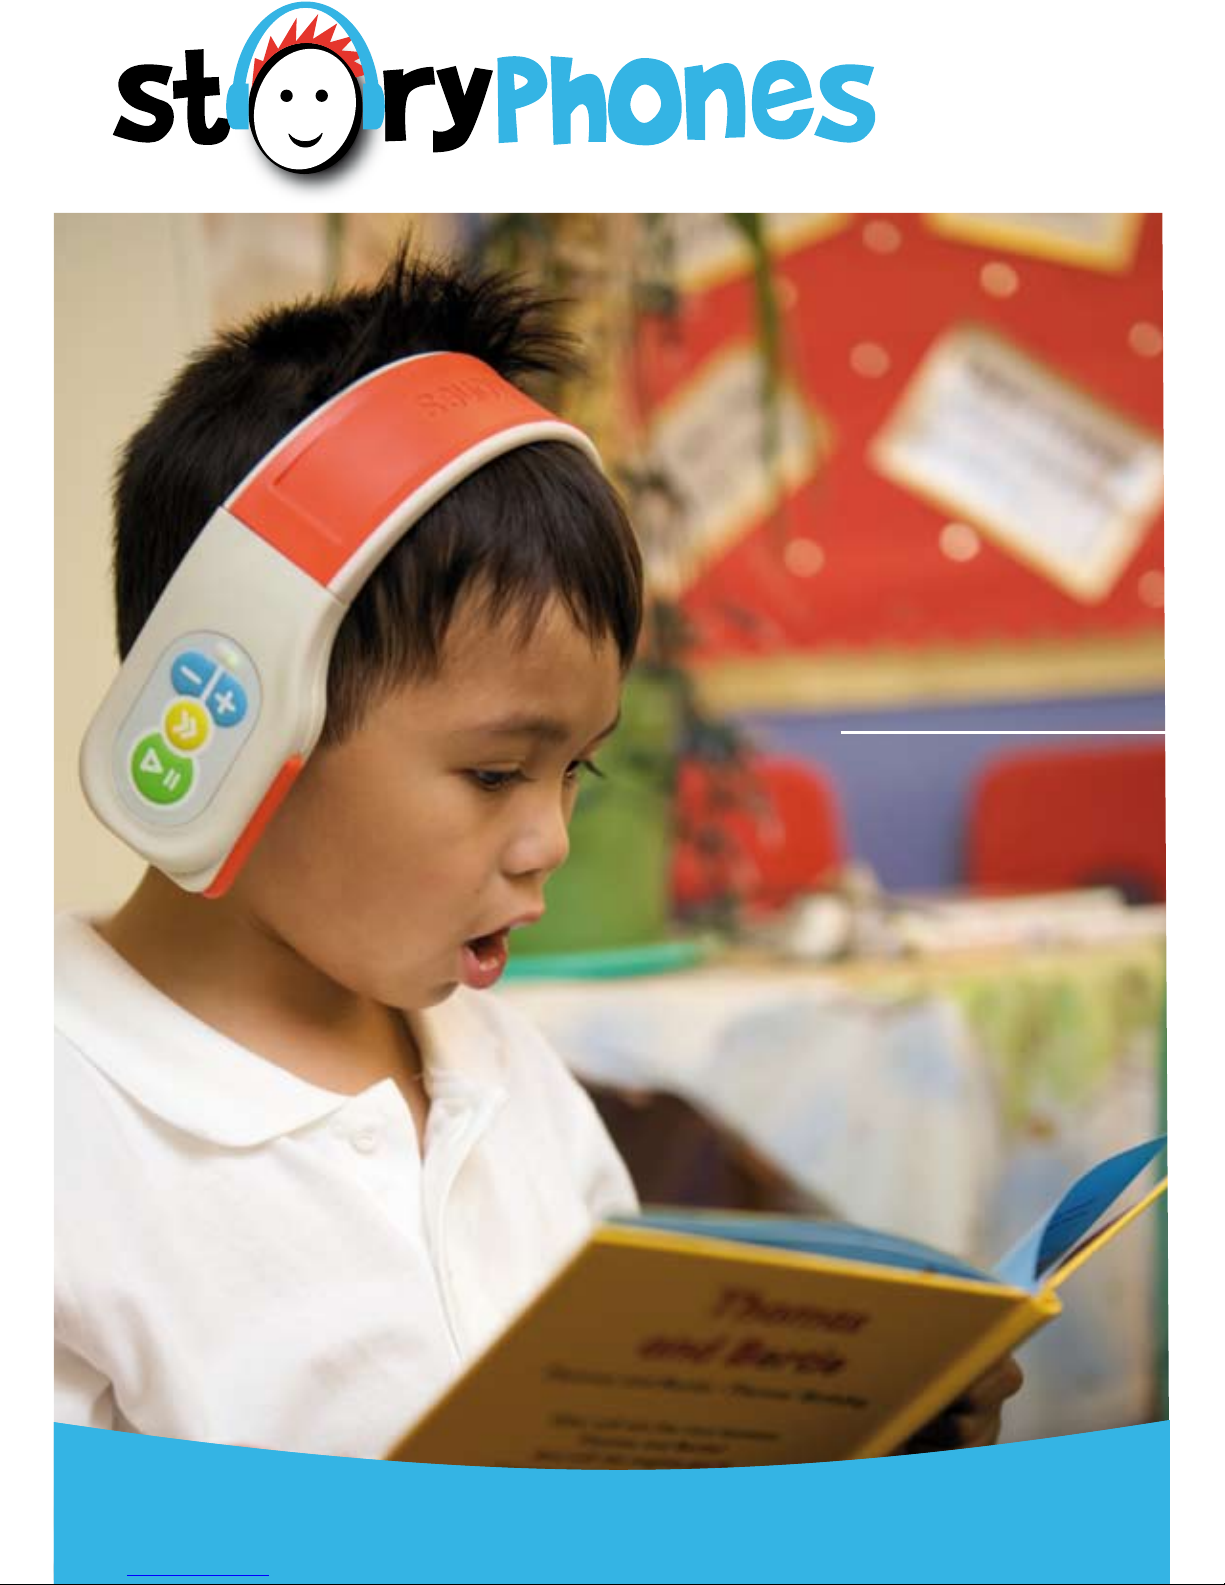
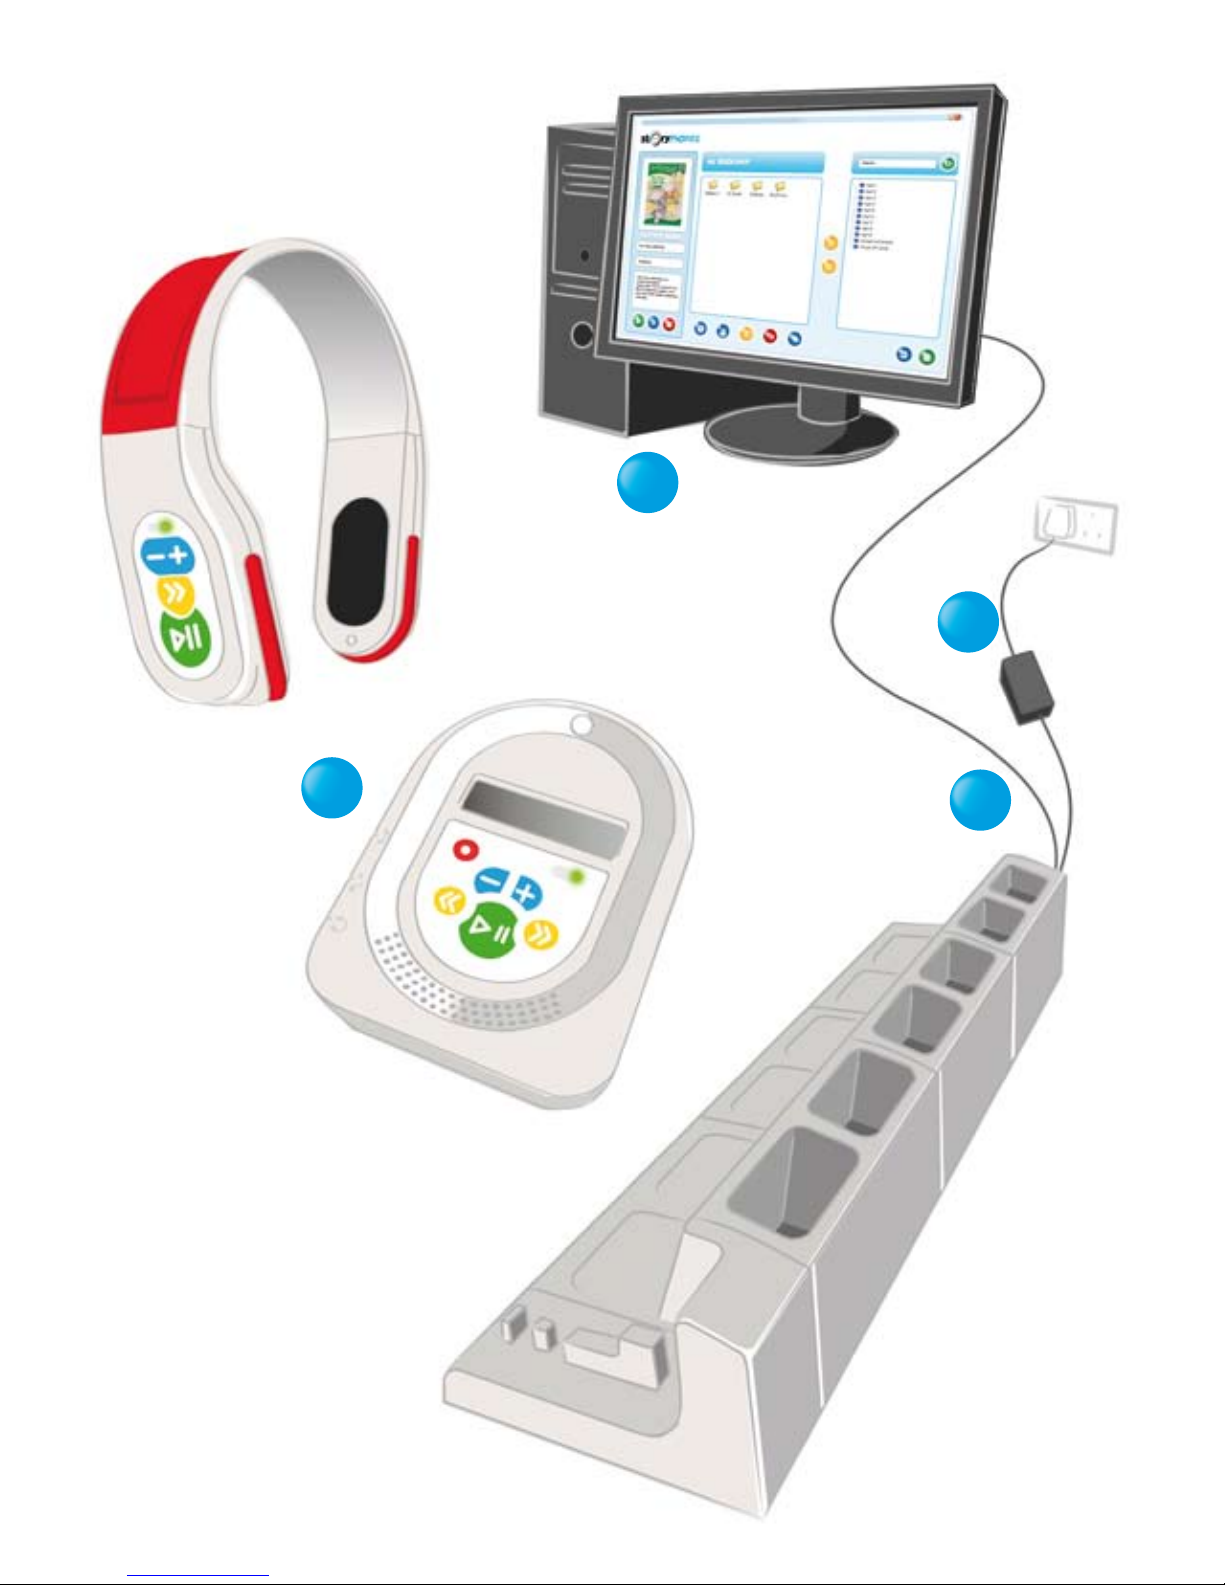
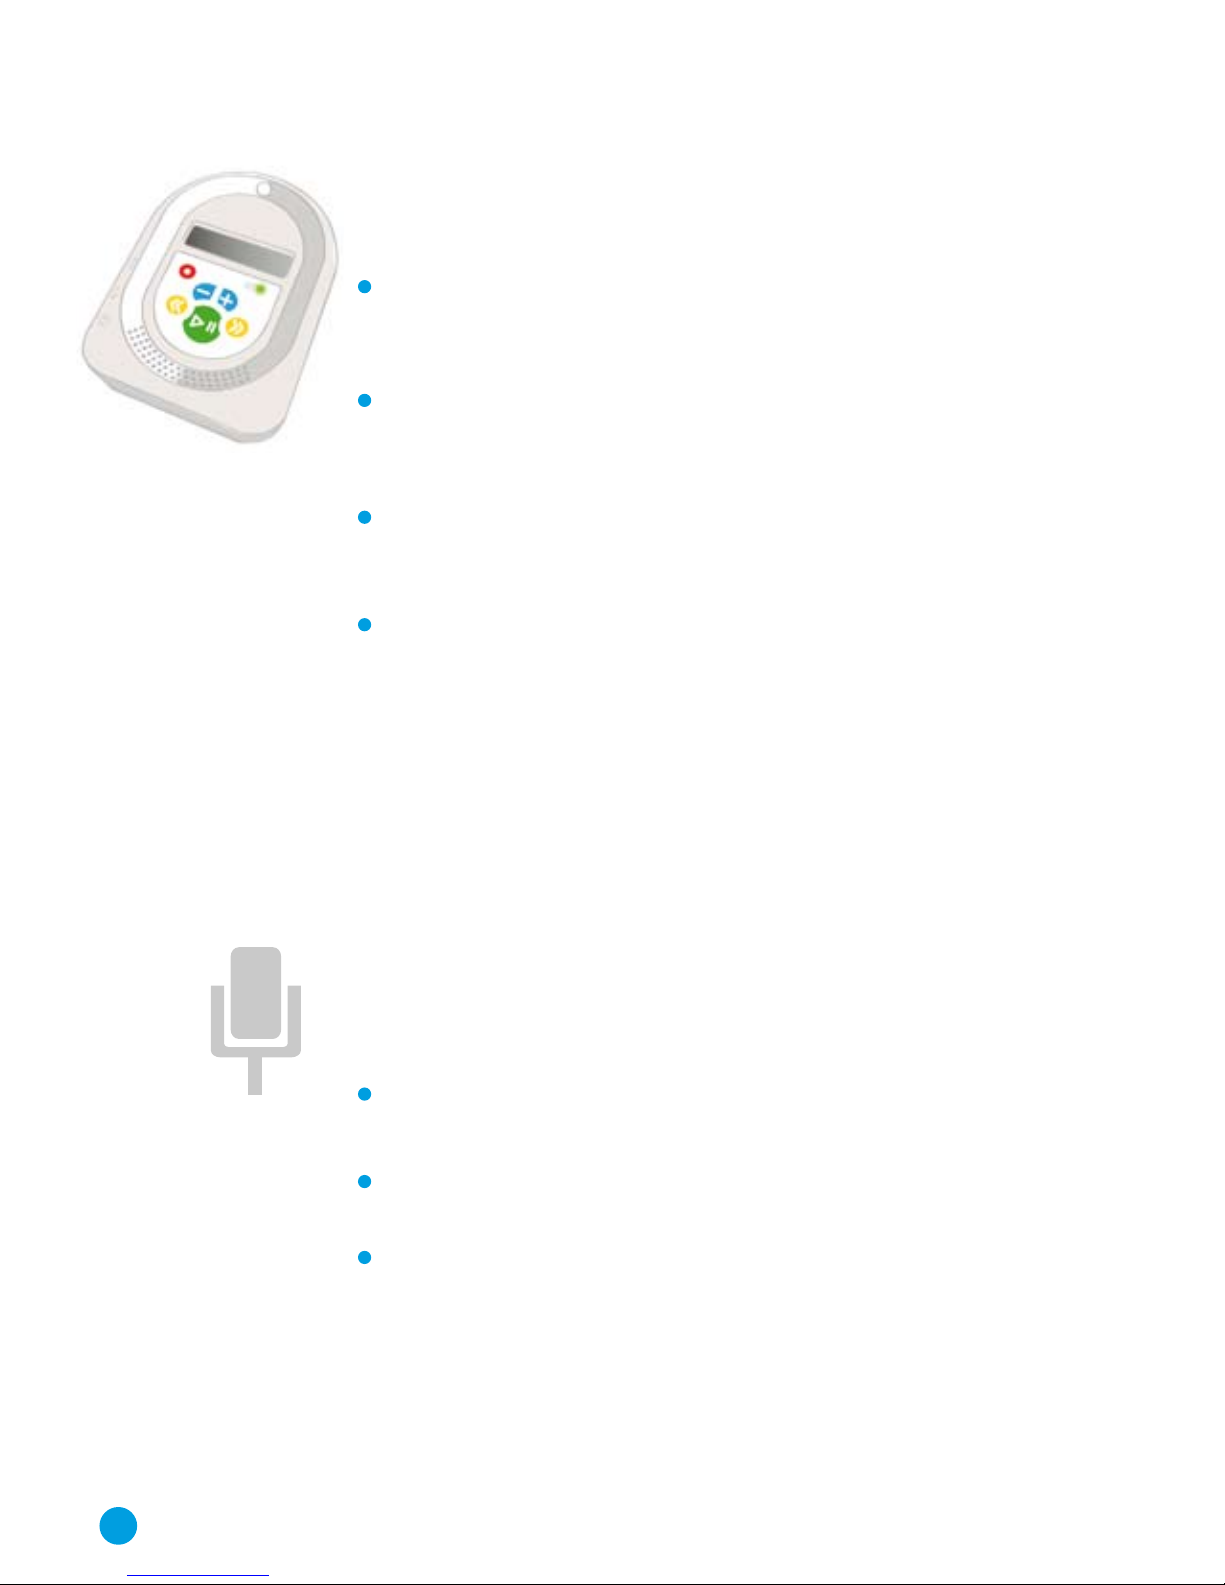
Installing the BookShelf Software
The BookShelf software is supplied on CD and the setup program should start
automatically when you insert the CD into your computer. If this does not happen,
double click on the CDROM Drive icon on your computer to start the setup program.
Click the“Next” button through the various screens that appear. If you are asked
to install the“.NET” programs or the C++ libraries then you must do this as some
files need updating on your computer for the BookShelf software to work.
If you wish to install the Adobe PDF reader software, you need to check the box
alongside the program name on the appropriate screen. The PDF reader program
will allow you to view various document downloads that are available on the
StoryPhones website and also through the StoryPhones Bookshop. You may
already have Adobe PDF Reader installed on your computer and if so, you can
leave the box unchecked and skip this install.
Your StoryPhones User Account
StoryPhones allows to you go online to buy audio stories and other content and to
access the online store you need a StoryPhones Account. When you first run the
BookShelf software after installation, you will see a “Welcome”pop-up screen giving
you three options. If you need to set up an account, select the“Register” option, click
the“Next” button and fill in your details. You will be sent an email to confirm your
account details and you will have to reply to this email in order to activate your
account. Please note that you will need an internet connection to create your
account but you do not need an internet connection to use the software, other
than to go online to access the BookShelf store.
If your setting has already created an account or one has been set up for you,
select this option, click the“Next” button and enter the details that you already
have. If you do not have an account set up we strongly recommend that you do
this so that you can access the BookShelf online store and have access to the side
range of stories, songs and other audio resources that are available. If you do not
enter the account details or create an account you will be asked for these details
each time you start the software.
Auto-updates
When you start BookShelf, you may be asked if you want to update the software.
This will provide you will the latest version of BookShelf. To do this click the
“Update”button. If the update button is“greyed out”you will not be able to do
the update. This is because you need to run the program as an “Administrator”
in Windows for the update to work correctly. For help on doing this, consult
your IT support. If you do not want to update, click the “Continue”button.
3

Setting up Your StoryPhones
System
Plug in the mains power supply to the mains socket and
connect the Base Unit to the power supply. Plug the base
unit into the USB port of the computer using the USB cable.
The Base Unit should remain connected to the computer
at all times to enable transfer of content and recharging of
batteries.
Start the Bookshelf software which you have already
installed. This will show when each player has fully installed.
Place a Headset into each of the docks on the Base Unit one
at a time as shown in the diagram. A yellow light will appear
on the Headset switch panel when it is correctly plugged
into the Base Unit. Wait for each Headset to appear in
Bookshelf before adding the next one. It may take up to
several minutes for each Headset to appear on first
installation.You may need to click the“Refresh”button
alongside the player selection box to make the players
appear.
Place the Remote Console onto the Remote dock located
at the end of the base unit and wait for this to appear in
Bookshelf.
The MP3 Headsets and Remote Console only need to remain
in the Base Unit for battery recharging and audio content
transfer. The players can be used away from the Base Unit
and should be returned at the end of the day for recharging.
Your StoryPhones system is now ready for use although the
batteries may need up to two hours for full charge. The yellow
light will disappear when the player is fully charged.
You do not need to wait for the battery to be empty before
recharging: if you wish, you can return the Headset and Remote
Console to the Base Unit when they are not in use for convenient
storage and a top-up charge.
4

Using the StoryPhones System
How to use the Headsets
The function buttons control play/pause,skip,and volume up
and down (see diagram on the inside back cover of the manual).
To play a track, simply press the Play/Pause button.
A short press when playing will pause the track.
To stop play, press and hold the Play/Pause button.
The green light comes on when the Headset is playing and flashes when paused.
To skip to the start of the next track, press the yellow Skip Forward button.
The blue buttons control the volume: ‘+’to increase, ‘-’to decrease.The volume is
changed in steps and you must press the buttons repeatedly to change the volume.
The function buttons can be disabled in various ways
(see the section‘Disabling function buttons’on page 17).
Automatic Play Control
Automatic Play Control (APC) makes use of a built in motion sensor.When set in
this mode and the Headset is in not in use, the APC system pauses play. When the
Headset is picked up, this triggers the motion sensor and play resumes at the point
at which it paused. No part of the song or story is missed.
APC mode can be enabled and disabled via the software (refer to page 16).
Sleep Mode
The Headset will go into a low power sleep mode if it is stopped for more than an
hour. To wake the Headset from sleep mode, press and hold the Play/Pause button
for a few seconds.
Recharging the Battery
When fully charged the battery will allow the Headset to be used for over 8 hours.
To recharge the battery, place the Headset in the Base Unit.The Base Unit must be
connected to the mains to allow charging.
5

How to use the Remote Console
MP3 Player
The function buttons control play/pause, skip forward and
back, adjust volume, and record (see diagram on the inside
back cover of the manual).
The Remote Console is controlled in the same way as the
Headsets but it is also possible to skip back to the previous
track.
If the Headsets have been set into Remote Control mode using
BookShelf, pressing the function buttons on the Remote
Console will cause them all to play, pause or stop together.
The loud speaker can be muted if the Console is being used
as a remote control and you do not want to hear the audio.
The speaker is muted by holding down the red button and
pressing volume down (‘-’) and is un-muted by holding down
the red button and pressing volume up (‘+’). Note that the
headphones output is not muted allowing a set of wired head-
phones to be plugged in for private listening or for the audio
to be played through an amplified system such as interactive
white board speakers.
Recording
How to Record using the Built-in
Microphone
Hold down the red button and then press the play button to
start the recording process.
A red light will appear and the display will indicate that the
Remote Console is in record mode.
Pressing the Play/Pause button stops the recording.
6

How to Add Your Recording to the
Bookshelf Library
Return the Remote Console to the Base Unit and open the
Bookshelf software. A window will appear asking which
recordings you want to transfer to Bookshelf. Follow the
instructions in the software section to add the recordings to
your Bookshelf Library.
How to Record from a Tape Player
You can also record from a tape or other external source
using the“line input” socket. You will need an audio lead
with a 3.5mm jack socket to plug in to the Remote Console
and appropriate connection for your tape player. For more
advice, see the StoryPhones website.
You must tell the Remote Console that you wish to record
from the“line input”socket. To select the line-in socket for
recording, hold down the red button and press skip-back.
This must be done immediately before you record your
track from the line input. You can switch back to using
microphone by holding the red button and pressing
skip-forward.
Using External Control Switches
The Remote Console has an input to allow up to two external
control switches to be connected to control play and skip-for-
ward. An adapter can be used to allow two switches to be
connected in to the switch input. Plugging a single switch in to
the control input allows control of the play function. More
information on switches and adapters can be found on the
StoryPhones website.
Sleep Mode
If the Remote Console has not used for about an hour, it will go
into a low power sleep mode to conserve battery power.
To wake the Remote console from sleep mode, simply hold the
play button for around 2 seconds.
7

The StoryPhones BookShelf Software
The StoryPhones BookShelf software (or Bookshelf) allows you
to transfer audio files from your computer, preview your audio
files, add files to your library, convert CDs, configure your players
and also link to the StoryPhones online bookshop. The software
is written to be easy to use and contains all that you need to use
StoryPhones in a single program.
BookShelf has two modes of operation: Child Mode and Adult
Mode. In child mode, many of the functions are disabled so that
children cannot delete audio files, move them around or
configure the Headsets. All of the on-line functions are also
disabled. However, the children are able to select which stories,
songs or other content they would like to listen to by copying
onto the Headsets or Remote Console and also to listen to
content on the computer using the built-in MP3 player.
Everything that you can do in child mode you can also do in adult
mode. BookShelf will always open in Child mode.
To access the adult functions click on the Mode button, type your
password in the pop-up window that appears and click OK. You
can set this password in the settings screen but the default pass-
word is the password that was provided to you or that you chose
during installation.
The program window is split into three panels:
MP3 Info and Player panel
Bookshelf panel
Players panel
8

The MP3 Info and Player Panel
This part of the program allows you to see the details of an audio
file in your library and also to listen to the track, maybe just to
preview the file to check it is what you want, or to allow children
to listen audio content through the computer.To see details of
an audio content file, simply click on the file and the information
will be displayed. To listen to the file, use the Play, Pause and Stop
buttons at the bottom of the panel.
The Bookshelf Panel
This section shows where all of your audio files are stored and
allows you to manage the audio files. You can rename a file or
folder, add tags to audio files, create and delete folders and
organise the content as you wish. Most functions are accessed
by a right mouse click on the file or folder.
Renaming a Content File
Click the right mouse button on the file and select ‘Rename File’
from the menu that appears.
Enter the new name for the file in the popup window that
appears and click OK.
Deleting a Content file
Click the right mouse button on the file and select ‘Delete
File’from the menu that appears.
Click OK to delete the file from your computer. Warning: you
are deleting this file permanently from your computer by
doing this. Note that if you accidentally delete a file that you
have bought from the StoryPhones Online Bookshop, you
can go back online and download the story or song again at
no cost.
9

Edit the ID3 Tags for a file
ID3 tags are used in MP3 files to save information such as Title,
Author, Publisher etc. Bookshelf uses these tags to display infor-
mation about each audio file in the MP3 Info and Player panel.
All of the audio content that you buy from StoryPhones will have
tags included but if you add you own files they may not have this
information. The tag editor allows you to add this information as
follows:
Click the right mouse
button on the file and
select ‘Edit ID3 Tags’
from the menu that
appears.
A new window will
appear with boxes to
allow you to add a Title,
Author information and
a description. Just type
the details into each of
the boxes.
You can also add a picture for each audio file. To do this,
click the Browse button and then the folder browse button
in the pop-up window that appears to navigate to the folder
containing the image file. The image file should be a ‘jpeg’ of
no more than 200x200 pixels. Select the image file and then
click OK. The image will appear in the tag editor window.
When you have finished editing the tags, click OK to close
the editor.
Create a Folder
Click the right mouse button on the white background of the
Bookshelf panel and select ‘Create a Folder’ from the menu
that appears.
A new folder will be created in the current folder and you can
then rename this as follows.
10

Renaming a folder
Click the right mouse button on the folder and select
‘Rename Folder’ from the menu that appears.
Type the new name into the popup window that appears
and then click the OK button.
Deleting a folder
Click the right mouse button on the folder and select ‘Delete
Folder’ from the menu that appears.
If the folder contains content files then you will not be
allowed to delete it. Otherwise click OK in the popup
window to remove the folder.
Moving a Content File
You can also move content files between folders by dragging and
dropping the files onto folders. Simply press and hold the left
mouse button on the item to be moved, drag it onto the required
folder and the release the mouse button.
Adding Content to a Folder
You can add audio files to your BookShelf
software using this button.
For further details see pages 18 and 19.
Please note the copyright
message in the software.
11

The Players Panel
This section allows you to list the content on each of the
Headsets or Remote Console and also to transfer and delete
content from the MP3 players.
Copying Audio Content to the Players
The most common task that you will want to do is to copy stories
or songs or any other audio file onto the players. This is done by
selecting files in the BookShelf pane and copying them over to
the Player pane, either by drag and drop or the click of a button.
Here is how to do it.
In the Players panel, click on the drop down arrow and a list of the
MP3 Headsets and Remote players connected will appear.This
will only show the players which are currently in the Base Unit
and available for the transfer of audio content.
Select the MP3 Headset you want to use from the list.
In the content window below, a list of the content on this player
will appear. Copy new content to the selected player as follows:
Choose an audio file on the Bookshelf window and click on it,
this will then be highlighted.
Next, click on the top arrow in the centre panel. The content
will appear in the content window. Alternatively you can
drag the desired file from the Bookshelf panel over to the
Players panel.
If you wish to add more content to the selected player, repeat
steps 1 and 2.
When you have finished choosing your content, click on the
‘Send Stories’ button at the bottom of the Players panel.
A window will appear asking you if you want to copy these
activities to your chosen player. Click ‘Yes’ to transfer the
content.
12

Copying the files over make take a minute or two and if you
are copying more than one file a window will appear show-
ing the progress of the file transfer. When this disappears the
player is now loaded with content and ready to use.
Remember, you can check what is currently stored on the
players by returning them to the base unit and selecting the
player in the Player panel. The content will appear in the
content window.
Tip: If the software has not recognised some of the players, you
can click on the refresh button to make it check for them.
Deleting audio content from the players
Click on an item of content in the Players panel, this will then
be highlighted.
Click on the delete button (the Bin!) in the bottom right
corner.
A window will appear asking if you want to delete the
content from the player. Click‘Yes’ if you want to do this.
This will delete the content from the player only; it will not
delete the content from the BookShelf. Click on ‘No’if you
want this content to remain.
If you wish to select all players, a window will appear asking
if you want to synchronise the players. If you choose to do
this, then all content from all of the players will be deleted.
Synchronising StoryPhones
(Or... putting the same content on all of them)
If you select “All StoryPhones”from the drop down list in the
Players panel, all of the StoryPhones that are in the Base Unit will
receive the same content. They can then be used in group work
activities, or this may just be a convenient way of programming
the same audio files on to all of the players.
13

When you select“All StoryPhones”, you will be warned that the
content will be deleted from all of the players in the Base Unit,
which is OK because the content is still stored on your computer.
Just click“Yes”to this.
You can now add audio files to the players in the normal way and
when you click the“Send Stories”button, the files will be copied
onto all of the players.
Function Buttons
The buttons below the Bookshelf panel provide a number of
other functions.
Help!
Click this button to get help on Bookshelf.
Operating Mode
As mentioned earlier in the manual, you can set up the software
to allow children to have independent access to Bookshelf and
the StoryPhones system. Clicking this button will swap between
child and adult mode and to get into adult mode it is necessary
to type in the adult password (initially set to the same as your
account password). In child mode it is not possible to delete files,
move audio files around or access the Settings panel to configure
the System. The online bookshop is also not available.
Settings Button
The settings function will allow you to manage your StoryPhones
Headsets and the Remote Console. You can select the operating
mode of each player, including renaming them, add MP3 files
to your library and set the Adult Mode password. The Settings
window is split into a number of panels.
14

General Settings
This box tells you where the Bookshelf audio files are stored on
your computer.
Security Settings
You setup your User Name for your system at installation and
this cannot be changed.
The Adult Password allows you access to all of the adult
functions including the online shop. You can set this to
something that is easy for you to remember but do remember
that this password provides access to your online bookshop
account and other settings on your StoryPhones system so this
should be a secure password.Note that this is initially set to the
same password that you used during the installation process.
You can change the password by clicking in on the change
button in this section and providing the current password
and the new one that you want to use in the dialogue box
that appears.
15

StoryPhones Settings
Setting the Operating Mode of each player
The Headsets can be used in one of three modes:
Normal mode: in this mode, the Headset does not use the
Automatic Play control function and is not controlled by the
Remote Console. You can select which buttons are available
from the Button Mode drop-down list.
Automatic Play Control mode: in this mode the motion
sensor is activated and so the Headset will stop play when
it is put down and start again when picked up. You can also
allow some of the buttons to be used in this mode.
Remote Control mode: in this mode the Headset will be
controlled by the Remote Console. You can choose to disable all
buttons or allow the user to control the volume of the Headset.
16
This manual suits for next models
1
Table of contents