8000-0916-01, Rev A INSTALL / INSTRUCTIONS, BOOTLOAD
The bootload interface is required to download upgrade
information into AD168 bay modules. Hook-up and
download are performed on-site, and should be
implemented by qualified service personnel only.
Download can involve any one or all of the AD168
modules. In the case of a bay with multiple VIM or
VOM modules, The hook-up and download procedure
always starts from the right-most module (facing the
front of the bay).
Bootload Interface Device PN AD168UPGR-CBL
– consisting of the following 3 components:
•One Bootload Interface Box.
•One AD168 Interface Cable w/ 8-pin female
connectors on both ends.
•One PC Interface Cable w/ male DB-9 connector
for connection to the Bootload Interface Box, and
female DB-9 connector for connection to the PC.
One PC, running MS-DOS, with serial capability at
1200 and 9600 baud.
One AD168 bay, populated with the following
modules: VIM(s), VOM(s), CPM, PSM, and CCM
(optional). See Figure 3 for module positions.
A diskette or diskettes. The download files for each
card type are contained in separate sub-directories
on the diskette(s).
!"
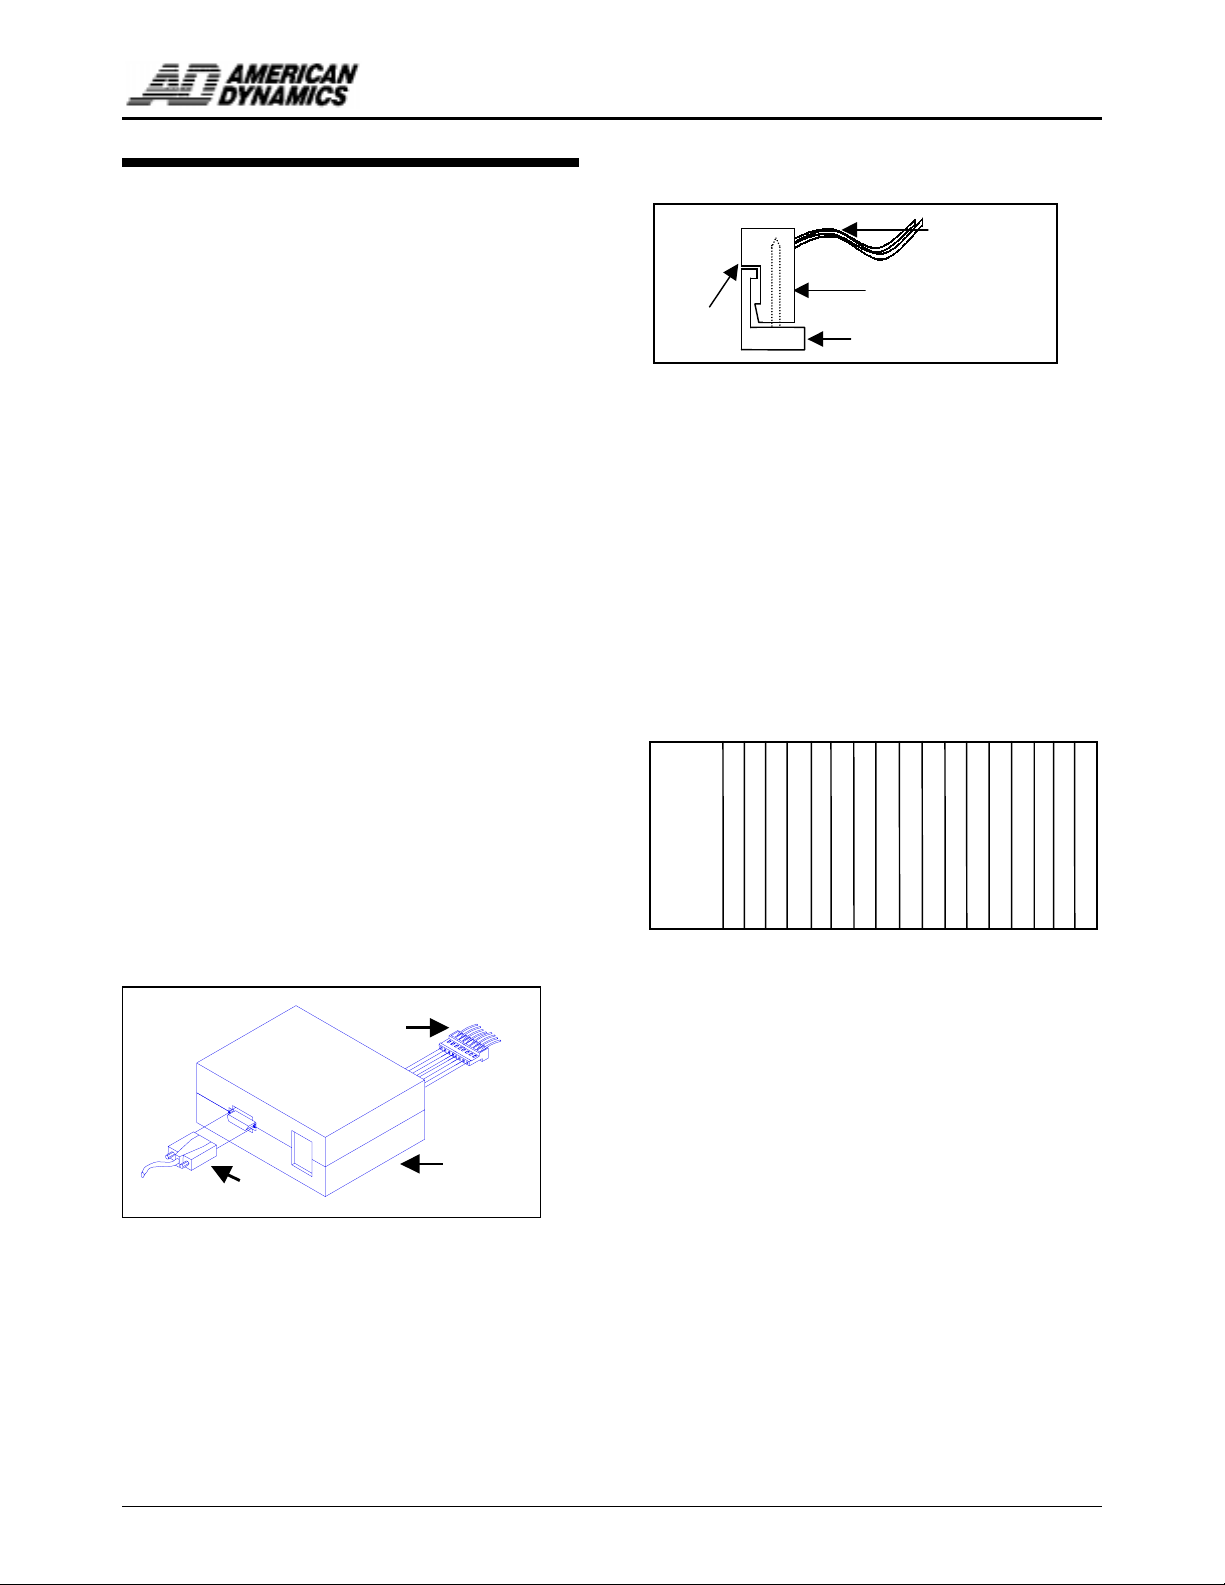
1. Connect the male end of the 6-foot cable “A” to the
female DB-9 connector on the interface box “B”.
2. Connect either end of the 8-conductor cable “C” to
the J3 right-angled header on the interface box.
Make sure that the overhang of the connector is
flush with the lip of the header (facing J3, pin 1 of
the 8-pin connector should be connected to the
right-most pin on J3). See Figure 2 following.
# !"!$#
Note: this procedure is applicable to the following
AD168 modules: VIM(s), VOM(s), CCM, CPM. A
separate procedure is described for the Power Supply
Module (PSM). Do not apply the following procedure
to the PSM.
1. Turn power off to the AD168 bay
2. Remove the front cover of the bay by manually
loosening the captive screws in the upper corners.
3. Remove the retainer bar positioned in front of the
AD168 modules. The bar is attached at the top of
the bay with three thumbscrews. Note: the bar may
have been removed during initial installation.
4. With the exception of the power supply module,
pull all AD168 modules to be downloaded out of
their respective mid-plane connectors, but do not
remove the modules from their bay slots.
5. Connect the female end of the PC interface cable to
the DB-9 COM 1 RS-232 serial port on the PC.
Note: Call Technical Support if COM 1 is not
available.
6. Connect the 8-pin bay interface connector to the
right-angled header on the card to be upgraded.
Make sure that the connector-to-header orientation
corresponds to that shown in Figure 2.
Instructions for downloading software to the cards are
provided with the equipment for each AD168 software
release. Refer to the appropriate document for
downloading procedures and special hook-up
instructions for the Power Supply Module (PSM).
%&
Contact Technical Support at 1-800-442-2225
(or 914-624-7640). Fax: 914-624-7685
AD168 right-angled header
8 wire conductors
Bootload Interface
8 pin Connector
overhang
Figure 2 – Proper Orientation of Cable w/ Header
R
P O N M L K J I H G F E D C B A
(
(
(
(
(
(
(
(
(
(
(
(
(
(
)
#
#
(
(
)
*
(
*
(
#
$
(
$
+
(
Figure 3 - AD168 Bay w/ Front Cover & Retainer Bar Off
AB
C
Figure 1 – Bootload Interface Device


