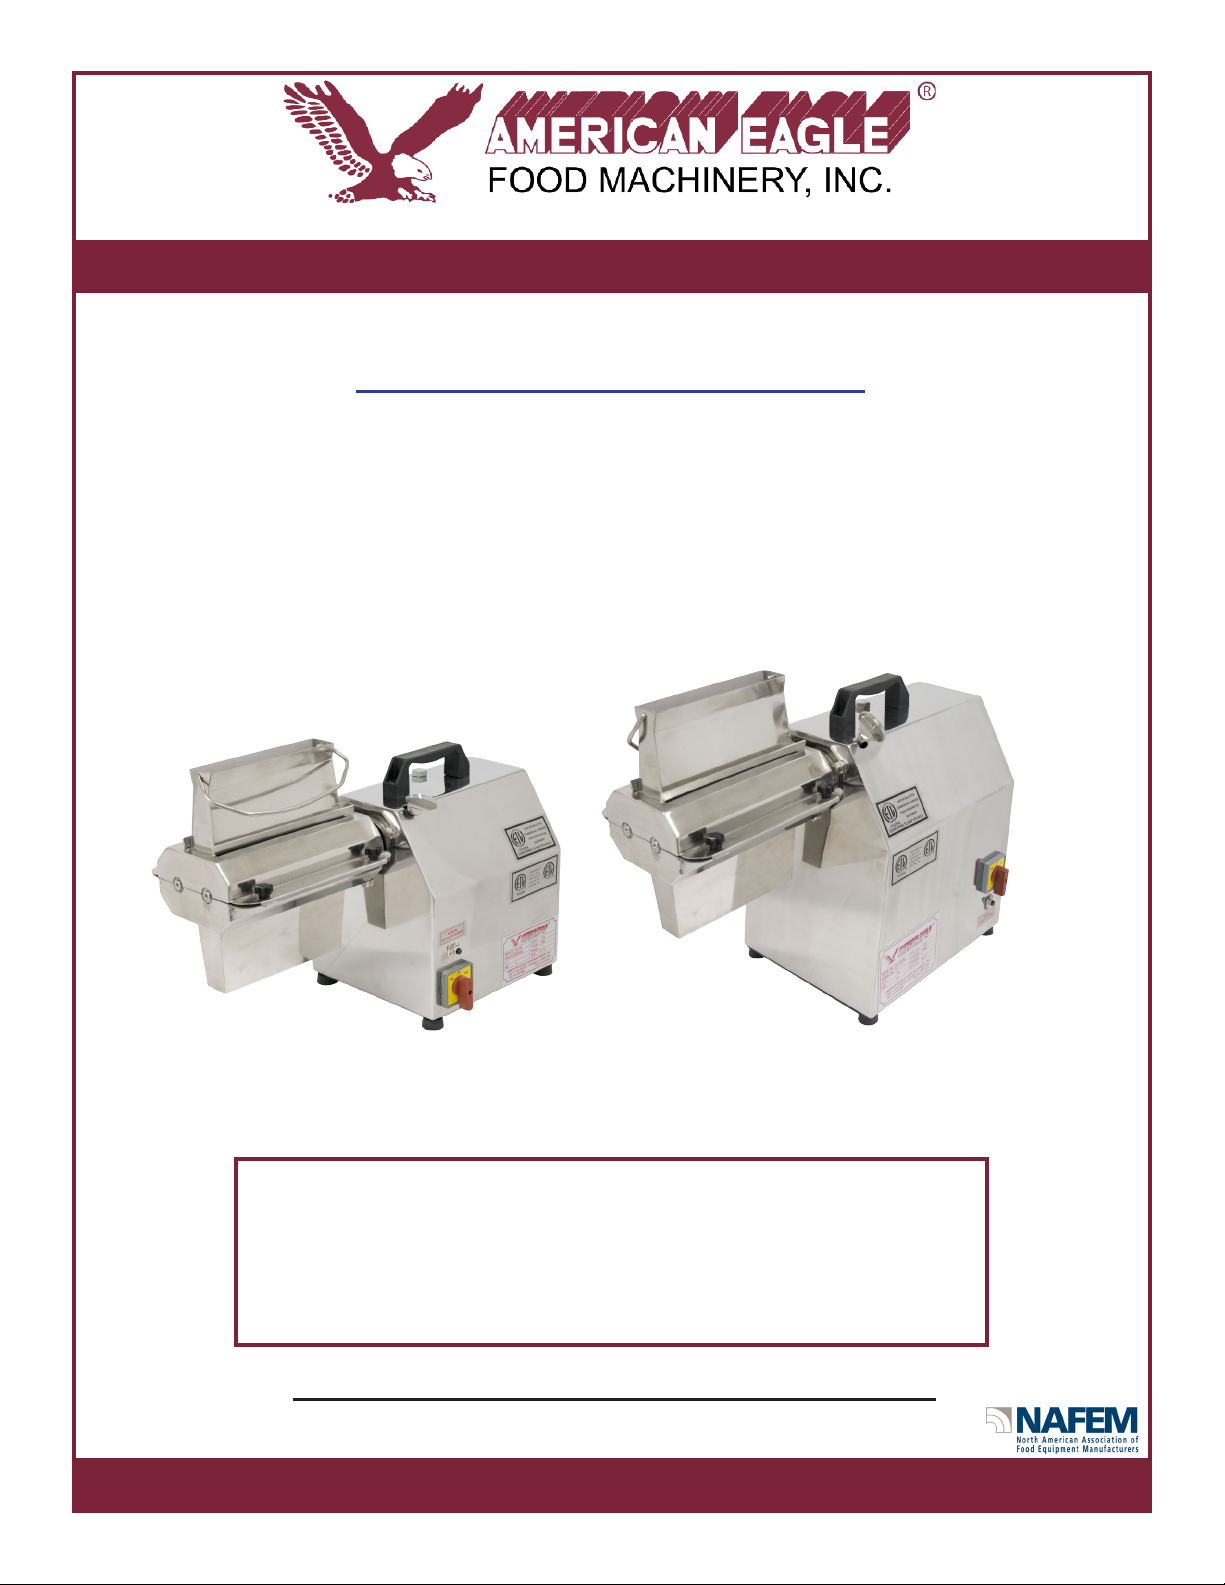
American Eagle AE-TS12 User manual

773-376-0800 (P) • 773-376-2010 (F) • 3131 S. Canal St. Chicago, IL 60616
Quality • Value • Reliability
Revision 10/2015
Proud Member of:
“The Value Leader in Commercial Bakery and Restaurant Equipment!”
AE-TS12 / AE-TS22
COUNTERTOP MEAT TENDERIZER KITS
OPERATION MANUAL
Visit us online for more product information:
www.americaneaglemachine.com
Mixers, Dough Sheeters, Dough Dividers, Meat Slicers, and more!
WARRANTY REGISTRATION
GO TO: WWW.AMERICANEAGLEMACHINE.COM OR
MAIL THE ENCLOSED WARRANTY REGISTRATION CARD
WARRANTY NOT VALID UNLESS REGISTERED!
REGISTRATION MUST BE COMPLETED WITHIN 30 DAYS OF
PURCHASE AND INCLUDE A COPY OF INVOICE OR RECEIPT
SAVE THIS MANUAL FOR FUTURE REFERENCE
Copyright © 2015, American Eagle Food Machinery, All rights reserved
AE-TS12
#12 Meat Tenderizer 1HP
AE-TS22
#22 Meat Tenderizer 1.5HP

Page 1 of 11
AE-TS12 & TS22
Operation Manual
773.376.0800 (P) • 773.376.2010 (F) • 3131 S. Canal St. Chicago, IL 60616
Revision 10/2015
INTRODUCTION AND NOTICE TO USER..................................................................................2
KEY COMPONENTS AND SPECIFICATIONS ............................................................................3
IMPORTANT SAFETY RULES …………….…………………………………………………………..4
INSTALLATION INSTRUCTIONS..…………….............................................................................5
ASSEMBLY INSTRUCTIONS ....................................................................................................6
OPERATING INSTRUCTIONS ....................................................................................................7
CLEANING PROCEDURES……………….................................................................................8-9
TROUBLESHOOTING ...............................................................................................................10
LIMITED WARRANTY STATEMENT..........................................................................................11
Index
FOR FUTURE REFERENCE, PLEASE RECORD THE FOLLOWING INFORMATION:
MODEL: ________________________ DATE OF PURCHASE: ______________________
SERIAL: ________________________ PURCHASED FROM: _______________________
PURCHASED BY: ________________ INVOICE / RECEIPT #: ______________________

Page 2 of 11
AE-TS12 & TS22
Operation Manual
773.376.0800 (P) • 773.376.2010 (F) • 3131 S. Canal St. Chicago, IL 60616
Revision 10/2015
773.376.0800 (P) • 773.376.2010 (F) • 3131 S. Canal St. Chicago, IL 60616
This Caution Sign will be used in the manual to warn you against injury or potential
injury to the Operator
This Warning Sign will be used in the manual to warn you against damage or
potential damage to the Machine
Thank you for choosing to purchase an American Eagle machine! American Eagle Food
Machinery, Inc. has been manufacturing and distributing restaurant and bakery equipment for
over 30 years. Our machines are designed for heavy duty, commercial use, and are ETL certified
to NSF No. 8, CSA, and CE standards. As long as the equipment is properly maintained and used
in accordance with this manual, you will enjoy years of productive service. You are responsible
for understanding safe and proper use of the machine.
To prevent illness, sickness or death caused by food-borne pathogens, the machine and
machine parts should be cleaned in accordance with state and local health department
regulations. All tenderizer head components are manufactured from 100% food grade stainless
steel, making them very durable and easy to clean. While cleaning and before operating, visually
inspect the machine and parts for any damage. Do not use the machine if anything is
damaged!
NOTE: Save all packaging for future use when needed to transport or ship the
machine! The original box provides the best protection against shipping damage.
NOTE: Unpack the machine as soon as possible. If the machine is damaged, contact the
carrier within fifteen (15) days of delivery. Immediately contact American Eagle about the
machine. After fifteen (15) days there will be no options to remedy any shipping damage.
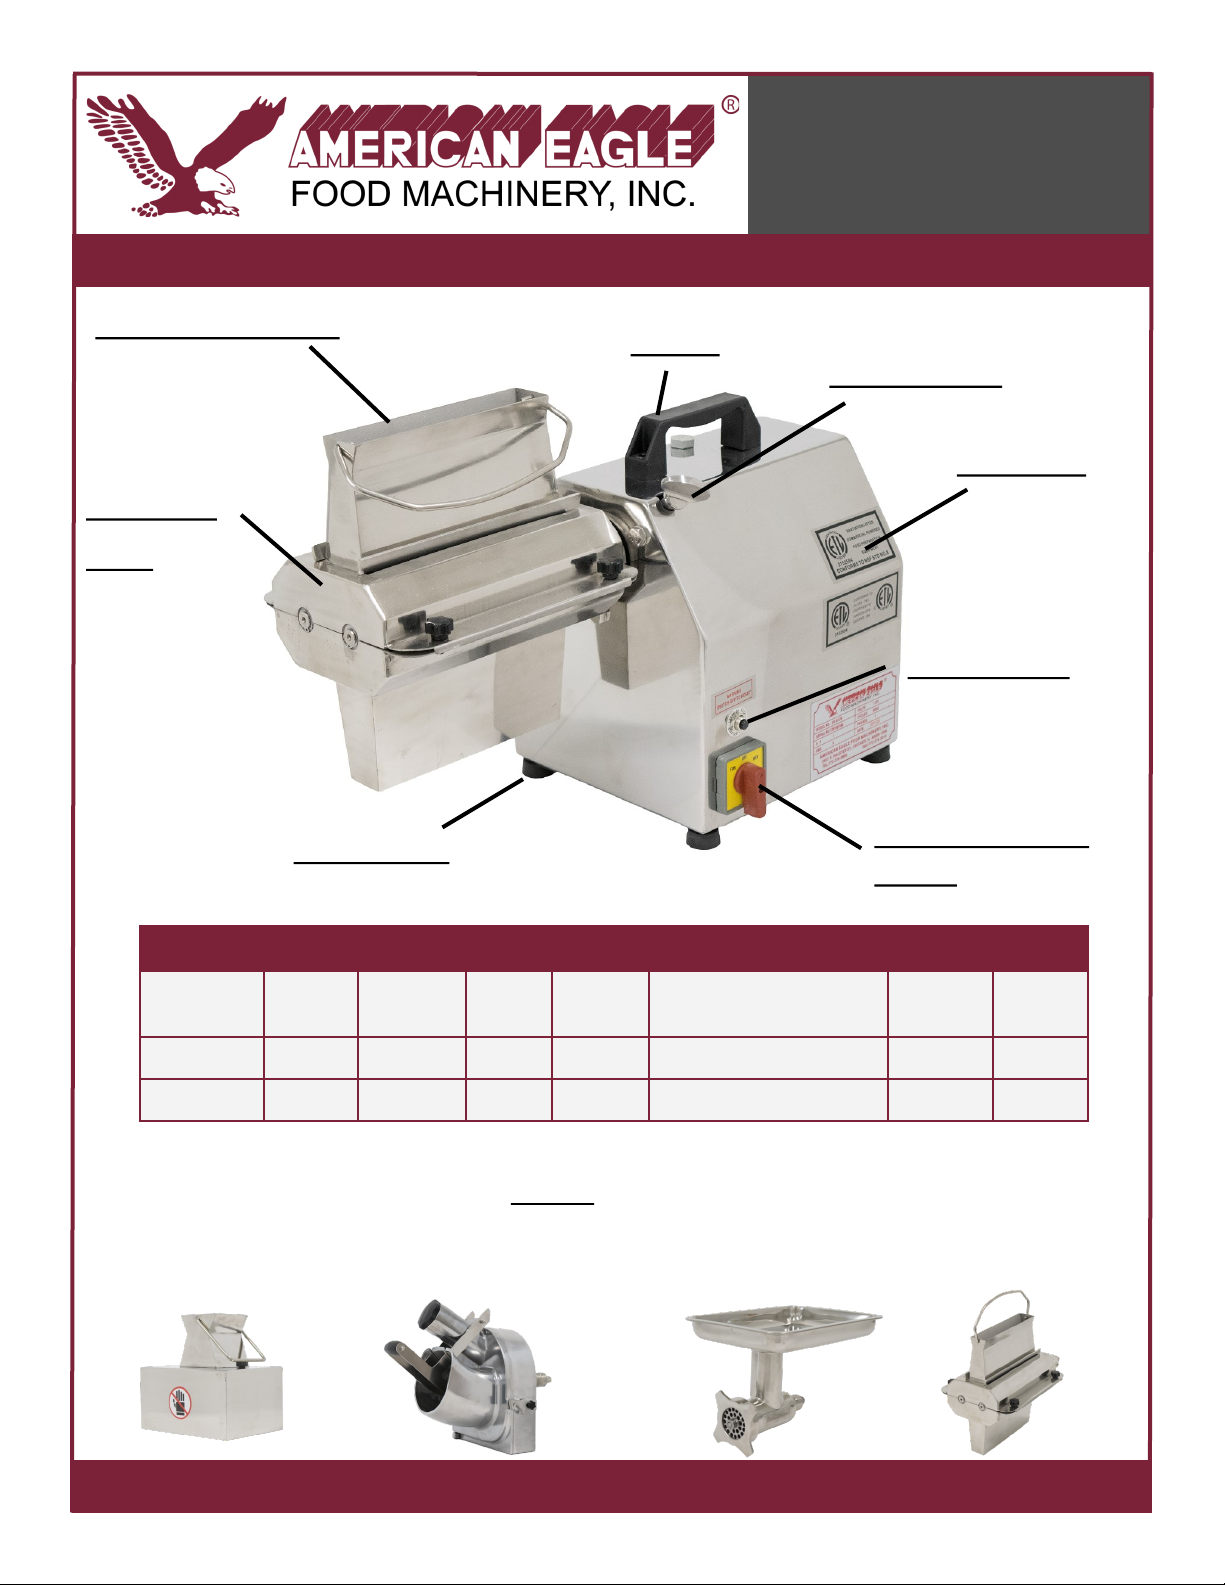
NOTE: You should receive: motor unit, hub attachment, handle and handle screws, allen
wrench, warranty card, and a manual.
If you are missing anything, need assistance, need service/repairs, or want to order
accessories, contact American Eagle at 773.376.0800 or 800.836.5756. See next page for key
components, specifications, included accessories and optional accessories.
Introduction and Notice to User

Page 3 of 11
AE-TS12 & TS22
Operation Manual
773.376.0800 (P) • 773.376.2010 (F) • 3131 S. Canal St. Chicago, IL 60616
Revision 10/2015
Key Components and Specifications
Tenderizer
Head
Reset Button
Forward/Reverse
Switch
Rubber Feet
Handle
Motor Unit
Specifications
Model Motor Voltage
V/HZ/PH Amps RPMs Operating Temperature Ship Net
AE-TS12 1 HP 115/60/1 8170 45ºF-95ºF (7.2ºC-35ºC) 64 lbs. 69 lbs.
AE-TS22 1.5 HP 115/60/1 16 170 45ºF-95ºF (7.2ºC-35ºC) 84 lbs. 89 lbs.
Both AE-TS12 and AE-TS22 motor units feature standard #12 hubs to use for a variety
of oponal aachments:
Tenderizer Opening
Thumb Screw
AE-G12NH
Meat Grinder
AE-MC12NH
Meat Cuer
AE-VS12NH
Vegetable Processor
AE-JS12H
Jerky Slicer

Page 4 of 11
AE-TS12 & TS22
Operation Manual
773.376.0800 (P) • 773.376.2010 (F) • 3131 S. Canal St. Chicago, IL 60616
Revision 10/2015
IMPORTANT SAFETY RULES
• ONLY install equipment on a clean, level, non-skid surface and in a well-lit area.
• ALWAYS make sure that your outlet meets the electrical specifications of the
machine. Check the name plate for the correct specifications. Using the wrong
electrical specifications may create hazards and will void the warranty.
• DO NOT bypass safety features on this equipment, alter, or modify any component from its
original condition. Doing so may create hazards and will void the warranty.
• DO NOT OPERATE the tenderizer without the feed chamber installed.
• DO NOT OPERATE outdoors without shelter from rain, snow, dirt and dust.
• DO NOT OPERATE the tenderizer in extremely hot or cold air temperatures. Only operate the
tenderizer between 45ºF and 95ºF (7.2ºC to 35ºC).
• DO NOT put fingers into feed chamber during operation. Secure all articles of loose
clothing, jewelry, and hair before operating.
• ALWAYS UNPLUG BEFORE CLEANING, SERVICING, OR REMOVING PARTS.
• KEEP the motor unit unplugged when not in use to prevent accidental start up.
• TEAM LIFT ITEM: USE TWO PEOPLE TO MOVE THE TENDERIZER.
• DO NOT USE REVERSE MODE. Using reverse on any attachment other than
the grinder head will cause damage not covered by warranty.
• DO NOT OPERATE CONTINUOUSLY WITHOUT MEAT BEING IN THE
TENDERIZER HEAD/FEED CHAMBER.
• AMERICAN EAGLE TENDERIZERS ARE INTENDED FOR TENDERIZING
THAWED, CHILLED, OR FRESH MEAT ONLY. TENDERIZING COMPLETELY
FROZEN MEAT OR OTHER TYPES OF PRODUCTS MAY CAUSE DAMAGE NOT
COVERED BY THE WARRANTY.
• TENDERIZER IS CAPABLE OF TENDERIZING SMALL, SOFT ANIMAL
BONES SUCH AS BONES FROM CHICKEN OR RABBIT. DO NOT TENDERIZE
LARGE, DENSE ANIMAL BONES SUCH AS FROM COWS, PIGS, DEER, ETC.
DAMAGE FROM BONES ARE NOT COVERED UNDER WARRANTY.
• WARNING: Splintered bones can get into digestive tract of pets and cause severe injury
or even death to your pet. Grind bones at your own risk.

Page 5 of 11
AE-TS12 & TS22
Operation Manual
773.376.0800 (P) • 773.376.2010 (F) • 3131 S. Canal St. Chicago, IL 60616
Revision 10/2015
INSTALLATION:
1. Read this manual completely before installation or operation. DO NOT proceed with
installation and operation if you have any questions or do not understand what is written
in this manual. Contact American Eagle if you need assistance.
2. Remove the two screws from the top of the tenderizer by using the allen wrench that was
included with the tenderizer.
3. Place the handle on top of the tenderizer, then insert the two screws into the holes of the
handle. Install the handle on the motor unit by tightening the screws with the allen
wrench. Hand tighten only!
4. Remove the tenderizer from the box with handle installed.
5. Inspect and make sure the rubber feet are securely screwed to the tenderizer.
6. Inspect the meat tenderizer to check that all parts have been provided.
7. Thoroughly clean the machine before using. Refer to Cleaning Procedures section.
8. Contact American Eagle if you have any questions or problems with the installation or
operation of this tenderizer. Do not return to retailer or dealer!
Installation Instructions
THIS MACHINE IS DESIGNED WITH A THREE-PRONG PLUG FOR PROPER
GROUNDING. THE OUTLET USED WITH THE PLUG MUST BE PROPERLY
GROUNDED. CONTACT AN ELECTRICIAN TO FIX YOUR OUTLET IF IT IS NOT
THE PROPER TYPE BEFORE OPERATING THE MACHINE. DO NOT REMOVE OR
CUT OFF THE THIRD GROUND PRONG OR USE AN ADAPTER PLUG.

Page 6 of 11
AE-TS12 & TS22
Operation Manual
773.376.0800 (P) • 773.376.2010 (F) • 3131 S. Canal St. Chicago, IL 60616
Revision 10/2015
Assembly Instructions
TENDERIZER HEAD ASSEMBLY:
NOTE: Please see our website at www.americaneaglemachine.com for an instructional video on
proper assembly. Damage from improper assembly is not covered under warranty!
1. To avoid injury, unplug the meat tenderizer before assembling the tenderizer head.
2. Insert the attachment into the hub, ensure the pin on the attachment aligns with the
hole on the motor unit and the feed chamber is fully inserted. See Figure 1.
3. Tighten the thumb screw clockwise until it is secure. Do not use a tool or over tighten!
See Figure 2.
TENDERIZER HEAD ASSEMBLY:
IMPORTANT: The tenderizer combs help guide the meat through the machine. When placed
in the machine and aligned properly, the combs curve away from each other.
1. The combs should rest within the space
on the top of the tenderizer housing. The
individual combs should fit loosely
between each of the tenderizer knives
2. CAREFULLY slide the combs into the
slots. Aligned correctly, the individual
prongs will fit between the rotating knives.
3. The combs should NOT contact the
knives during operation.
DO NOT FORCE THE COMBS IN,
THEY WILL DROP IN NATURALLY.
Figure 2Figure 1

Page 7 of 11
AE-TS12 & TS22
Operation Manual
773.376.0800 (P) • 773.376.2010 (F) • 3131 S. Canal St. Chicago, IL 60616
Revision 10/2015
NOTE: Before plugging in your unit, be sure your machine’s electrical specifications,
printed on the unit’s nameplate, match those of your local power.
1. Remove all skin and bones from meat before tenderizing. Cut the meat strips slightly smaller
than the opening of the feed chamber. Use boneless cuts only, not to exceed 3/4” thick.
Remove gristle before tenderizing to avoid plugging or stalling. Meat must fall easily into the
feed chamber.
2. Place the meat in the tenderizer opening and place a container under the feed chamber to catch
the tenderized meat.
3. Turn the forward/reverse switch to the forward (FOR) position. DO NOT OVER-TURN! DO NOT
REVERSE!
4. Feed the meat into the feed chamber. Do not force the meat through the feed chamber,
allow the meat strips to fall into the feed chamber and let the gravity do the work to pull the meat
through.
5. When finished processing, turn the forward/reverse switch to OFF, unplug the tenderizer.
NOTE: DO NOT OVER-TURN THE FORWARD/
REVERSE SWITCH. ALSO, DO NOT REVERSE.
Damage from over-turning or using reverse mode is not
covered under warranty! See photos on right.
HELPFUL MEAT PROCESSING TIPS:
• When smaller cuts are desired, pass the meat through several times at difference angles. Fold
thinner pieces before running through. Chill the meat thoroughly to 32ºF-34ºF (0ºC-1ºC) in
between each pass to reduce loss of juices and retain texture.
• Trim a handful of fat from meat. Process the fat through the feed chamber to help lubricate
tenderizer head for enhanced results.
• Always refrigerate freshly ground or tenderized meat and cook within 24 hours, or freeze the
meat if you do not plan to use immediately.
Operating Instructions

Page 8 of 11
AE-TS12 & TS22
Operation Manual
773.376.0800 (P) • 773.376.2010 (F) • 3131 S. Canal St. Chicago, IL 60616
Revision 10/2015
TO AVOID SERIOUS INJURY AND DAMAGE TO MACHINE:
• BEFORE CLEANING, SERVICING, OR REMOVING COMPONENTS, always turn the
tenderizer off and disconnect the motor unit from the power outlet.
• DO NOT attempt to clean while the tenderizer is in operation.
• DO NOT immerse the motor unit in water.
• DO NOT PRESSURE WASH, SPRAY DOWN, OR POUR WATER onto the tenderizer.
• DO NOT use products that contain sodium hypochlorite (bleach) on the tenderizer.
• DO NOT use ABRASIVE MATERIAL such as SCRUBBER PAD, or STEEL WOOL to
clean the machine. This will scratch the polished surface of the stainless steel.
• ALWAYS FOLLOW the directions on the sanitizer container or those provided by the vendor.
Allow the parts to air dry, or wipe dry before placing them back in the tenderizer.
• To prevent illness or death caused by food-borne disease, bacteria, and pathogens, it is
important to clean and sanitize the entire tenderizer on a regular basis as any component of the
tenderizer can get contaminated during use. You are responsible for adhering to all
guidelines and laws established by local municipal and/or state health departments to
prevent contamination of the machine and the processed food.
It is critical to properly CLEAN THE ENTIRE MACHINE and follow the instructions very
carefully on your sanitizer container to properly kill harmful bacteria and pathogens.
Chlorine, iodine or quaternary ammonium are common sanitizers safe to use.
IMPORTANT: Use of cleaning solutions NOT DESIGNATED for stainless steel or using
excessive amounts of sanitizer will cause damage to machine not covered by warranty. To
understand proper sanitizer concentration, thoroughly read the FDA FOOD CODE: section 4-
501.114, Manual and Mechanical Ware Washing Equipment, Chemical Sanitization -
Temperature, pH, Concentration, and Hardness.
Cleaning Procedures

Page 9 of 11
AE-TS12 & TS22
Operation Manual
773.376.0800 (P) • 773.376.2010 (F) • 3131 S. Canal St. Chicago, IL 60616
Revision 10/2015
Cleaning Procedures
TENDERIZER HEAD DISASSEMBLY, CLEANING & SANITIZING:
1. Make sure the unit is turned off and disconnected from the power outlet.
2. Loosen the thumb screw by turning it counterclockwise 3-4 times. DO NOT REMOVE!
3. Take the feed chamber off of the motor unit.
4. Remove the tenderizer stripper combs.
5. Loosen and remove the 4 tightening knobs and remove cover.
6. Remove idler roller (short shaft) and the drive roller (long shaft)
7. Clean and sanitize the disassembled components and the motor unit housing with a mild
detergent and warm water solution. Be careful to clean all components. Check blades see if all
are in good shape during cleaning. Otherwise, blades need to be replaced.
8. Wipe all blades with mineral oil/cooking oil, or spray on a coating of food grade silicone after
cleaning. This step will help protect the blades from premature wear.
9. Make sure that all surfaces are cleaned, sanitized, and allowed to air dry before
reassembling or storing. Reassemble tenderizer head and store separate from the motor. To
reassemble, put drive roller in first and then the idler roller, making sure the gears mesh. Place
cover on and secure with the knobs. Insert stripper combs as instructed in manual.
NOTE ABOUT DISHWASHERS: ALL TENDERIZER HEAD COMPONENTS ARE
PURE FOOD GRADE STAINLESS STEEL. HOWEVER, A DISHWASHER MAY STILL
BE ABLE TO CAUSE DAMAGE TO COMPONENTS THAT HAVE DEVELOPED MANY
SCRATCHES OR SURFACE DAMAGE. DAMAGE CAUSED BY DISHWASHER IS NOT
COVERED BY WARRANTY. INSPECT COMPONENTS AND IF IN DOUBT, HAND WASH
PARTS WITH MILD DETERGENT AND WARM WATER SOLUTION.
NOTE: Do not wash the blades with steam or hot water immediately after tenderizing
chilled meat. Very rapid changes in temperature will cause damage to components.
Allow components to warm more gradually before washing.
CAUTION: NEVER reassembled wet components back to store. NEVER run meat tenderizer
without locked firmly on the motor base.

Page 10 of 11
AE-TS12 & TS22
Operation Manual
773.376.0800 (P) • 773.376.2010 (F) • 3131 S. Canal St. Chicago, IL 60616
Revision 10/2015
Troubleshooting
Issue Cause Solution
During operation, the motor
unit sounds abnormal or is
straining
Trying to tenderize
completely frozen meat
Remove the meat from the tenderizer and let the meat
thaw before continuing to process the product
Blade edges have worn,
bent, or dulled Replace the blades
During operation the
tenderizer makes a
Knob is fasten too tight or
shafts are not aligned
Loosen the tightening knob. Disassemble the tenderizer
and make sure that the shafts and blades are aligned
Motor unit stops working
suddenly during operation
NOTE: If motor constantly
stops and you need to reset
often, there may be an
additional hazard. Stop use
and contact American Eagle
Machine has been
overloaded
Turn the forward/reverse switch to OFF. Let the unit cool
off for 10-15 minutes before starting again. Press the
Reset button, then resume.
Obstruction in the tenderizer
head is preventing shafts
from rotating, or an internal
gear of the unit has been
damaged and needs
replacement
Turn the forward/reverse switch to OFF. Let the unit cool
off for 10-15 minutes. Remove and disassemble the
tenderizer head, and remove the obstruction. Attempt to
run the motor without the tenderizer head in place. If the
motor continues the same behavior, contact American
Eagle.
During tenderizing, meat
backs up the feed chamber
Tenderizer knives have
worn, dulled, or bent Replace the blades
Meat is wrapping around the
tenderizer shafts.
Combs are missing, bent or
broken
Replace or gently repair tenderizer combs by carefully
bending the combs back into place

Page 11 of 11
AE-TS12 & TS22
Operation Manual
773.376.0800 (P) • 773.376.2010 (F) • 3131 S. Canal St. Chicago, IL 60616
Revision 10/2015
Parts: 1 Year • Labor: 1 Year
All equipment, which is sold under American Eagle Food Machinery, Inc. (AEFM) trademark and used for commercial purposes, is
warranted against defects in materials and workmanship for a period of one year parts and labor, except as specifically defined
below. The warranty period begins from the date of original purchase as evidenced by original retail purchase receipt or invoice.
This warranty is given solely to the original owner/user of the product from a retail store or dealer. No warranty is given to
subsequent transferees.
WARRANTY EXCLUSIONS (Items not covered under warranty):
All equipment accessories such as meat tenderizer knives, knobs, plastic spacers, handles, and shaft protectors. Any expendable
supply items subject to normal wear-and-tear. Other adjustments required due to installation, setup, or normal wear of machine.
WARRANTY PROCEDURE: Contact customer service for an RMA (Return Merchandise Authorization) number.
NO WARRANTY SERVICE WILL BE PROVIDED UNLESS EXPLICITLY AUTHORIZED BY AEFM. AEFM will repair or, at its
option, replace the defective product or part. Any replacement item will be refurbished and warrantied with the balance of original
warranty period or 90 days, whichever expires last.
• To obtain warranty service, the owner/end user will be responsible for the costs of returning all items to AEFM’s warehouse. SAVE
ALL ORIGINAL PACKAGING or use comparable packaging. Any damage caused during a return process will void the warranty.
• No warranty will be available for motors or parts damaged by changing directions or gears improperly (i.e. not allowing motor to
stop completely before switching between forward and reverse, or switching gears without stopping), overloading equipment, or
using improper electrical service, as determined by AEFM, or an AEFM Authorized Service Technician
• AEFM may at its option, authorize an Advance RMA and ship a replacement product or part prior to receiving a defective item.
Such cases will require credit card authorization on file. The MSRP cost will be charged for any items not returned within fifteen (15)
days of receiving the replacement.
• AEFM may at its option, authorize a third party service agency to perform on-site repairs for items greater than 100 lbs.
• Any Factory Refurbished Equipment carries a warranty period of 90 days parts, 45 days labor
THIS WARRANTY IS ONLY VALID IF A PROPERLY COMPLETED WARRANTY REGISTRATION FORM AND COPY OF
PURCHASE RECEIPT OR INVOICE HAS BEEN RECEIVED BY AEFM, INC. WITHIN THIRTY (30) DAYS FROM PURCHASE
DATE. Any defects in materials or workmanship must be reported within thirty (30) days of occurrence and said occurrence being
within warranted time period.
REGISTER WARRANTY ONLINE: WWW.AMERICANEAGLEMACHINE.COM OR REFER TO WARRANTY CARD.
This warranty is void if damage occurs because of freight or shipping damage, accident, carelessness, abuse, improper installation,
lack of proper maintenance and cleaning, acts of God or Nature, or if the equipment is installed or operated in any manner contrary
to installation and operating instructions. In those cases, repairs will be made at the owner’s request and authorization, at a
reasonable cost. Work performed by unauthorized personnel or unauthorized service agencies voids this warranty.
LIMITATION OF LIABILITY: The liability of AEFM is expressly limited to repairing or replacing equipment that proves to be
defective in materials or workmanship within the warranty period. AEFM expressly excludes liability for incidental or consequential
damages to purchaser/owner or any third party, including but not limited to and without limitation, damages arising from personal
injuries, lost profits, loss of business opportunity, loss of property, economic losses or statutory or exemplary damages whether
through negligence, strict liability or otherwise.
OTHER WARRANTIES: This warranty is in lieu of all other warranties, express or implied. AEFM expressly disclaims any implied
warranty of merchantability or expressed or implied warranty of fitness for a particular purpose. This is the sole Warranty
Agreement between AEFM, Inc. and the owner/end user. No other agreement is implied, authorized or assumed, whether by AEFM
or any third party.
Limited Warranty Statement
This manual suits for next models
1
Table of contents
Other American Eagle Industrial Equipment manuals