American Gardener YardStick Light YS18 User manual

Instruction Manual
YardStick®Light
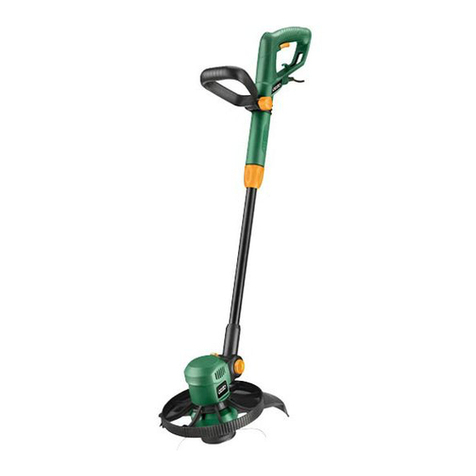
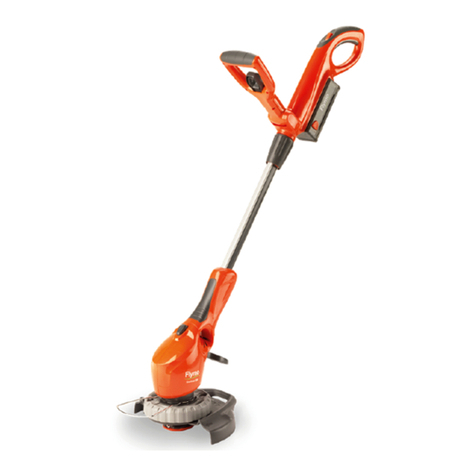
•Cordless Line Trimmer
•9” Cutting Path
•.065” Professional Grade Line
•18 Volt Power System
MODEL: YS18
BEFORE RETURNING THIS PRODUCT FOR ANY REASON
PLEASE CALL 1-800-637-2867.
IMPORTANT TIPS:
•Battery must be charged before use. Please refer to
battery charging instructions.
•When starting unit, the safety switch must first be
pushed in and then the main trigger squeezed. It is
not necessary to keep the safety switch pushed in
after the trimmer has been started.
CAUTION:
Before using this product, read this manual and follow
all Safety Rules and Operating Instructions.
American Gardener, Duluth, GA 30096
(800) 637-2867 - American-Gardener.com
No Gas, No Cord,
and Ready when
you are!
2
TABLE OF CONTENTS
Warranty………………………………………………………………….… 2
Safety Instructions…………………………………………………….….. 2
Operation……………………………………………………………….….. 4
Maintenance…………………………………………………………….…. 10
Storage…………………………………..…………………………………. 11
Accessories.……………………………………………………………….. 11
Service……..……………………………………………………………..… 11
Trouble Shooting.…………………………………………………………. 12
Español………….…………………………………………………………. 14
READ ALL INSTRUCTIONS BEFORE OPERATING TOOL
SAFETY INSTRUCTIONS
WARNING TO CALIFORNIA RESIDENTS: Handling the cord on the charger
associated with this product (or cords with accessories sold for this product) will
expose you to lead, a chemical known to the State of California to cause [cancer,
and] birth defects or other reproductive harm. Please wash hands after handling
the cord.
WARNING TO CALIFORNIA RESIDENTS:The batteries in this product con-
tain Lead, a chemical know to the State of California to cause cancer, and birth
defects or other reproductive harm. They are sealed for your protection – in no
Two Year Warranty on American Gardener YardStick
®
Light
During normal residential use, if this YardStick® Light fails due to a defect
in material or workmanship within two years from the date of purchase,
American Gardener, at its sole discretion, will repair or replace the unit
free of charge.
For warranty services or questions please call (800) 637-2867.
This warranty applies only while this YardStick® Light is used in the United
States.
The warranty does not cover components that are subject to normal wear,
such as the batteries. It also does not cover abuse, misuse, or use of the
product in a commercial setting. Replacement parts are available for pur-
chase from the retailer you bought your product from, or by calling us at
(800) 637-2867 or visiting our web site at www.american-gardener.com.
Please read and follow the instructions for this product carefully.
This warranty gives you specific legal rights, and you may also have other
rights, which vary from state to state.

3
circumstances should you attempt to open the batteries. Avoid excessive handling
the batteries.
WARNING: When using this tool, basic safety precautions should always be fol-
lowed to reduce the risk of fire, electric shock, and personal injury, including the
following:
To reduce risk of injury:
•Before any use, be sure everyone using this electric product reads and under-
stands all safety and operation instructions contained in this manual.
•Save these instructions and review frequently prior to use. You may store the
instructions in the slot located in the back of the charge rack.
•ATTACH LINE GUARD – Before use, attach the line guard correctly. See in-
structions on how to attach line guard in the Operation section. Failure to attach
the line guard may pose a risk of injury, may cause motor damage and will void
the warranty.
•UNIT PARTIALLY CHARGED – The YardStick®is shipped in a partially charged
state, so handle the unit with care during unpacking and assembling of line guard.
•AVOID DANGEROUS ENVIRONMENTS and weather conditions when using this
tool.
•KEEP CHILDREN AWAY – All visitors should be kept at a safe distance from
work area.
•STORE IDLE UNIT INDOORS when not in use, the unit should be stored indoors
in a dry location – out of reach of children.
•DON’T FORCE THE TOOL – It will do the job better and with less likelihood of a
risk of injury at the rate for which it was designed.
•USE RIGHT TOOL – Do not use the tool for any job except that for which it is
intended.
•WARNING: KEEP HANDS AND ALL BODY PARTS AWAY from the line and
line head. The line while in motion can cause injury.
•DRESS PROPERLY – Do not wear loose clothing or jewelry. They can be caught
in moving parts. Use of gloves and substantial footwear is recommended when
working outdoors. Wear protective hair covering to contain long hair and long
pants to protect from flying particles.
•DON’T OVERREACH – Maintain proper footing and balance at all times.
•USE SAFETY GLASSES – Always wear proper eye protection, and use face or
dust mask if operation is dusty.
•MAINTAIN UNIT WITH CARE – Keep the unit clean for best performance and to
reduce the risk of injury. Follow instructions for service. Keep handles dry, clean,
and free from oil and grease.
•UNINTENTIONAL STARTING – Don’t hold the switch area while carry the Yard-
Stick®. The unit is shipped partly charged, and may start inadvertently during as-
sembly if not handled properly.
•CHECK DAMAGED PARTS – If the YardStick® line trimmer experiences a hard
impact, check that no parts were damaged and verify that the unit operates prop-
erly. Check for misalignment or bending of moving parts, breakage of parts, and
any other condition that may affect operation. A part that is damaged should be
properly repaired or replaced by an authorized service center.
•STAY ALERT – Watch what you are doing. Use common sense. Do not operate
the tool when you are tired.
4
•DON’T GRASP MOVING LINE – Do not attempt to remove cut material or hold
material to be cut when the line is moving. Make sure the unit’s switch is off when
clearing or changing line.
To reduce risk when using charger:
•DO NOT use charger outdoors or in wet conditions; use inside only.
•DO NOT charge the unit when the temperature is below +40 F or above +120 F.
It may lessen the service life of the battery.
•This unit and its charger are designed to work together. DO NOT charge the
YardStick® with any other charger and DO NOT use this charger with any other
yard tool or appliance.
•The charger is designed to operate on 120 volts. DO NOT attempt to use it at any
other voltage.
SAVE THESE INSTRUCTIONS
OPERATIONS
CAUTION: The line cut-off blade attached to the line guard is sharp. Keep hands
away from blade while assembling line guard to trimmer.
•ATTACH LINE GUARD PRIOR TO USE –
1. Turn the trimmer up-side-down, unscrew the screw attached to the
bottom of the trimmer next to the line head. See figure1.
Figure-1
2. Attach the line guard to the trimmer housing by aligning the arrow on the
guard with the arrow on the unit. As in figure 2 below.

5
3. After the initial alignment, turn the guard clock-wise until the tab ‘clicks’.
See figure 3.
Figure-3
4. As a final step, secure the guard with the screw that was previously re-
moved. Please refer to Figure 4.
Figure-4
Important: The line guard incorporates an automatic line cut-off blade, which keeps
the cutting line trimmed to the proper length.
•CHARGE BATTERY PRIOR TO USE – The YardStick®does not come fully
charged when purchased. Before using the unit, the battery must be charged. Be-
fore charging the battery, read safety and charging instructions.
•PROPER RUN TIME AND PERFORMANCE can only be obtained with a fully
charged battery.
BATTERY AND CHARGER
The YardStick® (Model No. YS18) is equipped with an 18-volt high capacity battery
pack and an advanced microprocessor controlled smart charger. Following are
some important things for you to know about the features of your battery charger:
•CHARGE BEFORE USE- The battery pack is shipped in a partially
charged state and must be fully charged before use. NOTE: Batteries re-
quire cycle conditioning (charging and discharging) to reach their full ca-
6
pacity. Please allow several cycles of use for the maximum capacity (and
run-time) to be achieved.
•FULL CHARGE - In normal situations, the battery pack will reach a full
charge in one-hour. Initial use, long periods of inactivity, or storage at ex-
treme temperatures may require extended charge time.
•BATTERY PACK TEMPERATURE AND CHARGING - The charger is de-
signed to only charge the battery pack if the battery pack’s temperature is
considered normal – defined as a temperature range of 50-100 degrees
Fahrenheit. When using the trimmer continuously, the batteries may be-
come hot. The charger will recognize the temperature of the battery pack
and the green LED light will illuminate – effectively the charger is waiting
for the battery pack to reach a normal temperature before charging it. Af-
ter continuous use, you should let the battery pack cool down for up to 30
minutes before attempting to charge. Conversely, if the battery pack has
been left in the cold you will need to allow it to reach a normal temperature
before attempting to charge. NOTE: Only use the battery charger in a lo-
cation that will allow for a normal temperature.
•LED FUNCTIONS will indicate the status of the charging of the battery. A
RED LED means the battery is charging; a GREEN LED means the bat-
tery is fully charged. NOTE: a GREEN LED may also indicate that the bat-
tery pack’s temperature is not normal. If you suspect this is the case,
please allow the battery pack to reach a normal temperature.
Charging the Battery:
1. Plug the charger into a 120 Volt AC outlet.
2. Place the battery pack into the charge cradle as illustrated in Figure 5 below. A
RED LED should illuminate which shows the battery pack is properly aligned in
the charger.
3. The battery should reach a full charge in approximately one-hour. At this point
the GREEN LED will replace the RED LED.
4. It is normal for the battery pack and/or charger to feel warm to the touch while
charging.
Charging Notes:
•CAUTION: The charger can only be used with 60 Hz.(cycle)/120 VAC electricity.
•ONLY charge the battery pack with the charger provided.
•SAFE CHARGE –The battery pack can be left on the charger indefinitely.
•Longest life and best performance will be obtained when charging at normal
room temperature.
•Battery life is dependent on usage, storage temperature and time.

7
Before operating, insert fully charged battery as illustrated in Figure 6.
Figure-6
To turn tool ON, push in the thumb switch on the side of the handle. While holding
thumb switch IN, squeeze the trigger switch (under the handle) to start the unit. See
Figure 7. NOTE: Release the SAFETY thumb switch once the unit is running.
Figure-7
To turn tool OFF, merely release the trigger switch. The thumb switch will snap out
to prevent the trigger switch from being accidentally depressed.
Before operating, adjust the shaft to desired length per figure 8 below.
8
TRIMMING TECHNIQUES
Maintain proper balance at all times. Keep hands away from moving line. Wear eye
protection when using the unit. Hold the YardStick®firmly when starting and operat-
ing.
WEED AND LAWN TRIMMING
•The unit works best with dry grass, but it can be used safely in wet grass due to
the low voltage design.
•A long sweeping cutting motion will get the greatest amount of trimming per
charge.
•Watch out for foreign objects in the grass. Avoid trimming near wiring or other
objects that could become tangled in the rotation of the string head.
•Always inspect area to be trimmed for objects that could be damaged or tangled
during trimming.
•During normal operation, the cutting line will wear down and needs to be ad-
vanced to its full cutting length.
•Advance (bump feed) the cutting line – While the unit is running,
gently tap the line head against the ground until the cutting line advances to the
cut-off blade. Excess line will be cut off automatically to maintain proper length.
•To lengthen the life of the string spool, do not bump feed by tapping the line head
on concrete or asphalt.
To Change Line
CAUTION: Make sure you remove the battery from the unit before changing the
line to ensure that the tool is not accidentally turned ON. Place the unit on a flat
surface or upside down to gain access to the line head.
WARNING: To prevent injury, keep hands away from triggers during reloading.

9
USE ONLY 0.065" DIAMETER LINE. For optimal performance use line supplied
by American Gardener, which is available where you purchased the product or by
calling our customer service number (800) 637-2867.
Pre-wound replacement spools with line (Model RS18) are available as an ac-
cessory where you purchased your YardStick®.
•Turn trimmer upside down. Hold the base of the line head with one hand
while grasping the line head cover with the other hand. Squeeze the two
tabs on opposite sides of the line head cover while rotating the cover
counterclockwise until it releases from the base. See figure 11.
Figure-11
•The spring should remain in the hole in the center of the line head base. If
the spring becomes displaced, put it back into the hole in the line head
base.
•Remove the spool from the line head cover by pushing straight in on the
bump button.
•To refill the spool, insert the end of your bulk 0.065” round line into the
small hole in the spool. Do not insert more than 1/8’” of line into the hole
as excess line will interfere with the operation of the spring. Next, while
holding the spool by the bump button, wind the bulk string onto the spool
in the direction of the arrow being careful to make even layers. Continue to
wind until the line is just below the top edge of the spool flange and cut the
line off with a pair of scissors being careful to keep tension on the spool so
the line does not unwind.
Figure-12
10
•Next, insert the free end of the line from the spool through the metal
grommet in the line head cover from the inside out and push the spool
straight into the line head cover until the bump button protrudes out of the
cover. See figure 12. Gently pull approximately 6 inches of line out of the
line head while keeping tension on the spool to insure that the line is not
tangled inside. Once you are sure there are no tangles, excess line can be
wound back into the spool by turning the bump button until there is ap-
proximately 3 inches of line left protruding from the line head.
•Reattach the line head cover and spool to the line head base by inserting
the line head cover over the spring onto the base and rotating clockwise
until the line head cover locks in place.
Clearing Jams
CAUTION: To prevent injury, keep hands away from trigger while clearing of jams
of the line head. To prevent injury, do not use the YardStick®with damaged line
head assembly.
1. Inspect cutting line and spool and clear away debris.
2. While gently pulling on the cutting line, press the spool (bump head) until the
line releases. If jam is cleared, the spool should spin free a short distance and
the line will advance.
3. If the unit continues to jam or will not spin freely, call our customer service num-
ber (800) 637-2867. Failure to stop the unit when the line is jammed will cause
excessive battery drainage and shorten motor life (overheating).
MAINTENANCE
LUBRICATION – No periodic lubrication of the YardStick®bearings or other moving
parts is required.
CLEANING OF PLASTIC PARTS – Use only a dry brush or a cloth with warm wa-
ter and mild soap to clean plastic parts. Many household cleaners contain chemi-
cals, which could damage the plastic. Never use gasoline, turpentine, paint thinner
or similar fluids. Never spray-wash tool or immerse in water. Water or liquid inside
the tool can cause serious damage to the unit.
STORAGE
TEMPERATURE - Temperature extremes limit the useful life of the battery. The
best storage place is one that is cool and dry. Store the tool away from direct
sunlight, heating pipes, furnaces, etc. Do not store where temperatures go below
+40 F or above +120 F.
PREVENTING CORROSION – Fertilizers and other garden chemicals contain
compounds that greatly accelerate the corrosion of metals. Do not store the appli-
ance on or adjacent to fertilizers or chemicals.
ACCESSORIES
REPLACEMENT PARTS – For optimum cutting results and top performance, it is
recommended that only American Gardener replacement line, spools, and accesso-

11
ries be used. Genuine American Gardener accessories are available where you
purchased your YardStick®or direct by calling 1-800-637-2867 or visiting our web
site at www.american-gardener.com.
WARNING: The YardStick®is designed to only be used with .065” or less sized
nylon or co-polymer cutting line. Altering the line head in any manner, including
adding plastic or metal cutting blades, will damage your YardStick®and void your
warranty.
BATTERY RECYCLING – To preserve natural resources, please recycle or dis-
pose of this product’s NICKEL-CADMIUM (NiCd) BATTERY properly. Local, state
and federal laws prohibit disposal of NiCd batteries in ordinary trash. American
Gardener is a participant in the Rechargeable Battery Recycling Corporation
(RBRC) recycling program. We have paid a fee to allow for these batteries to be
properly disposed of via a RBRC collection site (various retailers are also RBRC
participants). Please call the RBRC toll free number of (800) 822-8837 or visit the
RBRC web site of www.rbrc.com to find a battery collection center near you.
BATTERY REPLACEMENT –You may order batteries directly from American Gar-
dener by calling (800) 637-2867.
WARNING: When replacing the batteries, the proper polarity or direction must be
observed. Reverse insertion of batteries can result in leakage or explosion. Be
careful to follow installation instructions that are shipped with the replacement bat-
teries to avoid damage and personal injury.
SERVICE:
Two Year Warranty on American Gardener YardStick® Light
During normal residential use, if this YardStick® Light fails due to a defect in mate-
rial or workmanship within two years from the date of purchase, American Gar-
dener, at its sole discretion, will repair or replace the unit free of charge.
For warranty services or questions please call (800) 637-2867.
This warranty applies only while this YardStick® Light is used in the United States.
The warranty does not cover components that are subject to normal wear, such as
the batteries. It also does not cover abuse, misuse, or use of the product in a
commercial setting. Replacement parts are available for purchase from the retailer
you bought your product from, or by calling us at (800) 637-2867 or visiting our web
site at www.american-gardener.com.
Please read and follow the instructions for this product carefully.
This warranty gives you specific legal rights, and you may also have other rights,
which vary from state to state.
Please visit www.american-gardner.com for more information.
DROPPING THE UNIT – If you drop the unit, carefully inspect it for any damage
before using it again.
12
If you see any condition that may affect safe operation, or if you have any ques-
tions, contact our customer service number at: 1-800- 637-2867.
TROUBLE SHOOTING
Problem: Unit will not charge OR Charger light does not turn green.
Solution(s):
•Inspect charge connectors on unit and charger to insure a proper connection is
made.
•Many outdoor or garage outlets in newer homes are protected by ground fault
(GFCI) circuits to prevent electrical shock from moisture. Make sure the
charger is completely plugged into wall outlet and that the outlet is in working
condition (i.e. not temporarily disabled by a GFCI protector).
•The LED on the unit’s charger should turn green after approximately 1 hour of
charging during regular use and 2 hours during its initial charge. After periods
of long storage (without charging the unit) it may be necessary to “awaken” the
unit’s battery. This can be done by turning the unit on and running it for a few
minutes. Once completed, return the unit to the charger stand and after an
hour the LED should turn green.
Problem: String breaks frequently.
Solution(s):
•Make sure to advance line frequently during use. This is especially critical
when trimming up against hard surfaces.
•Inspect line spool to insure that line is not overlapping or internally jammed.
You should be able to tap the bump head with the palm of your hand and pull
approximately ¼” of line freely with the other hand. If this is not the case,
please rewind the spool in an even fashion to avoid tangling of the line in the
spool. Please see “Clearing Jams”.
Problem: Cutting or run-time performance is diminished.
Solution(s):
•Please follow the trimming and edging techniques described in this manual for
best performance.
•The YardStick® should operate for approximately 20 minutes under a full
charge.
•Inspect line head to make sure it is clean and free of obstruction(s).
•Make sure the unit is fully charged – see the Operations section of this manual
for charging details.
Problem: Thumb safety switch is difficult to hold on during use.
Solution: The thumb safety switch need only be engaged when starting the unit.
There is no need to keep this switch engaged while using the product.
Problem: String does not cut easily when advanced.

13
Solution: Turn unit upright to inspect the line cut-off blade on the string trimmer
guard. Inspect the blade for sharpness or damage. You may sharpen this blade
with a standard file. Replacement guards with new blades are available by calling
(800) 637-2867.
14
Manual de Instrucciones
YardStick®Light
•Cortadora con cordel
•Corte de 9”
•Cordel de 0.065” (1,6 mm)
•Sistema eléctrico de 18 voltios
MODELO: YS18
ANTES DE DEVOLVER ESTE PRODUCTO POR
CUALQUIER RAZÓN, POR FAVOR LLAME AL
1-800-637-2867.
CONSEJOS IMPORTANTES:
•Debe cargar la batería antes de usar la unidad. Por
favor remítase a las instrucciones de carga.
•Cuando encienda la unidad, debe primero empujar
el seguro hacia el frente y luego presionar el gatillo.
No es necesario mantener el seguro presionado
durante el uso.
PRECAUCIÓN:
Lea el manual antes de usar el producto y siga las reglas
de seguridad y las instrucciones de funcionamiento.
American Gardener, Duluth, GA 30096
(800) 637-2867 - American-Gardener.com
¡Sin gasolina ni
cable, y lista
cuando usted lo
esté!

15
LEA TODAS LAS INSTRUCCIONES ANTES DE USAR LA
HERRAMIENTA
INSTRUCCIONES DE SEGURIDAD
ADVERTENCIA A RESIDENTES DE CALIFORNIA: Manejar el cable del
cargador asociado a este producto (o los cables de accesorios vendidos para este
producto) le expondrá al plomo, una sustancia que el Estado de California
reconoce como causante de cáncer, defectos de nacimiento y otros daños
reproductivos. Por favor lávese las manos después de manejar el cable.
ADVERTENCIA A RESIDENTES DE CALIFORNIA:Las baterías de este
producto contienen plomo, una sustancia que el Estado de California reconoce
como causante de cáncer, defectos de nacimiento y otros daños reproductivos.
Las baterías están selladas para su protección y NUNCA debe tratar de abrirlas.
Evite el manejo excesivo de las baterías.
ADVERTENCIA: Cuando use esta herramienta, debe siempre seguir las
precauciones básicas de seguridad para reducir el riesgo de fuego, descarga
eléctrica, o lesión, entre ellas las siguientes:
Para reducir el riesgo de lesionarse:
•Antes de todo uso, asegúrese que todos los usuarios de este producto eléctrico
comprendan todas las instrucciones de seguridad y de funcionamiento en este
manual.
Garantía de dos años del American Gardener YardStick
®
Light
Si durante el uso normal residencial este YardStick® Light no funciona
debido a un defecto de materiales o de manufactura dentro de dos años
de la fecha de compra, American Gardener, a su discreción única,
reparará o remplazará la unidad sin cargo alguno.
Para servicio de garantía o hacer preguntas llame al (800) 637-2867.
Esta garantía solo aplica mientras este YardStick® Light se use dentro de
los Estados Unidos de Norteamérica.
Esta garantía no cubre componentes sujetos a desgaste normal, tales
como cuchillas y baterías. Tampoco cubre abuso, mal uso, o uso del
producto en un entorno comercial. Las piezas de repuesto están
disponibles del detallista donde usted compró el producto, o llamando al
(800) 637-2867 o visitándonos en la web en www.american-
gardener.com.
Por favor lea y siga cuidadosamente las instrucciones de este producto.
Esta garantía le da a usted derechos legales; además, usted podría tener
otros derechos, los cuales varían de estado a estado.
16
•Guarde estas instrucciones y repáselas con frecuencia antes del uso. Puede
guardar las instrucciones en la ranura detrás del soporte de cargar.
•CONECTE EL PROTECTOR DEL CORDEL – Antes de usar, conecte el
protector del cordel correctamente. Vea las instrucciones para conectar el
protector del cordel en la sección de Funcionamiento. El no conectar el protector
puede ponerle a riesgo de lesión, causar daño al motor y anular la garantía.
•UNIDAD PARCIALMENTE CARGADA – El YardStick®se envía con carga
parcial en la batería y debe manejarse con cuidado cuando lo desempaque y
cuando arme el protector del cordel.
•EVITE LOS ENTORNOS Y EL CLIMA PELIGROSOS cuando use la
herramienta.
•MANTENGA LEJOS A LOS NIÑOS – Todos los visitantes deben mantenerse a
una distancia segura del área de trabajo.
•GUARDE A CUBIERTO LAS UNIDADES INACTIVAS – Cuando no las use, las
unidades deben guardarse a cubierto en un lugar seco y lejos del alcance de los
niños.
•NO FUERCE LA HERRAMIENTA – Hará el trabajo mejor y con menos riesgo de
lesión al ritmo para el cual fue diseñada.
•USE LA HERRAMIENTA ADECUADA – No use la herramienta para ningún
trabajo que no sea para el cual fue diseñada.
•ADVERTENCIA: ALEJE LAS MANOS Y EL CUERPO del cordel y del cabezal.
El cordel puede lesionarle cuando esté en movimiento.
•VISTA APROPIADAMENTE – No use ropa suelta o joyas. Éstas podrían
enredarse en las piezas móviles. Use guantes y calzado pesado cuando trabaje
al aire libre. Use sombreros protectores para retener el cabello largo y
pantalones largos para protegerle de las partículas en vuelo.
•NO SE SOBREEXTIENDA – Siempre manténgase en equilibrio y apoyado.
•USE GAFAS PROTECTORAS – Siempre use protección ocular adecuada, y use
una máscara de polvo si el funcionamiento generará polvo.
•DÉ MANTENIMIENTO CUIDADOSO – Mantenga la unidad limpia para mejor
rendimiento y para reducir el riesgo de lesiones. Siga las instrucciones de
lubricación y servicio. Mantenga los mangos limpios, secos y libres de aceite y
grasa.
•EVITE EL ENCENDIDO ACCIDENTAL – No transporte el YardStick®con el
dedo en el gatillo. La unidad se envía parcialmente cargada y se puede encender
accidentalmente si no se maneja con cuidado.
•EXAMINE LAS PIEZAS DAÑADAS – Si la cortadora de cordel YardStick®
experimenta un impacto fuerte, verifique que no se dañó ninguna pieza y que la
unidad funciona adecuadamente. Examine si las piezas móviles están
desalineadas o dobladas, si hay piezas rotas, o cualquier otra situación que
pueda afectar el funcionamiento. Una pieza dañada debe ser reparada por un
centro de servicio autorizado.
•MANTÉNGASE ALERTA – Esté pendiente a lo que hace. Use el sentido común.
No maneje la herramienta si está cansado.
•NO AGARRE EL CORDEL EN MOVIMIENTO – No trate de remover material
cortado ni sostener material por cortar cuando el cordel esté en movimiento. Vele
que el interruptor de la unidad esté apagado cuando limpie o cambie le cordel.
Para reducir el riesgo cuando use el cargador:
•NO use el cargador al aire libre o si está mojado afuera, use adentro solamente.

17
•NO cargue la unidad si la temperatura no está entre +40F (4C) y +120F (48C).
Puede reducir la vida útil de la batería.
•La unidad y su cargador están diseñados para trabajar juntos. NO cargue el
YardStick® con otro cargador y NO use este cargador con otro aparato.
•El cargador funciona solo con 120 voltios. NO use ningún otro voltaje.
GUARDE ESTAS INSTRUCCIONES
FUNCIONAMIENTO
PRECAUCIÓN: La cuchilla para recortar el cordel es filosa.
Mantenga las manos alejadas de la cuchilla mientras instale el
protector a la cortadora.
•CONECTE EL PROTECTOR DEL CORDEL ANTES DE USAR –
•Invierta la cortadora, entonces desatornille los tornillos enroscados a
la parte inferior de la cortadora al lado del cabezal. Vea la figura.
•Conecte el protector a la cortadora alineando las flechas en el protector a
las flechas en la unidad. Vea la figura.
18
•Después de la alineación inicial, rote el protector con el reloj hasta que las
orejas enganchen. Vea la figura.
•Como paso final, asegure el protector usando los tornillos extraídos
previamente. Por favor vea la figura.
Importante: El protector del cordel incluye una cuchilla para recortar el cordel
automáticamente, lo cual permite recortar el largo del cordel.
•CARGUE LA BATERÍA ANTES DE USAR – El YardStick®no trae la batería
completamente cargada cuando lo compre. Usted debe cargar la batería antes
de usarlo. Antes de cargar la batería, lea las instrucciones de seguridad y de
carga.
•RENDIMIENTO Y TIEMPO DE FUNCIONAMIENTO ADECUADOS serán
obtenidos solo con una batería completamente cargada.
BATERÍA Y CARGADOR
El YardStick® (Modelo No. YS18) está equipado con un paquete de baterías de 18
voltios de alta capacidad y un avanzado cargador inteligente computerizado. Abajo
hay algunas cosas importantes que debe saber acerca de su cargador:
•CARGUE ANTES DE USAR – El paquete de baterías se envía
parcialmente cargado y debe cargarse completamente antes de usarlo.
NOTE: Las baterías necesitan acondicionamiento cíclico (carga y

19
descarga) para alcanzar la capacidad máxima. Por favor espere varios
ciclos de usar y recargar para alcanzar la mayor capacidad de uso.
•CARGA COMPLETA – Bajo condiciones normales, el paquete de
baterías se carga completamente en una hora. El uso inicial, los períodos
largos sin uso o el guardar a altas temperaturas pueden producir un
tiempo de carga extendido.
•TEMPERATURA Y CARGA DEL PAQUETE DE BATERÍAS – El
cargador está diseñado para cargar el paquete solamente si la
temperatura del mismo es normal, entre 50 y 100 grados Fahrenheit (10C
a 38C). Cuando use la cortadora continuamente, las baterías se pueden
calentar. El cargador reconocerá la temperatura del paquete e iluminará
el LED verde; el cargador espera que el paquete de baterías llegue a la
temperatura normal para cargarlo. Después del uso continuo, deje que la
batería se enfríe por 30 minutos antes de tratar de cargarlo. Por el
contrario, si el paquete está muy frío, usted debe dejarlo llegar a la
temperatura normal antes de tratar de cargarlo. NOTE: Solo use el
cargador de baterías en un sitio que se encuentre a temperatura normal.
•LAS FUNCIONES DEL LED indican el estado de carga de la batería. Un
LED ROJO indica que está cargando; un LED VERDE indica carga plena.
NOTE: un LED VERDE también puede indicar que la temperatura del
paquete de baterías no es normal. Si usted sospecha esto, permita a la
batería llegar a una temperatura normal.
Para cargar la batería:
•Enchufe el cargador a una toma de 120 V CA.
•Ponga el paquete de baterías en el soporte de cargar como lo muestra la
Figura. El LED ROJO debe iluminarse indicando que el paquete está alineado
adecuadamente con el cargador.
•La batería deberá cargarse completamente en aproximadamente una hora.
En ese momento el LED VERDE suplantará al LED ROJO.
•Es normal que el paquete de baterías o el cargador se sientan tibios si los
toca mientras estén cargando.
Notas sobre cargar:
•PRECAUCIÓN: El cargador solo se puede usar en tomas de 60Hz y 115-120 V
CA.
•SOLO cargue el paquete de baterías con el cargador suministrado.
20
•CARGA SEGURA – El paquete de baterías puede quedarse en el cargador
indefinidamente.
•La vida más larga y el mejor rendimiento se obtienen cargando a temperatura
normal de salón.
•La vida de la batería depende del uso, temperatura de almacenaje y el tiempo.
Antes de manejar, inserte la batería completamente cargada como lo muestra
la Figura.
Para ENCENDER (ON) la unidad, use su pulgar para presionar el interruptor de
seguridad que se halla al costado del mango. Sosténgalo presionado mientras
aprieta el gatillo bajo el mango. Vea la figura. NOTE: Suelte el SEGURO de pulgar
una vez la unidad esté en marcha.
Para APAGAR (OFF) la herramienta, simplemente suelte el gatillo. El interruptor
de seguridad se saldrá y evitará que el gatillo sea activado accidentalmente.

21
TÉCNICAS DE RECORTE
Mantenga un buen balance en todo momento. Aleje las manos del cordel en
movimiento. Use protección ocular cuando use la unidad. Sostenga el YardStick®
firmemente cuando lo encienda y lo use.
RECORTAR CÉSPED Y MALAS HIERBAS
•La cortadora funciona mejor en césped seco, pero se puede usar en césped
mojado gracias a su diseño de bajo voltaje.
•Un movimiento de cortar largo y amplio le dará a usted la mayor cantidad de
cortes por carga.
•Cuídese de objetos extraños en el césped. Evite recortar cerca de alambres u
otros objetos que se pudieran enredar en la rotación del cabezal del cordel.
•Siempre inspeccione el área que recortará, buscando objetos que se puedan
dañar o enredar mientras corte.
•Durante el uso ordinario, el cordel de cortar se desgastará y deberá sacar más
cordel hasta tener suficiente para cortar de nuevo.
22
•Sacar el cordel (alimentación a golpes) – Mientras la unidad esté en marcha,
golpee levemente el cabezal del cordel contra el suelo hasta que salga suficiente
cordel para llegar a la cuchilla de recorte. El exceso de cordel será recortado
automáticamente para mantener el largo apropiado de corte.
•Para alargar la vida útil de la bobina del cordel, no alimente golpeando contra el
concreto o el asfalto.
Para cambiar el cordel
PRECAUCIÓN: Asegúrese de sacar el paquete de baterías de la unidad antes
de cambiar el cordel para asegurar que la herramienta no se encienda
accidentalmente. Coloque la unidad en una superficie planta o al revés para tener
acceso al cabezal de cordel.
ADVERTENCIA: Para evitar una lesión, aléjese de los gatillos mientras repone el
cordel.
USE SOLAMENTE CORDEL DE 0.065" (1,6 mm) DE DIÁMETRO. Para
rendimiento óptimo use el cordel suministrado por American Gardener, el cual está
disponible del detallista donde compró el producto o llamando al número de
servicio al cliente al (800) 637-2867.
Bobinas de repuesto con cordel (Modelo RS18) están disponibles como
accesorio en el lugar donde compró su YardStick®.
•Invierta la cortadora. Sostenga la base del cabezal con una mano
mientras agarra la cubierta del cabezal con la otra. Presione las dos
orejas a ambos costados de la cubierta del cabezal mientras rota la
cubierta contra el reloj hasta que se suelte de la base.
•El resorte debe permanecer en el hueco dentro de la base del cabezal. Si
el resorte se sale de sitio, póngalo dentro del hueco en la base del
cabezal.
•Quite la bobina de la cubierta del cabezal empujando rectamente en el
botón de golpear.
•Para rellenar la bobina, inserte el extremo del paquete de cordel redondo
de 0.065” (1,6 mm) por el hueco en la bobina. No inserte más de 1/8’” (3
mm) de cordel ya que el exceso de cordel interferirá con el funcionamiento
del resorte. Entonces, mientras sostiene la bobina por el botón de golpear,
envuelva el cordel del paquete a la bobina en la dirección de la flecha,

23
cuidándose de hacer capas parejas. Continúe envolviendo hasta que el
cordel quede justo debajo del borde superior del reborde de la bobina
luego corte el cordel con tijeras, cuidándose de mantener la tensión de la
bobina para que el cordel no se desenvuelva.
•Próximo, inserte el extremo libre del cordel de la bobina a través del ojal
de metal en la cubierta del cabezal desde adentro hacia fuera, y empuje la
bobina directamente dentro de la cubierta del cabezal hasta que el botón
de golpear se extienda fuera de la cubierta. Suavemente hale
aproximadamente 6 pulgadas (15 cm) de cordel de la bobina, mientras
sostiene la tensión de la bobina para asegurar que el cordel no se enrede
adentro. Una vez asegure que no hay enredos, el exceso de cordel se
puede envolver dentro de la bobina girando el botón de golpear hasta que
sobresalgan 3 pulgadas (7,5 cm) de cordel del cabezal.
•Reponga la cubierta del cabezal y la bobina a la base del cabezal
insertando la cubierta del cabezal sobre el resorte en la base y rotando
con el reloj hasta que la cubierta del cabezal se asegure en posición.
Para limpiar obstrucciones
PRECAUCIÓN: Para evitar lesiones, mantenga las manos alejadas del gatillo
mientras desatranque el cabezal del cordel. Para evitar lesiones, no use el
YardStick®si el armazón del cabezal del cordel está dañado.
4. Inspeccione el cordel y la bobina, y limpie los desperdicios.
5. Mientras hala con cuidado el cordel, presione la bobina (el cabezal de golpear)
hasta que el cordel alimente. Si el atrancamiento se ha liberado, la bobina debe
girar libremente una corta distancia y el cordel avanzará.
6. Si la unidad continúa atrancándose o no gira libremente, llame al número de
servicio al cliente al (800) 637-2867. No detener la unidad cuando se atranque
el cordel puede agotar excesivamente la batería y acortar la vida del motor
(sobrecalentamiento)
MANTENIMIENTO
LUBRICACIÓN – No necesita relubricar periódicamente ninguna de las piezas del
YardStick®.
24
LIMPIEZA DE PIEZAS PLÁSTICAS – Use solamente un cepillo seco o un trapo
con agua tibia y jabón liviano para limpiar las piezas plásticas. Muchos limpiadores
caseros contienen sustancias que pueden dañar el plástico. Nunca use gasolina,
aguarrás, disolvente de pinturas o fluidos similares. Nunca lave con agua a presión
o lo sumerja en agua. Agua o líquido dentro de la unidad puede causar daño grave
a la unidad.
CÓMO GUARDAR
TEMPERATURA – Los extremos de temperatura limitan la vida útil de la batería. El
mejor lugar para guardarla es en un lugar fresco y seco. Guarde la herramienta
lejos de la luz directa del sol, tubería de calefacción, hornos, etc. NOTE: No guarde
donde las temperaturas no estén entre +40 F (4C) a +120 F (48C).
EVITE LA CORROSIÓN – Los fertilizantes y otras sustancias químicas de jardín
contienen compuestos que pueden acelerar grandemente la corrosión de los
metales. No guarde el aparato sobre o cerca de los fertilizantes o sustancias
químicas.
ACCESORIOS
PIEZAS DE REPUESTO – Para resultados óptimos cuando recorte y el mejor
rendimiento, se recomienda que use solamente cordel de repuesto, bobinas y
accesorios American Gardener. Los accesorios genuinos American Gardener
están disponibles donde usted compró su YardStick®o directamente llamando al 1-
800-637-2867 o visitando nuestro sitio en la web www.american-gardener.com.
ADVERTENCIA: El YardStick®está diseñado para usar solamente cordel de nylon
o de copolímeros, de .065” (1,6mm) o menor. Alterar el cabezal del cordel de
cualquier manera, incluyendo añadir cuchillas de corte, de plástico o metal, dañará
su YardStick®y anulará la garantía.
RECICLAJE DE BATERÍAS– Para preservar los recursos naturales, por favor
recicle o deshágase de la BATERÍA DE NíQUEL-CADMIO (NiCd) apropiadamente.
Las leyes locales, estatales y federales pueden prohibir deshacerse de las baterías
de NiCd en la basura ordinaria. American Gardener participa voluntariamente en la
Corporación de Reciclaje de Baterías Recargables (RBRC). Pagamos una cuota
para ofrecer un método de reciclaje en centros de recolección de RBRC (varios
detallistas también participan en RBRC). Por favor llame el número gratis de
RBRC al (800) 822-8837 o visite a RBRC en la web en www.rbrc.com encontrará el
centro de reciclaje de RBRC más cercano.
REEMPLAZO DE BATERÍAS – Usted puede pedir baterías directamente de
American Gardener llamando al (800) 637-2867.
ADVERTENCIA: Cuando remplace las baterías, debe observar cuidadosamente
la dirección o polaridad de las baterías. Insertar las baterías al revés puede
resultar en derrame o explosión. Siga cuidadosamente las instrucciones de
instalación que vienen con las baterías de repuesto para evitar daño o lesión
corporal.

25
SERVICIO:
Garantía de dos años del American Gardener YardStick® Light
Si durante el uso normal residencial este YardStick® Light no funciona debido a un
defecto de materiales o de manufactura dentro de dos años de la fecha de compra,
American Gardener, a su discreción única, reparará o reemplazará la unidad sin
cargo alguno.
Para servicio de garantía o hacer preguntas llame al (800) 637-2867.
La garantía solo aplica mientras este YardStick® Light se use dentro de los
Estados Unidos de Norteamérica.
La garantía no cubre componentes sujetos a desgaste normal, tales como cuchillas
y baterías. Tampoco cubre abuso, mal uso, o uso del producto en un entorno
comercial. Las piezas de repuesto están disponibles del detallista donde usted
compró el producto, o llamando al (800) 637-2867 o visitándonos en la web en
www.american-gardener.com.
Por favor lea y siga cuidadosamente las instrucciones de este producto.
Esta garantía le da a usted derechos legales; además, usted podría tener otros
derechos, los cuales varían de estado a estado.
Por favor visite www.american-gardner.com para mayor información.
DEJAR CAER LA UNIDAD – Si deja caer la unidad, inspecciónela
cuidadosamente buscando daños antes de usarla de nuevo.
Si usted ve alguna condición que pudiera afectar el funcionamiento seguro, llame
al número de servicio al cliente al: 1-800- 637-2867.
EN CASO DE PROBLEMAS
Problema: La unidad no carga adecuadamente o la luz del cargador no
cambia a verde.
Solución(es):
•Inspeccione que la conexión entre el paquete de baterías de la unidad y el
soporte de cargar sea adecuada.
•Muchas tomas de corriente en los garajes y fuera de la casa están protegidas
por un interruptor de corto circuito (GFCI) para evitar una descarga debido a la
humedad. Asegúrese que el cargador esté completamente enchufado a la
toma y que ésta funcione (i.e. no está desactivada temporalmente por el
protector GFCI).
•El LED del cargador de la unidad debe cambiar a verde después de
aproximadamente 1 hora de carga durante uso ordinario y de 2 horas después
de su carga inicial. Después de guardar la unidad por tiempo prolongado (sin
cargarla) puede ser necesario “despertar” la batería. Puede hacer esto
encendiendo la unidad y dejándola correr por algunos minutos. Cuando acabe,
devuelva la unidad al soporte del cargador y tras una hora el LED se debe
tornar verde.
26
Problema: El cordel se rompe con frecuencia.
Solución(es):
•Asegúrese de alimentar el cordel con frecuencia mientras en uso. Esto es
crítico especialmente cuando corte al lado de una superficie dura.
•Inspeccione el cordel para verificar que éste no esté enredado o atascado
internamente. Usted debe poder dar un golpe al cabezal con la palma de una
mano y halar aproximadamente ¼” (6 mm) de cordel fácilmente con la otra
mano. Si no es así, por favor rebobine la bobina de manera pareja para evitar
que el cordel se enrede en la bobina. Por favor vea “Para limpiar
obstrucciones”.
Problema: El tiempo de corte o el rendimiento está reducido.
Solución(es):
•Por favor siga las técnicas de recorte descritas en el manual para mejor
rendimiento.
•El YardStick® debe funcionar por aproximadamente 20 minutos cuando tiene
carga completa.
•Inspeccione el cabezal del cordel para ver que esté limpio y libre de
obstrucciones.
•Verifique que la unidad esté completamente cargada – vea la sección de
Funcionamiento del manual para detalles sobre como cargar.
Problema: El seguro del pulgar es difícil de aguantar durante el uso.
Solución: El seguro del pulgar se usa solamente cuando encienda la unidad. No
tiene necesidad de mantener el interruptor activado cuando use el producto.
Problema: El cordel no corta fácilmente cuando lo alimenta.
Solución: Pare la unidad hacia arriba para inspeccionar la cuchilla cortadora del
protector del cordel. Examine la cuchilla para ver si está dañada o desafilada.
Usted puede afilar esta cuchilla con una lima ordinaria. Protectores de repuesto
con cuchillas nuevas están disponibles llamando al (800) 637-2867.
Table of contents
Languages:
Other American Gardener Trimmer manuals

American Gardener
American Gardener ReadyHedger 900052 User manual

American Gardener
American Gardener ReadyHedger RH25 User manual

American Gardener
American Gardener ReadyHedger RH30 User manual

American Gardener
American Gardener YardStick 900053 User manual

American Gardener
American Gardener ReadyHedger RH18 User manual
Popular Trimmer manuals by other brands

Parkside
Parkside PHS 650 A1 Translation of the original instructions

Husqvarna
Husqvarna 326HDAX-Series, 326HE3X-Series,... Operator's manual

Echo
Echo SRM-266T Operator's manual

Craftsman
Craftsman Incredi-Pull 316.794450 Operator's manual

Troy-Bilt
Troy-Bilt AST TB25CS Operator's manual

GreenWorks
GreenWorks G24ST Operator's manual