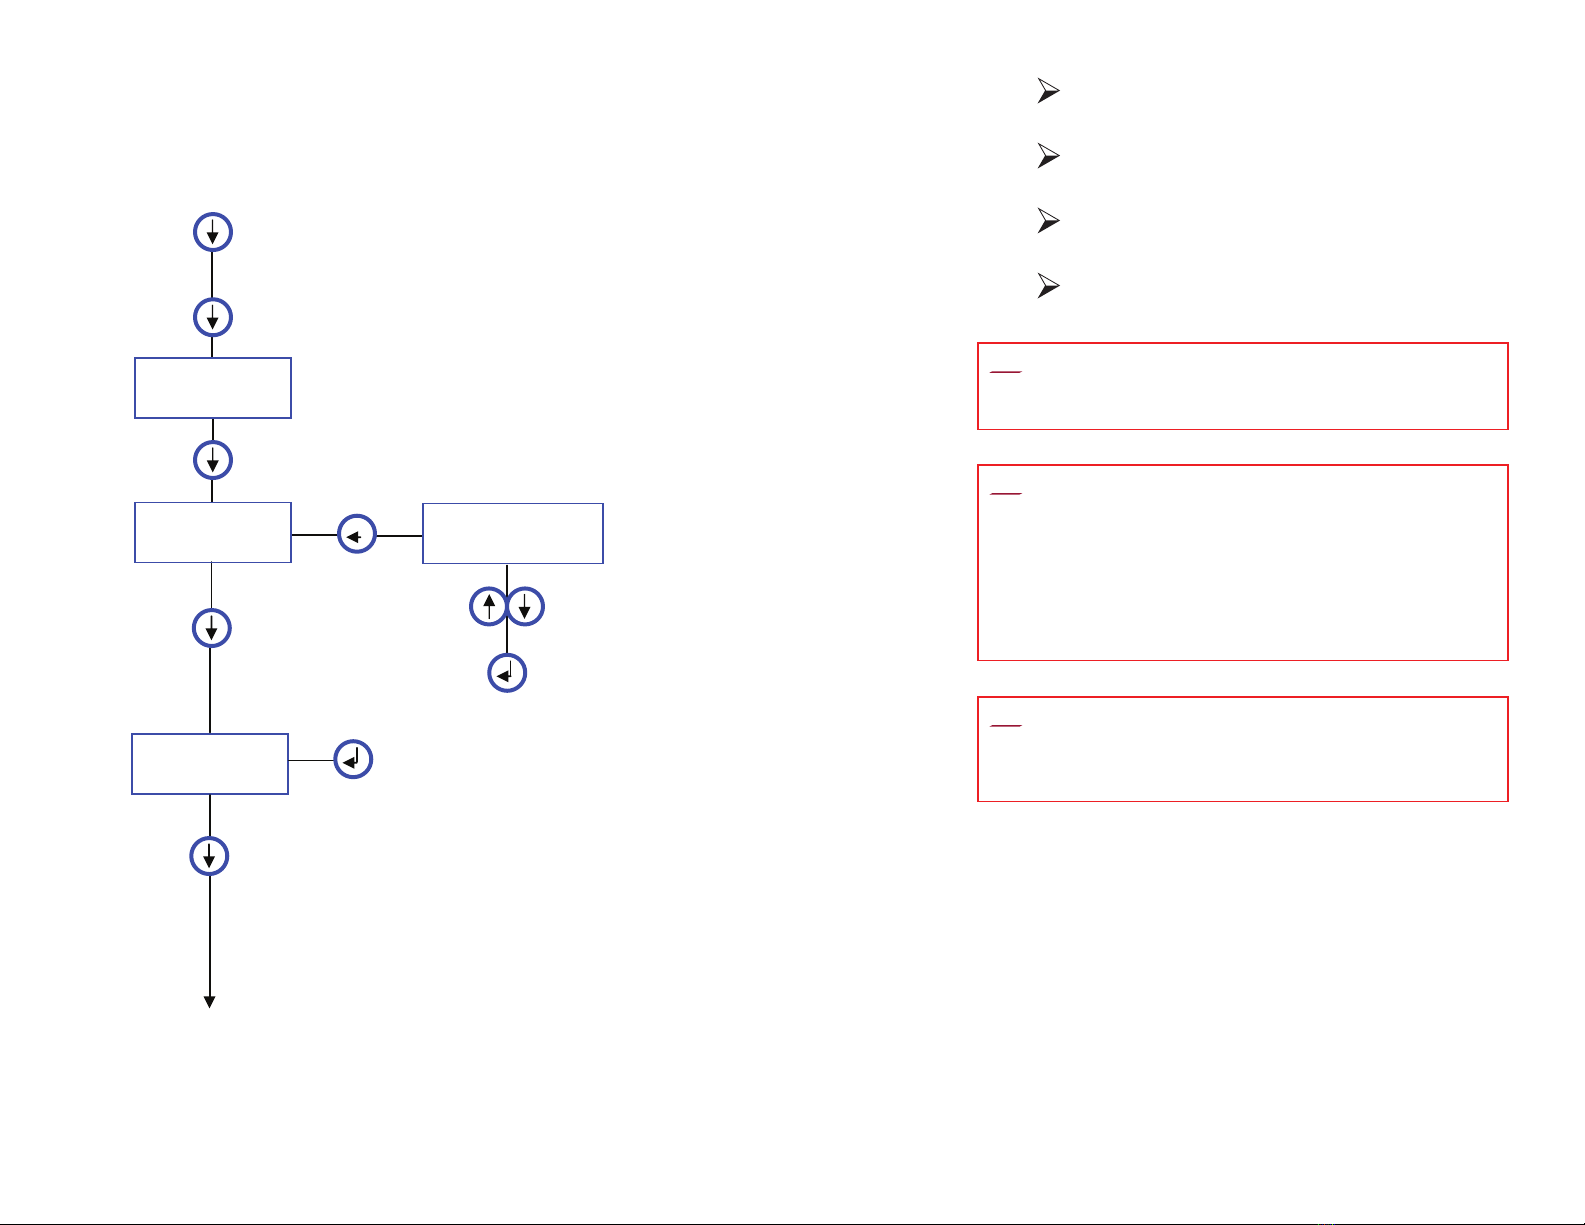
Align the programmer with the sensor and
press to transmit the program to the sensor
Press up or down to adjust distance
(16 cm recommended)
Press up or down for short range or long
range (DO NOT USE)
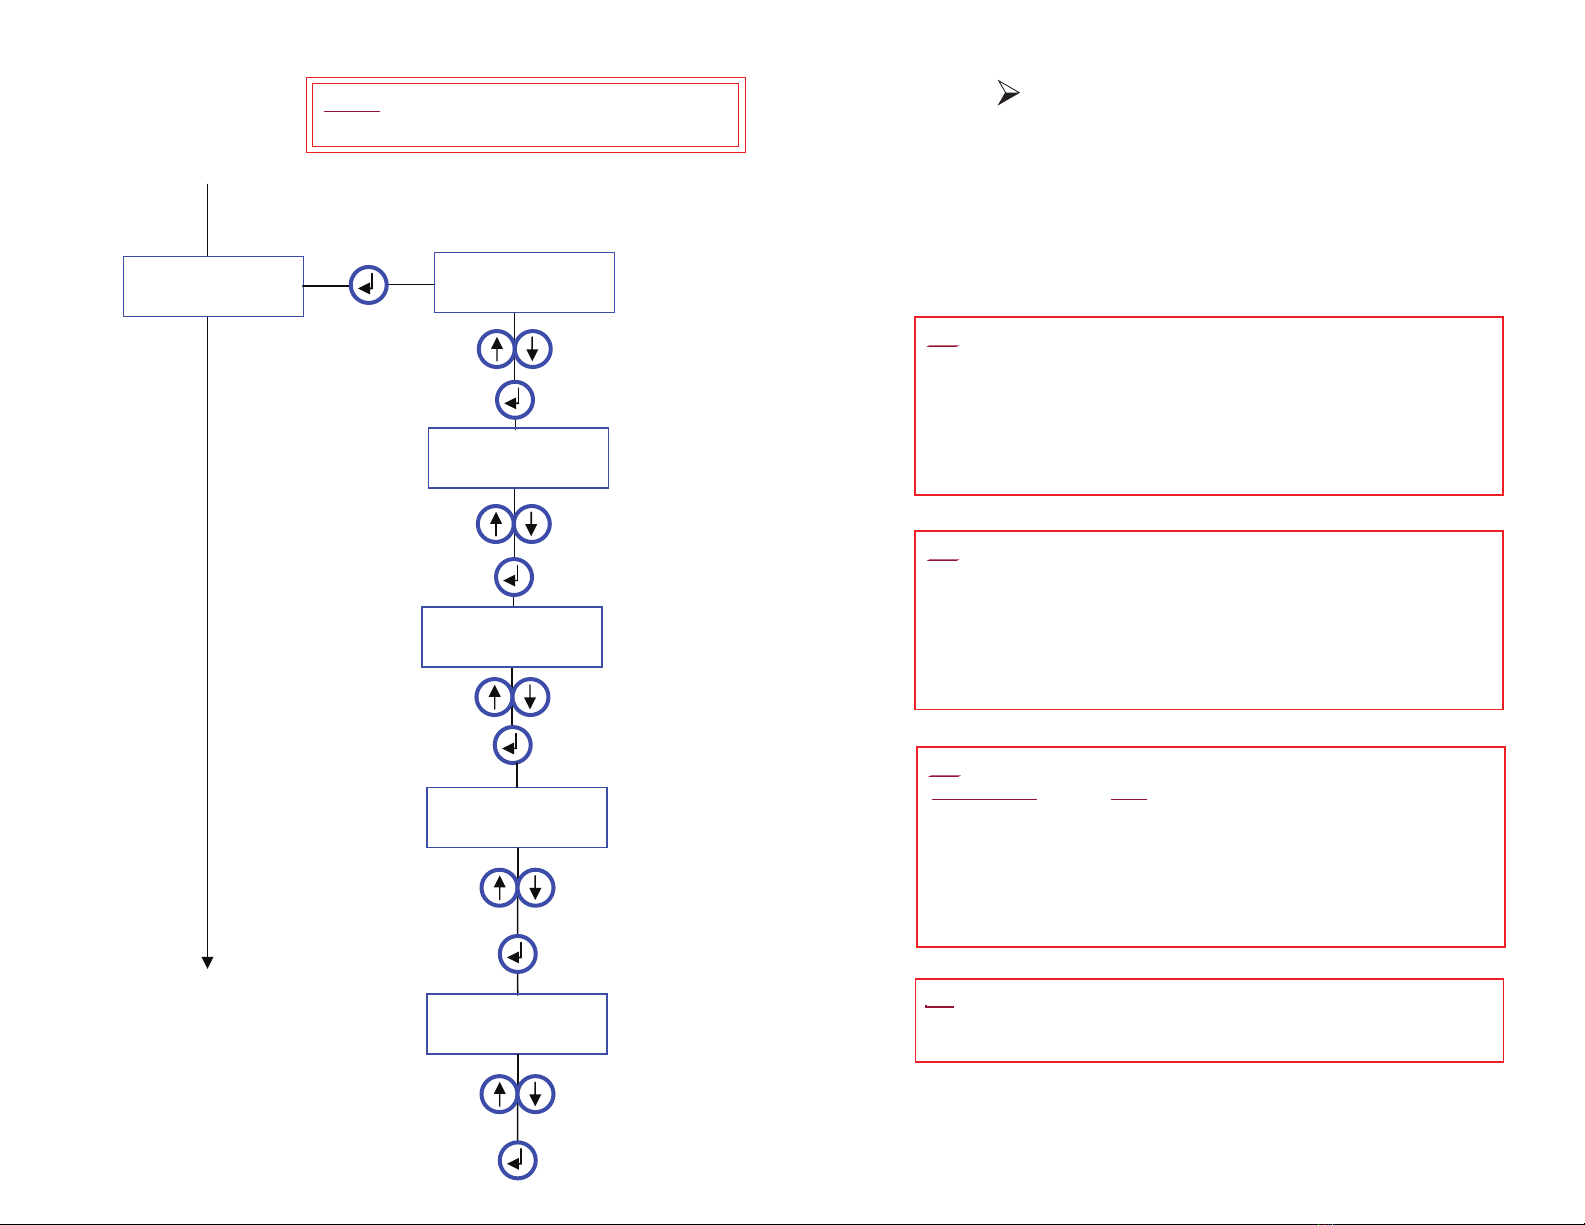
Press up or down to adjust time
Press up or down to adjust
metering run time
Press up or down to turn ON
the Auto Rise
feature and
adjust frequency
8
From MENU 4.2
To MENU 4.4
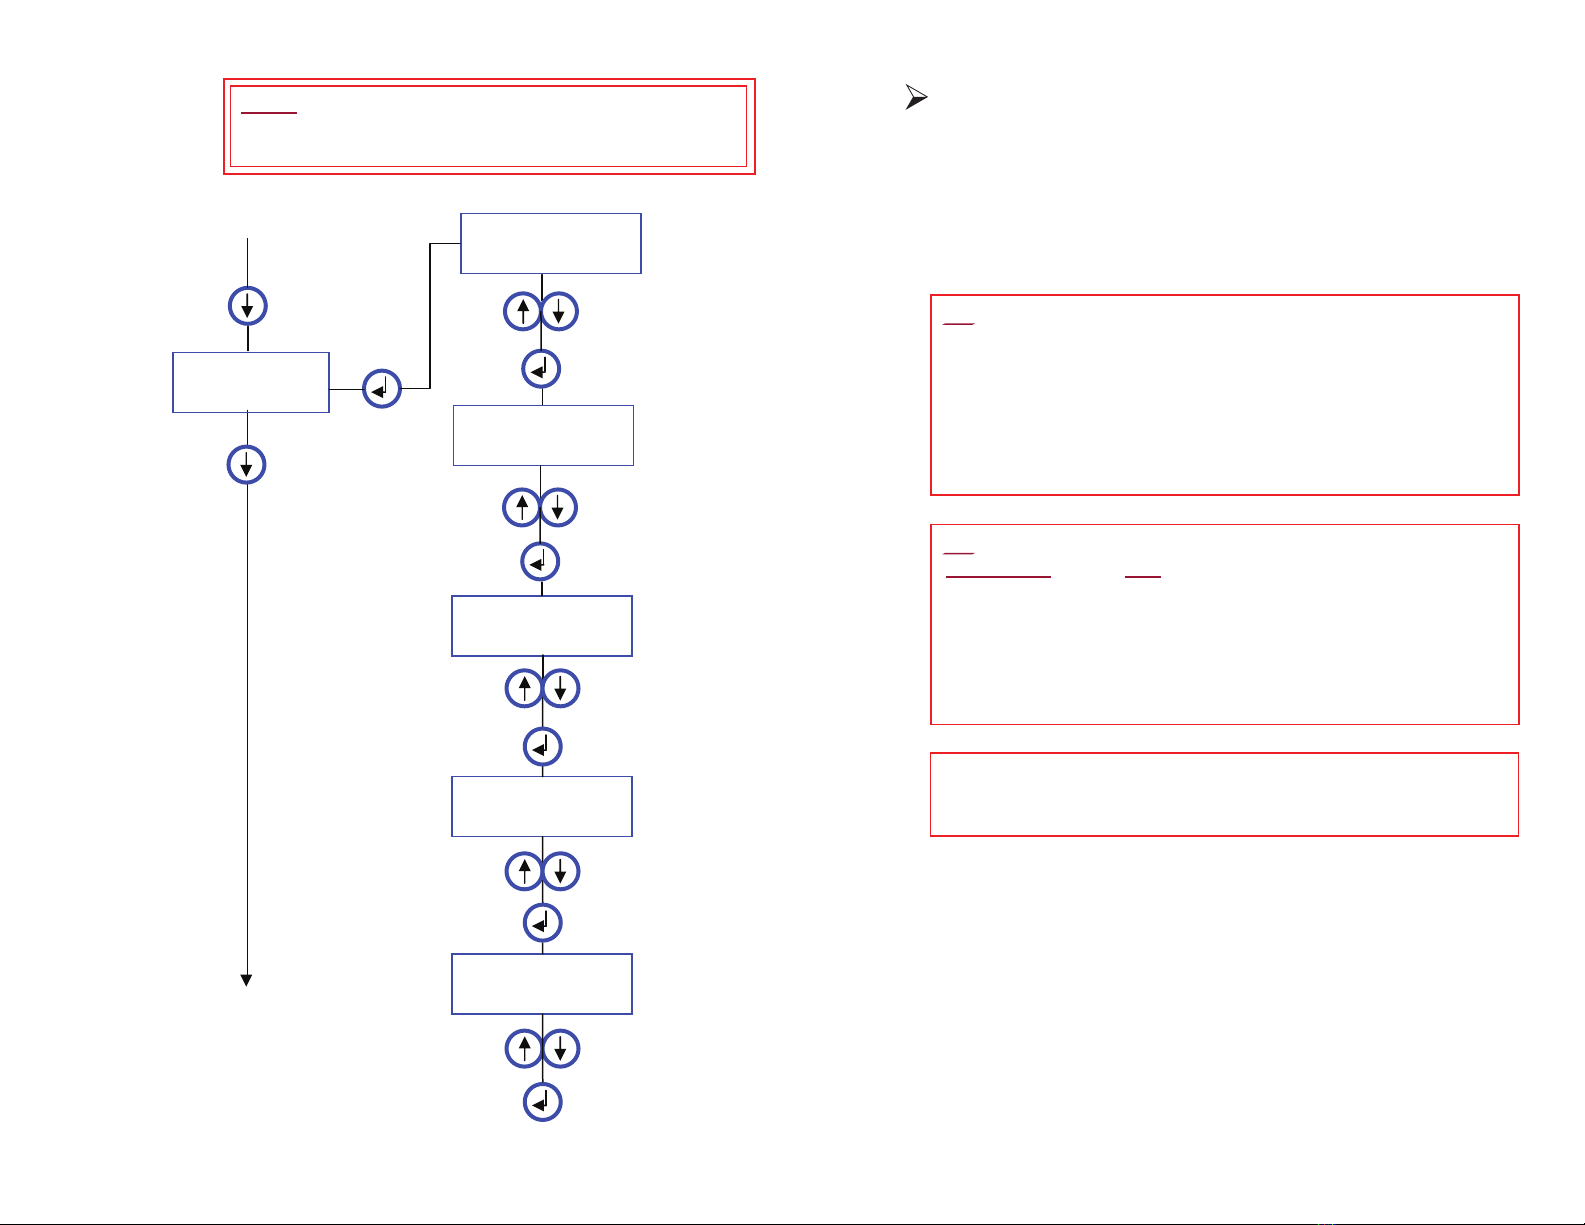
Metering with On/Off -- Faucet
Setting the sensor to the Metering faucet mode:
-Setthe"Comfort Timeout" (run time)
-Set"Auto-Rinse" frequency (if the frequency is set to 0,
‘auto-rinsing” (auto-purging) is Off)
-Setthe"Duration" (run time) of the auto-rinsing process.
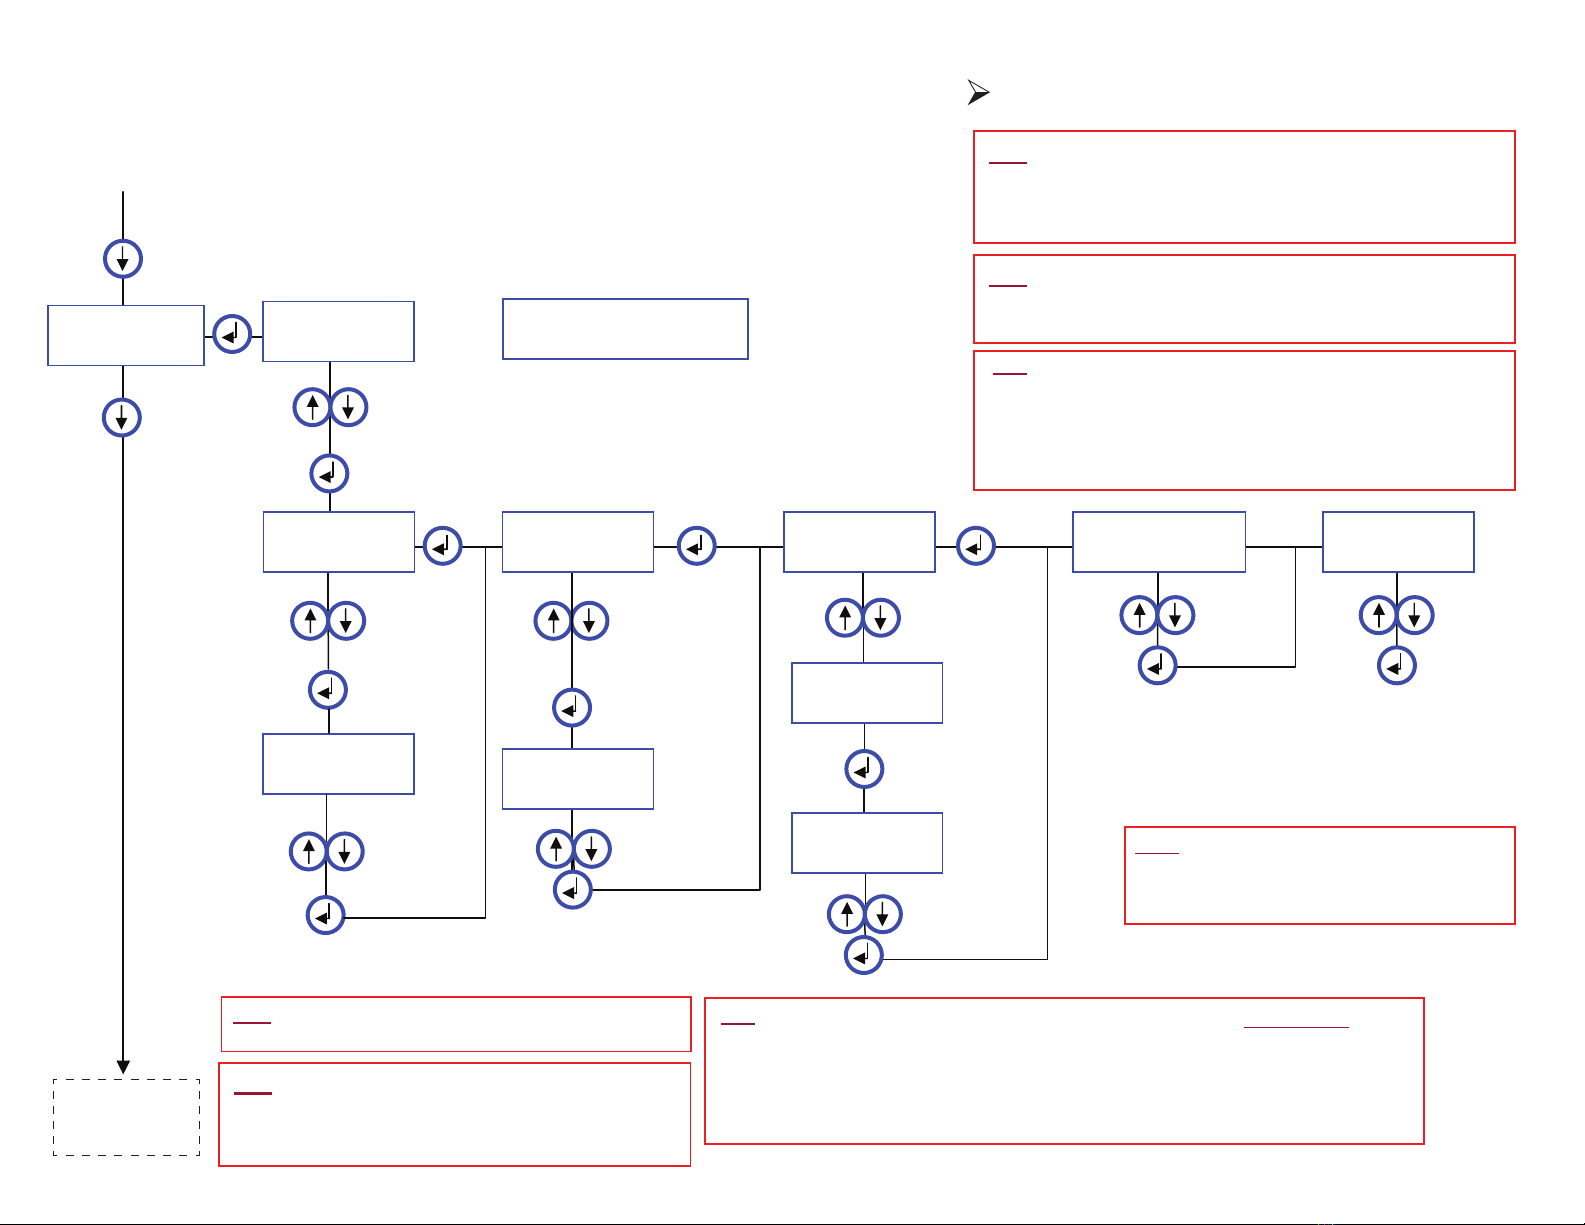
TIP: In this “Metering with On/Off Mode”, the “COMF. TIMEOUT” is the
RUN TIME - how long the water will run once activated by the user.
The detection distance is set very short, so the user must start & stop
the water by moving hands close to the sensor. - This is suited for
gooseneck type fittings where the movement of the user may be
outside the normal detection zone.
• Run Times: 3.25, 7.5, 10, 15, 30, 60, 120, or 240 seconds
TIP: The “Auto. RINSE” (Auto Purge) allows the faucet to
automatically turn ON after a set time period of non-use, maintaining
the trap seal & preventing the water from becoming stagnant.
Default Setting: ‘OFF’
• This time period can be set to activate from 1 to 72 hrs (of non-use)
in 1 hr increments.
• The duration of run time can be set from 1 sec. to 240 sec.
MENU 4.3
ON/OFF
COMF. TIMEOUT
= 15 Sec.
Auto. RINSE
= OFF.
Auto. RINSE
= 10 Sec.
SENSOR DISTANCE
= 5 cm
SENSOR DISTANCE
SHORT RANGE
NOTE: This is actually uses the ‘Metering’ mode, but with the
added feature of being able to start and stop the water flow
before the metering time runs out.
TIP: The "SENSOR DIST." (Sensor Distance) is the maximum
distance that the sensor can detect a user.
(Recommended setting 5 cm)