707\15 RO Manual
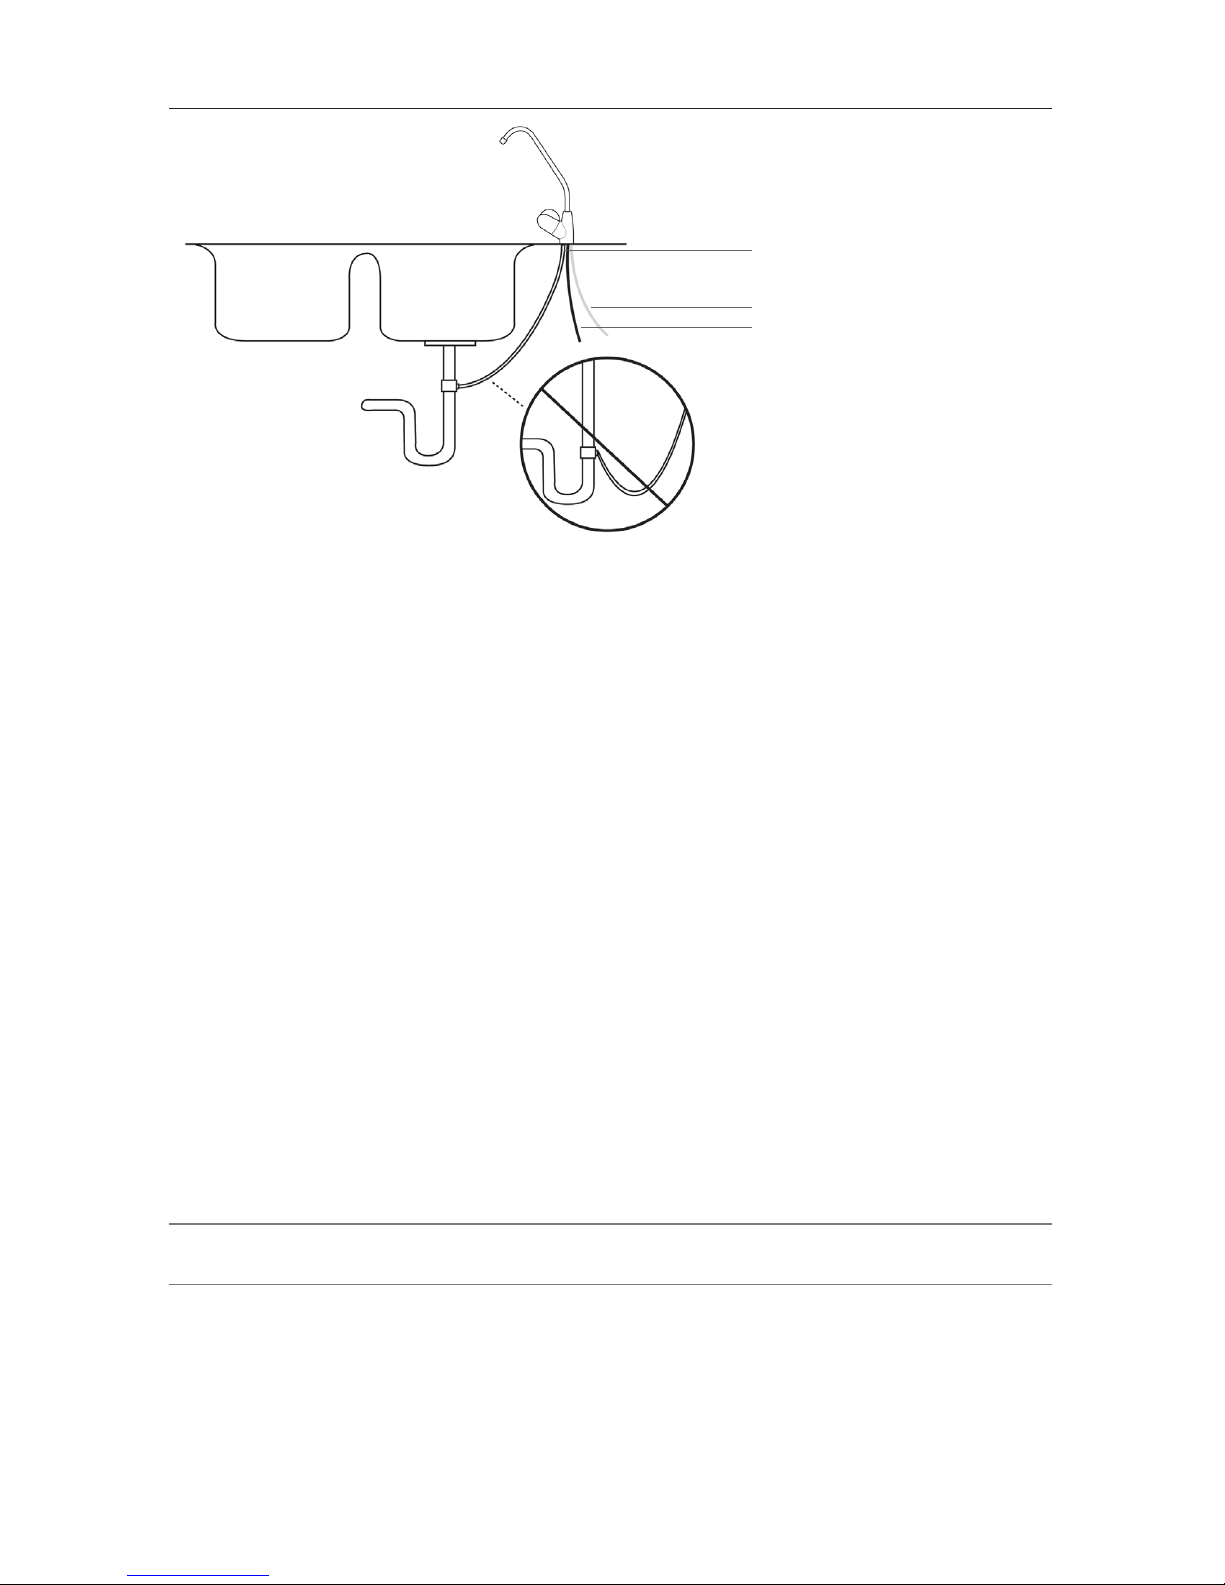
3. 3/8” black Drain Tube from Faucet Connect this tube to the black 3/8” drain clamp. (See
D in Figure 2 on page 6). Tighten rmly so tube will not pull out of drain clamp. IMPOR-
TANT: Do not leave excessive slack in drain tubing. Shorten tubing so that it ows
directly to the drain with no dips, loops, low spots, or kinks.
4. Post Filter Connection to Faucet Depending on the model, connect the 3/8” blue tube
from either the outlet side of the post-lter bowl or the outlet tting from the 10” inline post-
lter cartridge to the 3/8” Push-In adapter tting on the RO faucet.
5. RO Tank Connection Depending on the model, connect the 3/8” blue tube from either the
tee of the inlet side of the post-lter bowl or the tee of the inlet side of the 10” inline post-
lter cartridge to the Push-In ball valve on top of the RO storage tank.
STEP 7 SYSTEM START-UP PROCEDURES
Turn your sink cold water supply valve to the on position while leaving the Filter Pac/RO mod-
ule and RO tank ball valves in the off position (horizontal, which is perpendicular to the valve).
Check for leaks and adjust as necessary.
1. Slowly turn Filter Pac/RO module ball valve to the on position (blue valve vertical, which is
in line with the valve). As water enters the lter bowls and makes its way through the lters
to the membrane element you will hear air escaping through the drain. This is normal.
Open RO faucet on the sink until the water starts coming out. (Water ow will only be a
trickle and may take up to 20 minutes before water starts to come out of the faucet spout
on some units). Shut RO faucet off and check for leaks and adjust as necessary.
2. Open the tank ball valve by turning handle a ¼ turn toward the tubing. Let tank ll for 4 to
6 hours (if you are changing lters, your tank may already be full, so you would not need
to wait). Then turn on RO faucet and drain tank completely, (approx. 5 minutes). Shut RO
faucet off, allow tank to rell, and drain again in 4 to 6 hours. The RO system is shipped
with a food grade preservative and must be ushed out prior to use. DO NOT DRINK THE
RO WATER UNTIL TANK HAS BEEN DRAINED TWICE.
3. Shut RO faucet off and let system ll again. RO water is now ready for use.
I M P OR TA NT: Check carefully for small leaks every few hours for the rst few days to assure
there are no leaks. It is wise on any RO system to inspect for leaks since the system sits
unseen underneath your sink and a small leak may not be detected without close inspection.
Check for leaks occasionally thereafter and make adjustments as necessary.
STEP 8 REFRIGERATOR ICEMAKER HOOK-UP
1. If there is not an ice-line from the RO to the refrigerator, you may choose to run an ice-line
so that your ice and water dispenser will have ltered water. If the distance from the refrig-
erator to the RO is more than 50’, we recommend 3/8” polypropylene or polyethylene tub-
ing for best results. DO NOT USE COPPER. (Be sure you have the recommended water
pressure to your icemaker according to the refrigerator manufacturer’s specications.) 3/8”
tubing, a supplemental storage tank, more RO air pressure, or different usage patterns,
may be required to supply adequate pressure!
2. Connect tube (not included) to appropriate refrigerator connection and to a plastic “T”
tting (not included) spliced into the 3/8” blue tube between the post lter and faucet. It
is recommended to install a ball valve on the tube to the refrigerator for service and start
up purposes. Keep ball valve off until start up procedures are completed and RO tank is
completely full after the second tank draining.
I M P OR TA NT: Never turn on icemaker before RO tank is full of water to avoid damaging re-
frigerator solenoid. If your refrigerator has a water dispenser in the door, upon initial start-up
you will need to depress the water supply lever 2 to 3 minutes before the water will dispense.
STEP 9 RECOMMENDED FILTER SERVICE LIFE
The types of lters listed below vary depending on RO system style. The manufacturer
provides very high capacity carbon lters and replacement intervals are based on our lters.