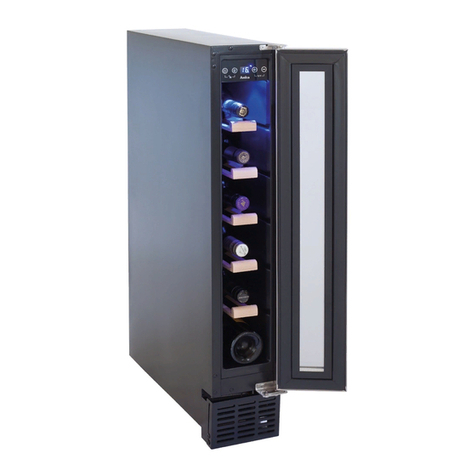
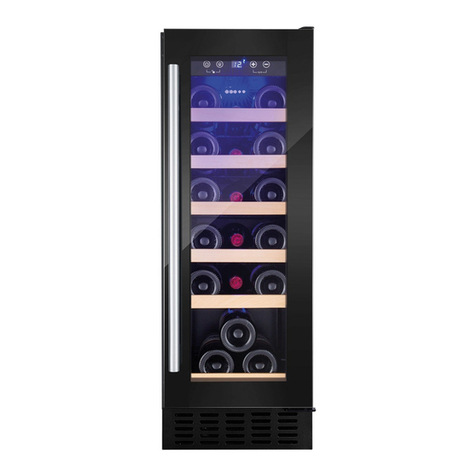
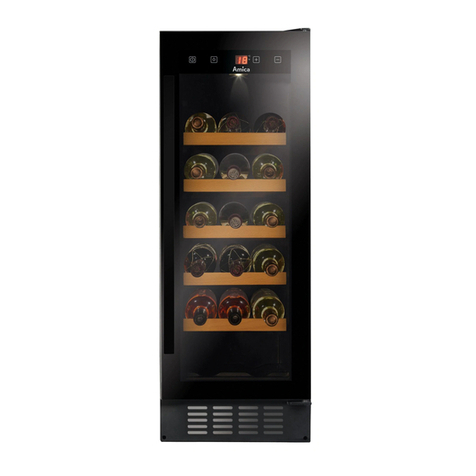
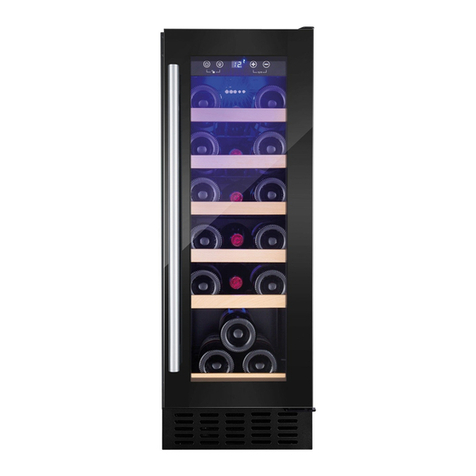
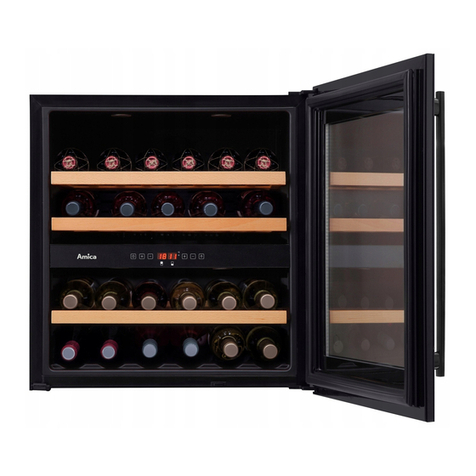
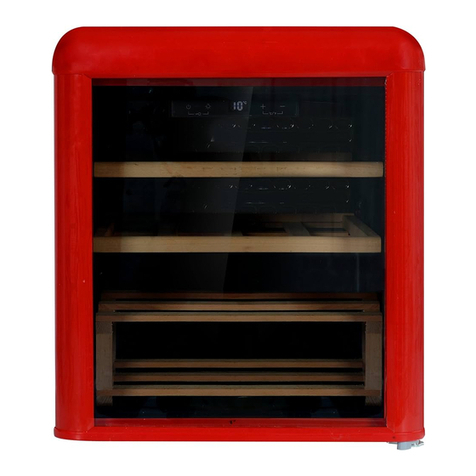
Amica WK 341 901 S User manual

Wine cooler / Weinklimaschrank / Cave à vin /
Wijnkoeler
WK 341 901 S
IO-RFW-0054
(07.2022)
OPERATING INSTRUCTIONS EN
GEBRAUCHSANWEISUNG DE
NOTICE D’UTILISATION FR
GEBRUIKSAANWIJZING NL

- 2 -
EN- Table of contents
GUIDELINES CONCERNING THE SAFETY OF USE 7
INSTALLATION AND OPERATING CONDITIONS OF THE APPLIANCE 9
CLIMATE RANGE 10
PRACTICAL EVERYDAY TIPS 11
UNPACKING 12
DISPOSAL OF OLD APPLIANCE 13
CONTROLS 14
APPLIANCE CONTROLS- SINGLE AND DUAL ZONE 14
REVERSING DOOR 15
CARE AND CLEANING 16
REMOVING THE SHELVES 16
CLEANING 16
TROUBLESHOOTING 16
IF THE APPLIANCE IS NOT WORKING, CHECK 16
THE APPLIANCE IS WORKING, BUT NOT VERY WELL, CHECK 17
THE APPLIANCE IS NOISY, CHECK 17
THE LIGHT DOES NOT WORK, CHECK 17
THE DOOR WILL NOT CLOSE PROPERLY, CHECK 17
THE DISPLAY SHOWS “E1” OR “E2” 17
EPREL 17
WARRANTY AND AFTER SALES SERVICE 18
WARRANTY 18

- 3 -
DE- Inhaltsverzeichnis
SICHERHEITSHINWEISE 20
INBETRIEBNAHME UND BETRIEBSBEDINGUNGEN DES GERÄTES 23
KLIMAKLASSE 24
PRAKTISCHE RATSCHLÄGE 24
AUSPACKEN 26
ENTSORGUNG VON ALTGERÄTEN 27
STEUERUNGSKOMPONENTEN 28
ÄNDERUNG DER ÖFFNUNGSRICHTUNG DER TÜR 29
REINIGUNG UND WARTUNG 30
HERAUSNEHMEN DER REGALE 30
REINIGUNG 30
PROBLEMLÖSUNG 30
WENN DAS GERÄT NICHT FUNKTIONIERT, PRÜFEN SIE: 30
WENN DAS GERÄT ZWAR FUNKTIONIERT, ABER NICHT GUT, PRÜFEN SIE: 31
WENN DAS GERÄT LÄRM MACHT, PRÜFEN SIE: 31
WENN DIE BELEUCHTUNG NICHT FUNKTIONIERT, PRÜFEN SIE: 31
WENN DIE TÜR NICHT RICHTIG SCHLIESST, PRÜFEN SIE: 31
WENN IN DER ANZEIGE „E1” ODER „E2” ERSCHEINT: 31
EPREL 31
GARANTIE, NACHVERKAUF-SERVICE 32
GARANTIE 32

- 4 -
FR- Table des matières
CONSIGNES DE SECURITÉ D’UTILISATION 34
INSTALLATION ET CONDITIONS DE FONCTIONNEMENT DE L’APPAREIL 37
CLASSE CLIMATIQUE 38
CONSEILS PRATIQUES 38
DÉBALLAGE 40
ÉLIMINATION DES APPAREILS USAGÉS 41
ÉLÉMENTS DE COMMANDE 42
MODIFICATION DU SENS D’OUVERTURE DE LA PORTE 43
NETTOYAGE ET ENTRETIEN 44
RETRAIT DES CLAYETTES 44
NETTOYAGE 44
RÉSOLUTION DES PROBLÈMES 44
SI L’APPAREIL NE FONCTIONNE PAS, VÉRIFIER 44
SI L’APPAREIL FONCTIONNE, MAIS D’UNE MANIÈRE PAS TOUT À FAIT EFFICACE,
VÉRIFIER 45
SI L’APPAREIL FAIT DU BRUIT, VÉRIFIER 45
SI L’ÉCLAIRAGE NE FONCTIONNE PAS, VÉRIFIER 45
SI LA PORTE N’EST PAS FERMÉE CORRECTEMENT, VÉRIFIER 45
SI L’AFFICHEUR AFFICHE « E1 » OU « E2 » 45
EPREL 45
GARANTIE, SERVICE APRÈS-VENTE 46
GARANTIE 46

- 5 -
NL- Inhoudsopgave
AANWIJZINGEN VOOR VEILIG GEBRUIK 48
INSTALLATIE EN WERKINGSVOORWAARDEN VAN HET APPARAAT 50
KLIMAATKLASSE 51
PRAKTISCHE TIPS 52
UITPAKKEN 53
VERWIJDERING VAN GEBRUIKTE APPARATUUR 54
BEDIENINGSELEMENTEN 55
OMDRAAIEN VAN DE DRAAIRICHTING VAN DE DEUR 56
REINIGING EN ONDERHOUD 57
UITNEMEN VAN DE SCHAPPEN 57
REINIGING 57
HET OPLOSSEN VAN PROBLEMEN 57
ALS HET APPARAAT NIET WERKT, CONTROLEERT U HET VOLGENDE: 57
ALS HET APPARAAT NIET GOED WERKT, CONTROLEERT U HET VOLGENDE: 58
ALS HET APPARAAT HERRIE MAAKT, CONTROLEERT U HET VOLGENDE: 58
ALS DE VERLICHTING NIET WERKT, CONTROLEERT U HET VOLGENDE: 58
ALS DE DEUR NIET GOED SLUIT, CONTROLEERT U HET VOLGENDE: 58
ALS OP DE DISPLAY “E1” OF “E2” BRANDT 58
EPREL 58
GARANTIE, SERVICE 59
GARANTIE 59

- 6 -
Dear customer,
From now on, your daily housework will be easier
than ever before. Your appliance is excepon-
ally easy to use and extremely ecient. Aer reading
these Operang Instrucons, operang the appliance
will be easy.
Before being packaged and leaving the manufacturer,
the appliance was thoroughly checked with regard to
safety and funconality.
Before using the appliance, please carefully read
these Operang Instrucons. By following these
instrucons carefully you will be able to avoid any
problems in using the appliance. It is important to
keep these Operang Instrucons and store them in a
safe place so that they can be consulted at any me.
Follow these instrucons carefully in order to avoid
possible accidents.
Sincerely,

- 7 -
GUIDELINES CONCERNING
THE SAFETY OF USE
• The appliance is intended for household use only.
• The manufacturer reserves the right to introduce
changes which do not aect the operation of the
appliance.
• The Manufacturer shall not be held liable for
damage arising from the failure to observe the
instructions contained in this manual.
• Keep this manual for future reference, or to pass
it over to the next user.
• This appliance is not intended for use by persons
(including children) with limited physical or men-
tal capabilities and persons who lack experience
or familiarity with the appliance.
• Do not allow children to use the appliance. Do
not allow them to play with the appliance. They
must not climb inside the drawers and swing on
the doors.
• The appliance operates properly at the ambient
temperature (see product che). Do not use it in
the cellar, unheated summer cottage during au-
tumn and winter.
• When placing, moving, lifting the appliance, do
not hold the door handles, do not pull the con-
denser at the rear part of the refrigerator and do
not touch the compressor unit.
• Pull the plug out from the mains socket before
each maintenance activity. Do not pull on the
cord, but hold the body of the plug instead.
• The “cracking” sound, which the appliance may
emit is caused by the expansion and contraction
of parts as a result of temperature variations.
• For safety reasons do not repair the appliance
yourself. Repairs carried out by persons who do
not have the required qualications may result in
serious danger for the user of the appliance.

- 8 -
• Make sure you do not damage the cooling sys-
tem, by puncturing the refrigerant pipes in the
evaporator or breaking the pipes. The refrigerant
is ammable. If the refrigerant makes contact
with the eyes, rinse them with clean water and
call for medical assistance immediately.
• Important! If the power cord is damaged, it should
be replaced by the manufacturer or specialist re-
pair centre or a qualied person in order to avoid
danger.
• When performing activities, such as cleaning,
maintenance or moving, the appliance must be
completely disconnected from power supply (by
pulling the plug out from the socket)
• This appliance can be used by children aged 8
years and older or by persons with physical, men-
tal or sensory handicaps, or by those who are
inexperienced or unfamiliar with the appliance,
provided they are supervised or have been in-
structed how to safely use the appliance and are
familiar with risks associated with the use of the
appliance. Ensure that children do not play with
the appliance. Cleaning and maintenance of the
appliance should not be performed by children
unless they are 8 years or older and are super-
vised by a competent person.
• Do not clean the appliance with steam
• Keep the appliance and its power cord away from
children under 8 years old.
• Do not immerse the power cord or plug in water.
• Keep cord away from heated surfaces.
• Do not allow the connection cord hanging over
the edge of a table or counter.
• Do not use any electrical appliances inside the
chamber
• Do not use any tools to speed up the defrosting
process
• Regularly clean the ventilation openings (in case
of built-in appliances or those installed under the
worktop)

- 9 -
• This appliance is not designed to be controlled
by electronic timers or other devices that cut o
power directly or remotely.
• In case of accidental spillage of liquids on electri-
cal components, immediately unplug your appli-
ance from the power supply.
• Make sure that the power cord is not crushed or
damaged during installation.
• Disable the appliance before disposing of it. Un-
plug the appliance from the power supply and cut
o the power cord. To prevent children or animals
from being trapped in the appliance, remove the
doors, hinges and locks.
• Note: If the appliance does not have a freezer
compartment (
!
), it is not suitable for freez-
ing foodstus.
• Pursuant to Commission Regulation (EU)
2019/2019, the minimum availability period for
spare parts necessary to repair the appliance is 7
or 10 years depending on the type and purpose
of the spare part.
• The list of spare parts and the ordering procedure
are available on the websites of the manufactur-
er, importer or an authorized representative.
INSTALLATION AND OPER-
ATING CONDITIONS OF THE
APPLIANCE
• Connect the appliance to the power supply 24 hours after unpacking
and setting in the nal location.
• Take the product out of the package, remove the scotch tape protect-
ing the door and the equipment. Any remaining adhesive stains may
be removed with a mild washing agent.
• Clean the interior surface of the cooler and the elements of the equip-
ment with a washing agent dissolved in lukewarm water, then wipe
it dry.
• Place the cooler on an even, at and stable surface, in dry, aired and
shaded room, far from the heat sources such as: oven, hob, central
heating radiators, central heating pipes, hot water installation, etc.
• On the exterior surface of the product may be a protective foil, this
foils should be removed.
• Make sure the appliance is placed in a horizontal position by screwing
in the 2 adjustable front legs (g. 1)

- 10 -
• Keep free space on the sides and rear of the appliance (see installa-
tion drawing)
• When you install your wine cooler inside a furniture cabinet, make
sure that the ventilation grille located in the bottom of the appliance
is not blocked.
• Odours may be released when you rst start your appliance. It will
dissipate when the interior of the appliance cools down
• When you rst start your wine cooler, the compressor will run contin-
uously until the desired temperature is reached inside the chamber
• When you unplug your appliance from the power supply, it is recom-
mended to wait 5 minutes before you plug it back in. This will reduce
the risk of damage to the compressor.
• On selected models, the correct temperature will be shown on the
display only a few hours after the wine cooler has been put into op-
eration
• This appliance should be connected to AC 220-240V 50Hz supply
socket. The socket must be tted properly, and must be supplied with
an earthing conduit and a 10A fuse.
• It is a legal requirement that the appliance is properly earthed. The
manufacturer will not be held liable for any damage or injury which
may result from the failure to full this requirement.
• Do not use adapters, multiple sockets and two-wire extension leads.
If it is necessary to use the extension lead, it must be equipped with
a protection ring and a single socket and must have a VDE/GS safety
certicate.
• If an extension lead is used (with a protection ring and safety certif-
icate), its socket must be located at a safe distance, away from the
sinks, and must not be in a place where it could be ooded by water
or waste water.
• Make sure the appliance can be easily disconnected from the mains,
either by pulling the plug out of the mains socket, or by switching the
two-pole switch o.
Climate range
The information about the climate range of the appliance is provided
on the rated plate. It indicates at which ambient temperature (that is,
room temperature, in which the appliance is working) the operation of
the appliance is optimal (proper).
Climate class Allowable ambient temperature
SN Extended
Temperate
This refrigeration appliance is intended for use at an
ambient temperature ranging between 10°C and 32°C
N Temperate This refrigeration appliance is intended for use at an
ambient temperature ranging between 16 °C and 32°C
ST Subtropical This refrigeration appliance is intended for use at an
ambient temperature ranging between 16 °C and 38 °C
T Tropical This refrigeration appliance is intended for use at an
ambient temperature ranging between 16 °C and 43 °C
- 11 -
PRACTICAL EVERYDAY TIPS
• If the light inside the appliance remains turned on, keep in mind that
the temperature inside the appliance will be higher
• Temperature inside the appliance depends on the amount and type
of stored wine bottles
• To ensure user safety and high quality of stored wine, do not install
the appliance in damp rooms
• Store wine bottles in designated spaces
• Your wine cooler has a limited capacity. Do not place more bottles in
your wine cooler than recommended in specication
• Do not open the wine cooler door if it is not necessary
• Do not cover the shelves with aluminium foil or other material. This
blocks the air circulation inside the appliance
• To avoid damage to the door seal, make sure that the door is com-
pletely open before pulling out the shelf. The shelves should be in-
serted as far as possible, otherwise the shelf may deform and dam-
age the door seal.
• Do not extend the loaded shelves beyond the extension limit (about
1/3 of the shelf length)
• This appliance is designed for storing bottles of wine. Do not use it
for any other purpose.
• Temperature stability is very important when storing wine.
• Exposing your wine cooler to sunlight, signicant temperature uctu-
ations, high humidity and vibrations may cause the wine to go bad.
• In periods of high humidity, condensed water vapour may appear on
the outer surfaces of the glass door. To prevent this, install the appli-
ance in a dry, adequately ventilated room.
• Selected models have an external handle. You need to install it on
your own. Do not use electric tools for this purpose (g. 3*). To do
this, pull the door seal slightly to the side and place the screws on
the inside of the door. Align the handle with the holes on the outside
of the door and tighten the screws with a screwdriver. Reinstall the
door seal.
• The maximum capacity of the appliance is given in the product sheet
enclosed with the wine cooler. This capacity applies to standard 0.75
litre bottles of Bordeaux.
• Selected models have an Anti-tip kit. Install it according to the en-
closed diagram (g. 6*).
• This refrigeration appliance is intended for use as a built-in appliance.
• To achieve the most eective food preservation for the longest pos-
sible time and to avoid wasting any food, position the products as
shown in Figure 12. In addition, this gure illustrates the layout of
drawers, baskets and shelves, which allows the most ecient use of
energy.
• Optimal temperature and storage conditions will extend product shelf
life and optimize electricity consumption. Optimal storage tempera-
ture range should be stated on the food product packaging.
*According to the model

- 12 -
UNPACKING
During transportation, protective
packaging was used to protect the
appliance against any damage. Af-
ter unpacking, please dispose of all
elements of packaging in a way that
will not cause damage to the environ-
ment.
All materials used for packaging the appliance are
environmentally friendly; they are 100% recyclable
and are marked with the appropriate symbol.
Important! Packaging materials (bags, polyethyl-
ene, polystyrene, etc.) should be kept away from
children during unpacking.

- 13 -
DISPOSAL OF OLD
APPLIANCE
In accordance with European Directive
2012/19/EU and local legislation re-
garding used electrical and electronic
goods, this appliance is marked with
the symbol of the crossed-out waste
container. This marking indicates that
the appliance must not be disposed
of together with other household waste after it has
been used.
The user is obliged to hand it over to waste collec-
tion centre collecting used electrical and electron-
ic goods. The collectors, including local collection
points, shops and local authority departments pro-
vide recycling schemes.
Proper handling of used electrical and electronic
goods helps avoid environmental and health haz-
ards resulting from the presence of dangerous com-
ponents and the inappropriate storage and process-
ing of such goods.

- 14 -
CONTROLS
Appliance controls- single and dual zone
The control panel is shown in gure 4. For reference it is also shown
below:
– Power button
– Light button
– “+” button
– “-” button
Child lock button (combined button)
Lock: The button will be locked automatically af-
ter power-on or several seconds if no button is
operated, or the button will be locked when the
button is pressed for long.
To lock / unlock press both buttons at the same
time for 5s.
Set the temperature unit °F or °C. (Combined
button)
First unlock the control panel. Press both buttons
at the same time, and then you can switch over
between the Celsius degree and Fahrenheit de-
gree for display. Each time the button is pressed,
a switch over will be made.
Power on/o button:
To turn o the appliance press this button for 5s,
the display screen will indicate “οF” for 60s.
When the cooler is in the ready mode, touch any
button to light the display screen and then press
this power button for 5s, the cooler will back to
normal work.
Lamp on/o button
Press the light button to switch the light on or o.
The buttons are used to change the temperature
inside the chamber. Before starting, unlock the
panel. The temperature range is 5-20OC

- 15 -
REVERSING DOOR
Wine cooler’s door can opening from left to right. To reverse the opening
direction:
1. Close the door
2. Take the door hinge hole caps(1), and also take o the door hinge
cover(2) unscrew the ange the screws(3); Take o the door hinge(4)
3. Take o the door
4. Take o the casing cap(5), (6)
5. Take o the adjustable feet(7, 10), ange screws(8), bottom hinge(9),
and high adjustable foot(10)
6. Install the high adjustable foot(10) on the left; Install the bottom
hinge(9) with ange screws(8); Install the short adjustable foot(7)
7. Put the casing cap(5), (6) on the door;
8. Install the door;
9. Install the door hinge cover(4) with the ange screws(3); Put the
door hinge cover(2) on the door hinge; Install the door hinge hole
caps(1)

- 16 -
CARE AND CLEANING
Always disconnect the appliance from the mains electrical supply before
any cleaning or maintenance.
Removing the shelves
• To remove a shelf from the wine cooler, rst remove all bottles from
the shelf, then pull the shelf forwards until the groove on either side
of the shelf is level with the plastic peg on either side of the cabinet
(as shown in g 5). Then lift the shelf up and pull forwards.
• To replace the shelves, follow the steps above in reverse order.
Cleaning
• Do not use abrasive products or detergents. After washing, rinse and
dry thoroughly.
• The exterior of the appliance and the door seal should be cleaned
using mild soapy water and dried thoroughly.
• The interior cabinet should be cleaned using a solution of bicarbonate
of soda and lukewarm water.
• Clean the shelves separately by hand using soap and water. Do not
put them in the dishwasher.
• Ensure that the cloth is only moist when cleaning the control panel
and electrical parts, and that all water is thoroughly dried o before
reconnecting the power.
• Once cleaning is complete, reconnect the mains electrical supply.
• If the appliance is not to be used for prolonged periods of time,
unplug and clean the appliance thoroughly. The door should be left
slightly ajar to prevent the formation of odours or condensation
TROUBLESHOOTING
If you have any problems with your appliance, you should check the
troubleshooting guide prior to calling Call Center to prevent unnecessary
service calls and potential cost.
If the appliance is not working, check
• There is power to the appliance
• The house fuses or circuit breakers are intact and the fuse in the plug
has not blown.
• The plug socket is functioning correctly. To check this, plug another
electrical appliance in to see if the socket is working.
• The ambient temperature is between 16°C to 32°C.

- 17 -
The appliance is working, but not very well, check
• The appliance is not overloaded.
• The thermostat is set to an appropriate temperature.
• The door is closing properly.
• The door gasket is sealing properly
• There is enough ventilation at the side and rear walls.
• The ambient temperature is between 16°C to 32°C.
The appliance is noisy, check
• The appliance is level and stable.
• The cooling gas will make some noise, even when the compressor is
not running.
• During operation, it is normal for the fan to run, even when the com-
pressor is not running.
The light does not work, check
• There is power to the appliance.
• The house fuses or circuit breakers are intact and the fuse in the plug
has not blown.
• The light button is not set to o.
Please note:
The LED lighting cannot be replaced without a service call
The door will not close properly, check
• The appliance is level and stable.
• If the door has been removed, it may not have been correctly ret-
ted.
• The door seal is dirty.
• The shelves are not positioned correctly.
The display shows “E1” or “E2”
• The temperature sensor has failed. Please contact Call Center
EPREL
For more information about the product, please refer to the EU EPREL
Product Database at https://eprel.ec.europa.eu. For more information,
please use your mobile device to scan the QR code on the energy label
or enter the product model listed on the energy label in the EPREL
search engine https://eprel.ec.europa.eu/

- 18 -
WARRANTY AND AFTER
SALES SERVICE
Warranty
Warranty service as stated on the warranty card. The manufacturer shall
not be held liable for any damage caused by improper use of the product.
Service
• The manufacturer recommends that all repairs and adjustments be
carried out by the Factory Service Technician or the Manufacturer’s
Authorized Service Point. For safety reasons, repairs should be re-
ferred to professionals.
• Repairs carried out by unqualied persons may seriously endanger
the appliance user.
• The minimum warranty period for the appliance oered by the man-
ufacturer, importer or authorized representative is given in the war-
ranty card.
• The warranty shall be void if you make any independent adaptations
or alterations, tamper with seals or other appliance safety devices
or its parts or interfere with the appliance contrary to operating in-
structions.
In the event of appliance malfunction, request assistance or repair.
If your appliance needs repair, please contact the service centre. Please
see warranty card for address and contact details of our service centre.
Before contacting us, please have ready the appliance serial number,
which can be found on the identication sticker: For your convenience,
please write it down below:
Manufacturer’s Declaration
The manufacturer hereby declares that this product meets the re-
quirements of the following European directives:
• Low Voltage Directive 2014/35/EC
• Electromagnetic Compatibility (EMC) Directive 2014/30/EC
• ErP Directive 2009/125/EC
• Directive RoHS 2011/65/EC
and has thus been marked with the and symbol and been
issued with a declaration of compliance made available to market
regulators.

- 19 -
Sehr geehrter Kunde,
Von heute an werden Ihre alltäglichen Pichten einfa-
cher denn je. Dieses Gerät ist eine Verbindung
einer außergewöhnlich leichten Bedienung und einer
perfekten Ezienz. Nachdem Sie diese Bedienungsan-
leitung gelesen haben, ist die Bedienung des Gerätes
kein Problem mehr.
Bevor das Gerät das Herstellerwerk verlassen konnte,
wurde er vor dem Verpacken gründlich auf deren Si-
cherheit und Funkonalitäten an Prüfständen über-
prü.
Bevor das Gerät in Betrieb genommen wird, lesen Sie
bie die Bedienungsanleitung aufmerksam durch. Be-
folgen Sie die darin stehenden Hinweise, vermeiden
Sie verschiedene Bedienfehler. Diese Bedienungsan-
leitung ist zu erhalten und so aufzubewahren, dass sie
jederzeit bei der Hand ist.
Zur Vermeidung möglicher Unfälle befolgen Sie die
in der Bedienungsanleitung stehenden Hinweise
genau.
Mit freundlichen Grüßen

- 20 -
SICHERHEITSHINWEISE
• Das Gerät ist ausschließlich für den Einsatz im
Haushalt bestimmt.
• Der Hersteller behält sich das Recht vor, Ände-
rungen vorzunehmen, die Gerätefunktion nicht
beeinträchtigen.
• Der Hersteller haftet nicht für die Schäden, die
Folge der Nichteinhaltung inder vorliegenden Ge-
brauchsanweisung angeführten Prinzipien sind.
• Bewahren Sie diese Gebrauchsanweisung auf, um
sie in Zukunft auszunutzenoder einem eventuel-
len Nachbesitzer übergeben zu können.
• Das Gerät darf nicht durch Personen (darunter
auch Kinder) mit eingeschränkten körperlichen,
sinnlichen oder psychischen Fähigkeiten sowie
durch unerfahrene sowie solche Personen, die
das Gerät nicht kennen, bedient werden, es sei
denn, es geschieht unter Aufsicht oder gemäß
der Anweisungen der für ihre Sicherheit verant-
wortlichen Personen.
• Erlauben Sie nicht den Kindern das Gerät ohne
Aufsicht zu bedienen. Erlauben Sie den Kinder
nicht mit dem Gerät zu spielen. Lassen Sie die
Kinder nicht sich auf die aufschiebbaren Bestand-
teile des Kühlschranks zu setzen oder auf der
Kühlschranktür zu hängen.
• Das Gerät arbeitet ordnungsgemäß bei einer
Raumtemperatur, die in der Tabelle mit der tech-
nischen Spezikation angegeben ist. Das Gerät
ist nur für den Gebrauch in Innenräumen geeig-
net, allerdings nicht in unbeheizten Kellerräumen,
Hausuren oder Sommerhäusern.
• Zum Aufstellen und Verschieben des Gerätes
dürfen nie die Türgrie, die Kondensatorröhrchen
oder die Kompressoreinheit benutzt werden.
• Vor jeder Wartungsarbeit ist der Netzstecker aus
der Steckdose zu entfernen. (Nicht am Kabel,
sondern immer am Netzstecker ziehen).
Table of contents
Languages:
Other Amica Kitchen Appliance manuals

Amica
Amica SMK 4021 User manual

Amica
Amica WCF1K series User manual

Amica
Amica CT 5013 User manual

Amica
Amica 500 User manual

Amica
Amica WCB1S60S24.1 User manual

Amica
Amica MM 3011 User manual

Amica
Amica 507GE3.33eEHZpTaDNA(Sm) User manual

Amica
Amica WCF2K Series User manual

Amica
Amica 51EE2.31MFG User manual

Amica
Amica 6020GG4.23ZpQW User manual

Amica
Amica WCF2V60B38.1 User manual

Amica
Amica SHI Series User manual

Amica
Amica 508GG Series User manual

Amica
Amica WKR 341 910 R User manual

Amica
Amica SMK 2015 User manual

Amica
Amica PT 3011 Lunaris User manual

Amica
Amica WCB2K60B36.1 User manual

Amica
Amica 51EETCM (W) User manual

Amica
Amica MM 3011 User manual

Amica
Amica CT 5012 User manual